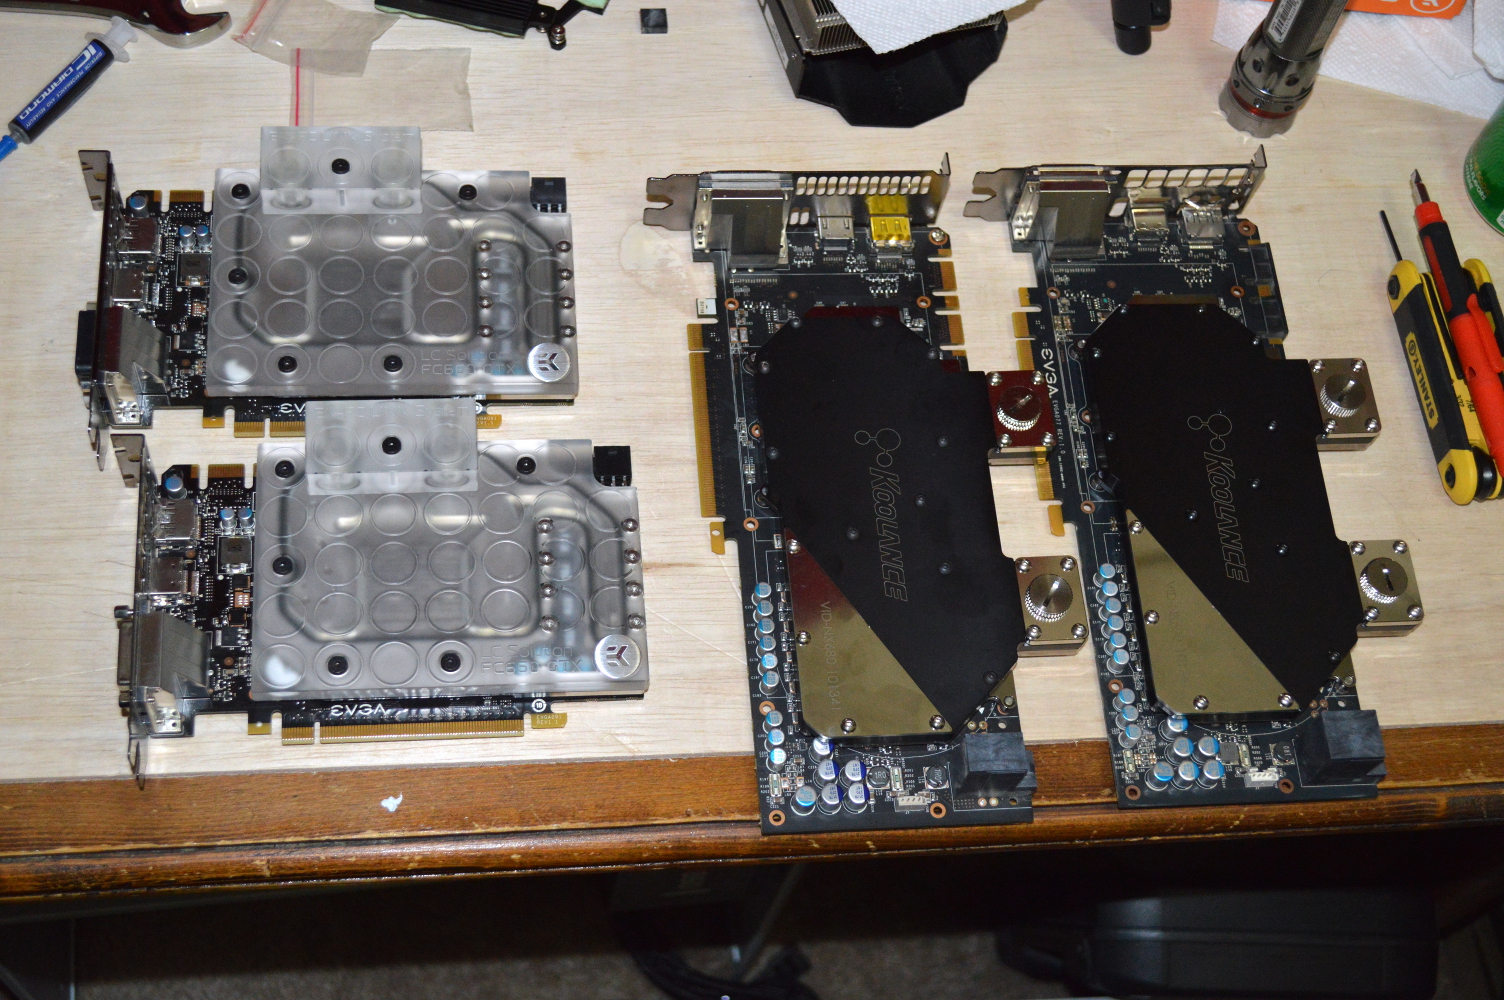
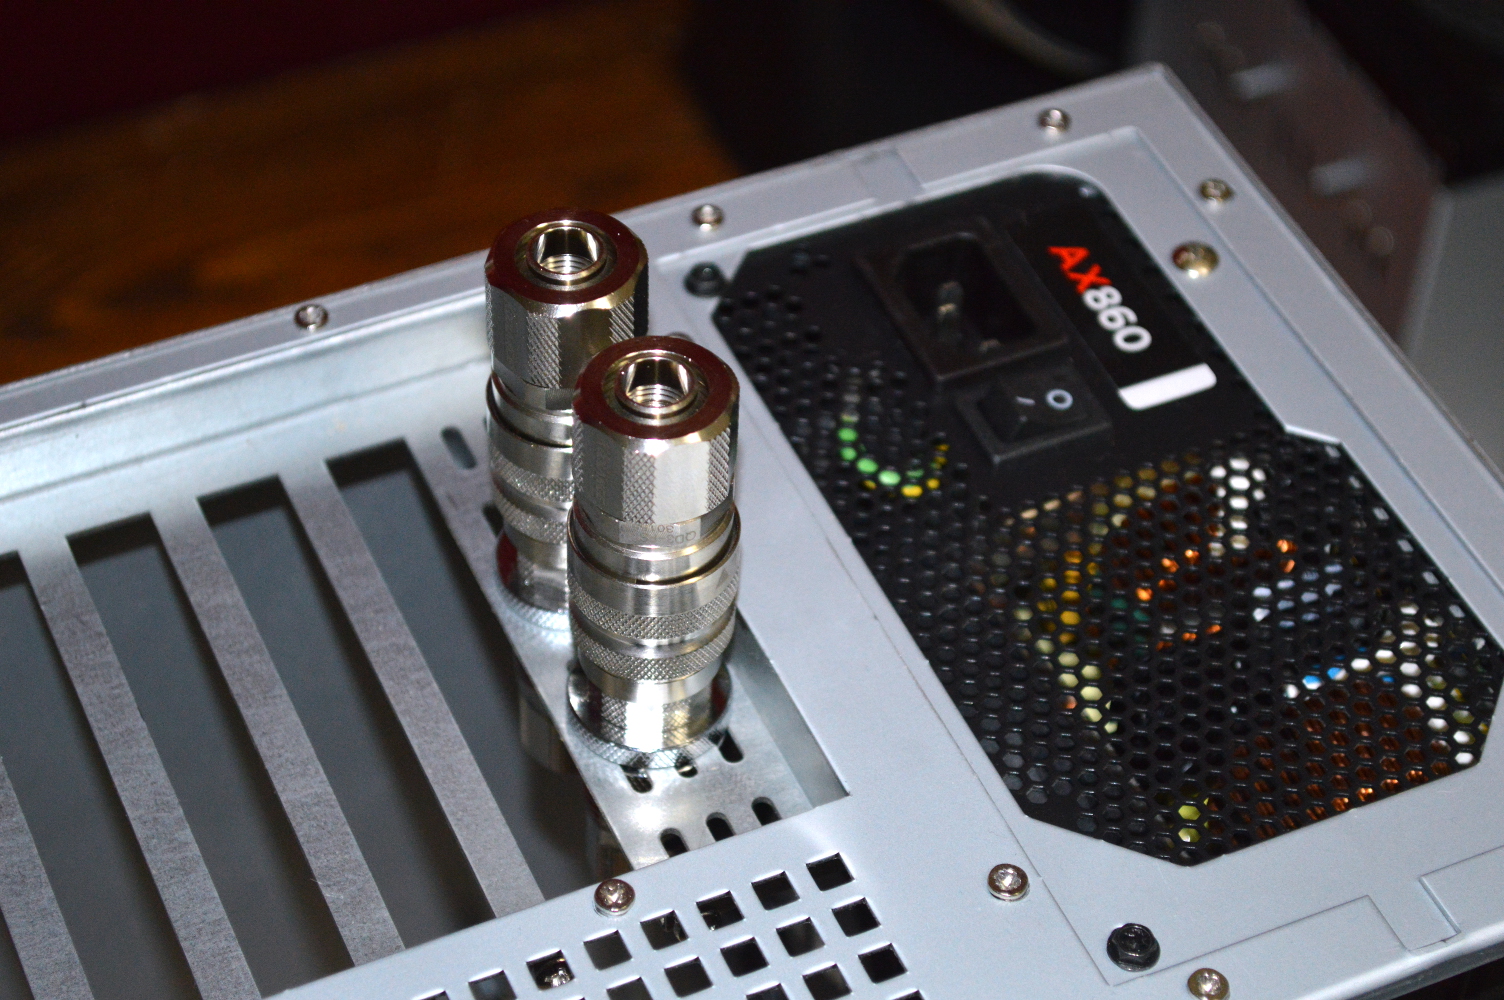
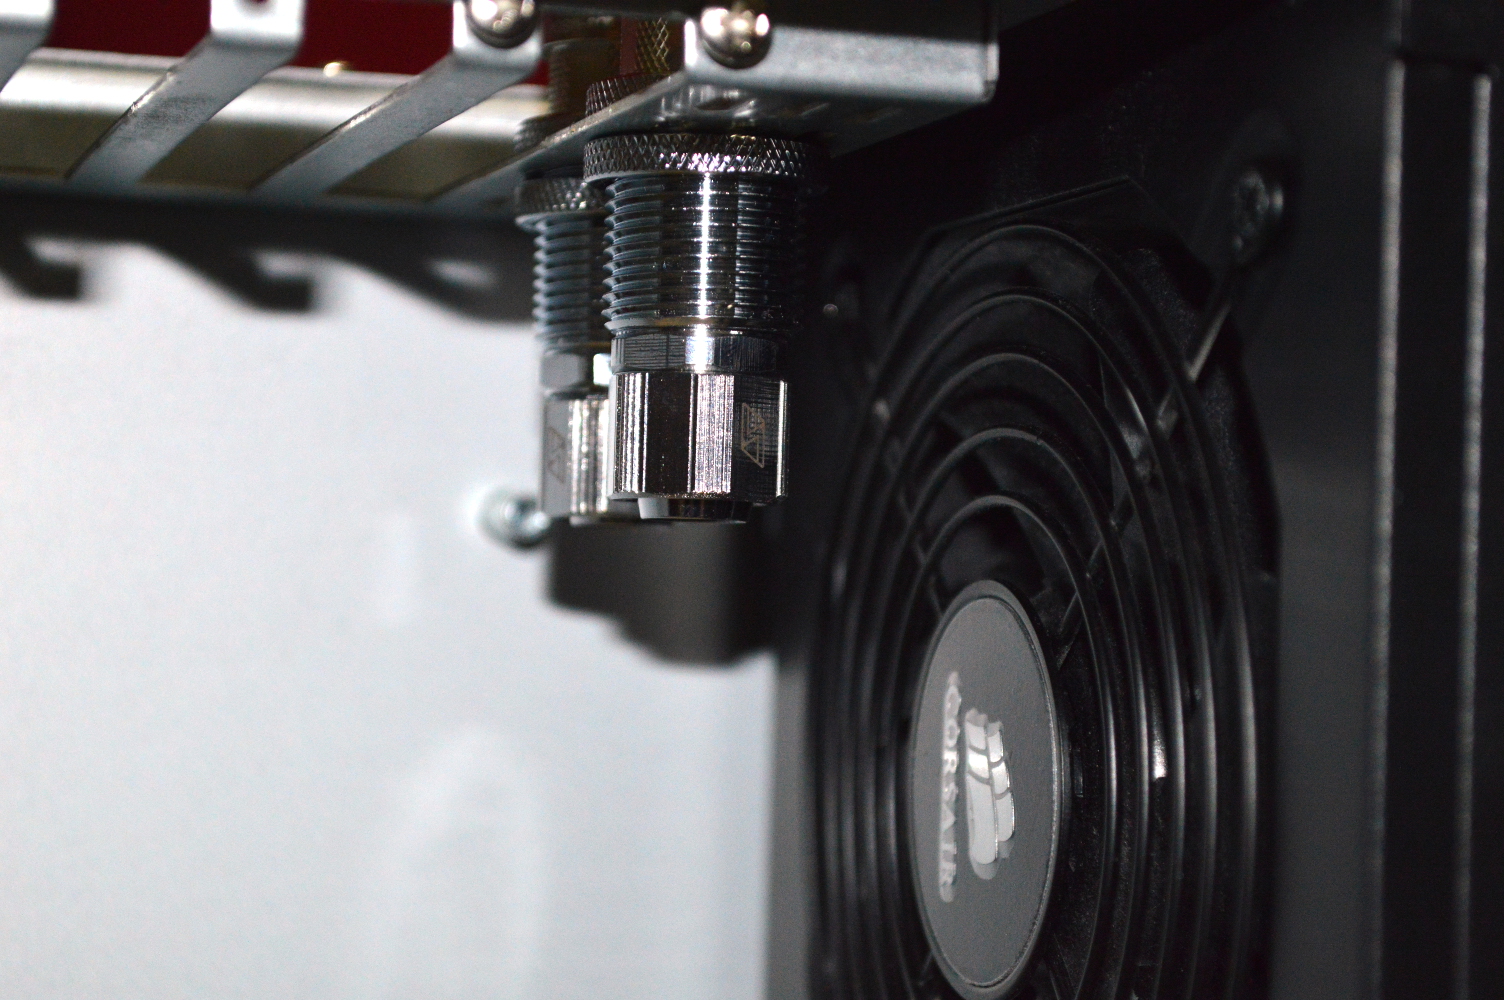
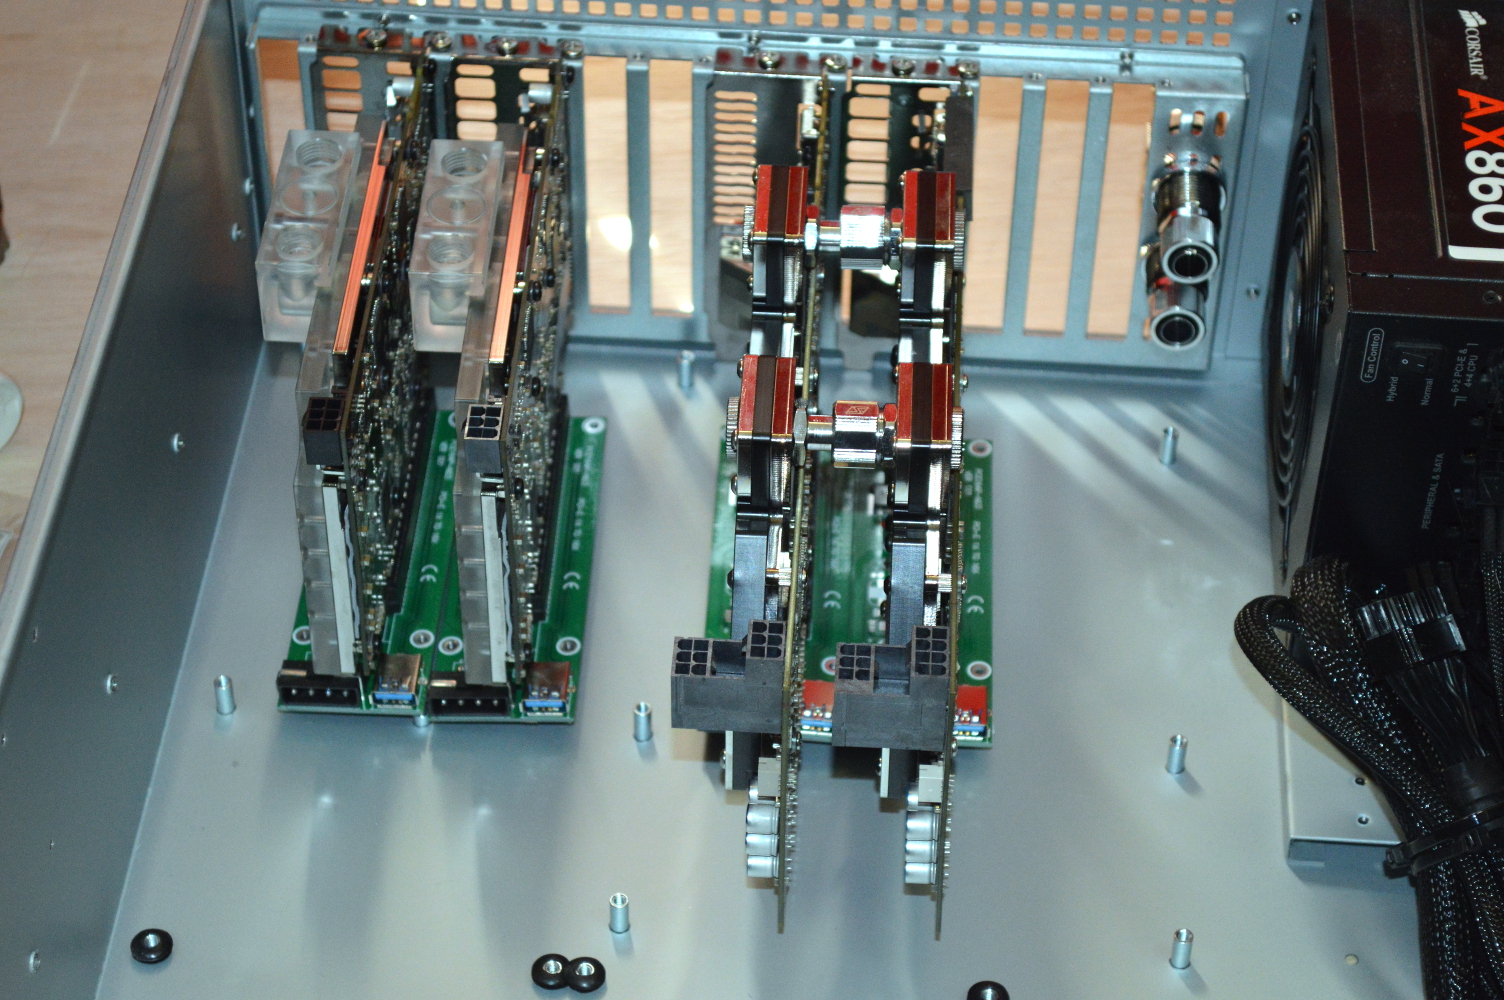
Desert Sapphire – Part IV

Build Log:

So the build continues…

The day after Christmas, my wife and I drove out into Kansas to visit family. Given the weather forecast for the next day compared to the weather while we were driving back, I decided to run to Micro Center instead of going directly home. This was to pick up the SLI fitting plus a couple other things to finish the build.

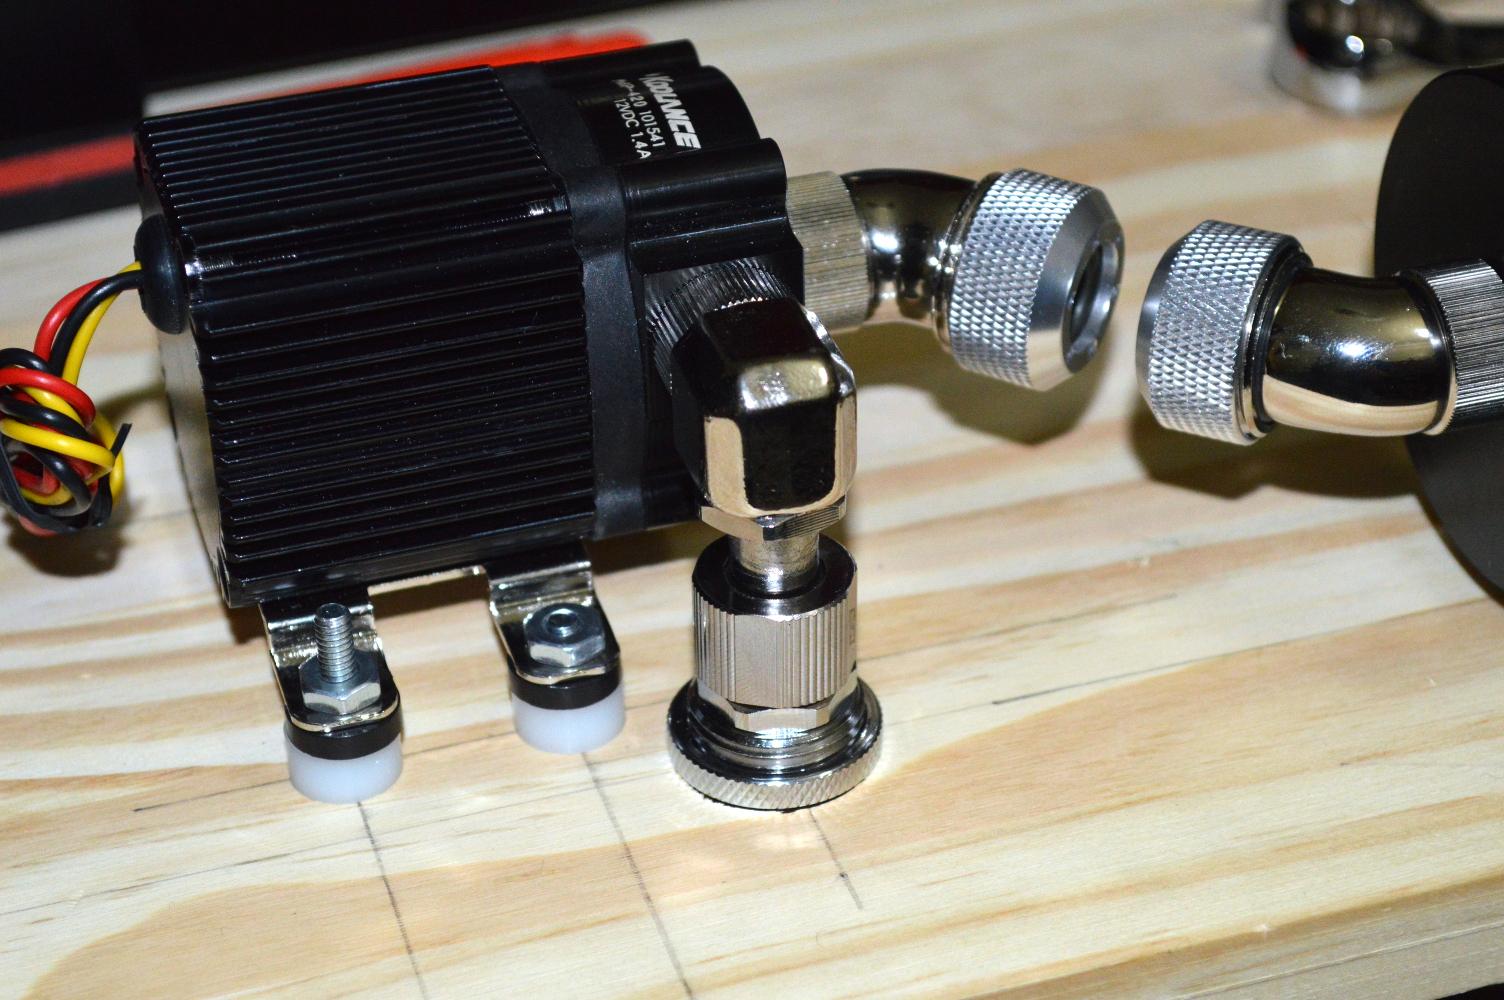
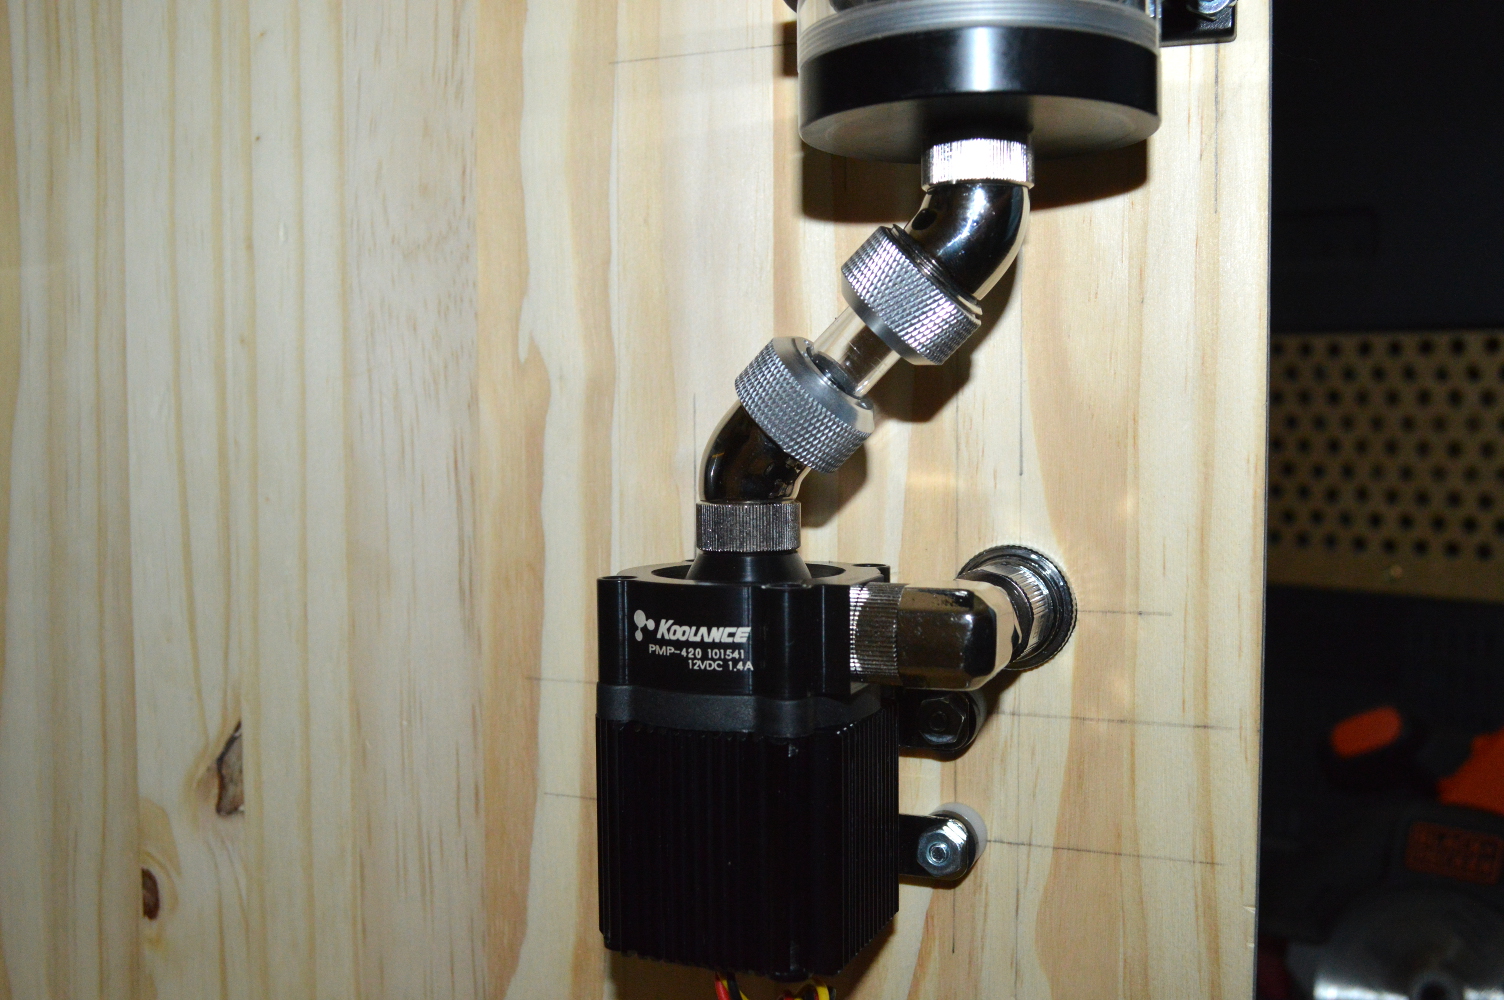
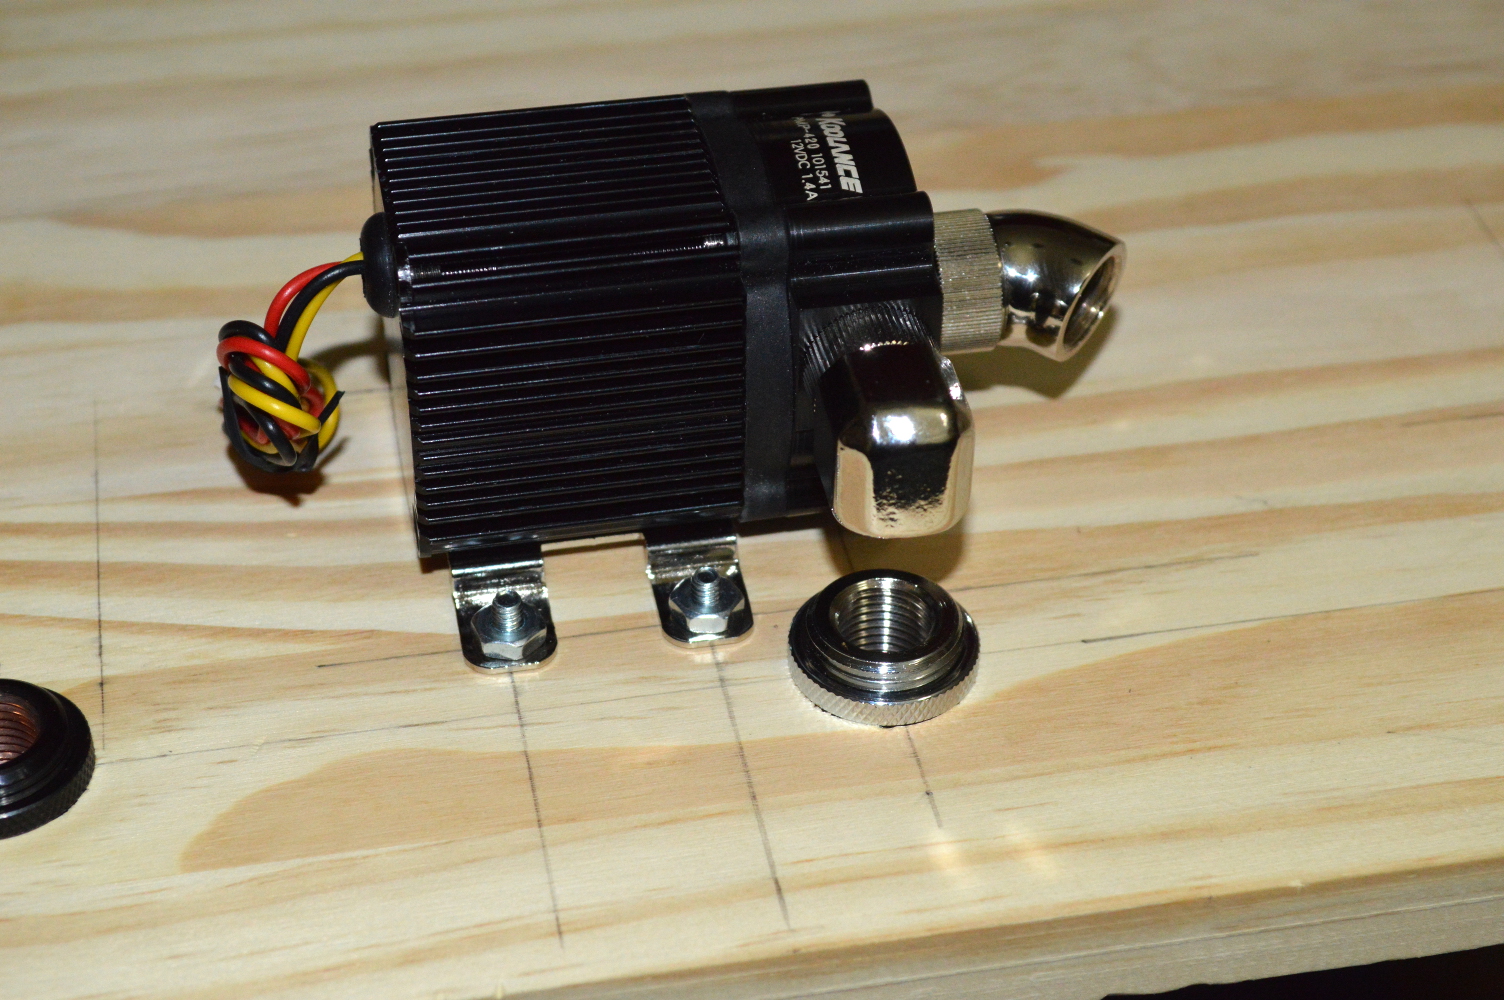
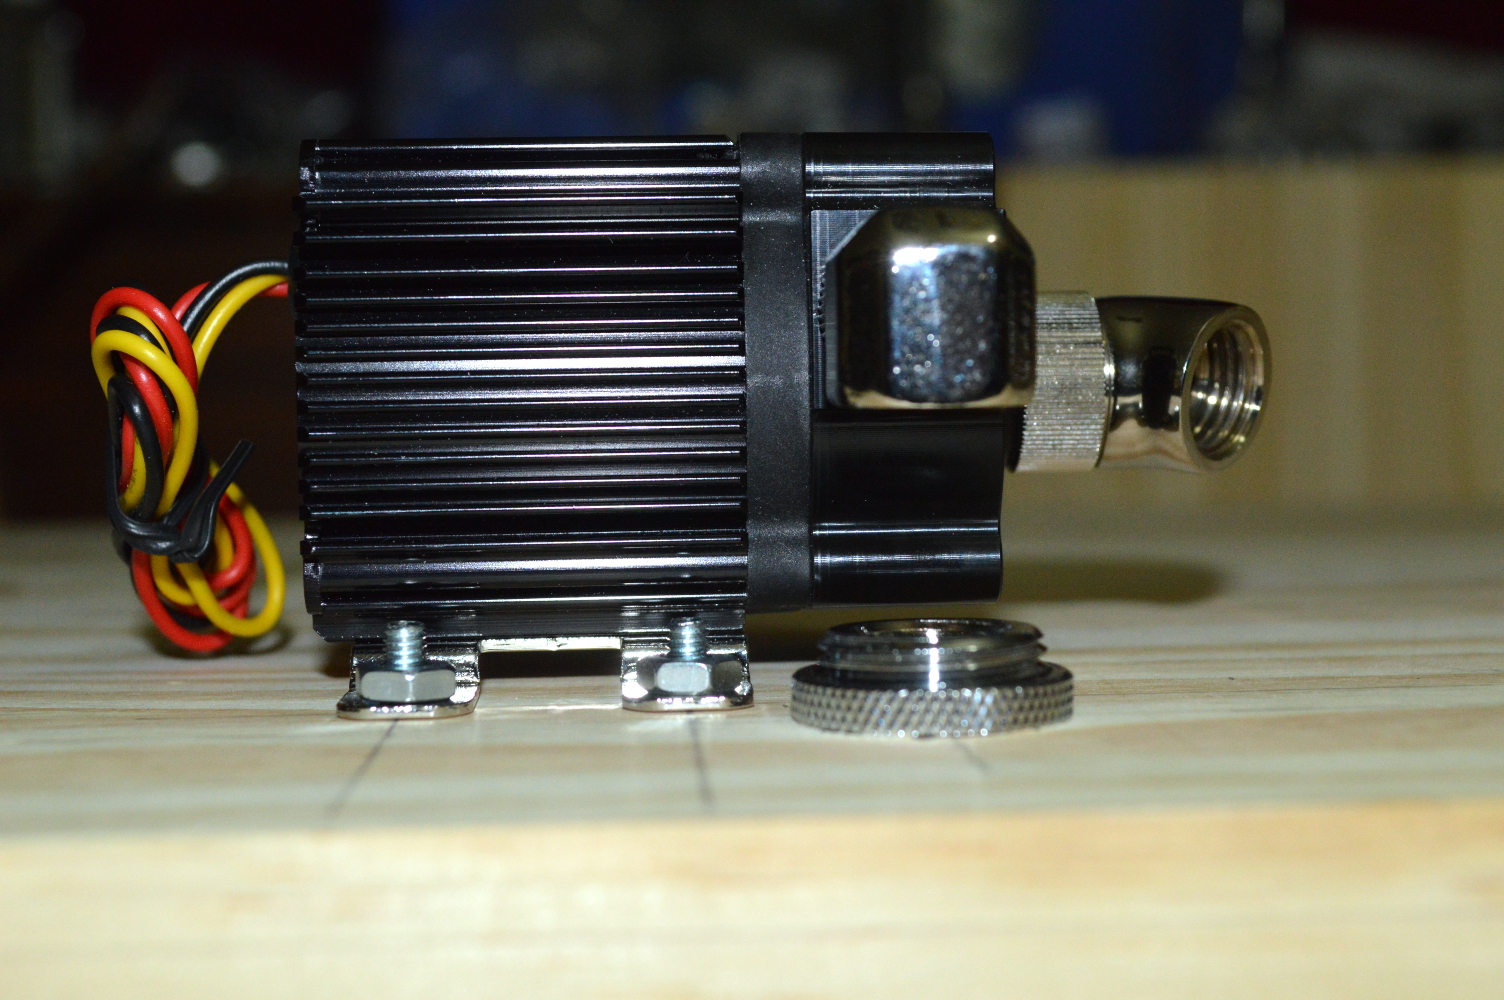
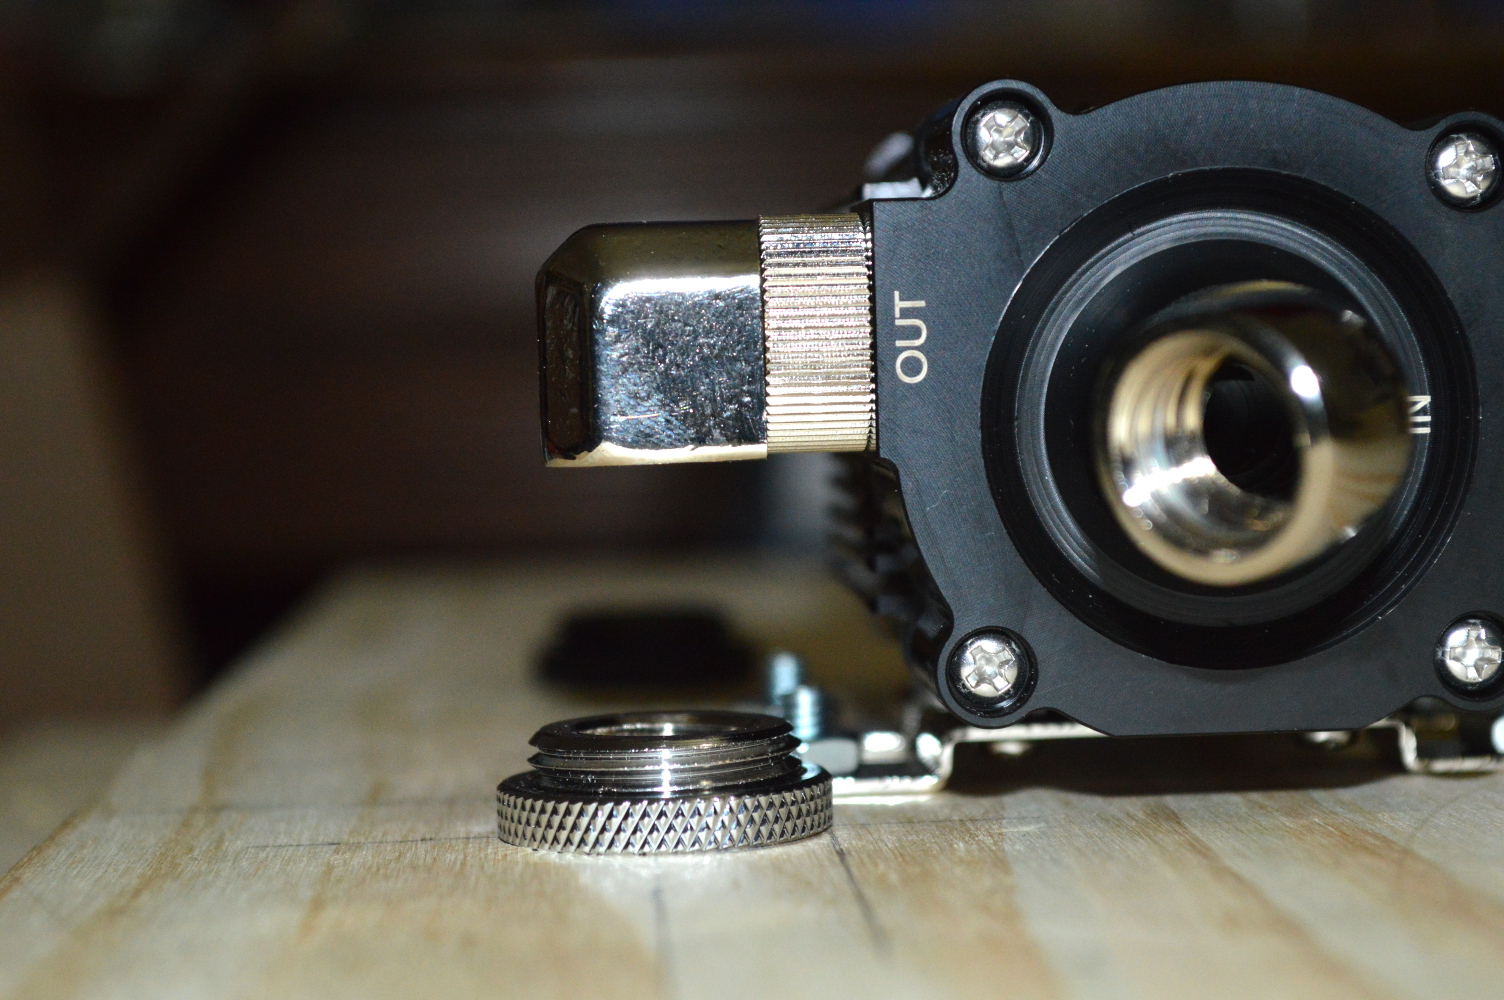
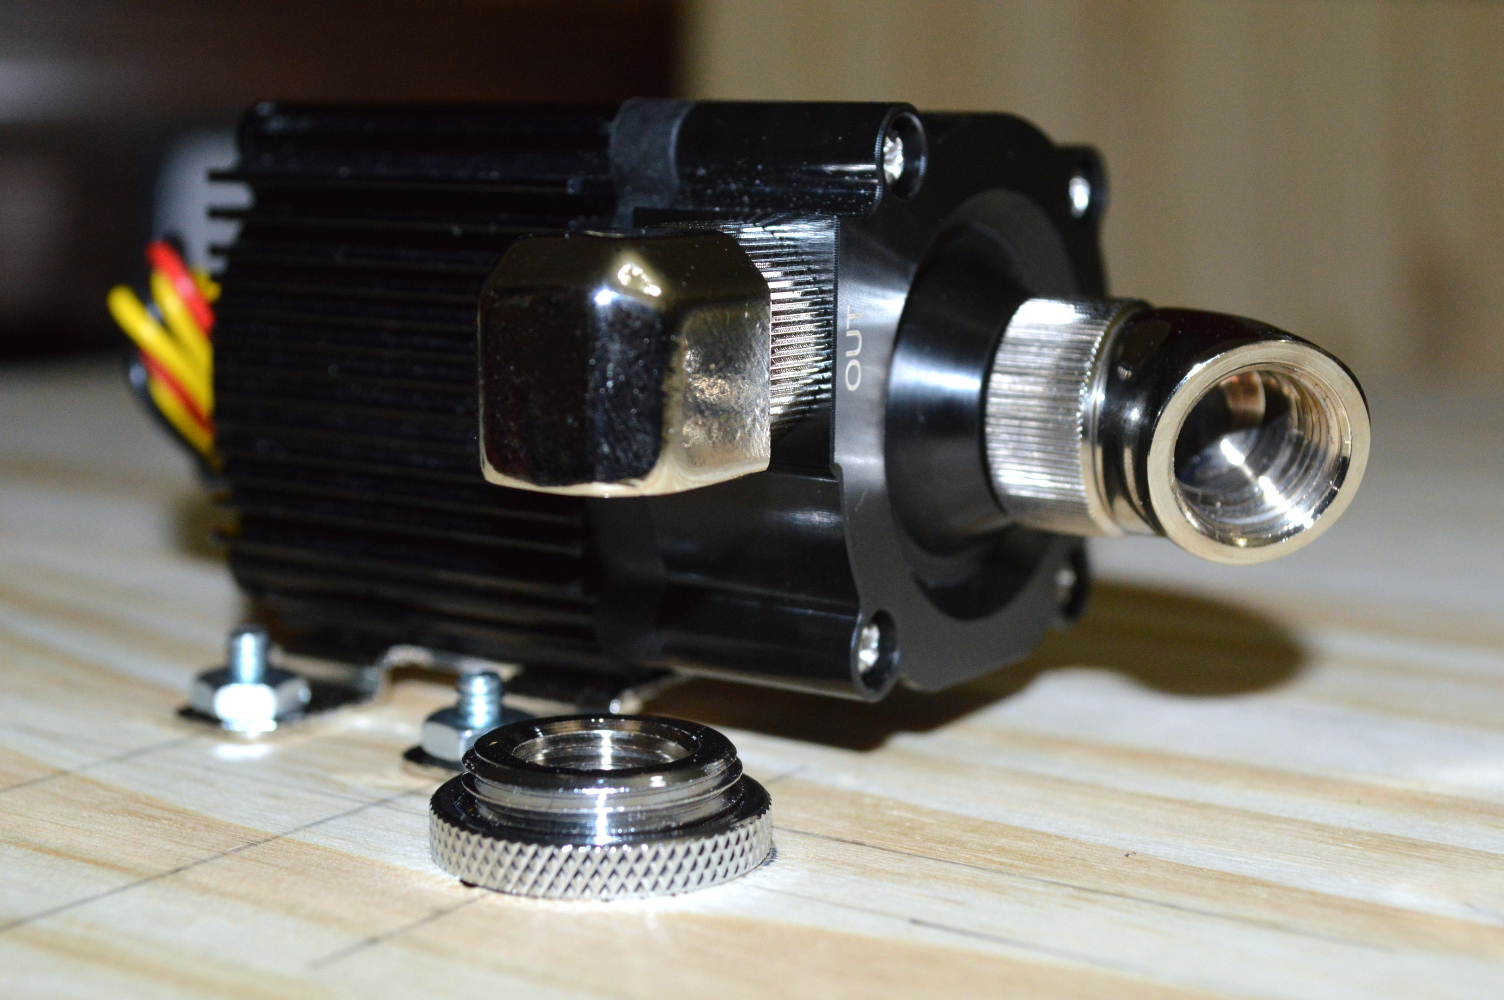
When I got home, after unloading from Christmas, I took the SLI fitting and put it into place. This basically demonstrated conclusively that all of my measurements regarding the pump were spot in.

pump7

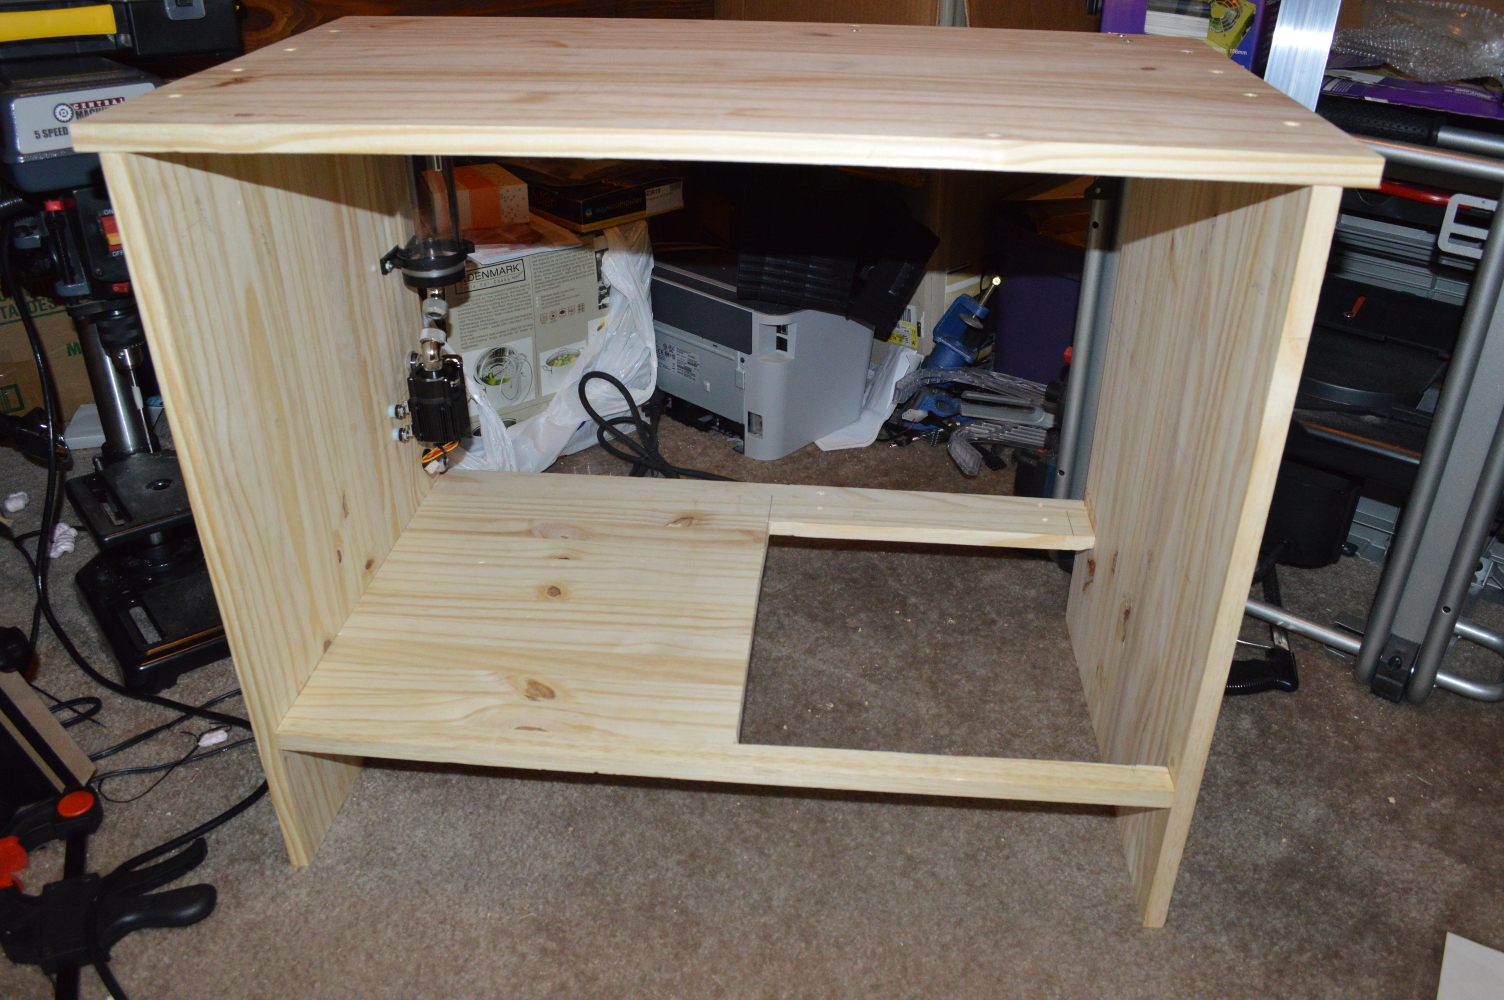
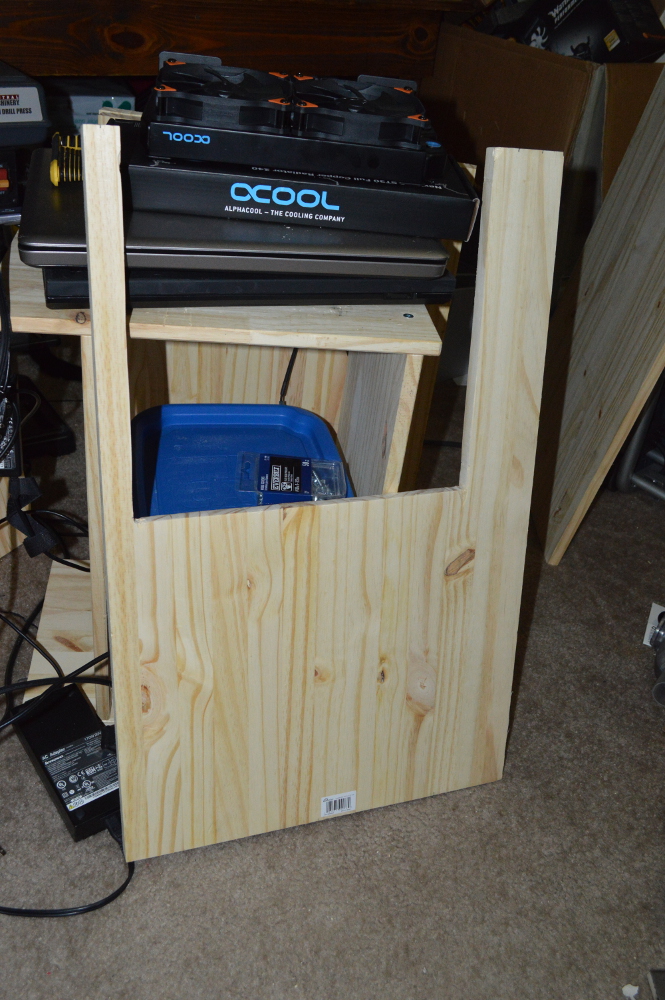
With almost every fit confirmed, the only other thing to do was glue and screw the cabinet together. The glue is Titebond No-Run No-Drip, which is perfect for end grain applications such as what I’m doing here, but requires that I leave everything for about 24 hours to cure. Since I was doing this on a Sunday afternoon, that would mean I couldn’t touch it till I got home from work the next day. Even though I also screwed the boards into the end, I decided to leave it all clamped overnight.

cabinet2

One thing I will say about this: nothing really prepares you for assembling it all together. When everything you’re seeing in your head or on paper actually meets the wood to demonstrate whether your idea has merit. So seeing this all come together seeing everything line up… it was such a relief to see it all work out.

Revisiting the pump

The noise level on the pump was not promising. The initial testing with the pump doing a 2-gallon push flush on the new radiator showed the noise to be concerning. I’m not sure if it was noise from air — wherein if I had it mounted in some fashion and let all air bleed the noise would’ve died away — or just the noise to expect from the pump.

I preemptively purchased a DDC pump from my local Micro Center — specifically the Swiftech MCP35X. They also had the MCP355, but I chose the MCP35X to hopefully retain fitting options. We’ll see if I will need it. I won’t know until I have at least the radiators mounted so I can do an isolated leak test on just those.

Swapping the pump isn’t out of the question — though it’ll be interesting given the cabinet is already prepared for the PMP-420. So if I can adapt for the noise, that’ll be great. Perhaps it’ll run quiet when the pump is mounted to the cabinet on vibration isolation with it pushing fluid for a while.

The power supply I was considering, however, will work just fine. It’s just a matter now of where to mount it.

Mounting and joining the radiators

You know the old saying of “measure twice, cut once”. Well sometimes it doesn’t keep you getting something wrong. In my case it was the holes in the table top for holding the radiator.

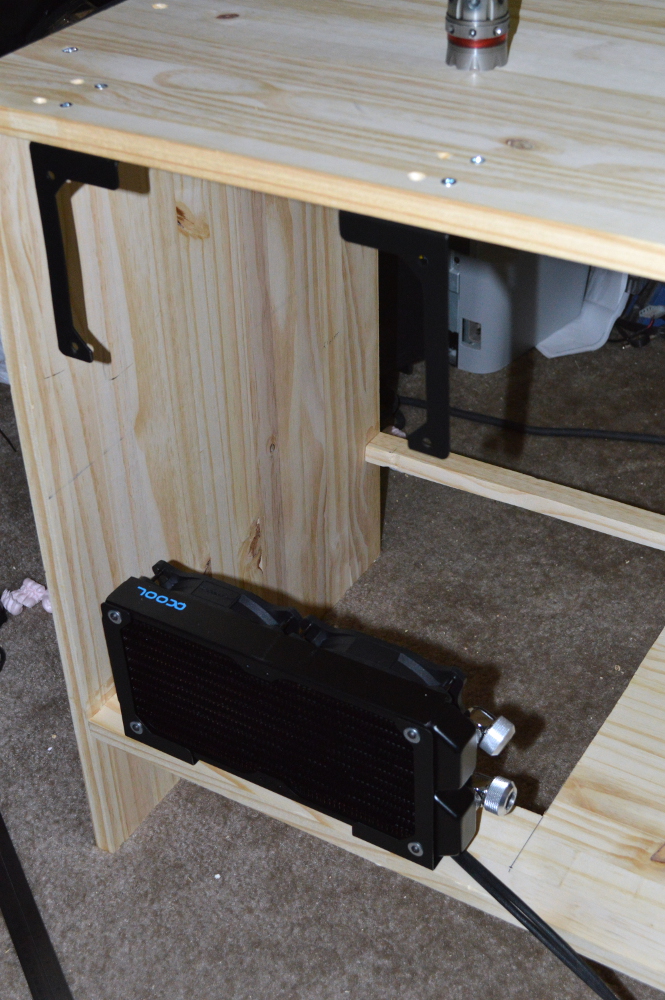
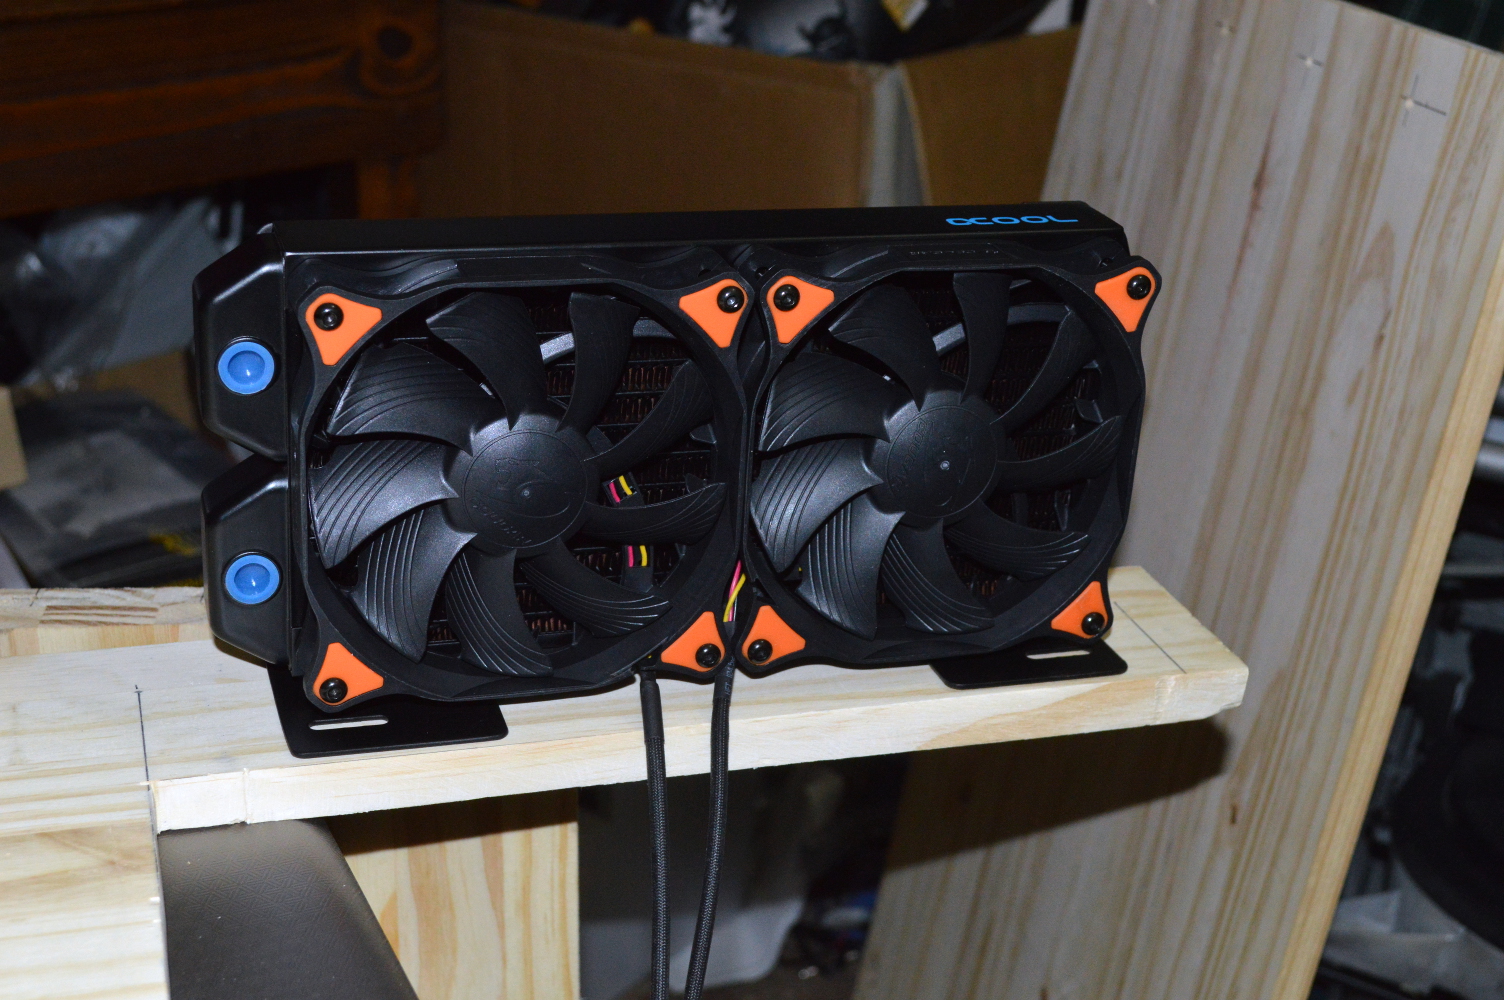
So after leaving the cabinet clamped and upside down all night, I took off the clamps…. and it promptly fell apart. Just kidding… I re-measured for the holes on the top and drilled and counter-sunk new holes. Then I mounted the bottom radiator and the top brackets.

cabinet3

One of the radiators would be hanging from the cabinet top directly above and — hopefully — directly lined up with the one mounted to the floor. The one in the middle would require a little ingenuity in the form of 1/8″ aluminum from Home Depot and a jigsaw. To figure out where to hang it, I needed to do a little math. Feel free to check this if you think it’s wrong. I based these numbers off the diagrams for the XS-PC bracket and AlphaCool radiator.

The AlphaCool radiator is 124mm wide, with a 9.5mm distance between the center of the fan screw and the edge. Hanging on the bracket gives a total radiator height of about 132mm for the top and bottom radiators, 264mm between. The third radiator is out in the open for another 124mm. This gives a total radiator width of 388mm. The gap between the top and bottom boards on the cabinet is 450mm.

This leaves a total space of 62mm around the middle radiator, or 31mm between the radiators. Adding 19mm to this means it will be 50mm between the screws. This is just shy of 2″. The widest piece of aluminum that Home Depot sells in any store near me is 2″.

But all is not lost. I ordered a couple pieces of 3″ wide 6061 aluminum from Grainger (item no. 2EYU9) for pickup… the day before we leave for delivery. In the mean time I can use the 2″x36″ aluminum I did buy to make a temporary solution for holding the radiator.

I cut a 2-1/2″ long piece of aluminum and drilled four 1/8″ holes that formed a rectangle about 2″ long and 15mm wide. Two of these should be enough to hold the center radiator and allow me to finish the loop.

bracket

My jigsaw is actually the MATRIX Jigsaw attachment from Black and Decker for the 20V MATRIX cordless drill. The blades are I used are Bosch T121AF3 jigsaw blades. This combination could make it through the 1/8″ aluminum. For drilling the holes, I used a 1/8″ cobalt drill bit. Make sure to keep your vacuum handy for the aluminum shards.

I wanted to get as far as I could before I had no choice but to take down Beta Orionis to get the other two radiators from that system. I mentioned in the first segment of the build log that the chassis for this build will be the Corsair 750D that I used for β Ori. I think what I failed to mention was that the other two double-120mm radiators, along with some of the fittings, would also be coming out of that build.

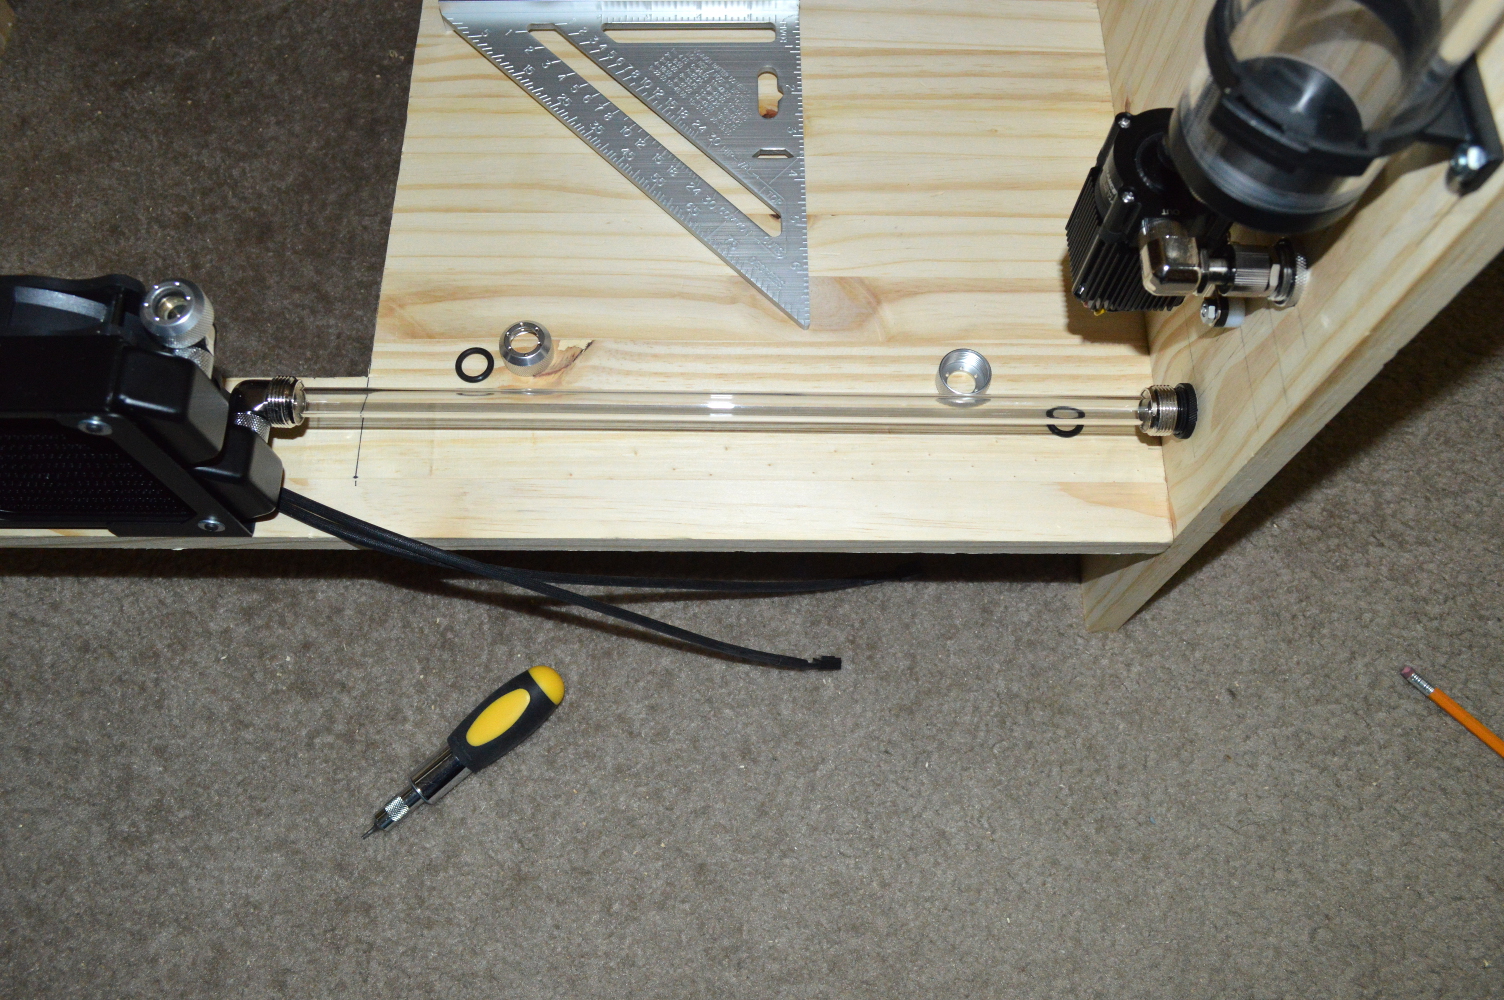
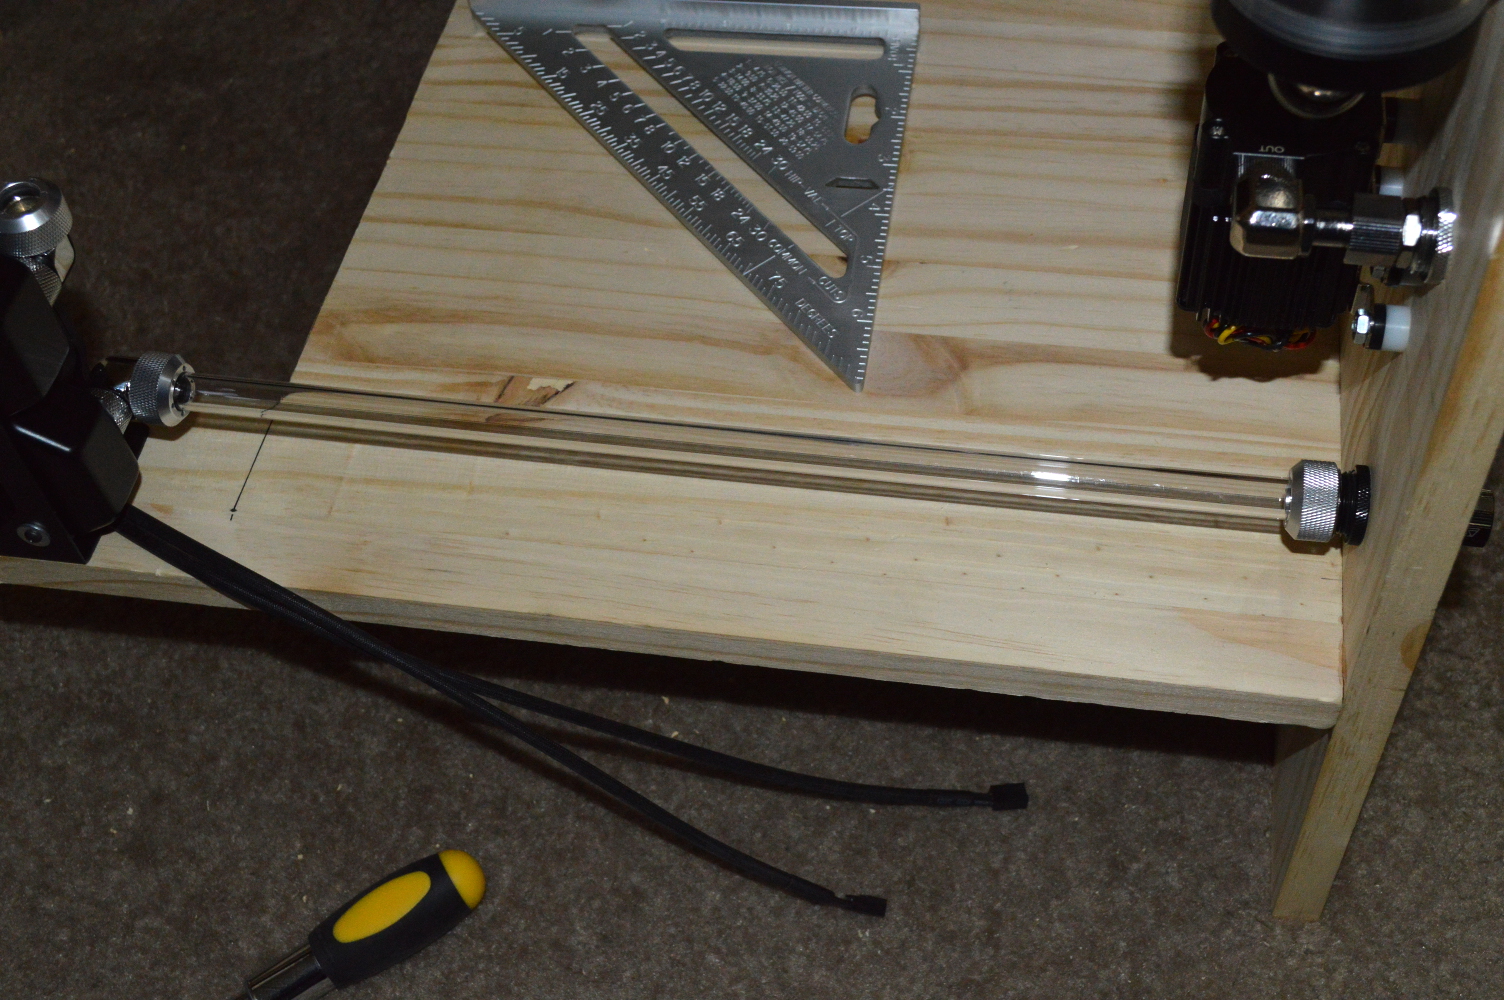
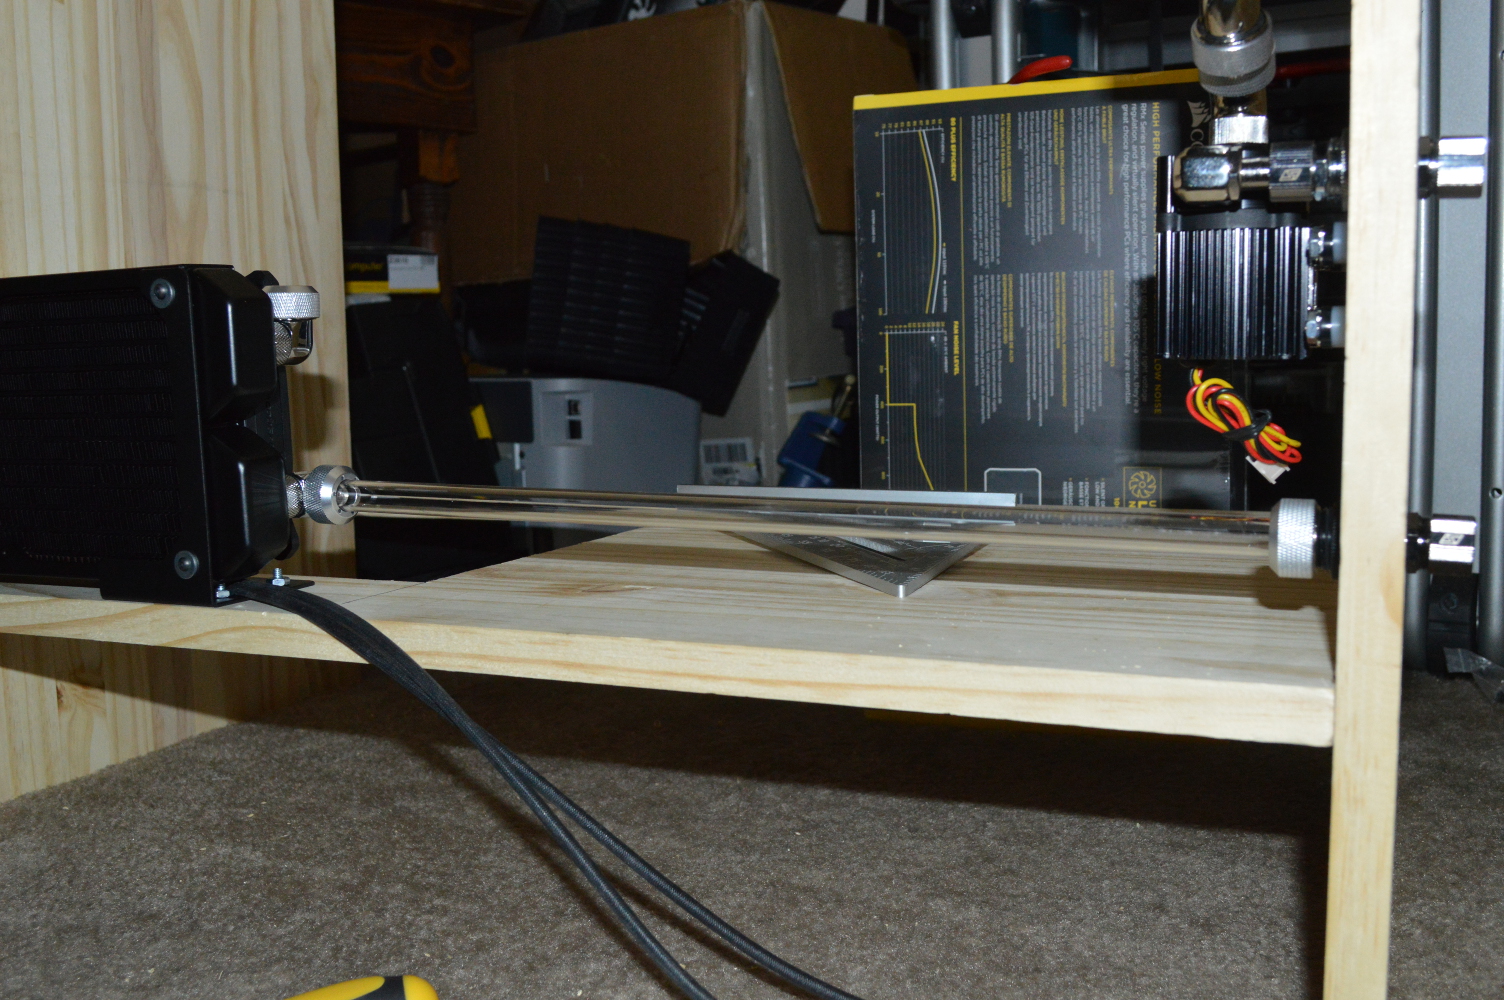
But first, I started laying some pipe in the cabinet. And the first run was mildly nerve-wracking since it, again, would tell me if I was spot-on with my measurements and mathematics. The first tubing ran from the cabinet’s inlet to the bottom radiator. It’s a straight run, straight line to the radiator from the bulkhead fitting. Or that’s how I measured it.

pipe1

pipe2

pipe3

And that’s how it turned out. About 14-1/2″. I love it when things come together like this. This also tells me that the line going from the top radiator back to the reservoir should work as I expect. The next piece of pipe was from the reservoir to the pump. Straight line again, but this one much shorter.

pipe4

By the way, one little trick about cutting PETG: use the same kind of cutters you would for soft tubing. You’ll get a very clean cut.

With this piece in place, it was time.

Desert Sapphire – Part III

Build Log:

Ah I love international orders…

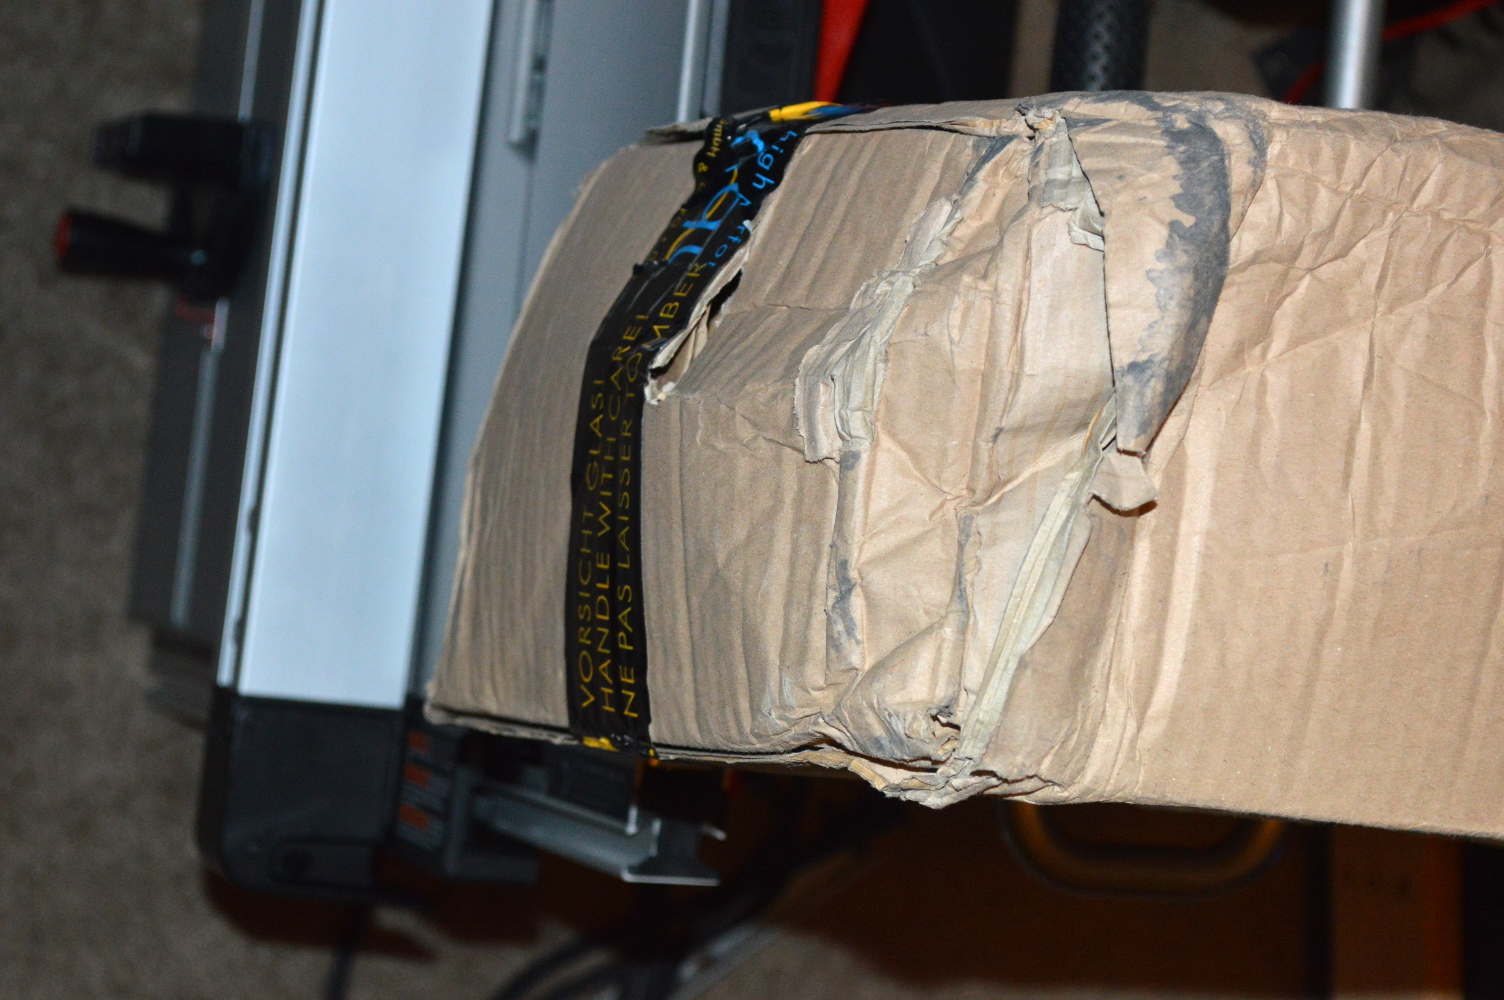
package1

package2

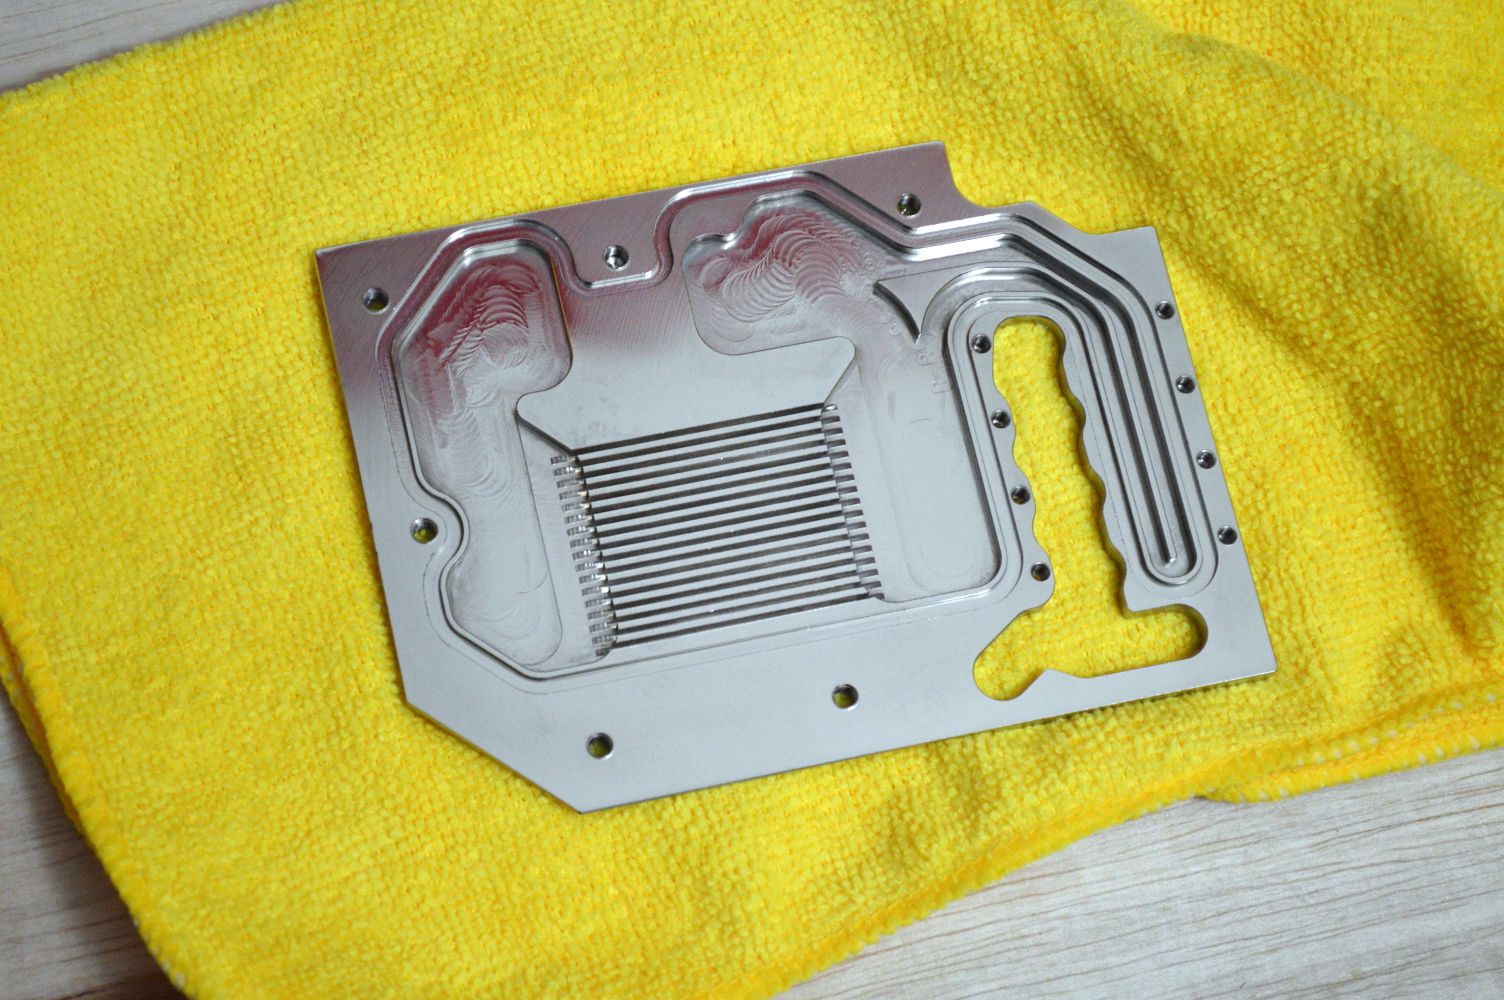
gpublock

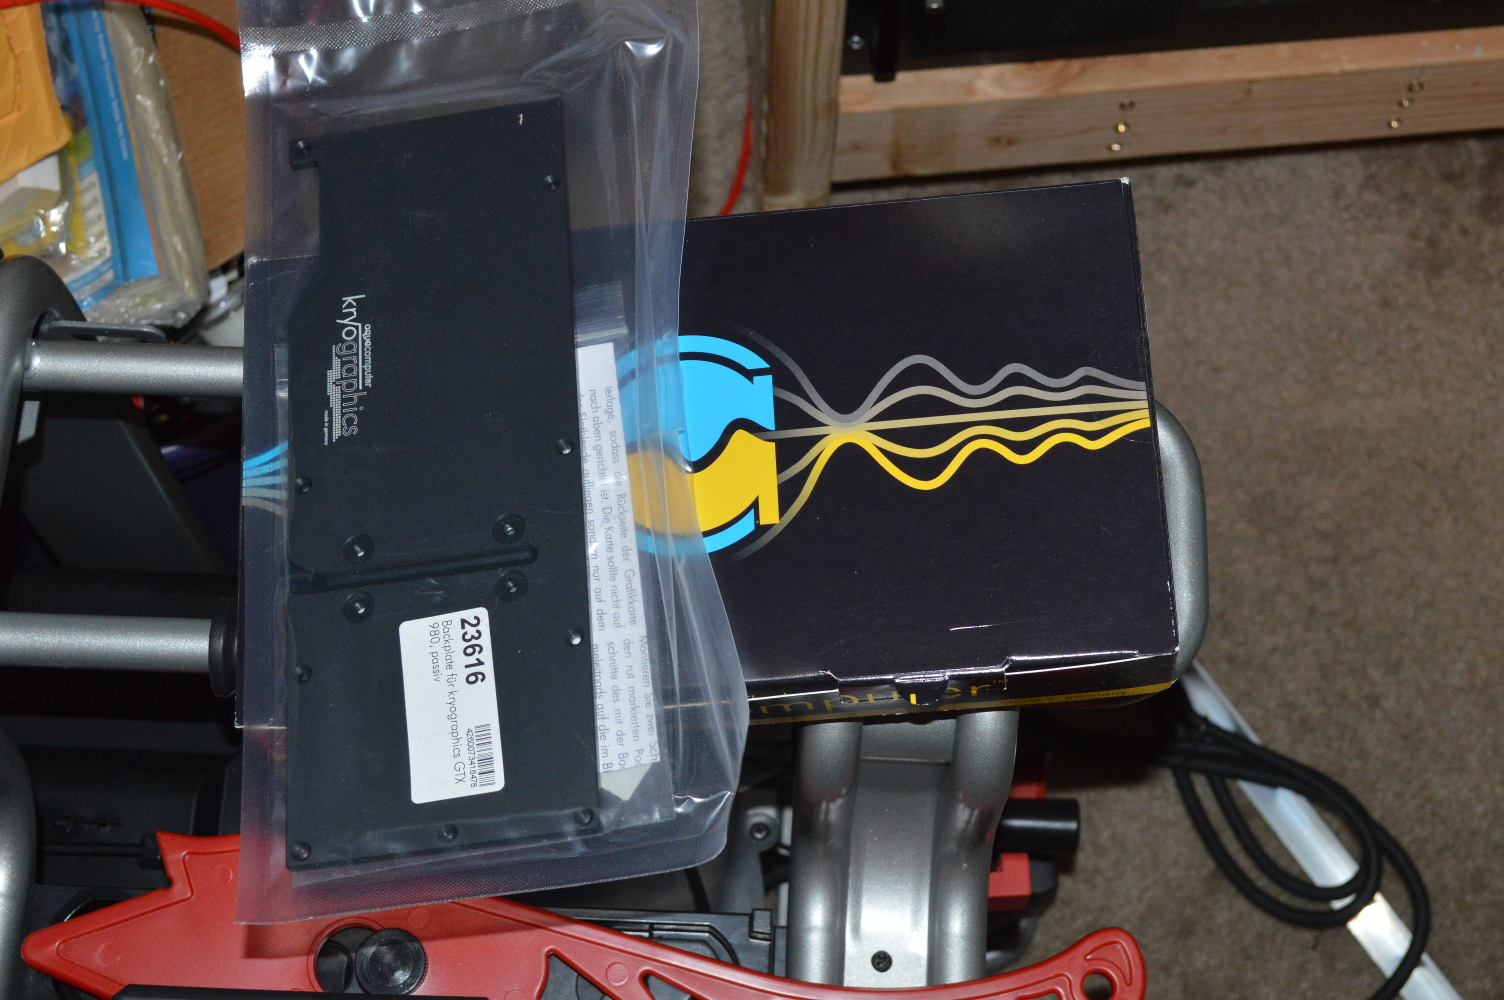
Thankfully everything in the box was unharmed. The only casualty was a corner of the thermal pad for the passive backplate. Not anything that’s concerning, though. The package from Performance-PCs came later in the week. That was the interesting one: fittings, pump, CPU block, tubing, fittings, fittings, and more fittings…

One thing I need to say about the pump: how in the hell is it capable of the specifications Koolance declares? And I mean that will all sincerity. If you look at the specification drawing, it’s about 47mm square. I was expecting this to be almost as large as a D5. 47mm, for those in the US who don’t want to pull out a calculator, is just under 2″. And no I didn’t look at the dimensions ahead of buying it.

On the plus side, it uses just 1.8A and runs off a 3-pin fan header, meaning it can be powered by the fan controller, if I decided to do that. The maximum flow rate is about 25% less than the D5 at max speed, but I bought this for the head pressure. So when the cabinet is built we’ll see how well it’ll perform.

Next step, though, was Home Depot to pick up some of their “random length” oak boards for making the cabinet.

Building the cabinet

I’ll have plans available toward the end of the build log for those who may want to build one of your own. The design here is for three double-120mm radiators on one side with everything else on the other and one side of the cabinet being bottomless to allow for airflow while the cabinet still looks like a cabinet.

As I mentioned, initially I thought about making it out of red oak, until I looked again at the price of it and decided to go with yellow pine, which cuts the cost of the cabinet in half. I bought two 18″x48″ laminated pine panels along with a 6′ length of 1″x3″ pine. Nominal width is 17.25″, which puts it a little wider than what I was aiming for. This would provide most of what I’d need to build the cabinet.

I started by ripping 18″ off one of the panels to give the 30″ long tabletop. The second panel was ripped in half to make two 24″x18″ pieces for the sides panels. This will allow for a 6″ clearance under the cabinet for airflow into the bottomless side of the cabinet. I’m sure my neighbors didn’t hugely appreciate the table saw (read a review of it here), but I can say that at least it’s not nearly as ear-piercing of a sound as my circular saw. And easier to clean up.

Though ripping the piece in half down to two approximate 24″ side panels required a little ingenuity, and a little cleanup of the cut afterward to ensure the boards were about as square as I could make them. The table saw has a maximum rip fence distance of only 18″, which was good for the first cut, but not so much for the second. Basically the clean-up involved clamping an adjustable T-square I bought at Harbor Freight at the right spot to guide my circular saw, then using an aluminum compound square from Home Depot for the little bit at the end the T-square blocked.

I initially thought of using dowels for this as well, but opted instead for #10 wood screws. To avoid problems, I wanted to also drill pilot holes in the end grain of the side panels, and #10 screws use a ⅛” pilot hole, the smallest size supported by my V-Drillguide. Through holes on the panels were 3/16″, which I would later discover is too skinny for the #10 screws to glide through cleanly. Not a problem as it means I can start the screws to line up and glue the panels before driving them home.

The holes are spaced every 3.5″. The downside was I didn’t have a self-centering dowel jig that could go down to 1/8″ — I don’t even think anyone makes one — so I had to improvise a little.

In cutting the bottom for the cabinet, I hit a little snag. I initially tried to cut a hole about 1″ in from the front and side and 3″ in from the back. Unfortunately in cutting out the hole using a jigsaw, I forgot to account for the weight of the board in the middle and when it got loose enough, it took out much of the side of the board. So instead of having a clean hole, I have a U. Oh well. It’ll still look good either way, and there will be plenty of support in the 3″ section for the radiators, especially since the radiators the radiators will be supported using brackets at the top and bottom.

cabinet1

So while waiting for the brackets to arrive from Performance-PCs, I tried to get the cabinet pieces to a point where all that would be left to drill were the holes for everything to be mounted. This also meant needing to figure out how and where to mount the pump and reservoir. My back made sure to complain later from being bent over the boards cutting and sanding.

Radiator brackets

Before finishing the cabinet, structurally at least, I needed to get the XS-PC brackets in hand and mounted to a radiator for a visual test for marking the screws. I surmised looking at the brackets that the screws would be best spaced about where the fan screws are, which would put them about 225mm apart, but as much as 240mm apart. The radiators themselves will be positioned such that the fans are centered on the “ledge”.

radtest1

To mount the brackets, I drilled holes for 1″ long #8 countersunk machine screws. I needed the holes on the cabinet top and bottom. Then I turned my attention to drilling the holes for the bulkhead fittings. Here is where things got a little interesting.

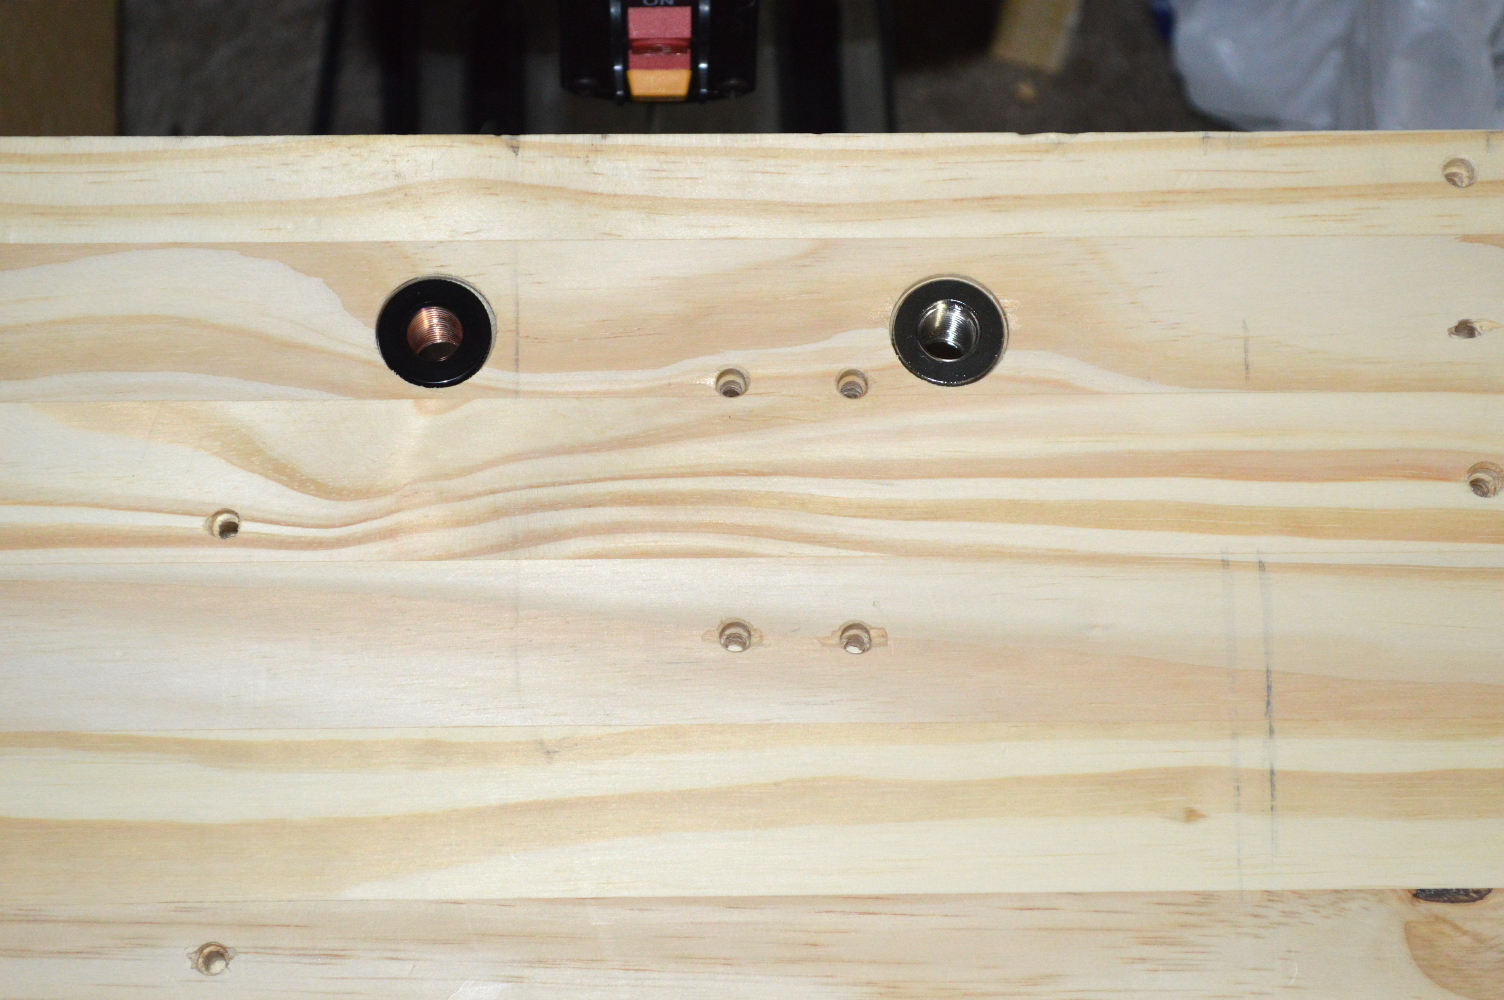
With how the bracket is positioned and using an AlphaCool 90-degree rotary fitting, the intake for the radiator measured to about 1.75″ from the back. Measuring using diagrams for the bracket and radiator puts the center of the fitting at about 1.5″ up from the bottom (1.54″ when converting mm to in, so close enough). So I measured and drilled the side panel for that.

Only there were a couple minor hitches I ran into. I initially tried to drill with a 3/4″ spade bit, thinking that would be wide enough. Not quite. If I knew that was going to be a concern, I would’ve picked up a set of spade bits from Home Depot or Harbor Freight since I only have a 1/2″, 3/4″, and 1″ spade bit — something I’ll likely do in the near future anyway.
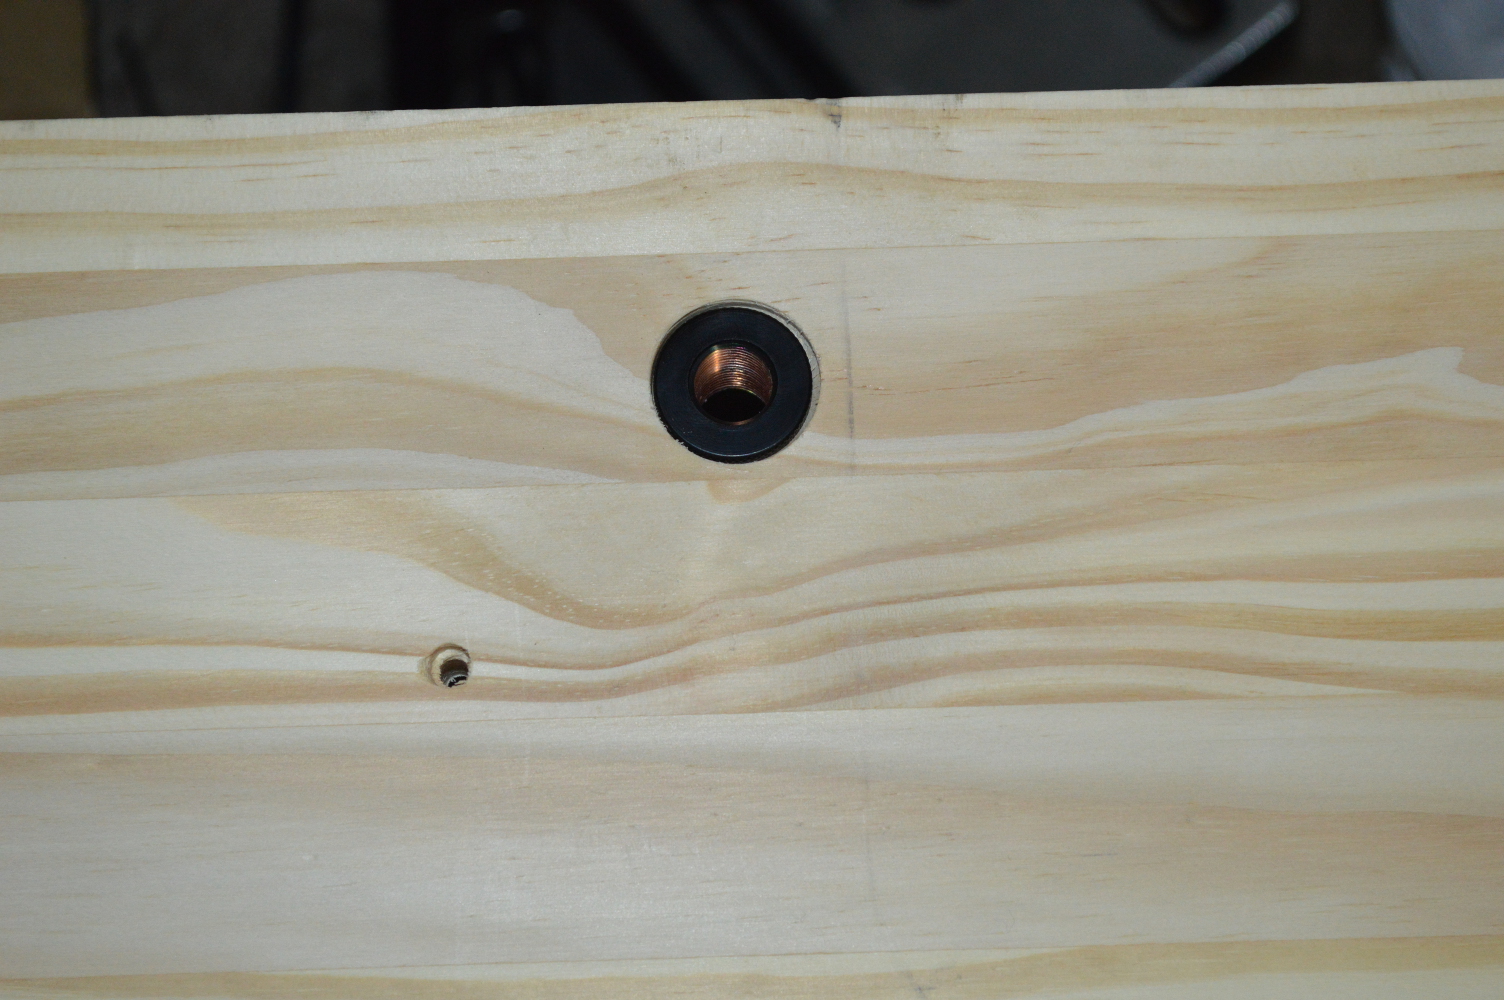
But I did have step bits, one that went to 7/8″. That allowed for the bulkhead fitting to sit, but not completely the way I wanted. It was just barely long enough, so I needed to sink it. That’s where another step bit came in handy, drilling a 1″ sink around the outside, allowing the fitting to sit flush with with the side panel.

bulkhead1

The fitting’s position should allow the return line to go straight to the bottom radiator. Unfortunately I was not going to know until the cabinet is put together whether that is how it turned out.

With the bulkhead fitting set, though, I didn’t turn my attention to the second bulkhead fitting. Not immediately at least. I planned to place it immediately above the return fitting, though. But first I’d need to mount the pump and reservoir to know where it would go.
Knowing where the bulkhead fitting would sit made measuring for most of that significantly easier. I chose to line the reservoir up so it would be centered along the same line as the bulkhead fittings. It would just make it much easier and leave the pump as the only complication.

And my thanks to Koolance and Bitspower for accurate drawings on their website. And thanks to my primary and secondary school teachers for the math education I received. No joke on that either. Let me show you what I mean.

reservoir

I was able to determine from Bitspower’s website that the reservoir mount I’m using was designed to fit onto an 80mm fan mount. And when mounts are designed to fit onto a standard layout such as that, it always makes measuring layouts so much easier.

Koolance’s diagram of the pump and 90-degree fitting allowed me to determine how far off the center line I’d be mounting the pump: about 40mm from the center of the bulkhead to the center of the pump, and shy of 1/2″ from the bulkhead center to the center on the closest mounting screws.

To figure out where on the board I’d be mounting it, I needed to know some details about the two EK 45-degree fittings I’d be using to connect the pump to the reservoir. Except there wasn’t any documentation available showing any kind of dimensions on the fittings, a situation that EK should rectify since everyone else from what I’ve seen makes such diagrams available. The diagrams are invaluable when making a custom project like this one. So I had no choice but to eyeball it.

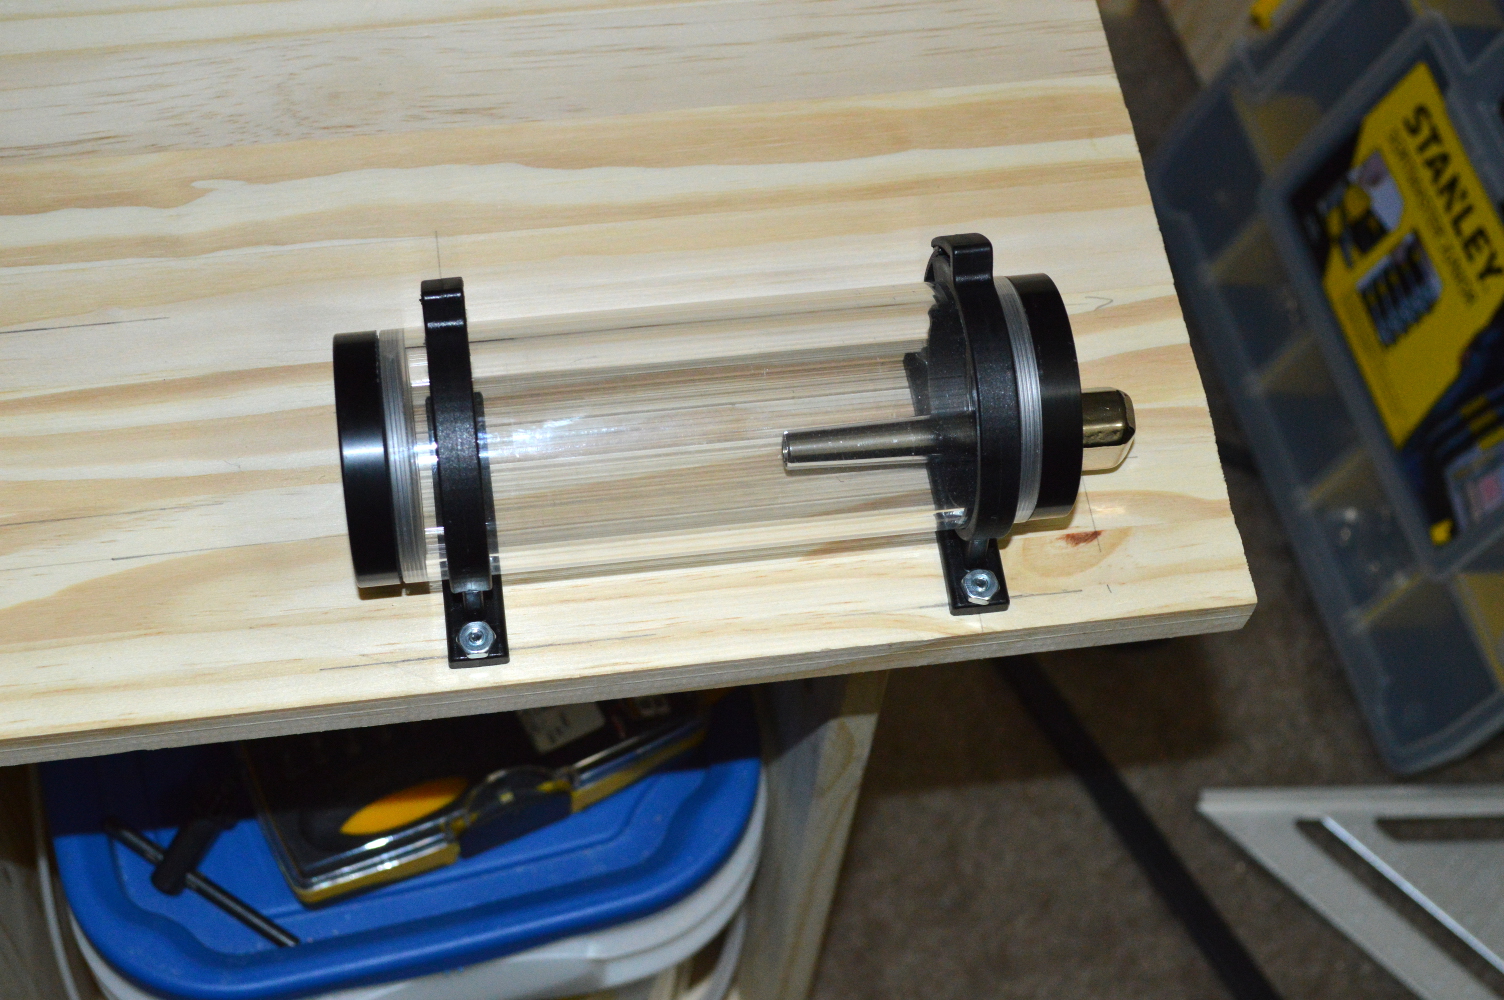
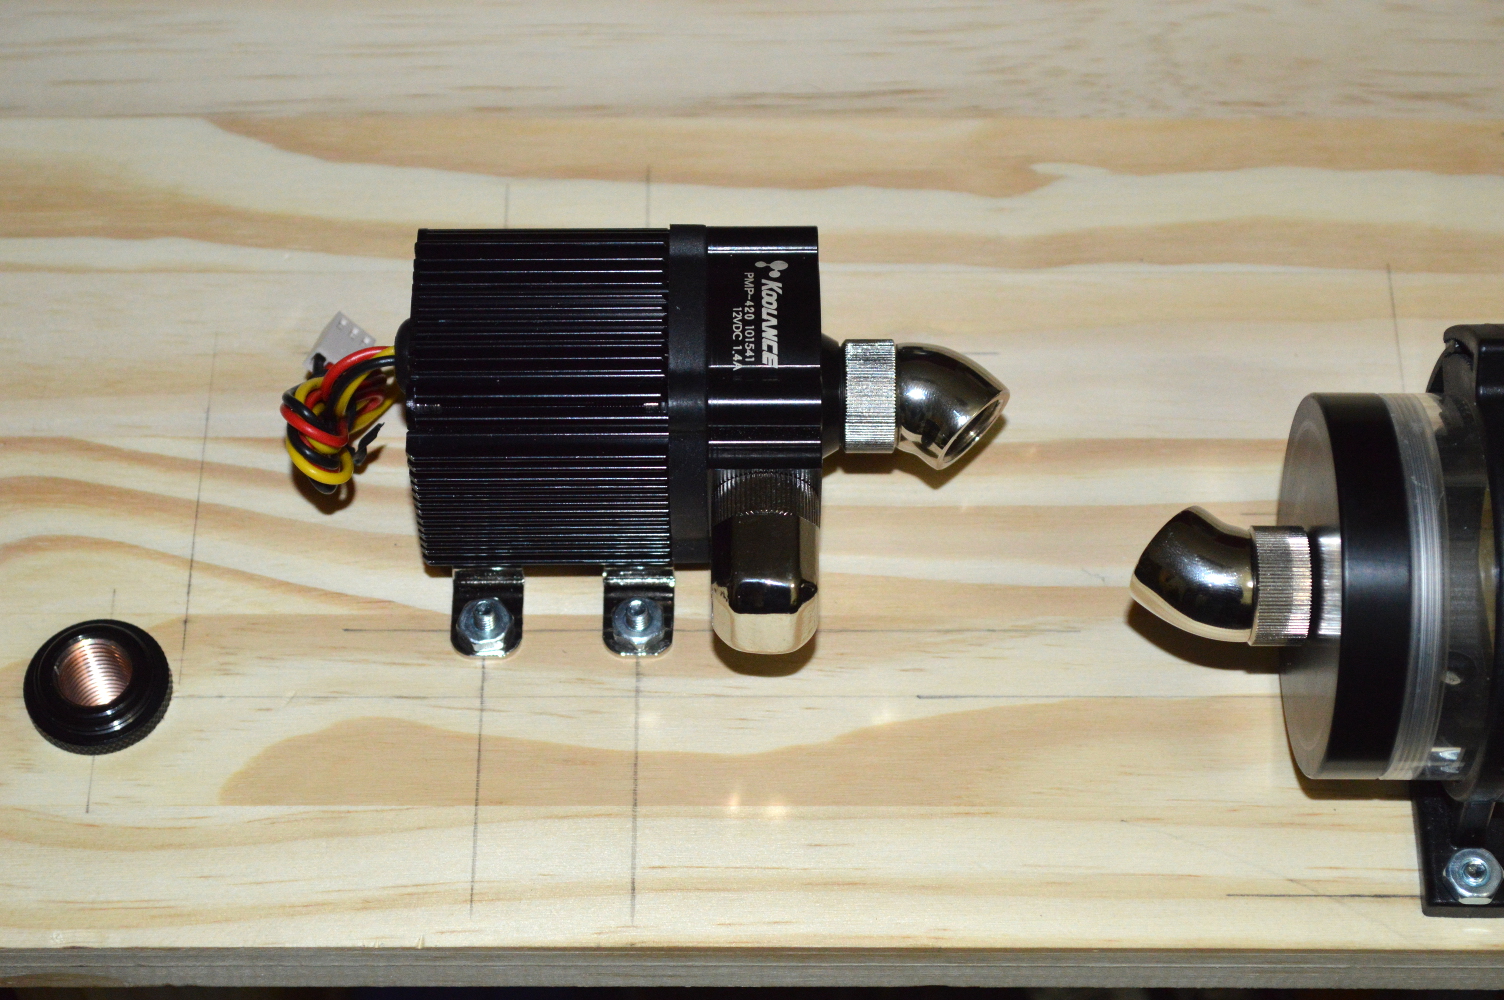
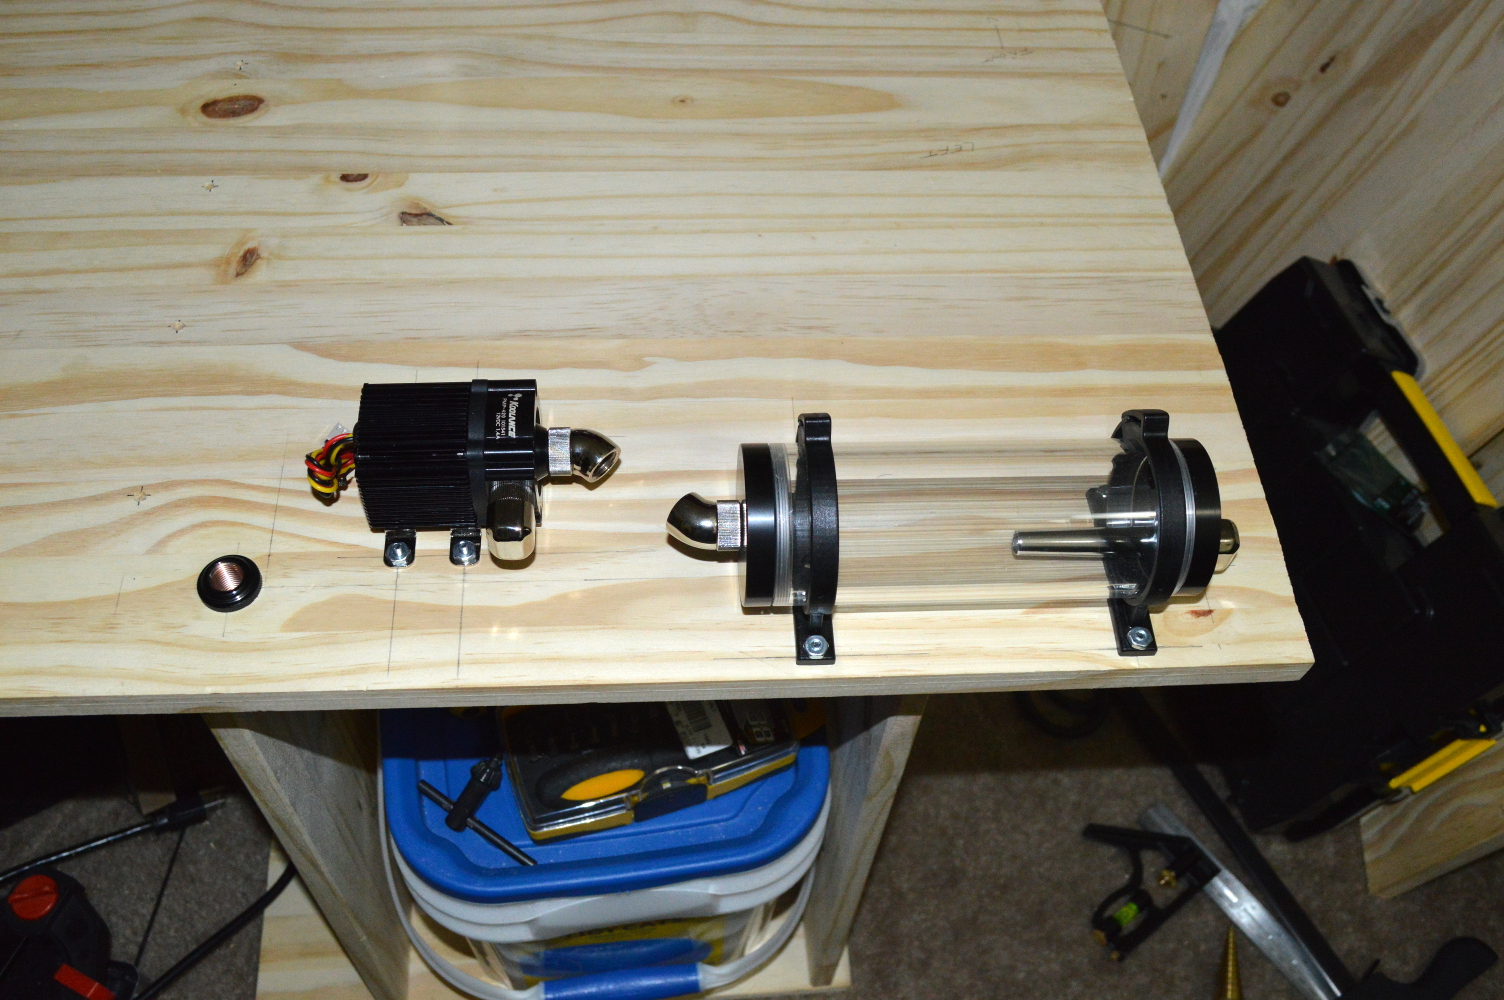
pump1

pump2

Once I had the pump mounted, I needed some ingenuity to figure out where to put the bulkhead fitting. Sure I could’ve just tried to line my square up under it, but I wanted to be a little more precise. From what I could gather, the pump top is about 18mm long, and the G1/4″ port appears to be middle-aligned, putting the center about 9mm in from the edge. This means that from the center of the lower screw hole to the center of the fitting port is about 46mm.

So I measured and drilled, following a procedure similar to what I did for the first bulkhead fitting.

bulkhead2

pump3

pump4

pump5

pump6

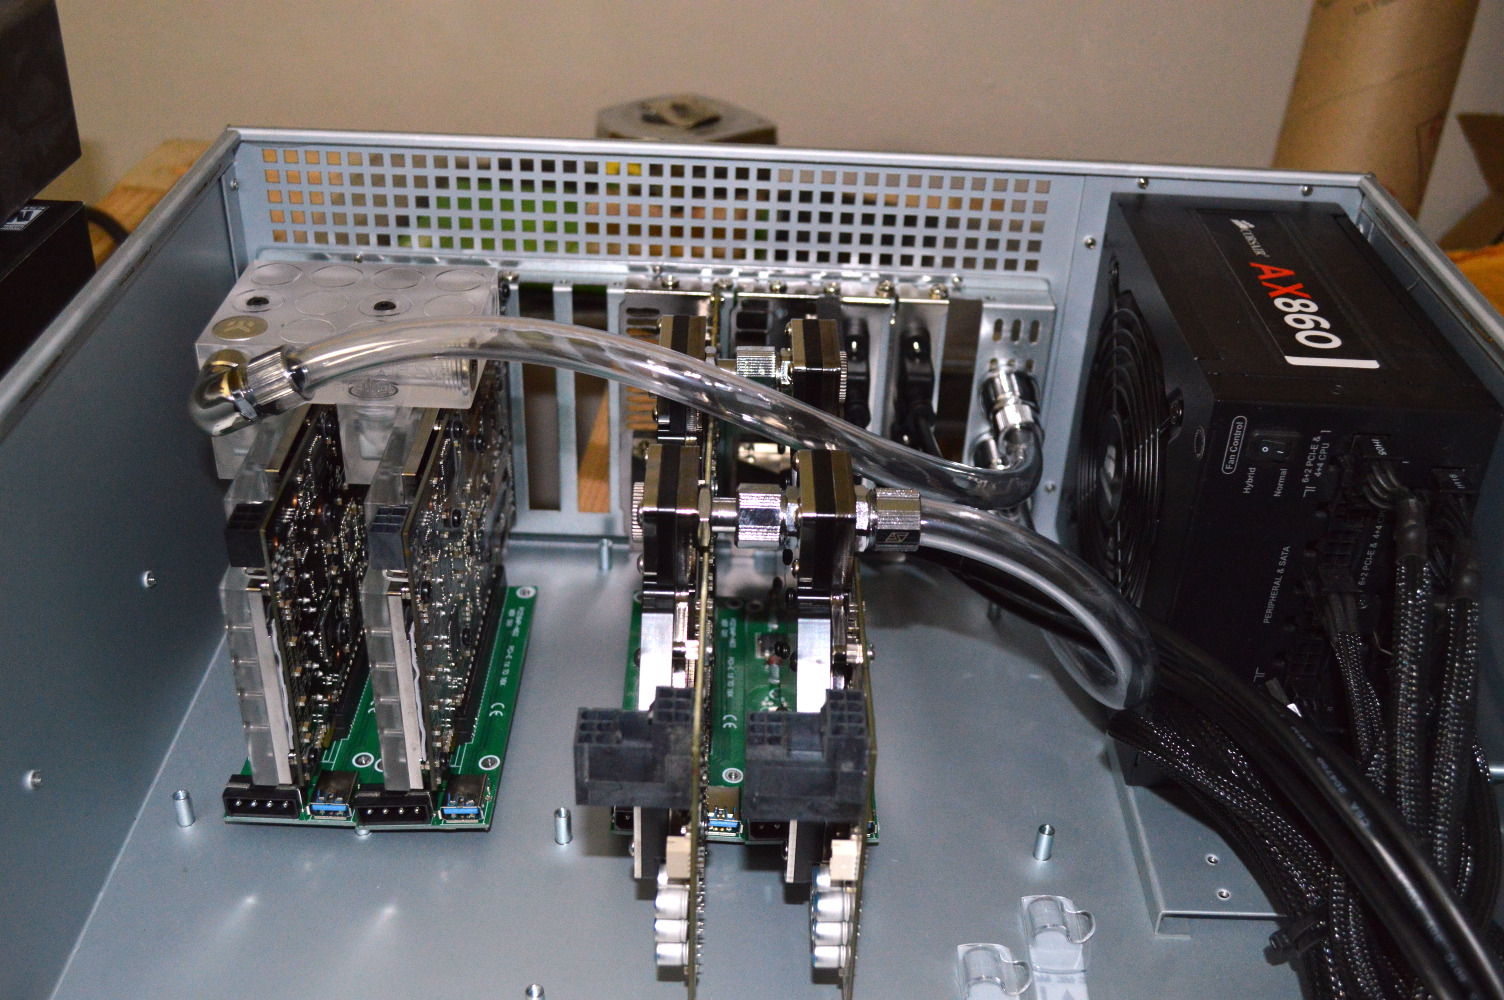
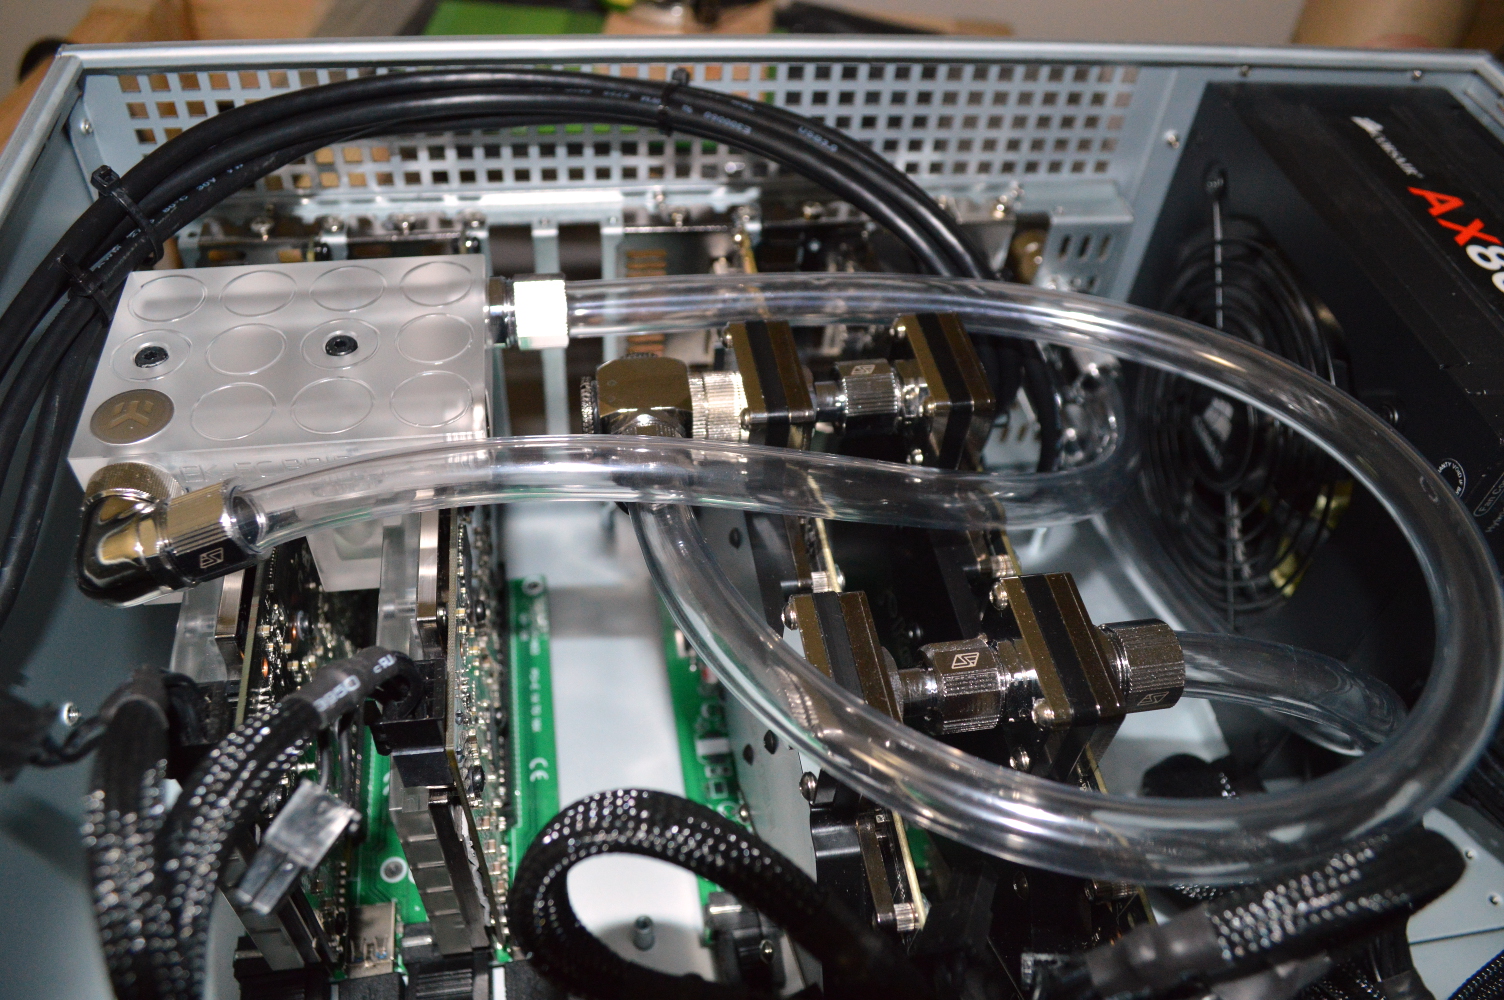
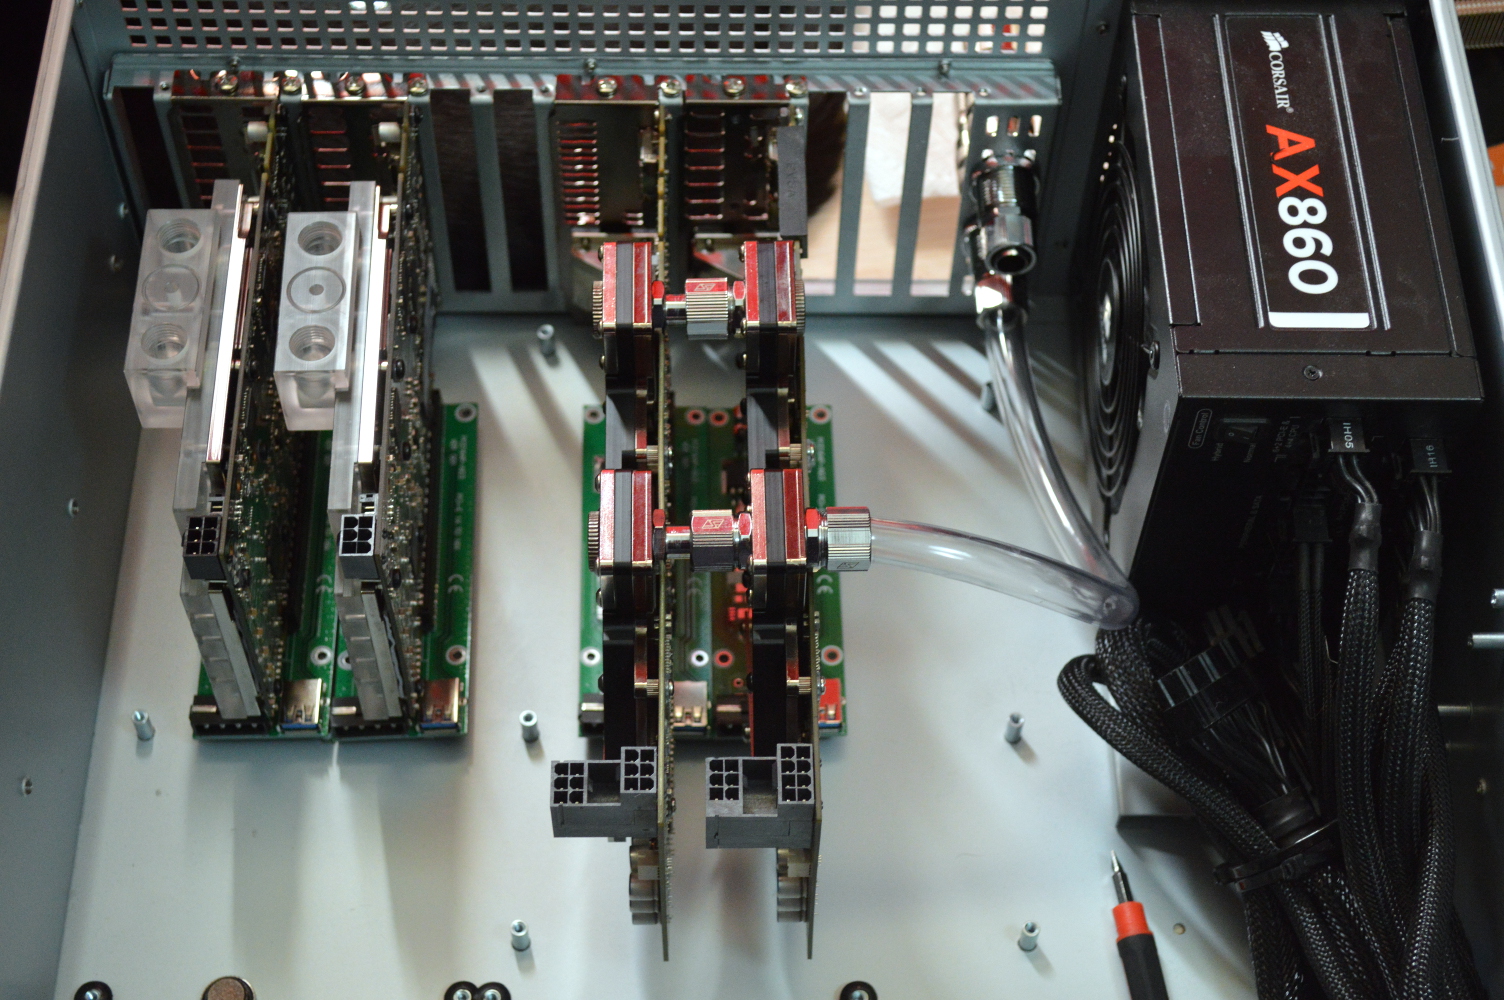
So it should be clear how this is going to run. The pump outlet is going right to the bulkhead fitting that will feed to the system. And the inlet to the box will go straight to the radiators. And the radiator will feed straight to the reservoir.

Unfortunately, though, this is much too close to make use of hard tubing fittings. So instead I’m going to use a Swiftech SLI fitting. I just need to get one from my local Micro Center when they’re next open.

The only question really still up in the air is how I’m going to power all of this. Current plan is to use a small FlexATX power supply I have laying around, provided it is quiet enough for the job. We’ll see when I flush the radiators and blocks later in the week. And I have an Add2PSU for synchronizing it with the main system, if I decide to do that.

But what you see above isn’t how the pump is going to be mounted in the final configuration, as I plan to use some 00 rubber washers for vibration isolation plus a couple 1/4″ nylon spacers. That should get the pump’s inlet lined up with the reservoir, and I’ll use PETG tubing as a short channel between them. But the 1″ screws I have are too short for that. And given a lot of this was all done on Christmas Eve night, I couldn’t just run to Home Depot to get the screws I needed. That will have to wait till Sunday after all of the Christmas festivities with mine and my wife’s families.

So until then, Merry Christmas.

Proposing an alternative

With Christmas and New Year’s around the corner, there’s something we all need to discuss. Proposals. Engagements. Casting your bachelorhood and bachelorettehood to the wind. Whatever you want to call it.

Do not propose on New Year’s or Christmas. It’s as cliche as proposing on Valentine’s Day or her birthday. And if your girlfriend is expecting you to propose on one of these days, then walk away. She values the idea of being engaged more than you and your relationship, or she values the ring more than you. If she breaks it off with you because you didn’t propose on Christmas, New Year’s, Valentine’s Day, or her birthday, it was for the best.

And when you do propose, do not go for the showy, public proposals either. I think you’re only setting yourself up for failure doing that as you won’t know if her “yes” is a genuine “yes” or one that was implicitly coerced from the public nature of the proposal. The eyes watching her in eager anticipation of whether she’ll say yes or not. And worse, the backlash that’ll come against her if she doesn’t.

Here’s how I proposed to my wife. In short, I didn’t. Not in what would be thought of as the traditional sense, that is. No ring. No elaborate setup. Nothing romantic about it. I just asked her. Completely out of the blue. We’d been together about a year at that point, but I was moving on with my life and wanted her to come along for the ride. That was a little over 10 years ago, as of when I write this, and we got married in December 2011.

My father was in the Navy when he proposed to my mother. By letter. That was in 1977.

By these standards, my father and I should be considered heartless people who have no idea what commitment actually means. Actually we both know what it means. It means we don’t need to use a ring with a huge diamond to wow a woman into marrying us. Instead we used the time preceding the proposal to wow them such that when we asked there was no need to worry about whether they’d say yes.

Yet all the time I see mentioned online how guys are going to propose to their significant others and they seem genuinely worried whether she will actually say yes. Which tells me there’s a major deficiency in the relationship, typically with regard to communication.

A friend on Facebook shared a video in which a guy was proposing to his girlfriend at, of all places, Times Square in New York City on New Year’s Eve. She instead runs away. One of my friend’s friends commented: “I would say she is really scared of commitment!” I didn’t agree:

I wouldn’t say she’s afraid of commitment, more like they weren’t on the same plane. But then I could never exactly understand why so many guys do the showy, very public marriage proposals…

My friend agreed:

Well, I can see that point. I think he should have hinted a little to her before he went all out. Definitely they were on two different wave lengths.

Basically before you propose, you should have already been talking about marriage and a future. You should already know before you propose that she has a high likelihood of saying yes. While the proposal itself might be “unexpected” in terms of timing, it shouldn’t be an event that catches her completely off guard.

If you feel you need to be wished “good luck” when proposing, don’t propose. If you feel you need to make the event around the proposal an elaborate display, a romantic dinner or huge getaway in an attempt to just wow her, then don’t propose. If you’re nervous about the possibility she might say No, don’t propose.

Don’t use an elaborate show to guilt her into saying yes. Don’t try for a public spectacle, such as Times Square at New Year’s Eve, to guilt her into saying yes. Don’t go for one of the cliche holidays or times of year either like the anniversary of your first date, or her birthday, or something like that. Your relationship should be unique enough and work well enough that you should be able to propose at any time of year without fearing she’ll say No. Which means you shouldn’t go along with the herd of guys who are going to propose to their girlfriends — likely in front of family and friends — at Christmas or New Year’s.

Instead just do what I did and ask out of the blue. If you feel your proposal needs to be a surprise, then don’t do the predictable, and don’t corner her either. Again, before the proposal even comes, both of you should be talking about a future with each other. If you’re not already doing that, don’t propose.

Revisiting due process and firearms

Perhaps my expectations are too high. I don’t think they are. Just as I would expect a programmer to understand the fundamental concepts of the languages they use, I would expect a lawyer to understand the fundamentals of law.

To this end, I would expect a practicing attorney to be knowledgeable of procedural due process. After all, due process applies both to civil and criminal litigation. So to encounter an attorney that gets the concept wrong just leaves me wondering.

Recently the governor of Connecticut, Dan Malloy, attempted to defend the use of the Federal government’s “no-fly list” as a “no-gun list”. I’ve been against this for the simple reason that no person is included on the “no-fly list” as a result of any kind of due process:

The biggest problem with excluding those on watch lists from being able to purchase firearms is the ability of the government to create lists indiscriminately, and add people to these lists with virtually no oversight.

If you actually value due process — which I’m convinced most people DON’T — then you’ll oppose this in its entirety.

I don’t say this lightly. I’ve written here before (here, here, here, here, and here) how many are willing to throw someone else’s due process rights under the bus. In the comments section to a Huffington Post article mentioning Malloy’s support, I said this:

The Fourteenth Amendment requires that before a person can be “deprived of… liberty”, they first must be subject to “due process of law”. “Due process” requires that the person being subjected to that due process be able to exercise their rights under the Fifth and Sixth Amendments, such as the right to convene a jury, call witnesses in his defense, cross-examine witnesses against him, and have an attorney to assist in that defense, and have all evidence against him examined by the jury to determine if the charges are proven beyond reasonable doubt.

Without the ability to exercise the Fifth and Sixth Amendment rights, the due process requirement is not met. So adding someone to an arbitrary government list, then using their inclusion to that list to deny that person their Second Amendment rights is also a violation of their Fourteenth Amendment rights and unconstitutional on its face. Period.

What I’ve outlined above is the essence of procedural due process. In short, before the government can enact any kind of deprivation of liberty against you, they must give you a chance to defend yourself. You have no such chance when it comes to these “no-fly” lists and other watch lists the Federal government has.

An attorney from Vermont replied:

Your legal analysis is not correct. Due process likely requires some process to challenge inclusion in the no-fly list, but not the determination that a person is, in fact, on the list. To be constitutional, the due process does not necessarily have to include all of the provisions you cite, which are those afforded people charged with crimes. There are existing provisions that allow people to challenge being placed on the no fly list. A challenge to that process is being litigated, but there is no final outcome to that case.

This isn’t accurate, but it’s not too far off. Instead the attorney has his words crossed. And unfortunately in my reply, I wasn’t entirely correct either, as I used the wrong term when describing a legitimate protection from the government. See if you can spot where I want wrong:

You have to be informed before you are added to the list that you may be added to the list. And you have to be given the opportunity to challenge that inclusion. In that challenge, the government must justify why you are to be included, and you must be given the opportunity to challenge that justification and appeal the result if it is not in your favor.

This is why we don’t put “alleged” child molesters on the sex offender registry. Conviction in a criminal court is required first.

What requires the “determination that a person is on the list” is the writ of habeas corpus. A person always has the right to challenge any action against them by the government — habeas corpus plus the First Amendment right to petition the government for a redress of grievances.

So if a person is on the “no-fly” list, they have the right to demand the government say why they are on the list — either directly or by way of the Court. And they have right to challenge being on the list, and the right to challenge before they are added to the list.

But…. that only comes into play if the list is being used to deprive liberties. And given we’re talking about this list being used to deprive Second Amendment rights, Due Process and habeas corpus *absolutely* come into play.

Habeas corpus. It’s all too easy to misuse legal terms. Instead what I was describing wasn’t the privilege of habeas corpus, but actually the protection against attainder.

From Article I, Section 9 of the Constitution: “No bill of attainder… shall be passed”. While this prohibition was directly on Congress, it by proxy limits the executive as well. A no-fly list cannot exist without congressional approval anyway. And for the Federal government to use them to deprive liberty is an attainder, a punishment without trial. And the right of due process first mentioned in the Fifth Amendment reinforces the ban mentioned in Article I, Section 9, while directly extending the prohibition to the Executive Branch.

No denial or deprivation of liberty may occur without due process of law. The Constitution is quite clear on that. Meaning the use of these lists of attainder, since they are already being used to limit someone’s liberties absent due process, to limit someone’s access to their Second Amendment rights clearly violates the Constitution.

Desert Sapphire – Part II

Build Log:

I mentioned in the previous segment that water cooling parts were on their way. The first order from Performance-PCs arrived the day after Thanksgiving — thank you FedEx for not screwing up this time.

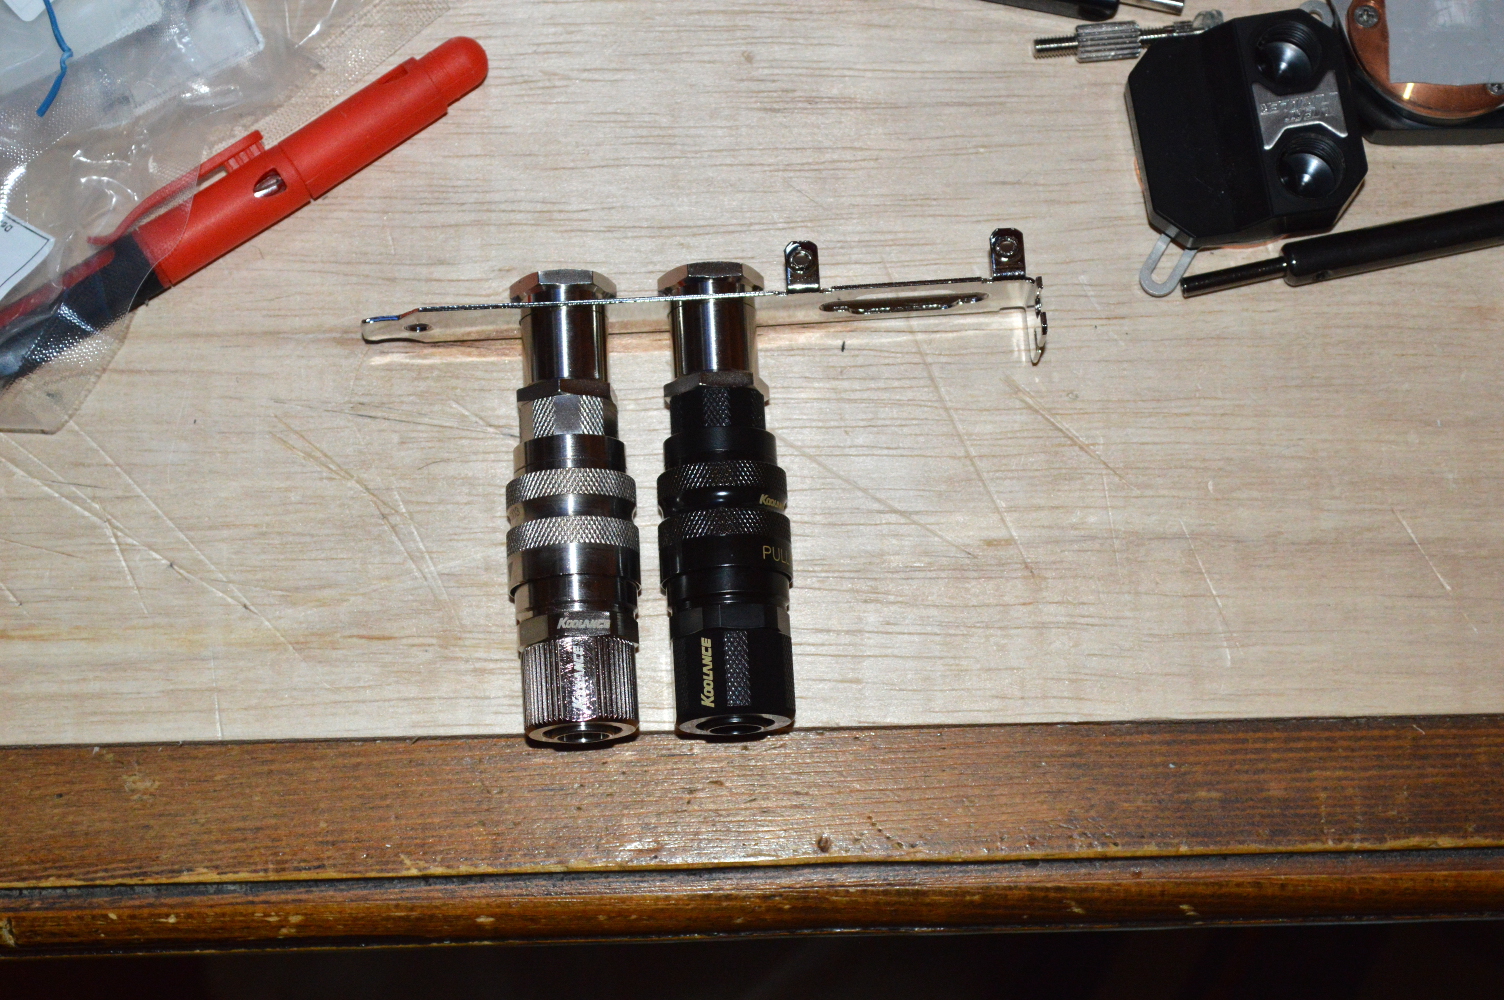
The Performance-PCs order contained two radiators, two bulkhead fittings, and a collection of Koolance quick disconnects:

One of the items listed is the Koolance L-Bracket with two G¼ pass-through fittings. Provided the quick disconnects could fit, I intended to use this for the pass-through to avoid modding the case. I know I’ve said previously that fittings shouldn’t be ordered early in a build. This was a necessary exception as it would affect planning if this didn’t fit. Plus I knew I’d be using these specific quick disconnects, so there wasn’t any risk ordering these up front.

quickdisconnects

Thankfully it did fit, but really only just. The female side of the quick disconnects have 3/8″x1/2″ compression fittings. Would it have worked if the quick disconnects were the larger 1/2″x3/4″ compression fittings? That’s difficult to say. It certainly would’ve been a tighter fit.

I really wish that Koolance had a second version of this pass-through that didn’t have the DB-15 slot on it and had the G¼” fittings spread out a little more. I’d also like to see a low-profile version of this bracket similar to the one they make for the since-discontinued VL2 line of quick disconnects.

Note as well that I’m using off-colored fittings. And as you can see from the picture above, I’m using one chrome and one black quick disconnect. This is simply to ensure that everything stays coordinated for flow. The flow must go in a particular direction through the CPU block, so this helps ensure that the flow stays coordinated between the cooling box and the blocks.

Second order

The next payday saw another order to Performance PCs, again ordering what I knew I’d need.

Everything in the 750D will use soft tubing, while the water box will use PETG. I have quite a few PrimoChill revolver fittings, so this gives me an opportunity to use those up. Plus it’ll make the water box a little easier to maintain. If there’s any part of this build I want to be able to last a long time, it’s that. I’m considering ordering the ratcheting cutting tool that MNPCTech sells, but I hear that you can use a standard tubing cutter on PETG, so I’ll see how well that works first, and I have a hacksaw if need be.

The AlphaCool 90-degree fittings are new. I typically go with Swiftech or Koolance, but these were 2.50 USD less expensive than the Swiftech fittings, 3 USD less expensive than Koolance, so I decided to try them.

But as you can see, I opted for the PMP-420 from Koolance as the pump. Again I wanted something better than the D5 Vario. The question is noise. I’ll be using this to flush pumps and blocks, so I’ll be able to test it out. If the noise is a bit much, I can see about dampening it. And the Add2PSU is to synchronize the power supplies. The exact cabling I’ll be using to plug everything up is still up in the air, but given how some LP4 to P4 converter cables are wired, I’m heavily leaning toward using a P4 cable.

Otherwise the rest of that inventory is pretty self-explanatory. Really about all that’s left to order is the fans for the radiators — likely going with Cougar CF-V12HPB since I’ve had good luck with them already — and the FlexATX power supply for powering the water box. I have another FlexATX power supply I might re-use for this. I’ll just need to first test it to see how noisy it was, so I’ll likely use it as part of testing the pump for flushing components.

Thankfully the Aquacomputer block and backplate didn’t take too long getting over to the US. Still could’ve been faster, but it would’ve required paying double the shipping rate for UPS. I basically had about everything I’d need when I’d need it.

The beauty of all of this? I can install blocks and tube up the loop in a smaller case before moving it to the 750D, and I won’t have to change a thing when moving it. Whereas with a loop where everything is inside the chassis, you may need to cut new tubing, and you’d certainly need to consider compatibility with your radiators before buying.

The cabinet

The next step really is figuring out what I’m going to do for the cabinet and radiator configuration. I’ve been browsing around for cabinets to see what is available, what might be easily adapted. And more and more I’m leaning more toward building a custom cabinet for this instead of using something off the shelf. I’m having a little difficulty finding cabinets that will fit what I’m wanting to do.

So instead I’m going to buy oak or pine boards and build one. It’ll be 30″ long by 15″ deep, and about 24″ tall. The inside of the cabinet will be only 18″ tall, providing for 6″ beneath the cabinet. This will be good since the radiator side of the cabinet will actually be bottomless, well almost. The radiators will be all but completely exposed, allowing for the most airflow through the fans.

The doors to the cabinet will also be solid, hence why the radiator side needs to be bottomless. If the door is closed, there won’t be any airflow if the cabinet was a typical cabinet. However with a bottomless cabinet, the radiators will still be able to pull air through. And the cabinet door can always be opened to allow for even more airflow if necessary.
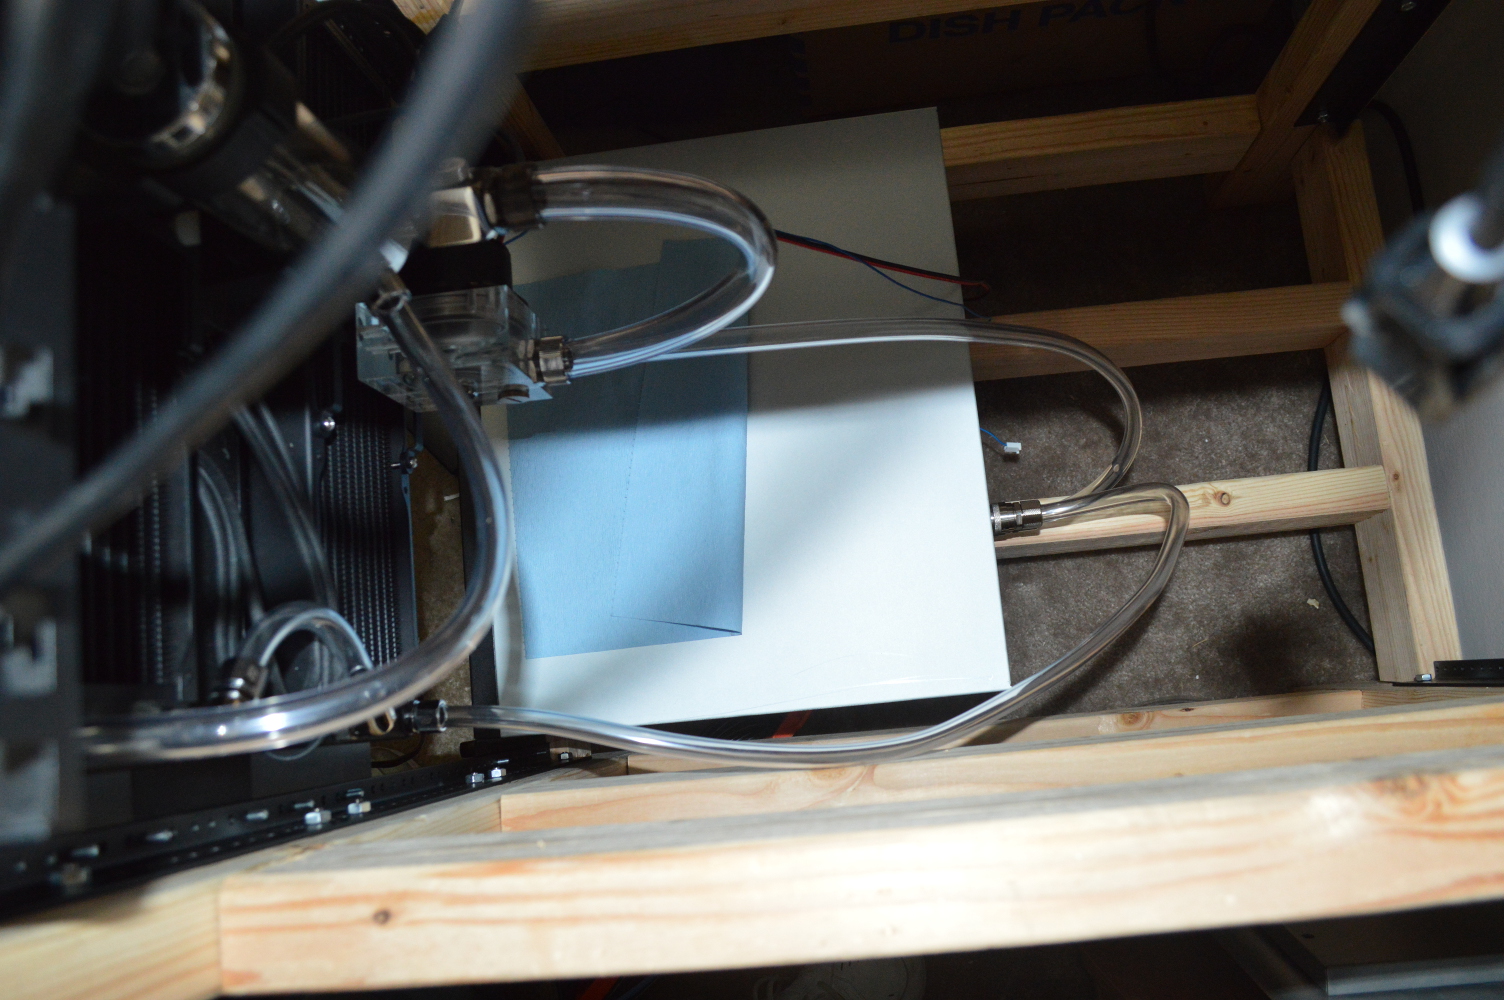
The fans will have a controller as well. The Phobya fan controller I previously used in Absinthe will be used here to allow the client to control the fan speeds when desirable. It’ll also serve as an immediate tachometer readout on the fans and pump as well. I forget whether it has an audible alarm, though.
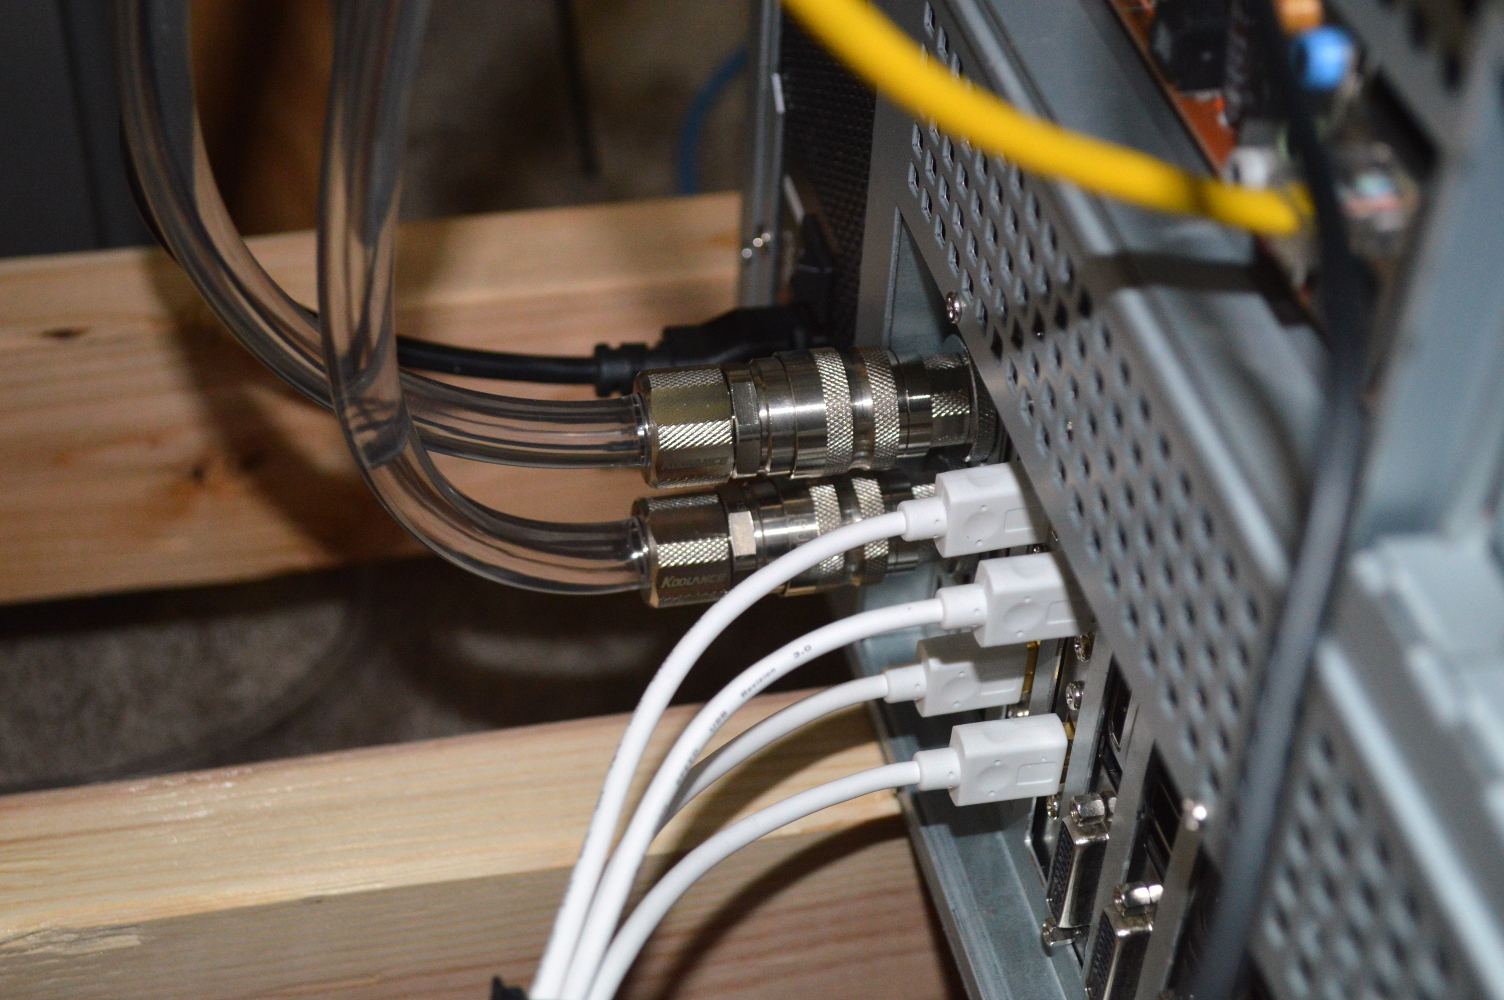
Now in talking about “sides” to the cabinet, there will obviously be a dividing wall in the middle. Currently I’m planning to set it up so the left side of the cabinet has the fan controller and temperature readout for the coolant while the right side has the radiators, pump, and reservoir. The pump has a heatsink and being passively cooled by the fans moving air through to the radiators should suffice.

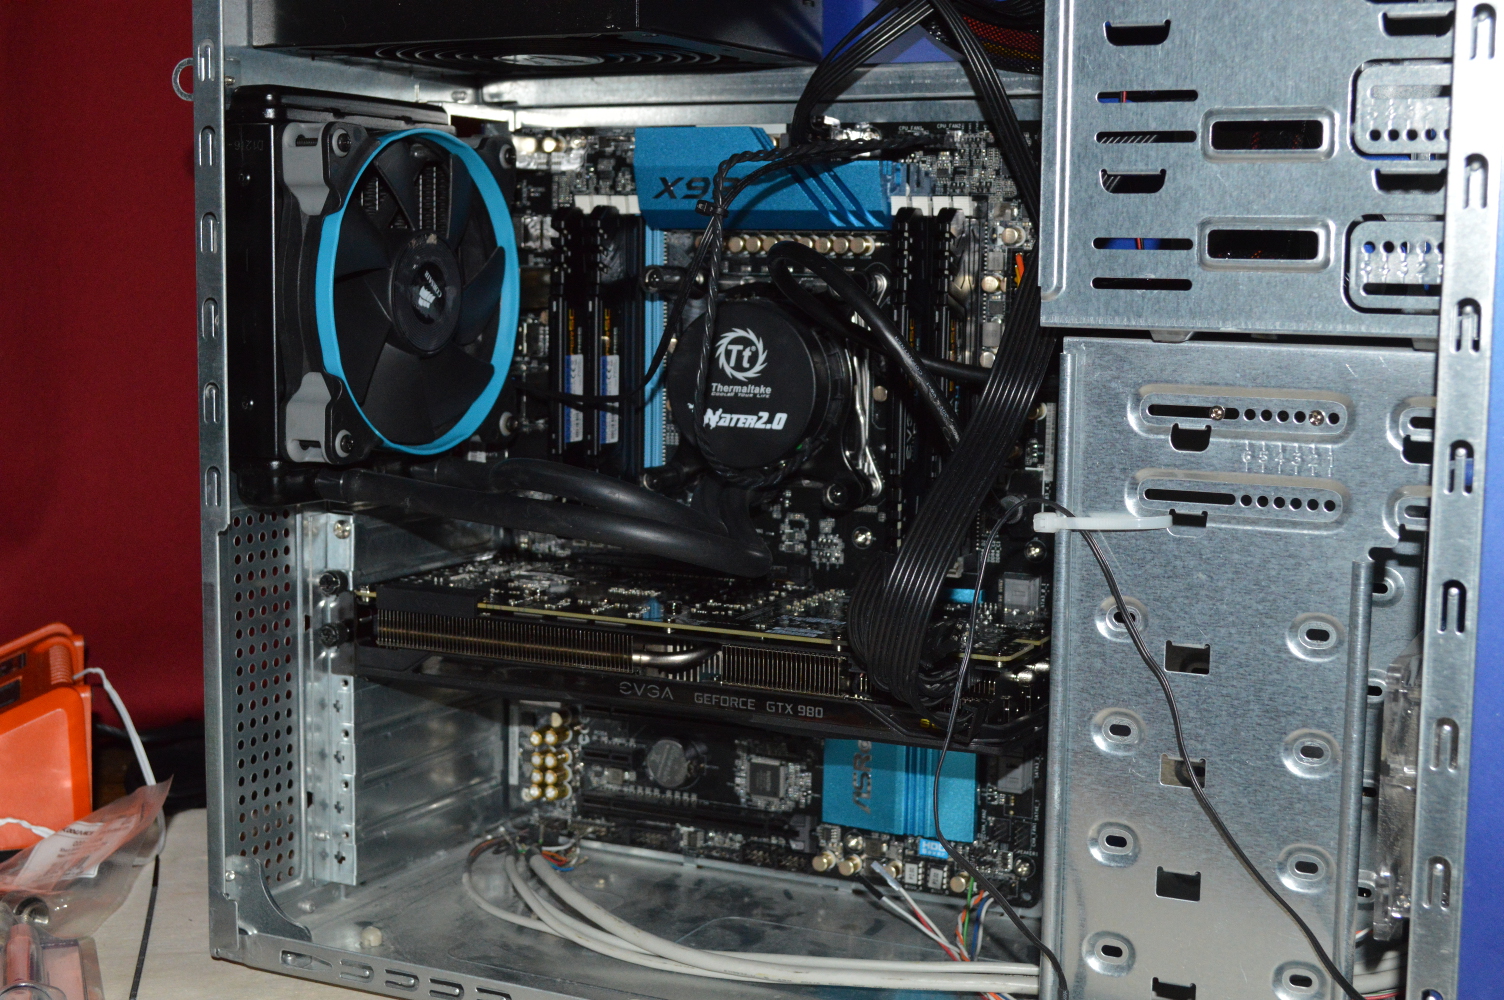
Otherwise, this is how the build currently looks in its temporary chassis:

testbuild

“I don’t believe you” vs “You’re lying”

If there’s one aspect of misinterpretation that really gets my goat, it’s this: “I don’t believe you” = “You’re lying!”

And it’s quite easy to see why this misinterpretation is made. Someone makes a statement and the person listening expresses skepticism, and the person making the statement interprets the skepticism as being accused of manufacturing details. I’ve come across this numerous, numerous times.

A little over a month ago, I had an exchange on Facebook regarding Martin Shkreli — yes, him. Shkreli had stated that he jacked the price on the toxoplasmosis medication Daraprim with the intent of spurring research into a new toxoplasmosis drug. He also acknowledged the price increase would cause another company to produce a generic. A click-bait headline stated that Shkreli was “fuming” when a San Diego pharmaceutical manufacturer did just that.

Going off Shkreli’s public statements, I said that Shkreli likely was not “fuming” with that development and that everyone “focused only on the new price” and basically ignored everything else he said. In response, a friend said, “He has no real intention of using profits to fund research, nor does he sincerely hope that his actions will motivate the development of safer treatments.”

My response was quite direct:

And when did you become a mind reader? Absent any other indications of his intentions, we can only go on his statements, which is also called giving him the benefit of the doubt. So if you have anything else you can point to that indicates his true intentions, then let’s have it. Otherwise, give him the benefit of the doubt and take his statements as his intentions, unless you’re not wanting others to give you the benefit of the doubt. And if you’re not willing to give him the benefit of the doubt, why should anyone else give it to you?

In response, a friend of that friend responded with “Sorry, know the guy, [friend] has it”. I challenged that statement:

You know [Shkreli] personally and have spoken with him about this particular move and his motivations behind it such that you can speak to his motivations? Sorry but I don’t believe you. But even if you did, you’d still be engaging in hearsay which makes any such statements untrustworthy. And saying you “know the guy” doesn’t mean what you say about his motivations on anything is correct, as a person you know can still surprise you.

When the friend of friend replied saying “Believe what you want – clearly you will”, I challenged further:

It’s not a matter of what I believe, [friend of friend], or what I want to believe. What I believe is immaterial. What you believe is immaterial. It’s a matter of what can be demonstrated to be true. And in some cases, we have little choice but to take a person’s statements prima facie — that is, assume them as true unless or until they can be shown to not be true. Why is this a concept so difficult for others to understand?

So unless you or someone else can *demonstrate* or has demonstrated his statements as false, then he is to be afforded the benefit of the doubt, regardless of whether you feel he deserves it or not.

Be skeptical all you want. There is nothing wrong with questioning someone’s motives or whether someone’s motives are genuine. But before you call someone a liar — which both you and [friend] are implying herein — you’d better be ready to demonstrate that they lied or otherwise hold your tongue. Otherwise, why should I hold mine?

If I still have you at this point, I’ll give you a quick demonstration of what I mean.

You’ll notice that above I did not call you a liar, implicitly or explicitly. I did not say or imply you knowingly and deliberately made a false statement in claiming you “know the guy”. For all I know, you just might. Or you may not. I have know way of proving the statement false, so I must assume it to be true — not accept it as true, only assume it is true.

That’s why I focused on whether you spoke to him specifically about his move regarding Daraprim.

The friend of friend’s responded saying they interpreted my statements as calling them a liar. My assumption is the friend of friend thought I should have just taken as fact unless I could disprove it their statement that they “know the guy” and, therefore, could speak to Shkreli’s intentions.

That’s not how things work. That isn’t just a shift in the burden of proof. It’s declaring that one should be able to manufacture statements and that no person can challenge them.

Expressing skepticism with regard to someone’s claim is quite different from stating the claim is false. If I say “I don’t believe you”, I mean just that: you haven’t convinced me your statement is true. If I say “You’re lying”, it means I can demonstrate your statement is false and I can demonstrate that you know your statement is false. Obviously, then, there’s an in-between.

To this extent, I have defended Anita Sarkeesian against accusations that she is a liar with regard to the content she has produced for her non-profit, Feminist Frequency:

Evidence shows Anita misrepresented herself and gained tremendous financial benefit from that misrepresentation, and I believe the evidence demonstrates beyond reasonable doubt that she committed fraud. She professed to be a gamer, but the level to which she played video games, or once played video games, is likely on the same level that someone who has built a computer could call themselves an “expert” at building computers.

But with regard to the content she has created, I think it’s a little bit of a stretch to say that Sarkeesian was lying, as that means she was being knowingly and intentionally dishonest with what she was presenting. The entire project stems from a fallacious starting point, though, in that she entered her research with a preconceived notion and bias, and she was looking for any evidence that could support her point. But a fallacious premise does not mean she was being knowingly and intentionally false with her statements. To say she was is a tough statement to prove.

Even with regard to Hitman and the video that Thunderf00t made on the scene in question, we can’t really know if Sarkeesian (or as proxy of her researchers or John McIntosh) is lying about the game. In all cases, however, Anita was certainly misrepresenting the games portrayed in her videos, with plenty taken out of context. Many have pointed this out. But it is not correct to call her a liar with her misrepresentations without also proving she knowingly misrepresented the games in question.

And I’ve gone further, in that one should not call someone a liar without maintaining context. Again, defending Anita Sarkeesian:

Context is what matters. We’ve all lied at some point, so would it be fair to hold the banner of “liar” over everyone’s head? No. Anita certainly misrepresented herself and gained financially from that misrepresentation. But with regard to her content, to say she was being knowingly and deliberately false in what she presented is a bit of a stretch. As such to call her a liar without limiting the statement to the context in which it can be proved she was knowingly and deliberately dishonest is not fair to Anita, just as it would not be fair to anyone else.
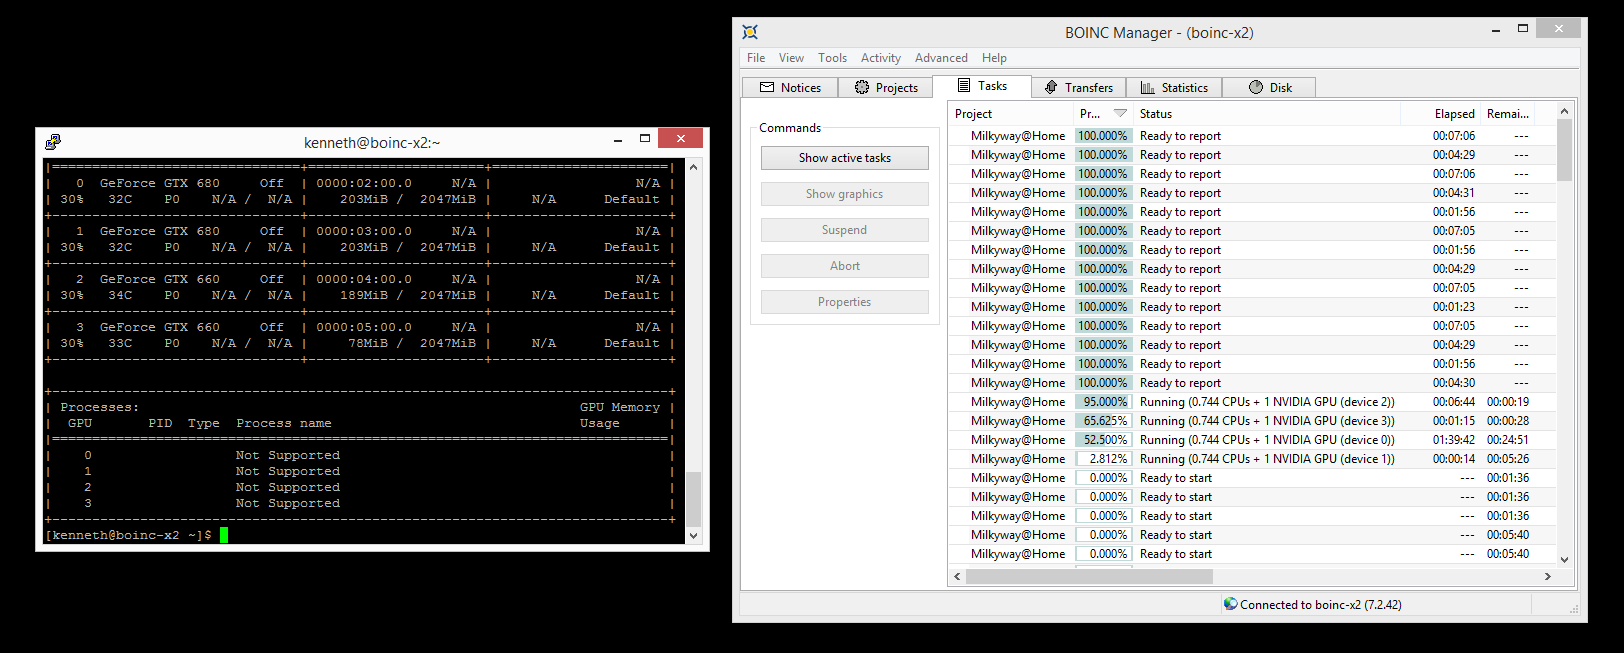
And again, this time responding to a video by Liana Kerzner:

You and I share the same definition on “liar” and “lying”. As I said in a couple comments in threads on your previous video, to me lying is being knowingly and intentionally false on statements being made. And I keep to that definition in part because I believe in always giving someone the benefit of doubt. Someone could be saying something that is demonstrably false only because they didn’t know.

But even then, I also feel that if you want to say someone is lying or is a liar, the context needs to be maintained. Everyone has lied at some point in their lives, I feel it is safe to say. But it is not fair to hold the banner of “liar” over everyone without also mentioning the context in which they lied, while also being able to demonstrate that they were being knowingly false in their statements. The latter is a tough standard to reach, and intentionally so. It isn’t fair to call someone a liar in any context unless you can show they were intentionally conveying information they know is false.

I believe whole-heartedly in giving everyone the benefit of doubt. It is why I’m a very staunch defender of due process. Sadly, I’m often a part of a very, very tiny minority when it comes to that.

Expressing skepticism toward a statement is not calling a person a liar. And generally when you make a statement with regard to someone else’s intentions — as opposed to your own intentions — you are making a material statement. Whenever you make a material statement, expect to be challenged, especially if you are making a statement with regard to someone else’s intentions.

Again, lying is a deliberate act. A person lies when they knowingly make a statement that is false. Along with lying comes fraud and perjury, both of which are treated as deliberate actions. You cannot “accidentally” commit fraud or perjury, just as you cannot “accidentally” lie. You can be mistaken with regard to a certain statement, due to being misinformed or making incorrect assumptions, but that is quite different from making statements you know to be false.

And unless you can demonstrate that statements someone made are false, and you can demonstrate that they knew or should have known those statements are false, you should not call someone a “liar”.

But again saying “I don’t believe you” is not and should not be interpreted as saying “You’re lying”. Lying means you know your statements are false and I can show it. “I don’t believe you” just means you need to try a little harder to convince me.

And if someone says to you “I don’t believe you” and you interpret that as “You’re lying”, then you believe whatever you say should be accepted as true regardless of whether it is true.

Desert Sapphire

Build Log:

The time has come to introduce another build project, this one being a client build. All of the primary hardware has been purchased and I’m just waiting on water cooling parts to arrive. This one is called Desert Sapphire. It’ll have a mostly blue theme and will be water cooled.

Mainboard: ASRock X99 Extreme4
CPU: Intel i7-5820k
RAM: 16GB EVGA DDR4-2800 SuperSC (4x4GB)
Storage: Samsung 850 EVO M.2 SSD
Graphics: EVGA GTX 980 SC ACX 2.0
OS: Windows 10 Home
Chassis: Corsair 750D

This is going to be a very high-end build, and it’ll be the first truly high-end system the client has ever owned, and he’s very excited about getting this system. Currently he’s running a second-generation Intel i3 with a Zotac GT620, so the difference here is like night and day. There’s also an interesting story behind this build.

The client had actually been out of work for a while but wasn’t really actively looking for work — he’s a younger man in his early 20s still living at home. So I proposed to him that I’d build him a system if he found a job and put up some of the cost. So he’s put up about half the cost of the system, and I’m absorbing the rest. The chassis is actually the 750D from β Ori. that will be available once I move that system into a 19″ rack.

And as I said, the system is going to be water cooled as well. Many of the parts have already been settled and/or ordered, at least on brands.

CPU block: EK Supremacy EVO
GPU block: Aquacomputer kryographics with passive backplate
Radiators: AlphaCool ST30, size to be determined
Pump: Koolance PMP-420 or PMP-500

This system will actually be externally water-cooled. There will be an inlet and outlet to the chassis that will be connected via Koolance quick disconnects, very similar to what I did for Colony West. The question that’s up in the air still is what to use to house the external water cooling setup.

And I’ve had a few ideas, all of which so far involve modifying something from off the shelf. The idea on that mark is I want it to look like a piece of furniture with the tubing and cabling going from the back of the computer to the box. I’ve looked at night stands and small cabinets mostly.

I’m doing this for a couple reasons. First, the client lives in Nevada — i.e. desert, hence the name. This means that there will be what some would consider over-kill radiator capacity. I’m currently planning on 6x120mm. The pump is also a little up in the air as I’m considering going with something more powerful than a D5 to ensure there won’t be any flow problems. On that I’m considering two pumps from Koolance: PMP-420 and PMP-500. I may end up going with a D5 in the end, simply but again flow is the primary concern.

The other reason I’m doing this is simply because I can. The client has voiced no objection to going that direction with the loop and trusts my judgment on this. But at the same time I’m wanting to demonstrate what I talked about in a segment of the β Ori. build log and that AntVenom demonstrated with his setup:

The box will contain the pump, reservoir, and radiators. Coolant will pass from the pump up to the system, through the blocks, then back out to the box where it will pass through the radiators and go back to the reservoir. The quick disconnects will be color coordinated to ensure that the flow goes in the right direction. There will be a small ATX power supply controlling the fans and pump that will be synchronized to the main power supply. More on that when I get there.

And here’s the best part: the cooling system is independent of the chassis. This means that the client could later add a second GTX 980 without affecting the radiator box. It’d affect only the main chassis, and not really all that much. Plus with all of the radiators external to the system, the radiators will have completely open airflow, meaning maximum cooling potential. The chassis could even be changed out later without having to worry about the radiators, and the radiators could be upgraded or additional ones added without worrying about the chassis.

Doing this provides for so much flexibility I’m surprised so few people are doing this. While there are some complications with going this route, they are relatively easy to overcome, provided you actually put some thinking into it.

The only part of owning a water cooled system that the setup would complicate is maintenance, but even then not really by much. It is something I’ll have to keep in mind when building the box, though, as the client will likely be the one maintaining this system unless I agree to go back out there about once a year. Aside from that, all he’d have to do is keep the fans and radiators cleared of dust.

That’s it for this part of the build log. Some of the water cooling parts have been ordered, but with Thanksgiving around the corner, it’ll be interesting to see when they arrive. The Aquacomputer block was also ordered direct from Aquacomputer in Germany, so hopefully it won’t take over a month to receive it. But if that happens, there will still be plenty to work on in the mean time.

Follow-up on Colony West

Build Log:

So the system has been up and running for about a week now, so it’s time for a follow-up on how the system is performing.

Temperatures

First I couldn’t be happier with the water cooling loop. The radiators have no problem keeping the GPUs cool. MilkyWay@Home tasks tended to produce the highest temperatures on the cards while air cooled, so seeing the temperatures in the low 30s C on water is just phenomenal. But that was with the fans running at full voltage.

So to quiet the system, I used the voltage step-down I already have (read about it here) to take the fans down to around 8 volts. When I plugged it in, I didn’t realize the voltage was set that low. But the temperatures only went up a few degrees, hovering around the mid 30s C. The fans are inaudible compared to the fans in the graphics host and graphics enclosure, which is odd considering the fans in both chassis are undervolted as well.

Either way, that is phenomenal performance. I’ll see what I can do about the other fan noise later. If it’s the power supplies in either instance, then there’s nothing I can do about it.

Stability

Along with temperatures, I also need to talk about stability. And that is where so far I’ve had some concerns. In short I think I need to revisit the water blocks. Not for cleaning, but to remount them, at least with regard to one of the GTX 660s.

For some reason one of the GTX 660s does not want to remain stable. The Xid error code thrown by the NVIDIA driver is 62, which is labeled as an “Internal micro-controller halt”. Three possible causes: hardware error/failure (unlikely), driver error (also unlikely), or thermal issues. This is what makes me think the block needs to be remounted.

Now if the temperatures on the GPUs are in the mid 30s, how can this be a thermal concern? Simple. It’s either the memory or VRMs that is the issue. I just hope I have enough thermal pad material to do that.

What’s odd is the driver crash would happen consistently after about 36 hours of continuous load. So I reconfigured BOINC to take a 15 minute “break” at midnight every day. This alleviated the driver concern, but it didn’t keep the issues completely at bay. So re-seating the water block is a necessity, meaning I get to test how well I could drain the system.

BOINC

Now for the real meat of the project: distributed computing performance.

Recall that there are four graphics cards: two GTX 680s and two GTX 660s. When the system remains stable, it’s able to clear over 100,000 points in a day.

Folding@Home

After clearing the 5000 ranking for MilkyWay@Home, I decided to turn the system over toward Folding@Home to see what kind of performance I could expect. Since this is a headless system, I needed to manually configure the client through the config.xml file. First, I used the –configure command-line option to set up a few basic options, then I manually edited the file to provide four slots, one for each graphics card.

01
02
03
04
05
06
07
08
09
10
11
12
<config>
  <user value='Colony_West'/>
  <team value='0'/>
  <passkey value='********************************'/>
  <smp value='true'/>
  <gpu value='true'/>
 
  <slot id='0' type='GPU'><gpus v='0' /></slot>
  <slot id='1' type='GPU'><gpus v='1' /></slot>
  <slot id='2' type='GPU'><gpus v='2' /></slot>
  <slot id='3' type='GPU'><gpus v='3' /></slot>
</config>

So how well does this perform? As of the time I wrote this, the client estimates it can clear 260k points per day, sometimes estimating over 270k points per day. Given published numbers I’ve seen for the GTX 680 and GTX 660, this likely means the GPUs are being held back a little by either the CPU or memory. The 660s should be able to pull between 100k and 115k PPD combined, while the GTX 680s should be able to net 210k to 225k PPD combined, meaning this setup should be able to pull almost 335k PPD, but 300k at minimum.

So the GPUs are being held back, likely by the fact this is a 10 year-old dual-core CPU that is being used. As the Folding@Home FAQ says, the GPU tasks are still heavily CPU dependent, though that’s something they aim to try to change later. But that means that even one of the GPUs is going to be held back by the current client.

So for now, Folding@Home is out. Perhaps when the AMD mainboard in either Absinthe or Beta Orionis are freed up will I try doing Folding@Home again. For now, Colony West will be doing just BOINC.

Rack water cooling, cont.

Build Log:

EK got back to me pretty quickly on my inquiry. The screws in question that I’d need are M3x10 DIN 7991. They even offered to mail me a set if I couldn’t find them locally. Grainger says they carry M3x10 DIN 7991, but the screws they sell are actually longer than 10mm, so they wouldn’t work for this. Thankfully McMaster-Carr also carries them, so I was able to have them shipped in. Unfortunately I had to order 100 of them when I only need 16. At least the excess dowel pins I ordered can be put to use. Not sure what I’m going to do with these.

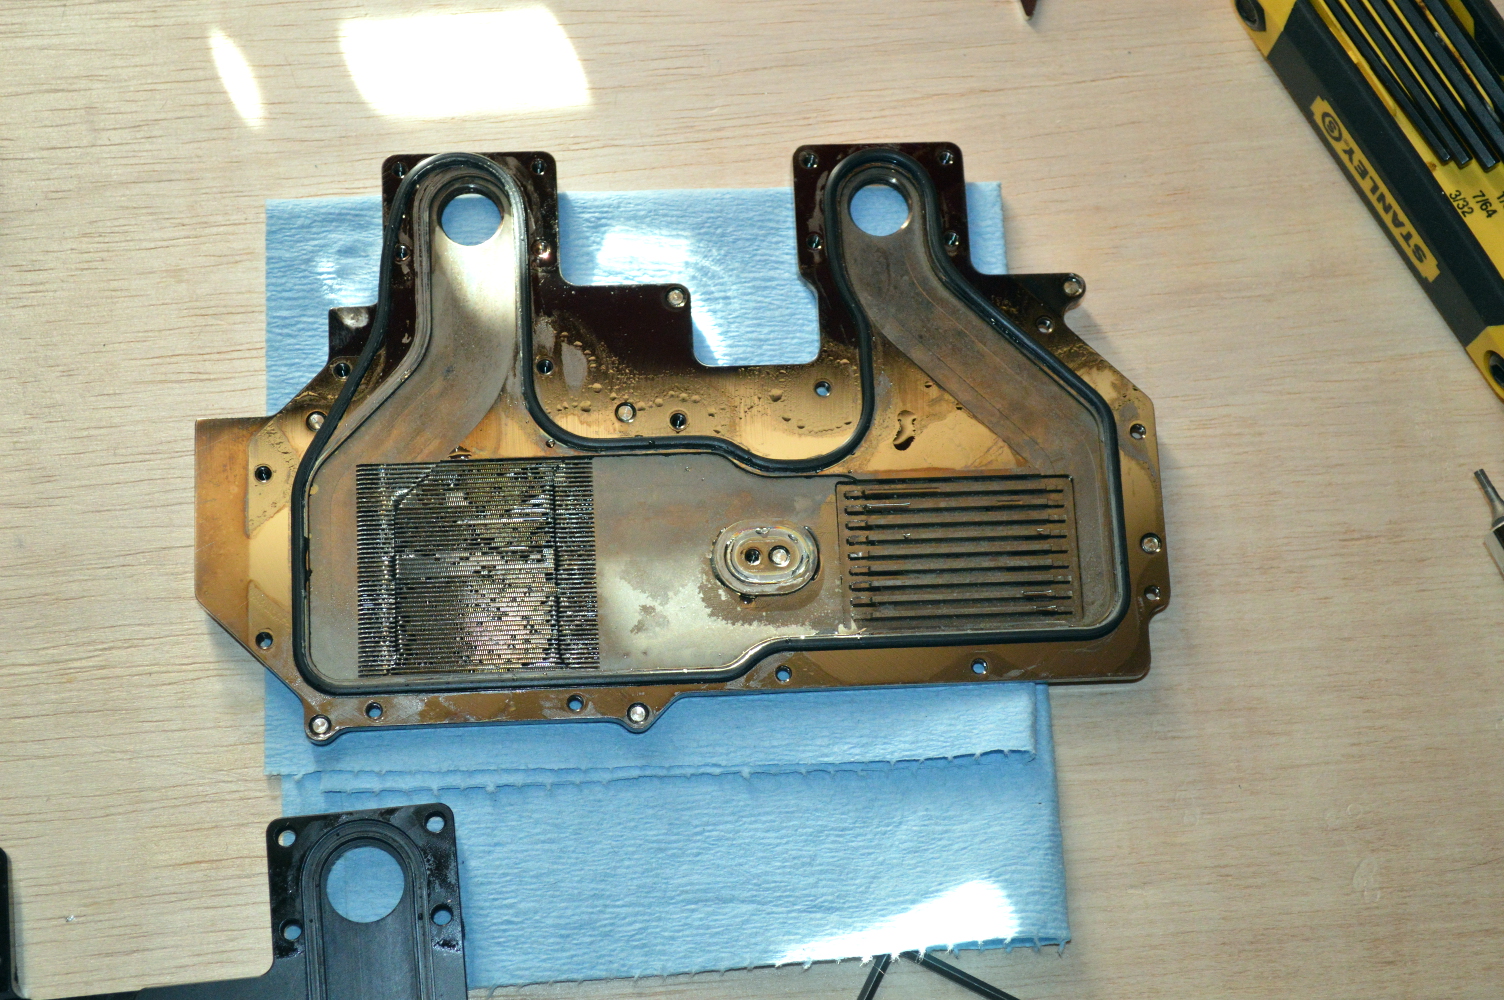
On cleaning the blocks, after a lot of research, and posting a thread to the Linus Tech Tips forum, I opted toward Mother’s California Gold Metal Polish. The difference is night and day, and the blocks look almost brand new.

cleanblock

Getting into the channel over the VRMs and in the fins over the GPU was interesting. And to get around the edge of the channels, I used a blue shop paper towel as it was easier to push into the corner than the microfiber towels I bought with the polish. For the fins over the GPU, just used a toothbrush.

But like I said, like night and day.

After seeing the EK blocks, though, I decided to also take apart and polish the Koolance blocks. Definitely glad I did, too, even though it meant having to re-flush the blocks. The liquid shown in the picture is distilled water, not old coolant.

koolance

Then came assembling everything. The GTX 660s went without a hitch. The GTX 680s, however, had a couple minor hiccups. On the Zotac card, there was a small foam block that was used to keep the massive cooler suspended over the card. It interfered with the Koolance block, but once I removed it, it wasn’t a problem.

foam

For the EVGA card, I needed to pick up some M3 nuts from Home Depot along with finding spare PVC washers or a substitute for them. The reason is the Koolance VID-NX680 doesn’t come with a separate screw and nut for the back panel, while the EK-FC680 does. That extra screw wasn’t needed for the Zotac card since it didn’t use a reference cooler, but since the EVGA GTX 680 does use a reference blower, it needs the extra screw for the back panel.

A quick glance at the instruction manual for EK’s block showed what I needed to buy. I already had ¼” M3 screws — plenty of them — but I just needed a nut for securing it.

Unfortunately I would come to that realization well beyond Home Depot’s closing time. Oh well. As Gosalyn Mallard says in Darkwing Duck, don’t let a minor setback stop you. Unfortunately there was a more major setback.

all_cards

For the graphics cards I intend to run them in a split parallel configuration. The GTX 660s will be in parallel, and the GTX 680s will be in parallel with a single line coming from the outlet on the GTX 660s going to the GTX 680s. And I want the GTX 680s to be right up against each other, and same for the GTX 660s.

I have the SLI fittings for the GTX 680s. I’m using Swiftech fittings for that. For the GTX 660s, I have an EK SLI bridge, but it’s a dual serial 3-slot bridge. So I decided to try to buy one from Micro Center, but it was an SLI Terminal I purchased, not the SLI Bridge. I should’ve paid a little more attention as now that means I have something I need to order in and more delays on this project.

But again, don’t let a setback stop you where you can. This isn’t a show stopper. There is still other progress to make in the mean time, and a receipt to find. Before closing out the night I attached fittings to the bulkheads: the male quick disconnects to the outside and compression fittings to the inside.

qdc

bulkhead3

* * * * *

Sunday started off with a trip to Home Depot to obtain some more small parts. I needed #6-32 screws, ½” length, some 00 rubber washers, and M3 nuts (mentioned previously). The 00 washers and screws were for mounting the pump to the radiator — the 00 washers act as vibration isolation and work quite well.

At home, I turned my attention first to the EVGA GTX 680 to get the bracket screwed to the card, then turned to doing test fits. Unfortunately having the GTX 660s all the way at the back corner of the case would not be feasible. The mainboard standoffs stick up too far and aren’t removable from what I can tell. So I had to have them one slot over.

testfit

testfit2

I turned my attention then to trying to get some of the cable management out of the way. The USB 3.0 panel mount cables, however, I should never have purchased. At least not the ones I did buy. So I placed an order for the 12″ cables as I think those will be much, much easier to cable manage. I ordered the 3′ cables as I didn’t think the 12″ cables would be long enough, and there wasn’t anything in between.

So basically until orders arrive later in the week, there isn’t much farther I can go on this, at least with the chassis. The radiators on the other hand…

* * * * *

The pump and reservoir were the easy part. Getting everything back onto the rack was a little interesting. But once I had everything on the rack, I started to tube up where I could. Which wasn’t much initially. I used EK 90-degree fittings plus Swiftech 3/8″x1/2″ fittings to run tubing between the radiators. And I ran a tube from the top radiator back to the top reservoir. That was about all I could accomplish initially.

The order arrived a few days later with the EK SLI bridge and the extra fittings. With these, I finished tubing up the graphics cards, mostly. After getting the SLI bridge mounted to the GTX 660s, I saw how close the fittings for the GTX 660s and GTX 680s would be.

tubing_cards

I measured this gap at 2-3/16″, with about a 2½” offset. But I didn’t want to order more fittings, so I looked at what I still had. Leftover from moving β Ori.’s pump and reservoir external, I had a Koolance 4-way fitting and a male-to-male rotary fitting. This served as a make-shift 90-degree fitting and I just looped tubing around to reach the SLI Bridge. Sometimes you need to improvise. With that tubed up, I turned to the leak test.

tubing_cards2

leak_test

I leak tested the graphics chassis in isolation simply because it was going to be much easier. Initially there was a pretty significant leak: I forgot to tighten down one of the stop fittings on a Koolance block. Thankfully that was the only leak.

Back to the rack and the radiators, or rather the pump and reservoir mounted to them. Between the pump and reservoir I opted to use 1/2″x3/4″ tubing just to avoid having to buy still more fittings to finish this. I already have such fittings with some tubing left over, so it was trivial, or nearly so.

The Swiftech 1/2″x3/4″ fitting wouldn’t sit flush and I didn’t want to go out and buy another extension fitting, so I used a T-fitting plus a male-to-male fitting to get things run. The tubing then curves down to meet another fitting on the pump. The outlet on the pump feeds to the quick disconnects. The outlet on the graphics chassis also goes through quick disconnects to get to the lower radiator. The top-most fitting on the top radiator goes back to the reservoir.

rack_loop

This actually made bleeding the system a little interesting. The reservoir is entirely bottom-fed, meaning the water blocking the inlet to the reservoir was going to also make it difficult to get air out of the system. It took a few tries to actually get fluid moving. But once I did, it didn’t take much to bleed it. With that bleeding, I turned my attention to getting the graphics host and my wife’s gaming server back onto the rack and getting the cabling managed.

rear_graphicschassis

rear_graphicshost

And that was basically it. Unfortunately I’m having some stability issues, but I think I’ll just need to rebuild the operating system to get that figured out. But with Fedora 23 due out in a few days as of when I write this, I’ll just put up with the stability concerns until then.

I’ve got a couple other minor enhancements to make to this after doing some experimentation, primarily involved around getting the tachometer for the pump plugged into the graphics host and synchronizing the power supplies between the host and the GPU chassis.

Stay tuned…

But before I go for now, let’s talk about temperatures. To show that these are temperatures under a full load from the Berkeley client and not idle temperatures, I made sure to show both in the same image. These are two GTX 680s with Koolance VID-NX680 blocks and two GTX 660s with EK-FC680 blocks and two XS-PC EX360 radiators with Cougar Vortex HDB fans.

temperatures

Right-click on the image and select “View image” to see it full-size. Given these temperatures I think I’ll see what they look like with the fans turned down. Stay tuned…

Debt settlements – Reply to Star Fresh Northwest

Recently I received an e-mail from Ron Burg of Star Fresh Northwest, which is a subsidiary of Lauber Dancey, PLLC, in Washington State:

Hi there,

My name is Ron, and I write primarily for startfreshnorthwest.com. I was looking for some information on debt settlement and negotiating a debt this morning when I came across your excellent page. While reading through it, I especially loved your “Correcting the Motley Fool regarding debt collectors” post!

I actually just published something on negotiating a debt:

http://startfreshnorthwest.com/everything-you-need-to-know-about-negotiating-debt/

I’d love to hear any feedback you have!
Cheers
– Ron

As I said in the article Ron had read, I don’t like it when misinformation is published about debts and debt collections. And for misinformation to be published by a person writing for a subsidiary of a law firm is actually worse than if someone at Credit.com publishes misinformation (and I’ve gotten on their case quite a bit as well).

So let’s get into this.

* * * * *

First what is a settlement? In general a settlement is an offer to satisfy a tort privately as opposed to via a lawsuit or arbitration. The defendant and plaintiff agree in writing that

  1. A specific tort occurred by the action or inaction of the defendant
  2. A specific remedy is sought
  3. Plaintiff forever abdicates any claim against defendant for the specific tort
  4. Defendant agrees specific tort occurred, whether or not the defendant accepts or disclaims liability for the tort
  5. Defendant ascents to the remedy outlined in the agreement and will satisfy the remedy in a manner considered “reasonable” or within specific terms outlined

Fairly simple. But how does this apply to debt settlements?

The tort in question is typically breach of contract, in that you are not paying on a liability in accordance to the terms of your agreement with the creditor. Whenever a tort can be demonstrated to have occurred — which is quite easy when we’re talking about debt accounts — one party is said to have been injured and is entitled under the law to damages. With debts the damages to which the injured party is entitled is quite obvious: the outstanding balance plus any additional fees or interest provided by the contract.

Either party can offer to settle the tort claim. The plaintiff, however, always has the option to file a lawsuit or take the matter to arbitration. With debt collections there are additional duties the creditor must satisfy first before filing a lawsuit or seeking arbitration, and that typically involves exhausting all other reasonable options to collect the debt.

Settlements are offered to make a claim go away. And whenever there is a tort claim, the plaintiff actually has a duty to attempt to settle the claim outside Court, with the lawsuit being filed only if those attempts fail. In other words, if a defendant first learns of the tort by being served, the defendant can request a continuance on the lawsuit and use that time to attempt to settle. If, however, there have been attempts to settle outside Court, then the continuance will likely be denied.

Tort settlements tend to specify damages and remedies significantly lower than what the law entitles the injured party. This occurs for many reasons that can basically be boiled down to this: it’s better to get something than nothing. And it should be pretty obvious as to how that ties into debt settlements.

I’ll use myself as an example. Back in 2010 my wife and I received a settlement offer from Wells Fargo on a credit card account my wife had in her name that had been charged off. The settlement offer was for a reduced total balance with payments spread across 6 months. We agreed to the terms of the settlement and paid as agreed. If we failed to pay as agreed, they likely would’ve taken us to Court.

Now the one thing that needs to be kept in mind with regard to negotiating settlements is that the injured party typically has the upper-hand in the negotiations. They always have the option to take their claim to Court or arbitration, which can be used as leverage in the negotiations. And with debt claims for which dollar amounts and payment histories can be conclusively demonstrated, that’s a significant amount of leverage. And a judgment also opens up other avenues for collection, giving the creditor still more leverage in negotiating.

But don’t think the defendant has nothing they can leverage. The question that plaintiffs to claims will always need to consider isn’t the likelihood of prevailing should the claim go to Court or arbitration, but the likelihood of receiving what the Court orders the defendant to pay. This works in the defendant’s favor a lot of the time, and can be quite useful in negotiating a settlement. However in negotiating a settlement, the defendant should always use language giving the impression they are trying to act as best as possible in the plaintiff’s best interests. A couple years ago I said this in the comments to Credit.com’s article “Can I Pay a Creditor Less Than I Owe?“:

It is in the creditor’s best interest to accept whatever payments the person can afford, but few actually mention that when talking to a creditor — probably because it sounds like you’re being patronizing. But demonstrating to the creditor that what they are demanding is unreasonable in light of your current income/expense outlook may work in your favor.

Or it might not.

They may still talk about Court or pursuing other collection options, so telling the creditor that doing so — up to and including Court — may or will not increase the rate of payment (as the debtor will show to the Court evidence of their current income, or lack thereof, their current expenses and obligations, etc.), and may only delay payment.

What you are capable of paying can be used as leverage in trying to negotiate a settlement. However, bear in mind that the plantiff will likely push back against your capability claims and demand you prove that is really what you’re capable of paying instead of being able to pay more.

Which brings me to Ron’s article.

* * * * *

Much of what I’ve written above is from the standpoint of a debt that has been charged off to collections. But if you read Ron’s article, that is not the context from which he’s writing. Instead he’s writing from the context of debts that are either still current or have only fallen one or two payments past due.

What surprises most people is finding that, yes, you can cut the debt on your credit cards bills in half, if not more! That’s right. Under the right circumstances, and equipping yourself with the right knowledge, you can finally see a light at the end of the tunnel. If you are ready to say goodbye to financial burdens and finally start to gain control over your finances, follow our guidelines and tips for debt settlement and give yourself a fresh start today!

This isn’t “debt settlement”, but contract negotiation.

The premise of Ron’s article I have actually already addressed on this blog. Six (6) years ago. As such, I really hate the fact that much of what I’m likely going to be saying herein responding to Ron’s article is going to be a lot of repetition. But then, I’ve likely repeated myself a lot in most of the articles I’ve written on debt. Because those who write about debts and collections and settlements have likely never been through the situations they are writing about. I have.

So as I said, Ron is writing from the standpoint wherein a debtor has gotten a bit in over his or her head and is looking to unload some of that debt. As such they may look at their credit card statements and wonder what they can do to get out from under the totality of their balances.

While Ron is correct in saying that you can offer to settle your debt for a fraction of what you owe — even correctly stating you have a “right to ask for a settlement” — what if the creditor declines the offer? As I said in the above-linked article from six years ago, a creditor has no obligation to accept what you’re offering. So what do you do then? Since, as I said, all of these articles speak from the standpoint of “you can settle your debt for a fraction of what you owe”. No, you can offer to do so, but whether you will actually succeed comes down to a lot of variables.

When you take on a credit card or loan, you are signing a contract. Now you are free to attempt to renegotiate that contract at any time. On loans you can try to refinance the outstanding balance under new terms, such as a lower monthly payment and/or lower interest rate. With credit cards, you can ask for a higher credit limit and/or lower interest rate. You also have the option to try to renegotiate the outstanding balance under different terms.

For example if you have a credit card with an outstanding balance of $2,500 and you’re trying to pay off a lot of outstanding liabilities, you can contact the credit card issuer about this balance. In contacting them, you can explain your circumstances. If the account is still current within the contract and not over the limit, the credit card issuer is not going to have a lot of incentive to work with you. Hence Ron’s statement that “lenders will usually accept a partial payment if it looks like they might never receive a payment in the future.”

Now if you’re wanting to do this, the first thing you need to do is close the account before you start negotiating. And if you try to renegotiate the outstanding balance, the first thing the issuer is going to force on you is closing the account. Closing the account, though, doesn’t avoid additional interest charges on the outstanding balance in accordance with the original agreement, and the original contract will stipulate such.

This is where negotiations come into play. As the original account has been closed, you can attempt to negotiate different terms on the balance based on your ability to pay. Negotiating is about give and take. If you’re going to ask they do something that isn’t in their best interest — such as reducing interest rates or lowering the balance — then you need to be willing to give them something in return.

This means the more you request, the more you’d better be willing to give in return. This is likely why Ron focuses so much on the “lump sum”, as the quickest way for a creditor to agree to a reduced balance is if you’re able to pay that reduced balance all at once. However the ability to offer a lump sum payment of a reduced amount could also cause the creditor to push back: “If you can pay all of that in one lump sum, why can’t you make payments on the remainder?”

These are some notions that Ron attempts to address in a later section in his article. For now, he moves into determining whether you need an attorney. Recall from above that his article is being written for subsidiary of a law firm.

* * * * *

While you do need an attorney when filing for bankruptcy, most people don’t think they would need one for debt consolidation. By no means is it absolutely mandatory. However, using an attorney to help negotiate a settlement can take a lot of pressure off of you. An attorney already knows your rights and legal grounds. Attorneys will help to exhaust all options to see the outcome you desire.

In actuality I would suggest against employing an attorney to assist with renegotiating debts. Outstanding debts are not so complicated a situation that an attorney is necessary to ensure you understand everything. Plus what an attorney might help you save in renegotiating your outstanding liabilities could be overtaken or severely reduced by attorney’s fees, leaving you not as far ahead as you thought you’d get or worse off.

But let’s humor Ron’s idea to hire an attorney. He provides three ways in which “an attorney can help you with debt settlements”.

1. They recognize scams

Companies that claim to specialize in debt relief or consolidation, but ask for money upfront for their services, are usually scammers. They will take your money without a guarantee of results.

If you’re talking to an attorney about debt consolidation, you likely aren’t talking to other debt relief or consolidation firms. Instead you would have the attorney instead of going to a debt relief or credit counseling firm to represent your interests with your creditors.

2. They offer cease of harassment

When you work with an attorney, you can redirect all your harassing calls from creditors to them. Once you have an attorney to represent you and your case, creditors can ONLY talk to them and cannot call you again.

This is demonstrably false.

The Fair Debt Collection Practices Act at 15 USC § 1692c(a)(2) declares, with regard to debt collectors, that a debt collector cannot directly contact a debtor known to be represented by an attorney, provided they have the attorney’s information. So if the former is true, but the latter is not, they can contact the debtor directly to obtain or verify the attorney’s information.

However if the debt collector exhausts all reasonable effort to contact the attorney but is unable to actually communicate with the attorney, then the Fair Debt Collection Practices Act allows the debt collector to contact the debtor directly. It also allows the attorney to consent to direct contact with the debtor.

The same holds true with regard to attorneys retained to represent your interests to original creditors. If you tell your creditor that you’ve hired an attorney to represent your interests in negotiating your debt account, a couple things will come to light. First, they’ll wonder how you can afford an attorney but not afford to pay your balance in full. And second, if they exhaust all reasonable effort to contact your attorney but are unable to do so, the creditor can and will contact you directly.

Your attorney cannot stonewall negotiations on your debts by refusing to talk with them. And if they attempt such, you will be contacted directly by your creditor, or your creditor will file a lawsuit.

3. Negotiation is in their job’s nature

An attorney’s job is to convincingly argue for his or her client’s desired outcome. Attorneys will take on the creditors and be able to successfully negotiate until the credit card companies agree to settle for the partial payment.

An attorney’s job is to represent your interests to an opposing party, whether that is a private party or the government. Part of representing your interests is getting the best outcome possible given the facts of the situation. Their job is not to get your desired outcome, and being represented by an attorney does not mean you will get what you want.

Before approaching your creditors, your attorney will discuss with you the totality of your circumstances. In doing this, your attorney will get an idea of what you want and why, make sure your desires are reasonable, and then present your desires to your creditors. There will be push-back, which is why in discussing your situation with you, the attorney will figure out how far you’re willing to allow them to push back.

So if you say you want to negotiate a $3,000 balance to $1,500, the attorney will ask how you feel about paying $2,000 or even $2,500. He or she will present $1,500 to the creditor, expecting push back, will offer steadily higher amounts.

Often the credit card company will settle for the attorney’s proposed percentage because they know that if they don’t agree with the partial payment, then the borrower is likely headed toward bankruptcy, meaning the lender would end up with nothing.

Chances are if a debtor has taken on representation, the creditor may have in the back of their mind that the debtor is steps away from bankruptcy. However bankruptcy doesn’t mean necessarily that the creditors get nothing, but it could mean they walk away with a far reduced amount.

But at the same time, they’re not going to just jump at whatever percentage the attorney offers and will likely push back.

Next, Ron goes into some cons of settling your debts for less than what you owe.

* * * * *

First, remember that you are offering a large sum of money at once. If this is not laying around in a bank account, you need to consider the ways in which it will affect you and your family. Paying off a huge lump sum may cause some huge changes in the standard of living you are used to.

And again, Ron is focusing on the lump sum.

Here’s one thing that needs to be said: settling your debts does not have to involve lump sum payments, and your inability to make a lump sum payment does not detract from your ability to renegotiate your debts. While creditors would certainly prefer lump sum payments, it is not absolutely necessary.

If you are consolidating debts through a loan, then obviously you will be offering a lump sum. But if you are merely trying to get rid of the debt faster, you can negotiate for a reduced balance in exchange for a higher monthly payment, or an eliminated interest rate in exchange for a higher monthly payment. But the common token in negotiating your debts is you need to be willing to put more money to them each month in exchange for the creditor giving up its rights under the contract.

His second point about settlements being a ding on your credit report is accurate, but its difficult to measure the impact it’ll have on your future ability to get credit.

But it’s under his next section, “Negotiating 101”, that he finally gets factually accurate with his statements, in part because it finally addresses the caveats that you will face trying to do this.

* * * * *

Now a lot of what Ron says in his “Negotiating 101” section is on the money. I have only a few concerns with what he’s said.

To start off, I don’t think credit card companies have a “settlement” department. Typically you’ll likely be talking with their collections department on this, but the person to whom you will be speaking will vary from issuer to issuer. It’s probably best to initiate contact on settling your balance in writing, as that will ensure it gets to the right person who can then contact you.

But along with this is what Ron never says that I did above: negotiating to settle your balances will result in the account being closed. They’re not going to keep the account open if you’re wanting to do this. They will close the account if you haven’t closed it in advance. So along with cutting spending to the card, as Ron rightly suggests, you need to close the account as well.

Also, remember that your lender wants to hear a dollar amount for your offer. Propose a lump sum payment of around 30 percent of your balance. They will likely try to negotiate for a higher payment; however, if they ask for more than 50 percent of your balance, consider how that will affect your finances. If you can’t do that, consider offering a settlement to another company or saving up for that payment in the future.

The biggest problem with attempting to propose a lump sum payment is the credit card issuer will want to know where that money came from. If you had the money sitting in the bank, the creditor is going to be less likely to work with you.

You see your creditor is going to be working from the standpoint of what is going to be best for them. And what is best for them is keeping the account open and current within the contract while collecting the balance you owe in full plus any additional interest assessed in the interim. So if you’re going to lump sum pay off a balance for less than what you owe out of money you have sitting in the bank, the creditor is going to push back, especially if you’re saying you’re in “dire straights” but have enough savings sitting in a bank account to offer a several thousand dollar lump sum.

Instead the creditor is going to offer that the account be suspended to avoid new charges, and may offer to suspend assessing interest in that time as well to keep the balance from growing still more, and that you continue to make at least the minimum monthly payment as calculated by your contract. In the mean time they will want you to use your savings to keep your head above water while keeping them in the loop on your standing.

Now if you’re borrowing to consolidate your credit card balances and have been approved for a loan, then that will work in your favor, but still expect the creditor to push back on your offer since they are out to get as much back of what they’re owed as possible.

And certainly get any settlement offers in writing before you remit a single payment.

The rest of his article from that point talks about budgeting and saving, which have nothing to do with debt settlement or contract negotiation, so I’ll call it here. This rebuttal is getting long enough.