Alien Gear holsters

When I started carrying concealed, I originally carried a Taurus PT917C in a Crossbreed Holsters holster. Crossbreed, like most other manufacturers, make hybrid holsters that are little more than a scabbard bolted onto a piece of leather with clips to hold it to your belt. Not exactly the greatest thing in the world.

When I started carrying a Glock 19, I didn’t go with Crossbreed or White Hat to find a holster. Instead, I went with Comp-Tac and the MTAC holster. It was a bit more expensive, but it featured a full-length scabbard, and one feature I really liked about it is the fact the back of the holster completely covers any hardware. It was still a scabbard bolted to leather, but it wasn’t just a scabbard bolted to leather like the holsters you get from Crossbreed, White Hat and Galco.

Now about a month ago I discovered the scabbard broke — a clean split down one of the curves in the plastic. Because your belt is what provides the retention on the firearm, this wasn’t a huge problem, but not something I wanted to leave for long. Unfortunately replacing the scabbard would cost around $40. So I decided to look around at other options.

As a member of the United States Concealed Carry Association, I’d seen Alien Gear advertised quite a bit. They’ve also shown up as sponsored ads in my Facebook feed. So I decided to check them out.

AGH_leather_16-9

Their latest model is the Cloak Tuck 2.0. Like the MTAC, it is a full-cover scabbard (at least for the Glock 19), but otherwise has a design similar to what you’d find from Crossbreed, White Hat or Galco. The exception here, though, is it’s called a “Neoprene Composite Holster”. And this is probably the only idea behind the Cloak Tuk that sets it apart from the competition. Let’s face it, the design of the holster is virtually identical to almost everything else out there. But it’s also a lot less expensive than virtually everything else out there.

In fact the Cloak Tuck 2.0 cost less than a replacement scabbard for the MTAC, which convinced me to check it out. I had to wait 2 weeks from order before it was shipped, whereas I was able to order the MTAC pre-made from a reseller.

And like N8², Alien Gear is claiming to have the most comfortable holster on the market. And they back it up with a 30-day full refund policy, along with a lifetime warranty. Unlike the N8² holster, though, the Alien Gear has a replaceable scabbard, and is also about half the price.

But how does it stack up? Again I’ve had mine for about two weeks now.

First, the holster uses 3/32 hex-head screws to hold everything together, which is great as hex-head screws won’t eat into your clothing the way Phillips-head screws can. The screws on my Crossbreed holster ate a hole through my jeans. For the price Crossbreed charges, almost $70 for the Supertuck Deluxe, they could’ve gone the extra mile and used hex head screws.

On my Alien Gear holster, one of the belt clip screws actually came completely loose while another had loosened but not completely. I noticed this when I saw the green spacer laying on the floor in my living room as it had fallen through my pant leg. A couple days later, I had to tighten that screw down again. I’m not sure why that is happening, and I hope it won’t continue to be a problem. This is not something I’d noticed on either the Crossbreed or MTAC.

Now the spacers on the holster are green, but they do include a set of black spacers if you want to replace them. Around the scabbard, you can tighten or loosen these to adjust the retention on the gun — remember that your belt should actually provide the retention more than the holster.

The draw is completely contrary to what I’ve typically seen from holsters. About the best way to describe it is to say the draw from the Crossbreed and MTAC holsters requires more effort than holstering. The Alien Gear holster is the other way around. The draw is virtually effortless, almost like the holster is pushing the gun out of your holster as you draw it, while holstering requires a bit of effort to completely seat the firearm. You still have to put some initial force behind drawing the gun, but it is a much easier draw than the Crossbreed and MTAC.

Let’s talk about comfort. This holster isn’t really anything special. Against bare skin, the neoprene does feel different than leather, and it took a little bit to get used to. Now is it the “most comfortable” holster I’ve owned? So far, yes. The Crossbreed was, by far, the worst of the ones I’ve so far owned. The MTAC was certainly leaps and bounds better than Crossbreed, and while the Alien Gear feels better than the MTAC, I wouldn’t call it a significant difference.

Aside from the screws coming loose easily, my only complaint about the Cloak Tuk is the exposed hardware on the back. This was one thing about the MTAC that I liked, and I’d ask that Alien Gear look at changing their design to cover the mounting hardware on the back of the holster. I’d also ask that they investigate the problem with the belt screws coming loose to see if there is something that might need changed to keep that from occurring — I shouldn’t have to put Loctite on the screws for my holster to keep things together.

At only $36 plus shipping, though, it’s one hell of a value for a holster. Crossbreed, Galco, and White Hat currently charge near $70 for their holsters (looking at ones for a Glock 19), though White Hat does have the BaseMax for $55. The MTAC is $90+ depending on where you find it. N82 charges $70 for the Professional series, and $40 for the “Original” series holsters.

If you’re shopping for a concealed carry holster, I suggest checking them out. They also have a 2-holster combo special going on.

So let’s summarize.

Pros:

  • Very inexpensive, priced much lower than competing hybrid holsters
  • More comfortable than others I’ve owned
  • Smooth and near-effortless draw
  • Replaceable scabbard — if you change your carry weapon, they’ll also exchange it
  • Lifetime “forever” warranty

Cons:

  • Exposed hardware on back (corrected with Cloak Tuck 3.0)
  • Screws for belt clip came loose seemingly relatively easily

(Alien Gear image is resized from a wallpaper they have available for download and is used under “Fair Use” in accordance 17 USC § 107 for the purposes of commentary and criticism.)

Rack mount HDD enclosure, part 3

Build Log:

It’s never good when a company that has so much praise among computer builders screws up your first order from them.

This time, the culprit is CaseLabs. That’s right. CaseLabs. The CaseLabs. The company making cases featured in builds that have caused our eyes to bleed with envy.

And I wasn’t even ordering a case, but a case component. I ordered two of item MAC-361, which is a mounting bracket for two 3.5″ hard drives. What they sent me was two of item MAC-362, which is a mounting bracket for 4 SSDs.

So that basically means that all of the highly-praised companies from which I’ve ordered have gotten an order wrong at least once. FrozenCPU. Performance-PCs. Mountain Mods — okay they just screwed up how it was shipped and refunded me the difference, but got the items themselves right.

And now CaseLabs is starting out 0 for 1.

In all instances where orders have been wrong, it’s typically been because of similar item numbers. But in all seriousness, how hard is it to double check that what you’re about to send out is correct for the order? I don’t know how many people at CaseLabs sign off on an order before it is shipped — the packing slip doesn’t give any indication — but this has happened even at FrozenCPU and Performance-PCs where multiple people sign off on an order before it ships. Hell there was that hilarious order when FrozenCPU sent me 5 backplates for 2 GPU blocks.

And who particularly at CaseLabs looked at my order, saw it was for a dual HDD mounting bracket, looked at the quad-SSD mounting bracket and thought “Yeah, that’s the right item”?

Okay, rant over. I’ve contacted CaseLabs about this and hopefully they will alleviate the discrepancy via 2-day shipping or better.

Otherwise, yeah I’m pissed. It means delays and extra expense very time something like this happens.

If CaseLabs had gotten this order right, I would have needed only a bunch of 60mm fans and a Flex ATX power supply to finish this project — or at make something that functions how I’d want. Now instead I need to wait for them to send the correct mounting brackets, as the internals of the enclosure depend heavily on how those are placed.

Follow-up — Jan 24:

As mentioned, I e-mailed CaseLabs about the concern. Unfortunately they didn’t receive my original e-mail — I suspect the attachment caused it to be filtered out — but replied to my follow-up e-mail on Friday, Jan 23. That same day, they sent out a package via FedEx 2-day that should also contain a return shipping label for sending back in the SSD bracket they mistakenly sent me.

Rack mount server project

Build Log:

Materials and components:

Yes this is a server being built from older hardware. My wife’s been bugging me about building her a server, so I decided to go this route. Initially I built this into a Logisys 4802 4U server chassis, which was almost 2′ long, but decided that wasn’t going to really work well. For one this was going to be mounted into a short rack cabinet, so a 2′ long case just wasn’t going to do. Plus with a full-ATX power supply, it was heavy. Now this still isn’t exactly light, but it’s a hell of a lot lighter than what was built into the Logisys case.

And building into this small of a case was certainly frustrating.

I went with this case simply because it can support a full ATX mainboard, as it was only full ATX mainboards I had laying around. I still have several of them actually — one holding an old Athlon XP chip, another with a Celeron 800MHz processor, another with an Athlon 64, and one more with another Athlon X2 (3800+, I believe). So building a rack mount server seemed the best way to put some of that hold hardware to use.

And given I’m considering trying to build a cabinet from an IKEA kitchen cabinet, I might have a use for the Logisys case after all. Or I might go small form-factor again.

Modularity is one of the great things about the PlinkUSA chassis. There are three drive mount brackets: two for 3.5″ drives, and another for 5.25″ drives/devices, all of which are removable. It also comes with a fan controller with a temperature sensor. It also provides plenty of screws as well, which is good because the heads seem to strip easily — one of the things I hate about Phillips head screws.

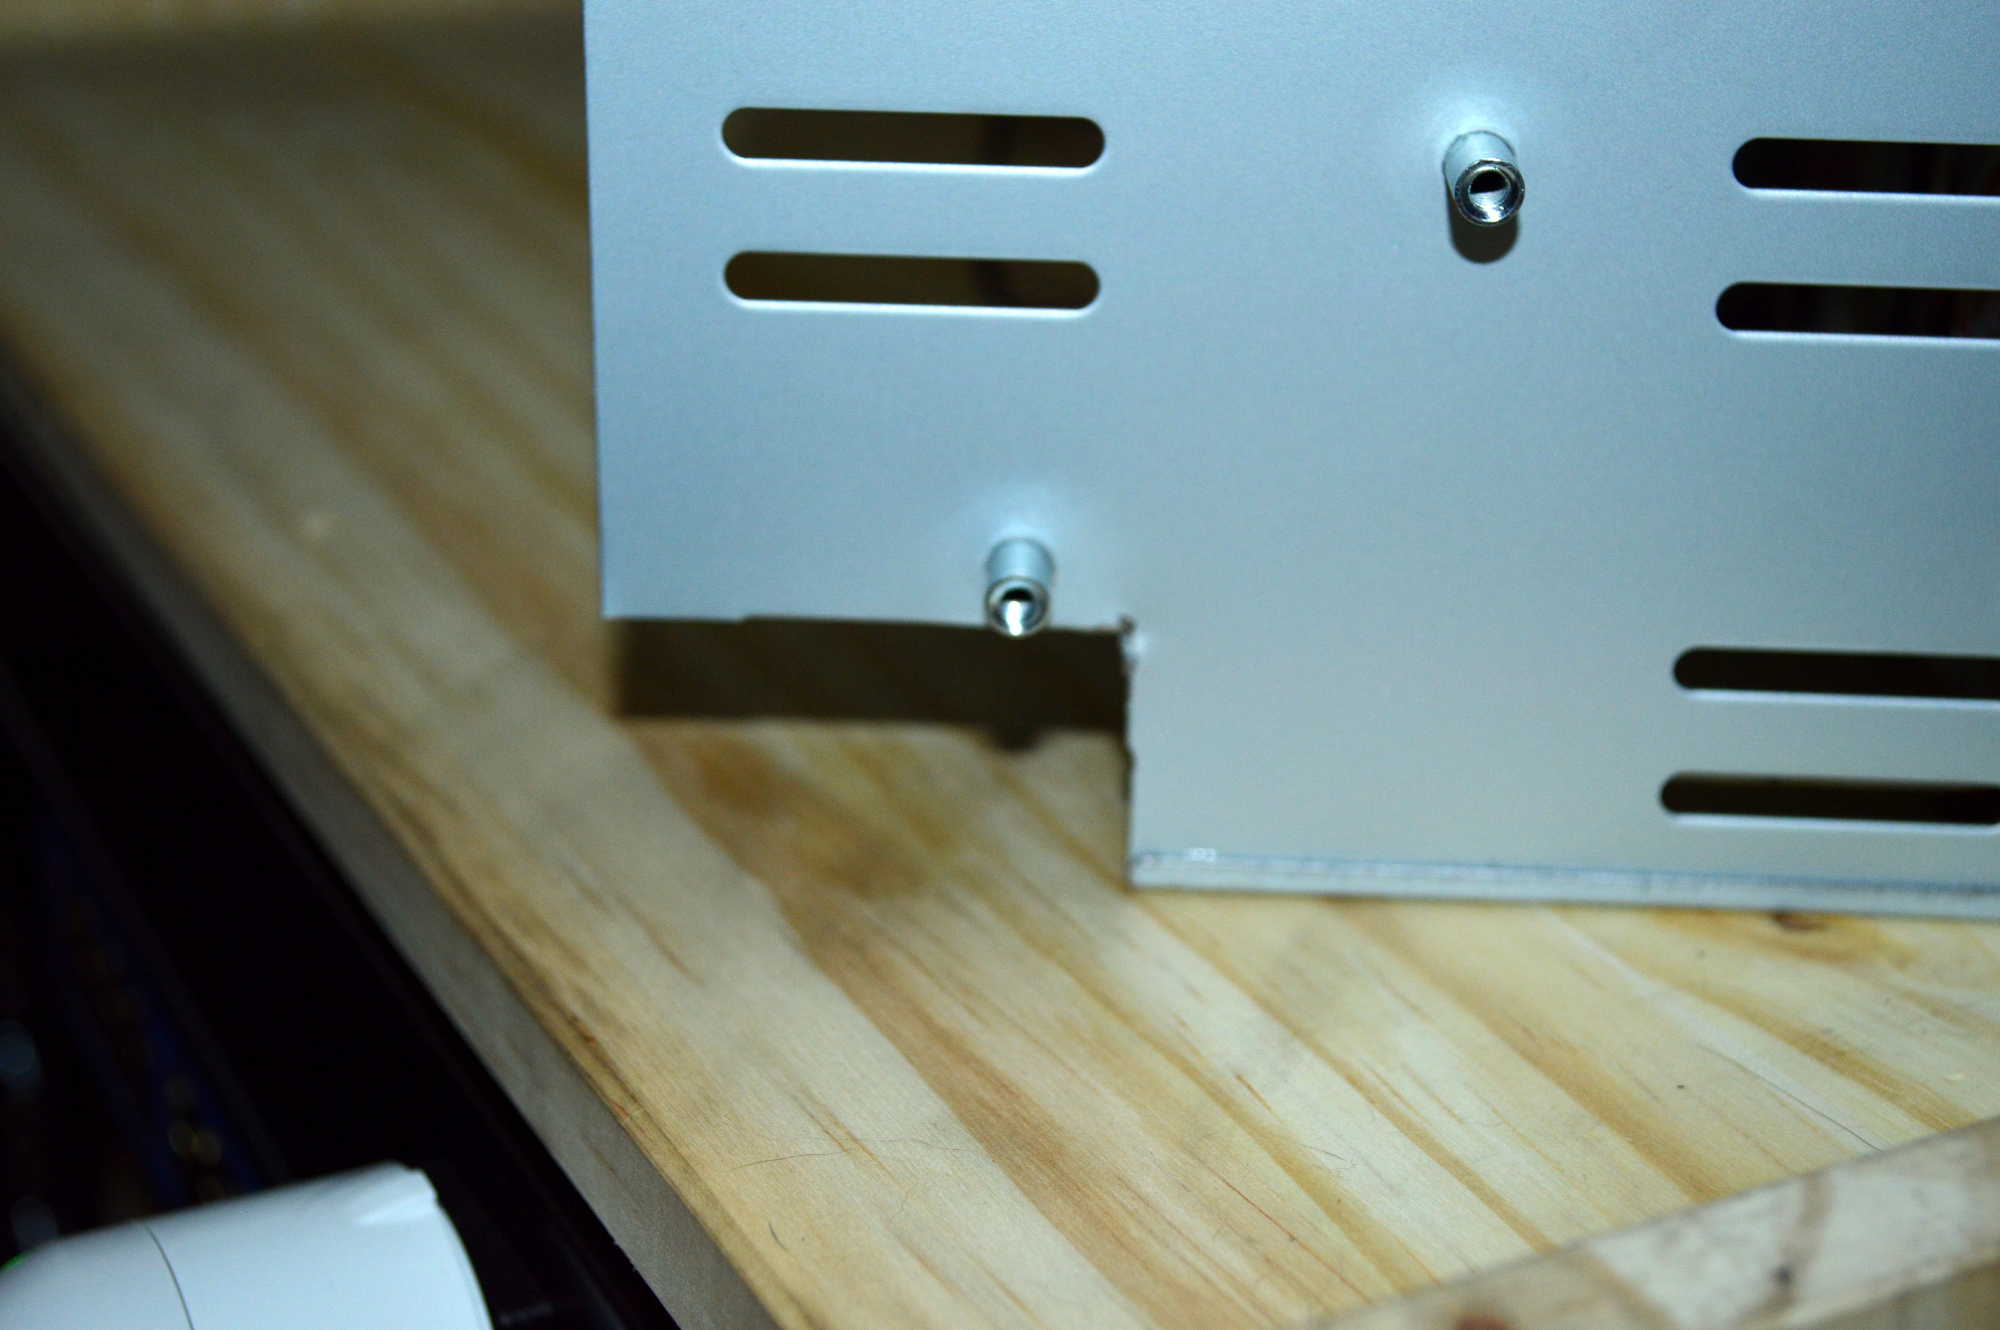
Unfortunately the 5.25″ bracket interfered with the mainboard. I considered removing it entirely, but since the chassis comes with just 2x60mm fans pre-installed, I wanted to retain the 5.25″ bay for additional fans. Cue the tin snips.

DSC_0190

In the end I had to take the cut entirely above the screw mount to ensure there was room for the FPIO connectors. This isn’t going to be supporting 5.25″ devices, so needing to cut away at this wasn’t a huge deal. And my tin snips were able to cut through this without a problem.

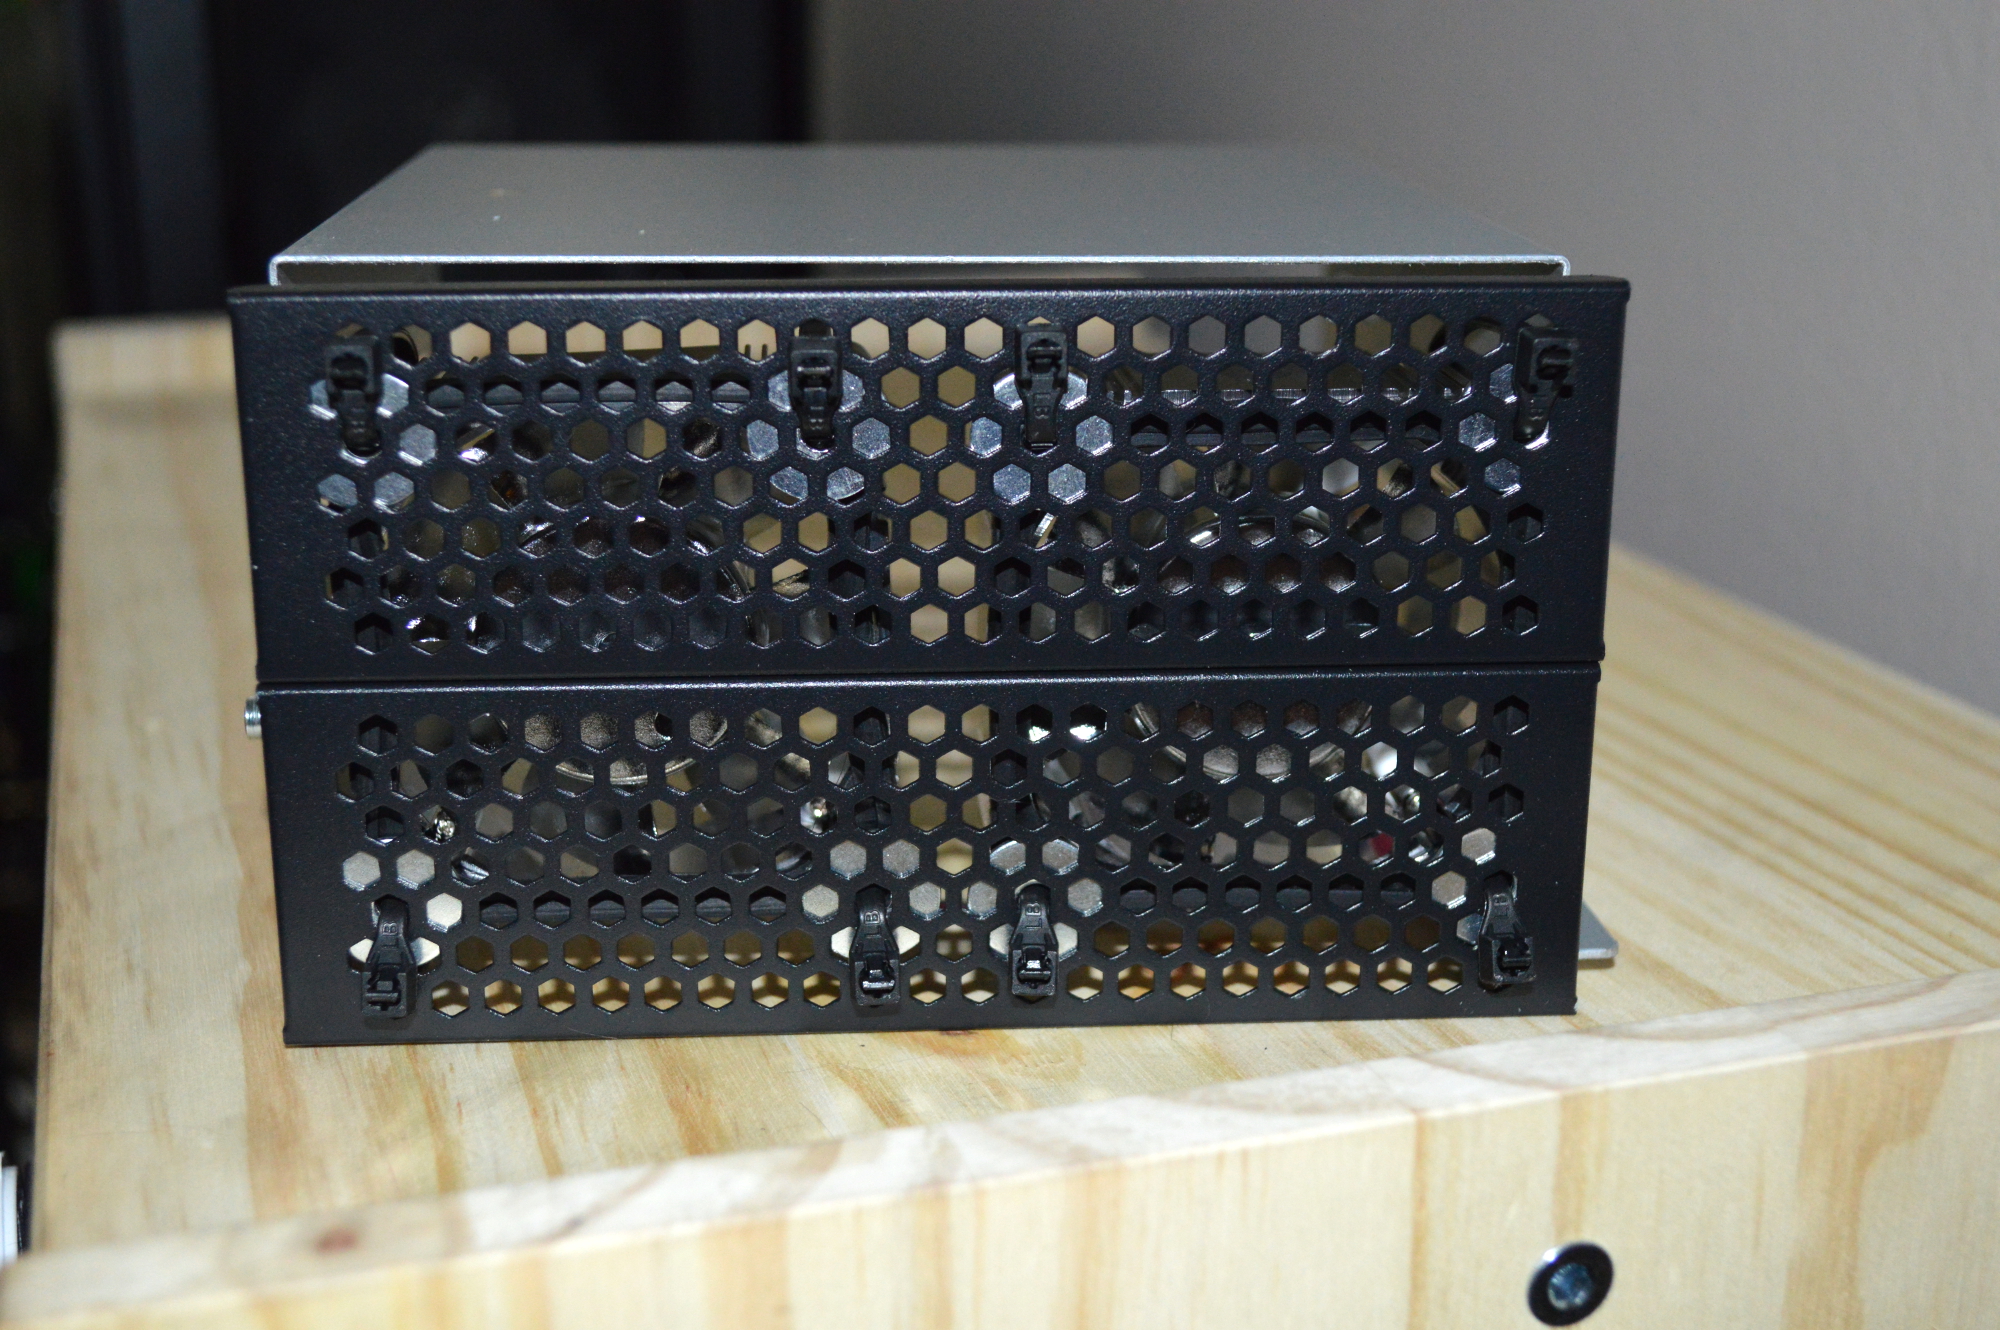
I purchased two 60mm fans from Micro Center to mount to this. Unfortunately the front mesh doesn’t line up with really anything available. So instead of trying to find something online, I decided to improvise. Plus the only fan mounts for 2 drive bays I could find would be for a single 80mm fan, though mounts for 40mm fans into a single drive bay are available.

DSC_0188

DSC_0189

Zip ties and washers. Sometimes you just need to go with it. And it works fine, as after mounting these up I plugged them into a spare power supply to test.

I’m unsure what metal washers I used, as they were just some spares I had lying around. But there are also 00 rubber washers and a 60mm Lamptron fan gasket as well holding the fan against this. The fans are the Evercool AL6025. And it’s a good thing they’ll be connected to a fan controller as these fans are loud at full speed. If they become annoying, I might change them to NoiseBlocker 60mm fans. But as this server shouldn’t be getting used for anything really intense, I don’t foresee it being a problem.

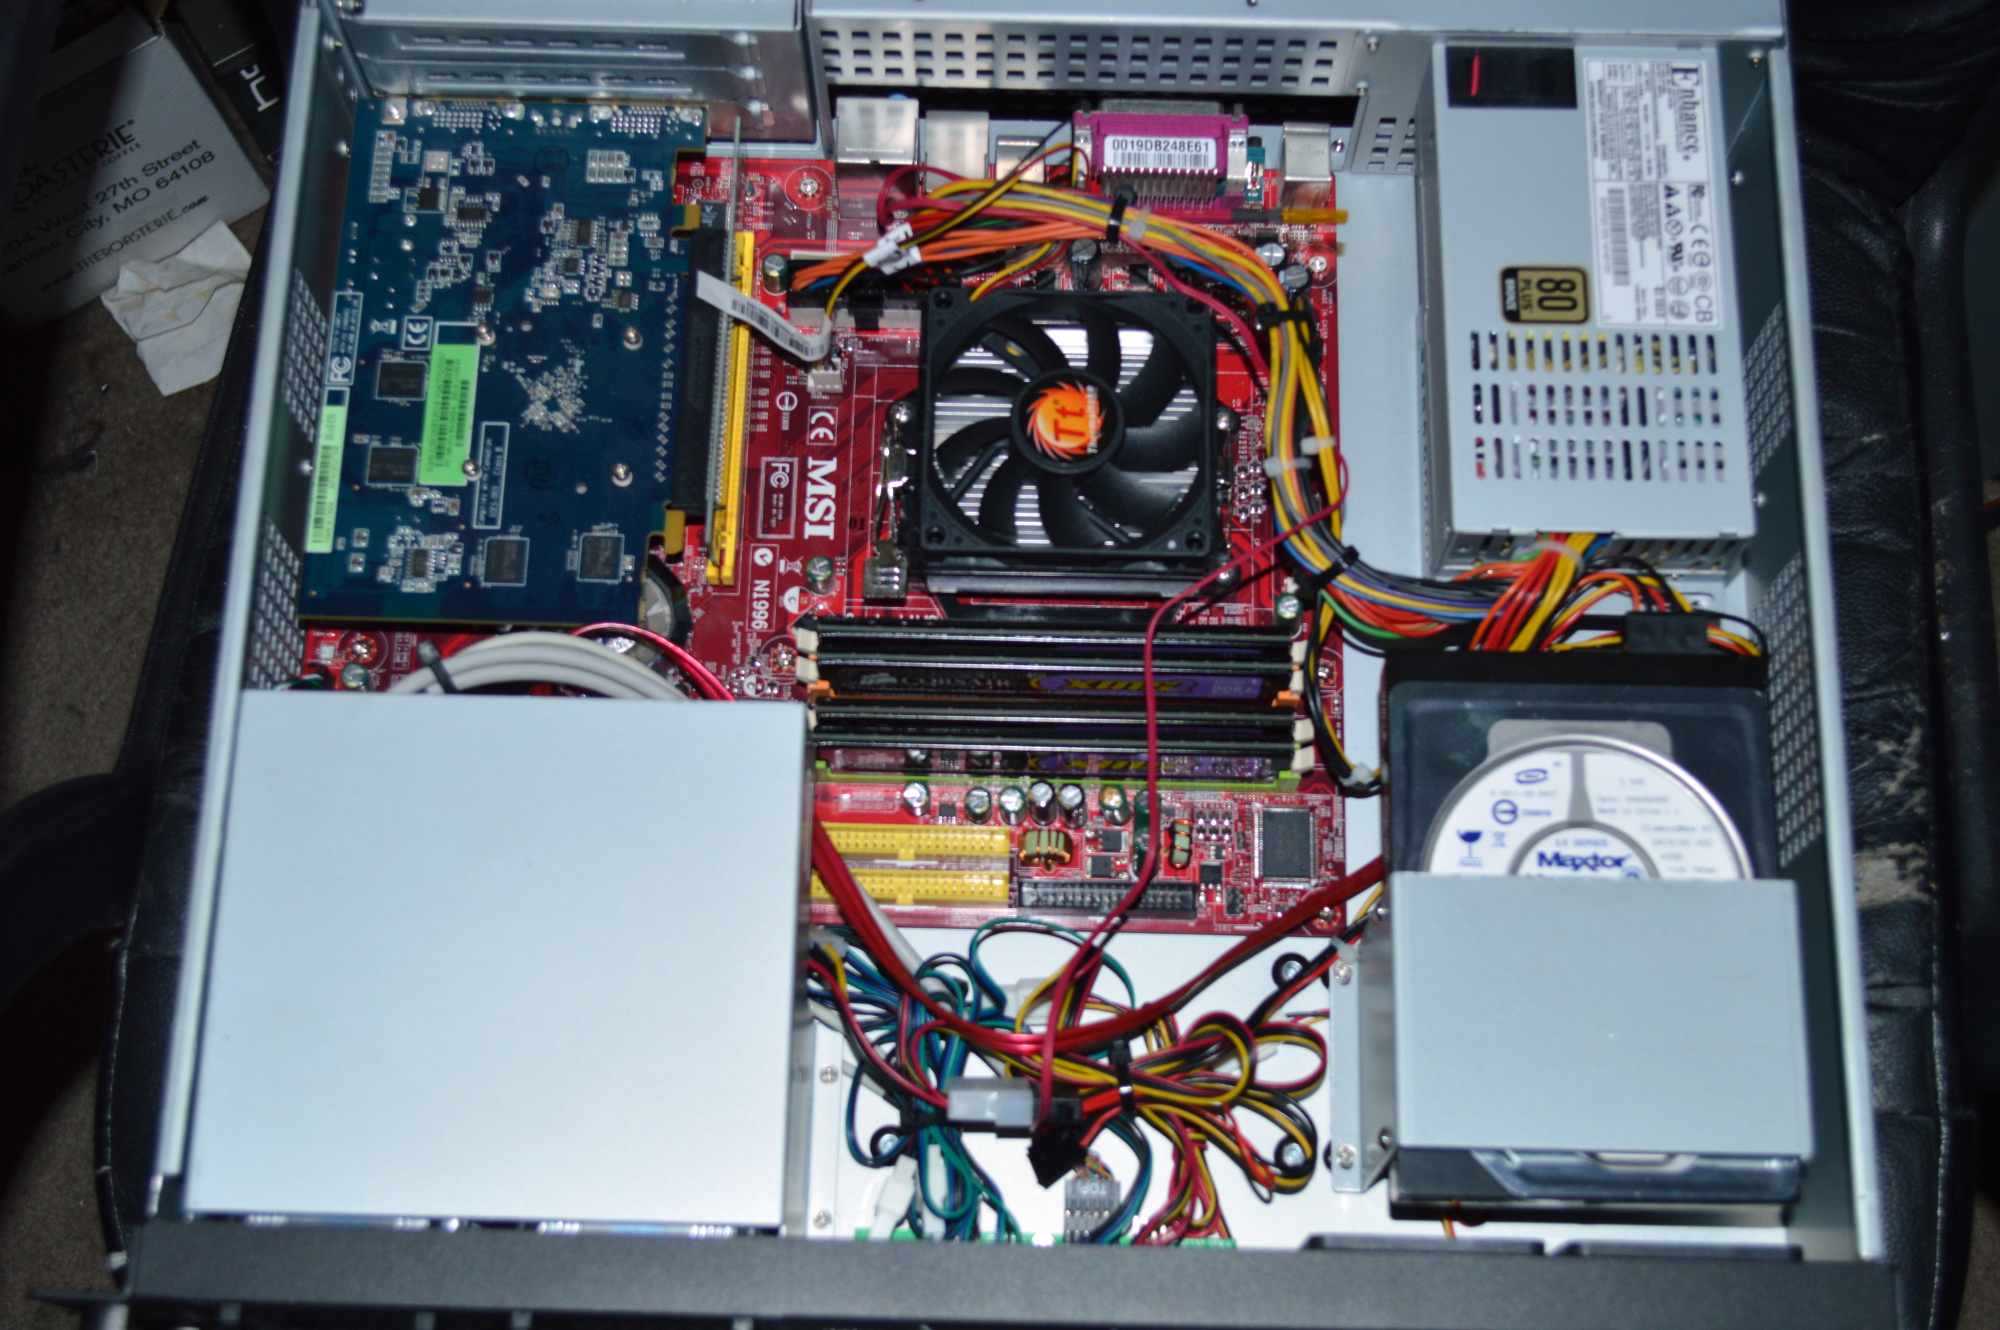
This is especially true because finding a low profile cooler was interesting. Thankfully I got lucky at Micro Center and didn’t have to order one online. The one I selected is the ThermalTake CL-P0503, which is made for the AM2 socket. It’s certainly a lower profile than the stock cooler that comes with the Athlon X2, and I’d certainly prefer a lower profile still, but this was a readily available option, and it was only $7.

DSC_0192

Now my only concern with this server build is just the power supply. It’s only 250W, so I think it’ll be good enough for all of this. The graphics card is my only concern with it, but as the graphics card isn’t going to be seeing any major action, it should still be fine. Micro Center carries Flex ATX power supplies, though, so if I feel I need to bump it up, I have a local option.

DSC_0195

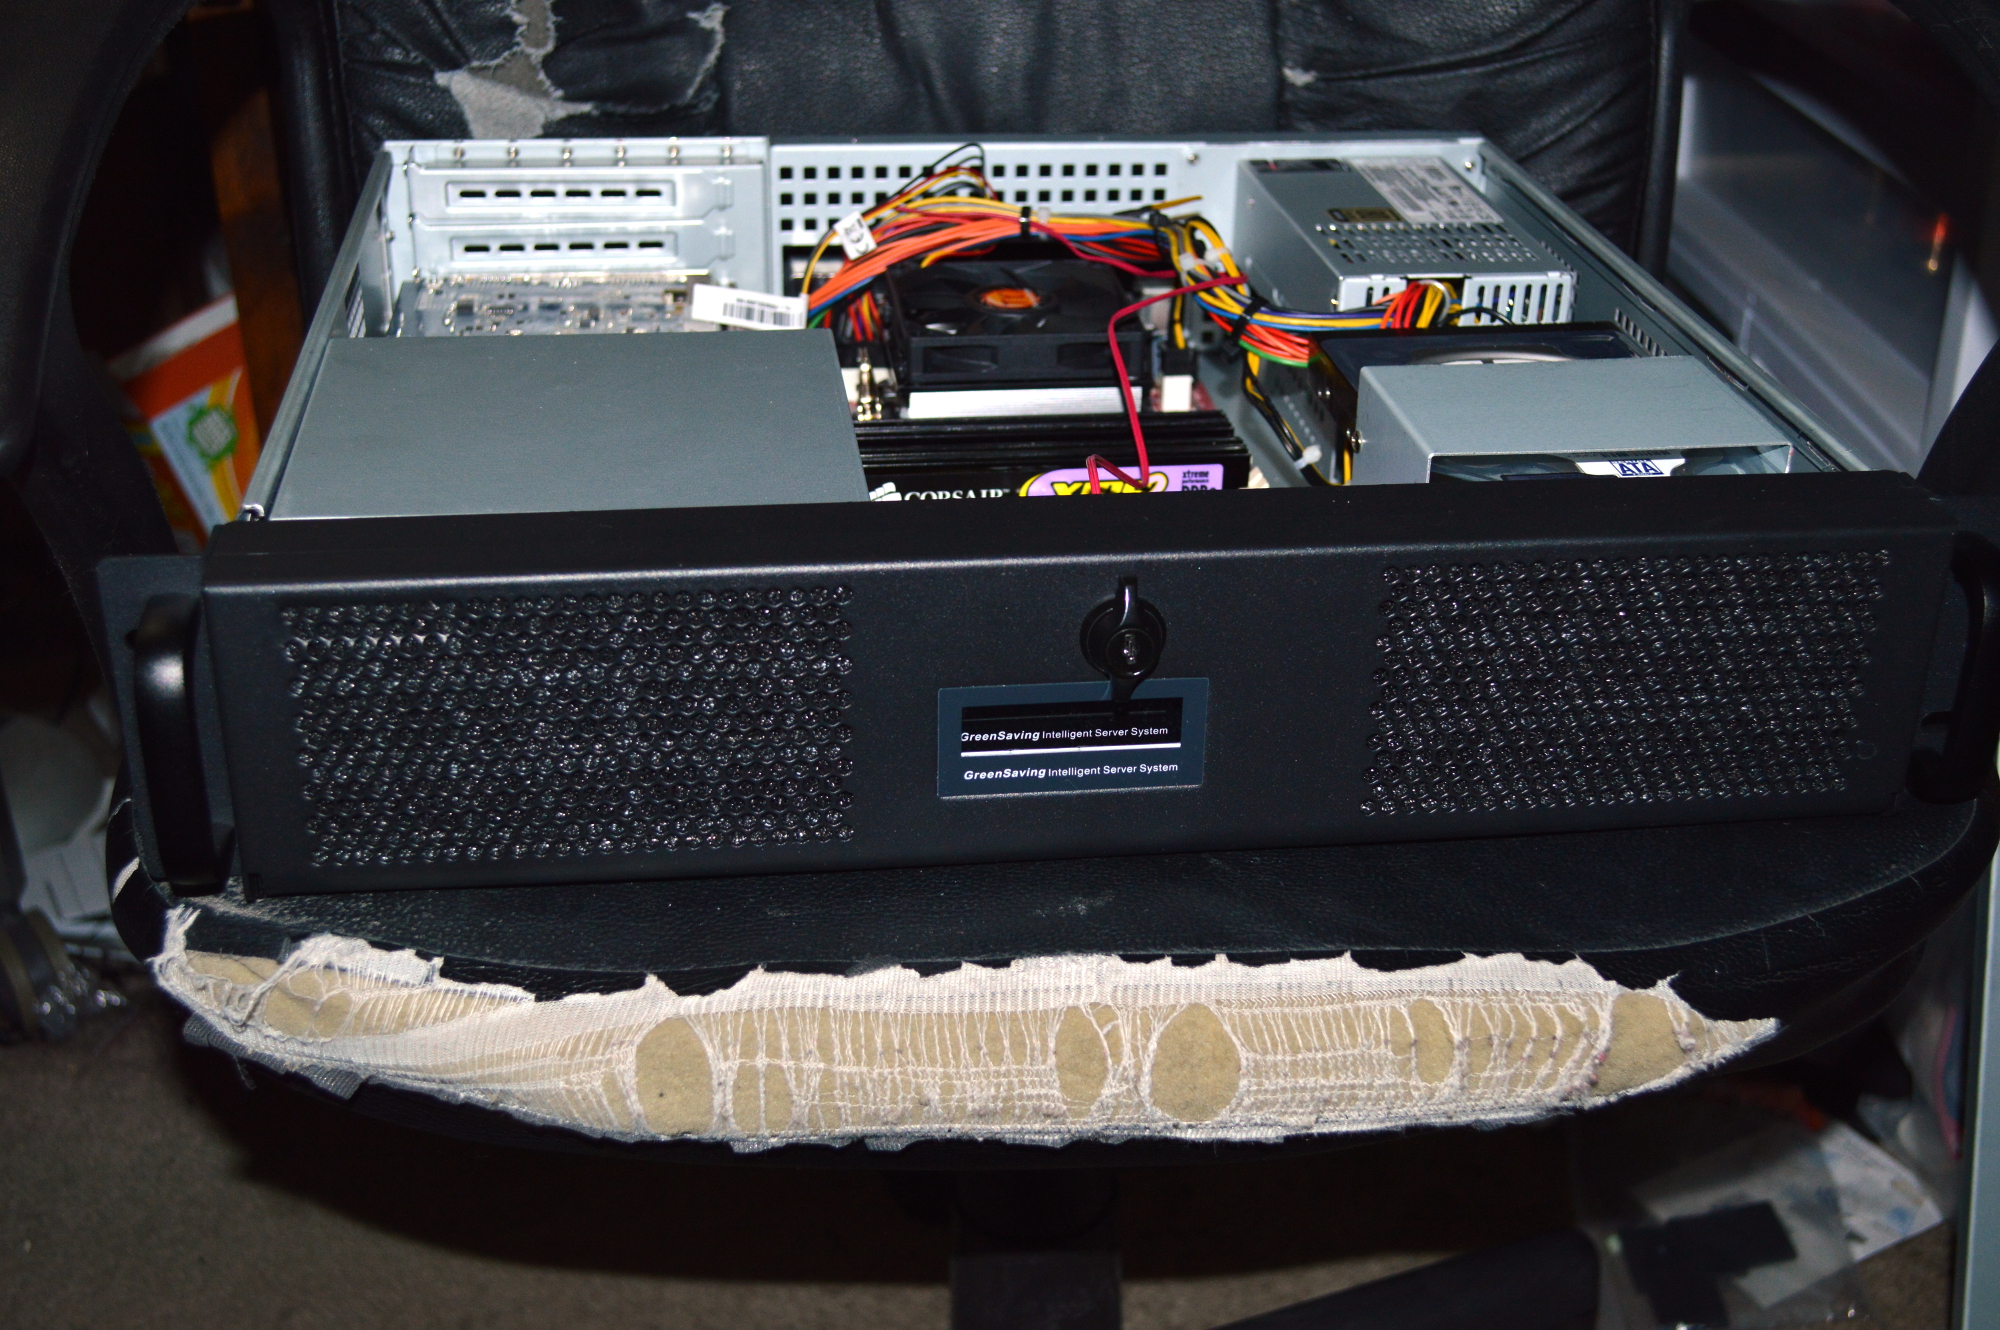
So that’s it for this project. It’ll be mounted into another rack mount cabinet I’ll be building from the IKEA RAST nightstand, where it’ll reside until I build a rack cabinet for the entertainment center. But it won’t get fired up until I build that cabinet, which will happen when another rack mount surge suppressor arrives this week.

DSC_0197

Absinthe – Part XVIII

Build Log:

And here we are to the 18th part of this build log for Absinthe. There’s not much of an update on this one, though — just some more pictures of the build, plus a couple minor things, so let’s get into this.

First, I’ve been messing with rack mount lately, and I recently built a 6U rack mount cabinet from an IKEA RAST night stand. I decided to put that up on my wife’s desk with the network switch and surge suppressor I also purchased to go with it — her desk is nearest the router, and the switch has always been on her desk. This allowed for a good reorganization of the cabling around her system while also putting another AC outlet within reach for a USB charger.

Beyond that, the only change to her system was installing another fan using a 3-bay fan mount from Mountain Mods. This time I went with the aluminum version with a DEMCiflex filter over it. I had originally ordered an acrylic version of it, but it cracked while I was trying to make the necessary cuts for it to fit into the 750D. The aluminum one can be cut with just tin snips.

Unfortunately the aluminum one is also cut differently and sits deeper into the drive bays than the acrylic version, meaning getting the ferrous strips placed for it was a little difficult. I’ll look for something to fill in the gap later. The filter’s placed and doing its job, so I’m not all that concerned at this point.

One other thing I forgot to mention in the previous entry to the log is the sound card. The red LEDs on the SoundBlaster Z sound card is easily dispatched. Just remove the cover — just 4 screws — and take snips to the LEDs. That’s it. You are likely voiding your warranty doing this, but it gets rid of an annoying light and is, in my opinion, a much better solution to just wrapping it in tape.

So that’s it for now. There is a graphics upgrade planned for this down the line — upgrading her GTX 660s to, likely, a GTX 970, possibly two. I’m also considering an R9 290 or 290X. The only thing turning me off with regard to those cards is just how hot they run and how much power they consume. But VisionTek puts one out with a water block pre-installed for less than what it’d cost to buy a GTX 970 and water block separately.

But I think ultimately it’ll be the GTX 970 in the end. We’ll see. For now, enjoy some new pictures of the build, without the annoying red light.

DSC_0180

DSC_0184

DSC_0186

Misconstruing free speech, revisited – Andrew Shirvell

Andrew Shirvell was an assistant attorney general in the state of Michigan. He helped the execution of a campaign against an openly-gay student at the University of Michigan. His role in that campaign led to his termination, and a Court recently ruled he is not entitled to unemployment benefits.

The reason is quite simple: being terminated for cause does not entitle you to unemployment benefits.

Now Shirvell wasn’t fired simply for his speech. He was fired for numerous violations of official policies and misuse of state resources. He even went so far as to contact the student’s employer, who happened to be then-House Speaker Nancy Pelosi, and also engaging in other forms of harassing behavior toward the student.

So clearly he wasn’t fired just for his speech, but he was certainly trying to make it sound like that was the case. Even if it was the case, it still doesn’t save him from termination.

Let me reiterate: your speech is not immune from consequence. I’ve written on this before back during the fallout when one of the more vocal members of the Robertson clan was let go from Duck Dynasty and everyone tried to make it sound like the entirety of the First Amendment had been repealed by A&E with that singular action.

For example, I don’t write about health care much, and when I do, I must be careful about what I write. Whenever an article comes up about a hospital or clinic, I always double-check whether said hospital or clinic is one of my employer’s clients or prospects before sharing it or writing an opinion on it. Any articles I come across that pertain to my employer or call out my employer directly I do not share, even if the article is positive.

If I speak negatively about one of my employer’s clients, or about my employer, I could be fired for cause or forced to resign — the latter of which would still entitle me to certain benefits under my employer’s policies — and nothing in the law would protect me from that. And I would not be entitled to unemployment benefits should that occur, even if what I write occurs during my off-hours on my own computer.

For example, if I was employed by British Petroleum at the time of the oil spill in the Gulf of Mexico, and I liked or shared an opinion piece decrying BP as destroying the environment, I could be fired for that because what I would be liking and/or sharing is intentionally disparaging of BP, and my action could rightly be interpreted as disparaging my employer.

The problem becomes even more acute when we’re talking about a government official. A police officer once said to me that there is no difference between an off-duty and on-duty officer. They are still a police officer. As such there is also no difference between an off-hours and on-hours prosecutor, or an off-hours and on-hours attorney. With many professions, clocking out doesn’t separate you from your job. Clocking out doesn’t mean that you can suddenly do and/or say whatever you want and your employer cannot touch you. If what you do or say during your off-hours reflects poorly upon your employer, you’re not immune from consequence.

And again, being a government official makes it very difficult to separate yourself from your job. Anything a government official does during what they might consider their “off hours” could reflect poorly on the office that employs them. And the same could hold true for other professions as well.

It is why a common tactic of online aggressors is to discover the employer of one of their targets and contact them, in an attempt to get them fired. As an example of that, the information for the individual behind the (currently offline) Tumblr blog Plebcomics was published online, including employer information, and that person was fired from their job. It’s one of the reasons I’m often hesitant to engage certain topics on this blog. Sure I shouldn’t let fear drive me away from engaging or discussing certain topics, but the fear of losing your livelihood can still be a powerful motivator.

Again it is why I do not discuss my employer or my employer’s clients on this blog, and even with regard to health care I am careful about what I write. Because the law only protects you from prosecution for what you write, but not from being fired for it unless what you are writing falls under certain protected classifications under Federal law.

And executing a campaign targeting one specific, openly-gay student is not religious expression, especially when coupled with other behavior that any reasonable person would call harassment.

Rack mount HDD enclosure, part 2

Build Log:

I’ve made some progress on this particular project by ordering parts for it. I also sent out the evaluation request to iStarUSA for the hard drive rack, but ultimately I don’t think I’m going to use it. Instead I’ve had a little bit of a rethink on it.

First, let’s talk about what’s been ordered. I ordered a 2U plastic rack mount enclosure from Allied Electronics, specifically Bud Industries part PRM-14462, which has useable dimensions of 16.5″ width, 3″ height and 7.5″ depth, which is more than enough space. What I was seeking, though, was an enclosure with a removable front face. A lot of the enclosures I found had the faceplate part of the overall structure, with the sides, top or bottom screwing into it as part of the overall structure. And the aluminum rack mount chassis that Bud Industries develops go along that line as well.

But the plastic rack mount option does not. The rack mount “ears” can be removed from the box if desired, and the front plate is not critical to the overall structure, making it a perfect fit. I’ll need to modify the front panel to mount intake fans — possibly even get rid of it entirely and just mount some kind of mesh in its place, like the MNPCTech modder’s mesh. Might do the same to the back, actually, to make things easy and promote a clean air flow through it, along with being easier to cut what and where I need.

This one also appears to be a lot easier to disassemble. Since I’m no longer planning to go with hot swap drive caddies, this is going to be important. This enclosure is going to be used in a home setting, meaning the drives aren’t going to be getting pounded like they would in a large business or enterprise setting, so the need to replace them should be very, very infrequent.

So instead of mounting up drive caddies, I’m looking at drive cages. Since I’m not planning to allow the drives to be removed out the front of this, meaning I’ll have to completely open the enclosure to get to the drives, I think I’ve found something that’ll work just perfectly: CaseLabs S3 Dual HDD Mount. It appears from the picture that this is only 2″ tall, perhaps a hair taller, which is perfect for what I’m building.

Now if I was trying to do this with 2.5″ laptop drives or SSDs, then I would have gone with something off the shelf and called it a day — even gone with removable drive caddies as well since that is what is mostly available. But for 3.5″ platter drives, things have been a little more… difficult to plan and locate.

I had also planned on just having SATA to eSATA pass-through cables in the back, but have decided instead on using a port multiplier. It’ll increase the cost of this substantially but lower the complexity of trying to connect all of this up. I didn’t even realize that the port multipliers could be purchased separate, but Addonics carries them. They have options with a built-in RAID function, but the one I bought doesn’t have that.

So the parts list so far is looking like this:

  • Bud Industries PRM-14462
  • Addonics AD5SARM6G 5-port SATA III port multiplier
  • CaseLabs S3 Dual HDD Mount (x 2)

I only just discovered the CaseLabs HDD mount, so I haven’t ordered that yet as of the time I’m writing this. But so far the cost of these, not including shipping, is about 150 USD, which seems like a lot. But when you consider that pre-fabricated enclosures like this tend to be easily double that, I’m still coming out ahead.

For example there’s the M-140-JB enclosure from iStarUSA, which currently sells for about 300 USD through Amazon. It has a 150W open-frame power supply and hot-swap bays, but does not come with the port multiplier for connecting it to your server/system, nor any drive cables, which will add about 100 USD. And then there’s the EA-105-JB, which is basically just a steel box with some fans and hard drive mounts — no power supply, no drive cables, nothing else. Some places list it for about 150 USD.

All that’s left now is to figure out how to power the thing, and for that I’m leaning toward just getting an inexpensive 1U power supply and creating an on/off switch for it using a leftover locking anti-vandal switch I have laying around. The open-frame power supply on the M-140-JB gives me an idea as well.

So that’s it for now. Hopefully my next update on this will feature me actually building this.

Slacktivism

It is very easy to click Like or Share on Facebook. It requires no more effort than moving the mouse to the desired location and setting you finger down for a split second — though in the case of Share it requires do the same to click the button to create the post.

Going out and doing something requires effort.

It is one of the reasons I get extremely frustrated when I see images like this:

10342448_685740681503939_2673944626941795340_nLet me fill in a little of my history here and hopefully it’ll be clear as to why this image pisses me off. First, open Google and search the phrase “Fairfield cat killers”.

Back in 1997 I lived in Fairfield, Iowa. I was a junior at Fairfield High School when three guys, also students at Fairfield High, allegedly drunk at the time, decided to go to the Noah’s Ark Animal Shelter and wreak havoc, swinging a baseball bat at anything that moved. In the end they killed 16 cats and severely injured 7 more.

Now back in 1997 the Internet wasn’t nearly as widespread as it was today. I couldn’t just write a quick blip on a blog, or create a cute little image like the one above on Facebook, or tweet my support for the animal shelter and how I’m against animal cruelty. Instead actions were required. You had to actually get out and do something.

And I did. I volunteered at Noah’s Ark.

I also had a cat at the time, and he definitely made sure to tell me how much of a mistake I had made, so unfortunately it was only for a day that I volunteered. Now I was in high school, and most high schools require community service as a condition for graduating. Except I never reported the time to my school. Instead I worked for a couple days at the local library for the community service time that I actually reported.

And though I only worked a day at Noah’s Ark, I’ve still done more with regard to animal cruelty than anyone who merely clicks “Like” or “Share” on any picture like the above one, or tweets or reblogs or upvotes, or whatever word happens to apply to the social network of your choice.

If you want to do something to actually bring animal cruelty to an end, you need to be active outside your home. Donate your time — even if it’s just a day — or your money to a shelter or the ASPCA. Then you’re actually doing something, and you can truly say you are against animal cruelty.

Actions always speak louder than words, and getting out and doing something will always mean more than merely “sharing” something online.

Absinthe – Part XVII

Build Log:

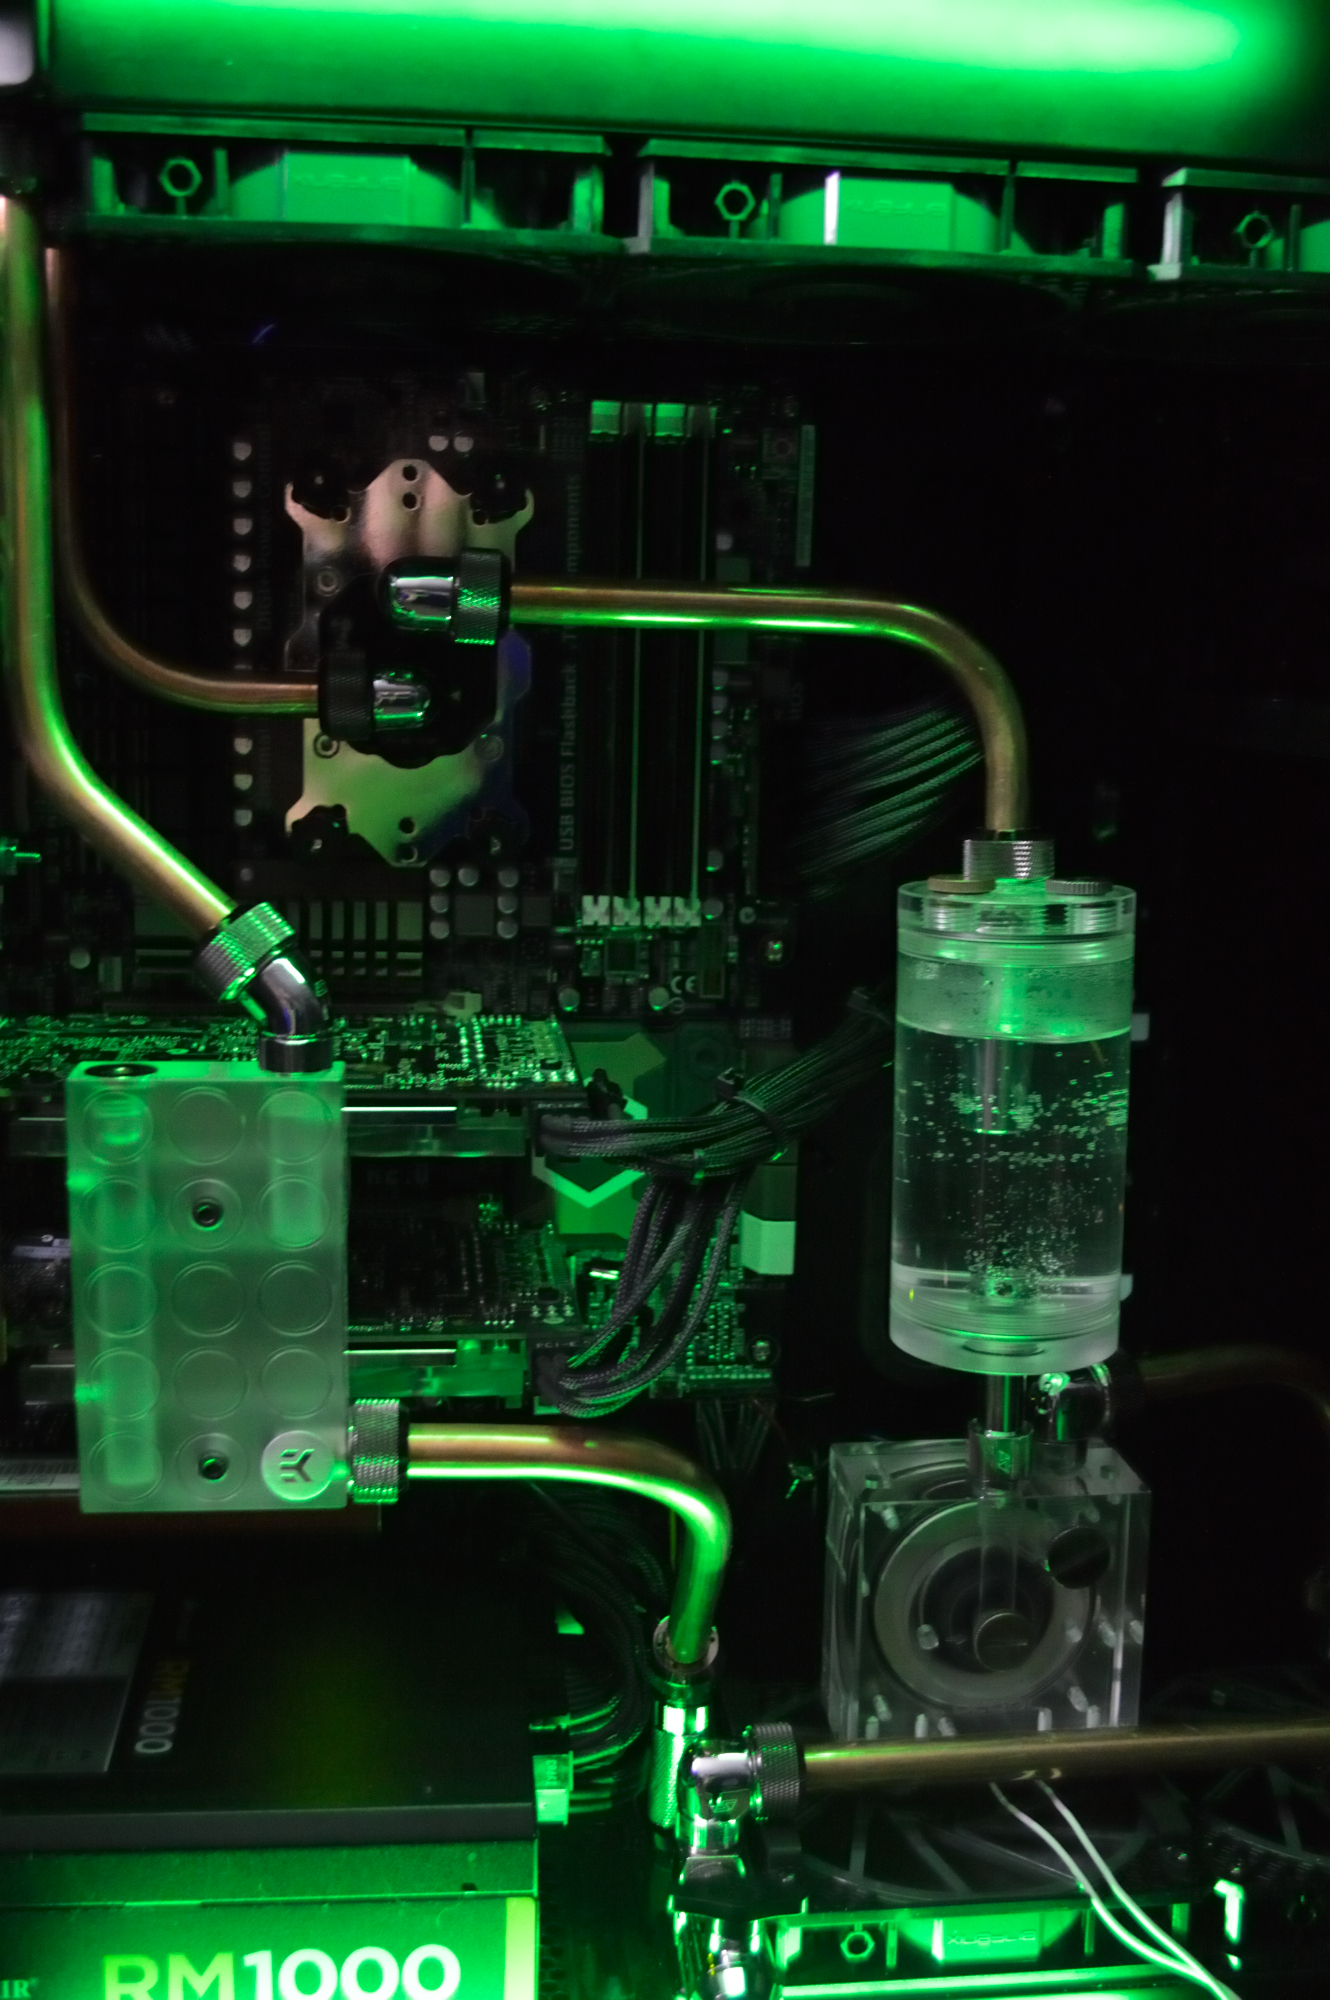
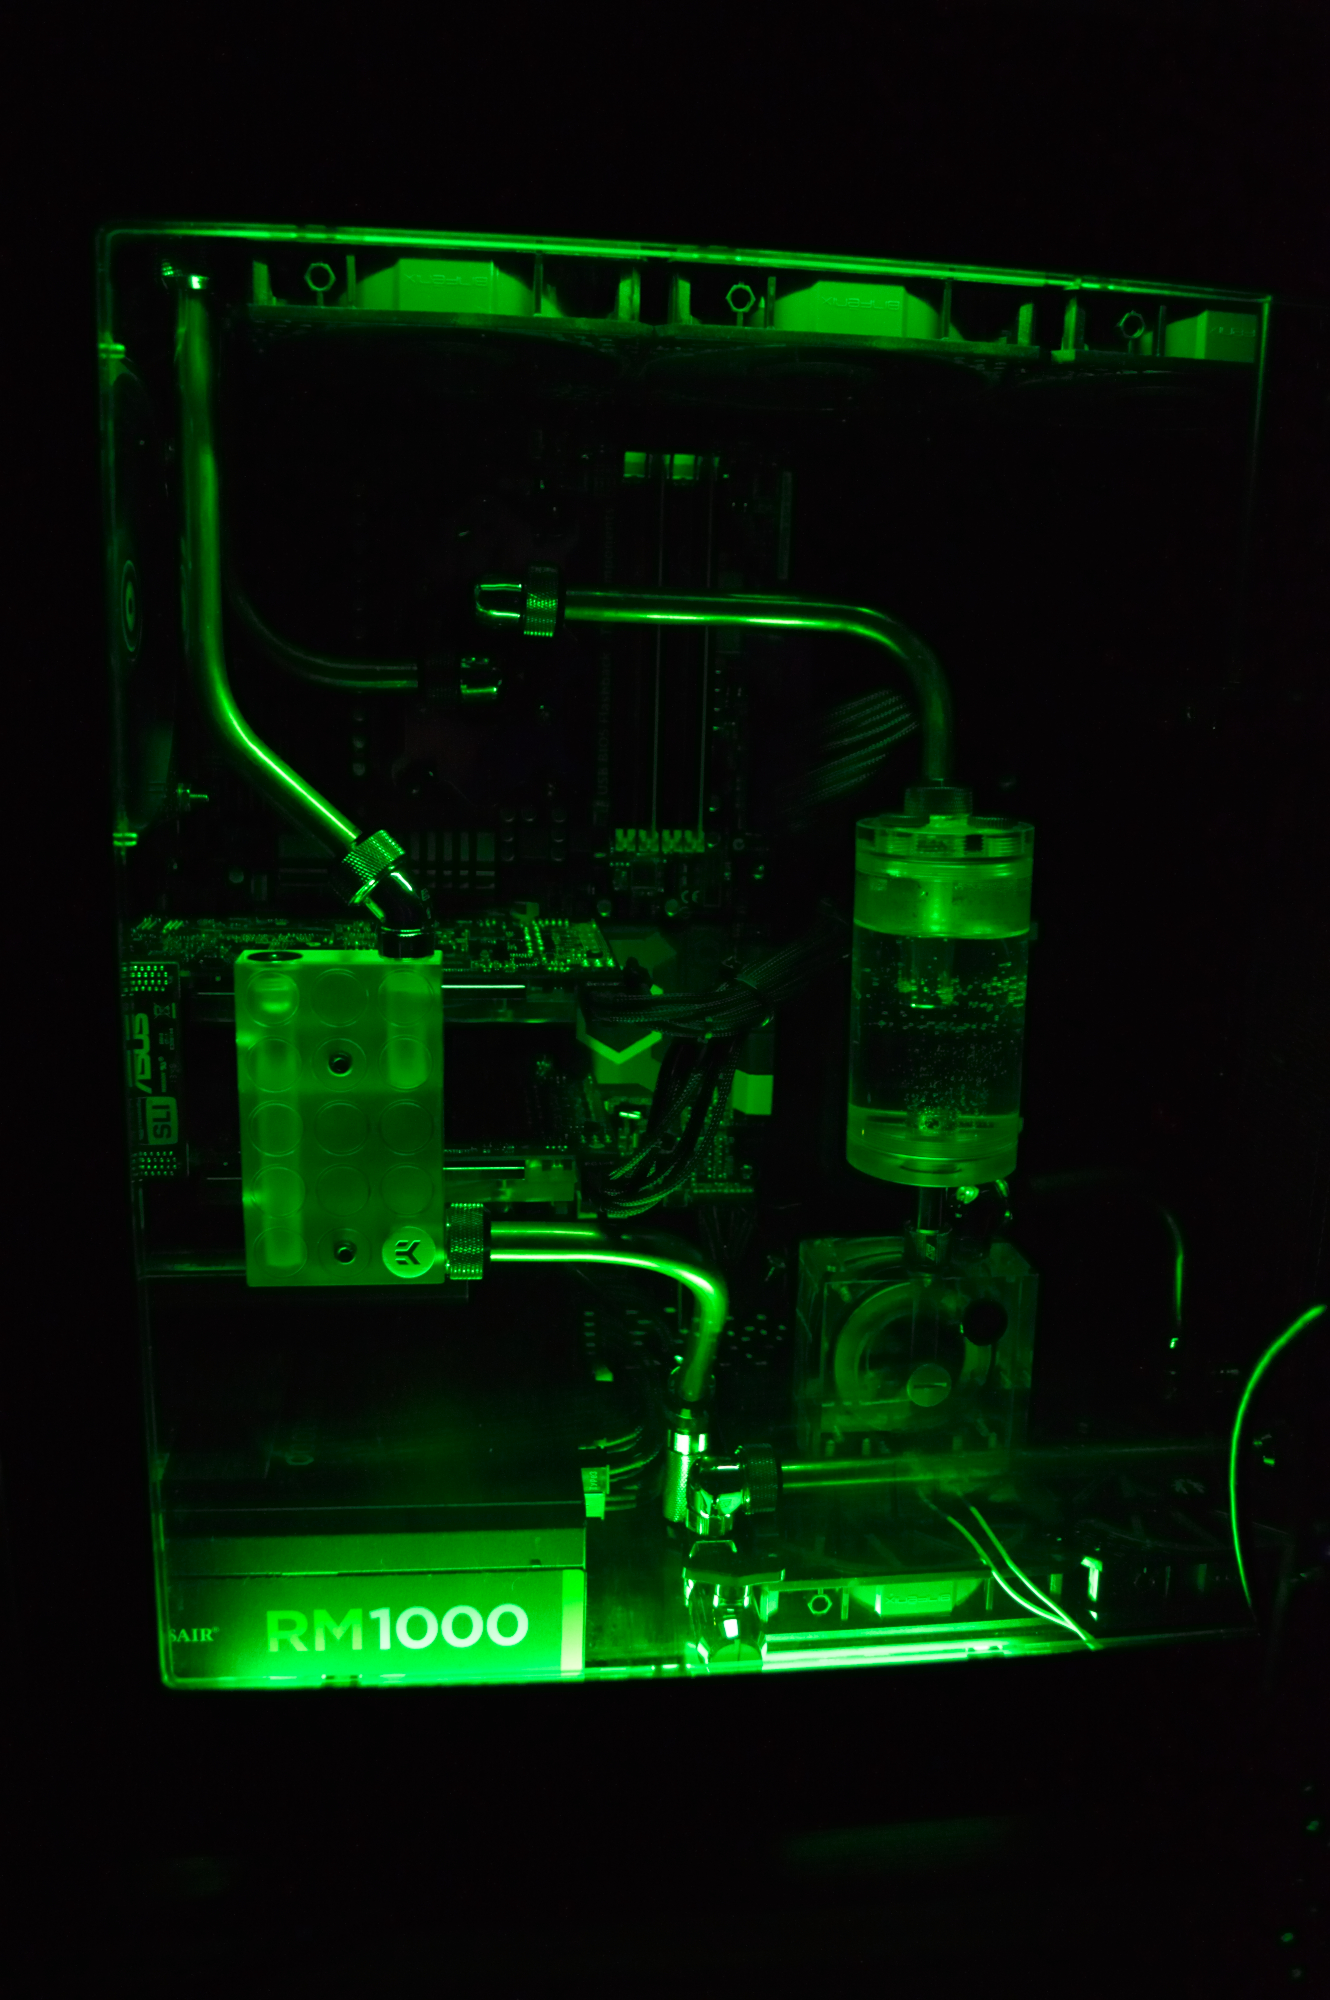
As planned the loop in Absinthe was upgraded to three radiators. To be honest, ahead of this I wasn’t expecting it to work. A 2x120mm radiator plus an RM1000 sitting in the bottom of the Corsair 750D. It works…

The work started this past Friday evening when I flushed the radiator and assembled the fittings onto it.

DSC_0085

I used a gallon of water for a straight flush before setting it up into a loop through my water filter for a filtered run to get any leftover. Then my wife and I planned for the next day.

Saturday

I woke up before my wife on Saturday and took advantage of the time to tear down her computer as far as possible to move onto another table. I just wanted to eliminate as much bulk from the system as I could. I was starting with a full loop and a tower with quite a bit of hardware in it.

DSC_0091

And really the problem was simply that it was heavy. I drained the loop as far down as I could first, then started tearing everything apart one piece of copper at a time. Once everything was out, I hooked them up to the spare pump and reservoir for a flush. The radiators were pretty straightforward. The CPU block and GPU setup required a little improvisation.

DSC_0108

DSC_0111

Then came actually installing the radiators back into the system. Recall from the Absinthe “intermission” article that I said your loop needs to be planned around your radiators. And recall from the start of this article that I wasn’t even entirely sure this would work. I knew from building Beta Orionis that the three radiators would fit into the case. It was the power supply that was the concern. The fact I would need to use extension fittings to get the hardline fittings above the edge of the fans helped convince me this could happen.

But the whether I could get the power cables around everything would determine the success of this idea.

DSC_0115

DSC_0118

A tight fit, and I knew it would be a tight fit. But it still fits. Talk about a huge sigh of relief. And with that came installing the other radiators and tubing it up. I used this as a chance to completely redo her tubing as well.

Initially I had the pump mounted to the front radiator using the UN Z2 bracket. The route of the fluid would be from pump -> front radiator -> bottom radiator -> graphics cards -> top radiator -> CPU -> reservoir. And what I built would have worked, I just didn’t like how it looked.

DSC_0135

Like I said it works. But I didn’t like the fact the pump was just hanging off the radiator, for one. But the front tubing I wanted to keep, but I wasn’t sure if I could mount the pump to the bottom radiator and still preserve that. I left the loop running overnight with distilled water running through it while pondering the next move: fill with coolant or, drain it and change what I didn’t like.

Sunday

I ultimately decided to change the loop. It didn’t require completely rebuilding it, thankfully, only pulling down the connection from the CPU to the reservoir and from the pump to the front radiator. I also had to change how the pump and reservoir were connected to ensure there would be clearance for what I had planned.

DSC_0143

But the pump fit the way I hoped it would. And I used a Swiftech SLI fitting to go from the reservoir to pump, which easily puts it higher than the 90-degree rotary fitting that would go from the pump to the front radiator, much the same how I have it in Beta Orionis.

Two 15mm extension fittings plus the 90-degree rotary fitting made the connection from the CPU to the reservoir.

DSC_0148

And I think the new loop looks much cleaner than the previous. The tube that crosses around in front is a much lower profile than what I initially had in Absinthe.

Overall I’m quite pleased with how it turned out. I was able to pull a couple 90-degree fittings from the loop, though I did add in two 15mm extensions. That dual 45-degree setup was split up and one 45-degree fitting created a much cleaner run from the GPUs to the top radiator, while the other made for an easy run from the bottom radiator to the GPUs.

DSC_0128

DSC_0126

And now for the overall loop (plus the mandatory cat tax):

DSC_0150

DSC_0151

That’s Beta Orionis in the background hooked up to the “heart lung machine”. So with it all connected up, the only thing left to do was another distilled water leak test.

DSC_0152

While it was leak testing, I worked on finishing the cabling. Ultimately it wouldn’t be done till I could connect the pump to the power supply after it was filled with (fresh) coolant and ready to boot.

DSC_0165

And with that, my wife has her system back.

But work isn’t quite done. I have a fan mounting bracket on way from Mountain Mods to show later this week, along with a DEMCiflex filter kit for the 750D. So more updates to come.

Beta Orionis – Part XV: Follow-up with Koolance blocks

Build Log:

I’m a little conflicted.

Earlier I posted about a rather interesting temperature differential I was experiencing with the Koolance VID-NX680 blocks I had originally purchased for my graphics cards. Under Bioshock Infinite, the cards had experienced a greater than 20C difference in temperature with the hotter card getting into the upper 70s. I posted about this on The Mod Zoo forum, and it was recommended I contact Koolance. In hindsight as well I decided I needed to attempt to re-test the blocks — this time around, though, with the intent of doing an RMA. So I set out to do just that — identify which block needed to be returned on an RMA and start the RMA process with Koolance.

Only that’s no longer necessary.

Flushing the blocks

Before re-mounting the blocks on the cards, I flushed them with distilled water. The apparatus I set up for this involved the old Phobya pump from the original water cooling build that preceded Absinthe, a Bitspower reservoir sitting with an open top to feed into it, pushing water through a tube into the block, with the outlet on the block just dumping into the sink.

DSC_0084

Obviously I had the pump wired up with the intent of actually using it to push water through the blocks. It’s similar to how I described flushing the radiators for Beta Orionis in an earlier article. The beauty of using this kind of setup for flushing blocks is the pump will put pressure behind it instead of trying to rely on gravity or the seal and shake method.

After flushing both blocks, I mounted them and set them up in a serial configuration. Then after refilling and bleeding the loop, it was time to test.

Temperature testing

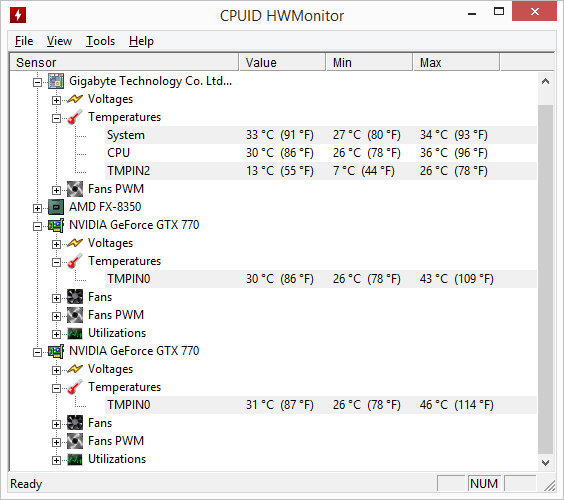
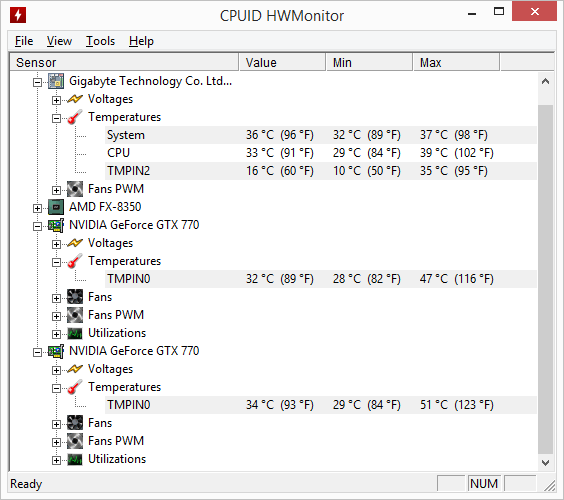
And the results compared to previous are like night and day. I ran two tests against it: Valley Benchmark running the benchmark sequence, and bfgminer on its benchmark setting for around 30 minutes. In both cases, the temperature differential was similar to what was seen with the Watercool blocks: about 3C or 4C difference between both cards. That is exactly where you want it.

koolance_valley

With Valley Benchmark, as shown here, the temperatures maxed out at 46C and 43C, which is very similar to what I got with the Watercool blocks running Heaven Benchmark. Now with the Watercool blocks, I never captured any screenshots running bfgminer, but I can tell you that it produced temperatures exactly the same as Bioshock Infinite, making it a pretty good means of temperature testing cards. And in the case of the flushed Koolance blocks, the temperatures were, again, very similar to the Watercool blocks, maxing out at 51C and 47C.

koolance_bfgminer

This is what you want to be seeing out of your water blocks. So no RMA will be necessary on this.

Afterward

As I said, though, I’m now conflicted on what to do: keep the Koolance blocks or switch back to the Watercool blocks. I think it’ll be the latter. Watercool’s blocks just look better, in my opinion, especially with the back plate, though the performance between the two is very similar. I had the Watercool blocks running in parallel, whereas I had the Koolance blocks running in series, and the difference between the two tends to be a couple degrees, advantage series. So with the Watercool blocks in parallel performing similar to the Koolance blocks in series, that tells me the Watercool blocks are still the better performers.

Plus, again, they look better in my opinion.

Now I don’t need to swap them out right away. The temperatures are exactly how I expected them from the outset. But since I have a mainboard swap coming up soon, I’ll wait till then to swap the blocks so I do it all at once.

Rack mount hard drive enclosure project

Build Log:

I’ve been looking around for a rack mount hard drive solution that meets certain requirements:

  • 4×3.5″ hard drives
  • No built-in RAID controller
  • One eSATA connector per drive — i.e. no port multiplier
  • Maximum 2U height
  • AC power supply and fans for cooling

So far I’ve come up empty, so I’m instead looking at building one.

I’ve already got a proof of concept via an eSATA bracket I picked up at my local Micro Center. Basically I connected the SATA side of the bracket’s cable to a hard drive and ran an eSATA cable to an eSATA port on my computer to ensure it would be detected. For power, I’ve been looking at either getting a 1U or 2U server power supply, or using one of the units I’ve seen at Circuit Specialists. For the enclosure I’ve already found several options and am still researching them.

All that’s left is the hard drive rack, and that’s where I’ve been running into difficulty.

It seems to build what I want I cannot go “off the shelf”, at least not without replacing my two WD Blues with their corresponding laptop versions. Instead what I’m wanting to do is add two additional WD Blues and convert my RAID 1 into a RAID 10 — giving me an extra terabyte of storage space and additional performance without sacrificing the safety and redundancy. So part of this is coming down to cost evaluation.

Now one of the requirements for this project is a maximum 2U form factor. I can find power supplies that will meet a 1U or 2U form factor without difficulty. Finding drive cages for 3.5″ hard drives that will fit into a 1U or 2U enclsoure, on the other hand, hasn’t been so simple. Now if I change over to 2.5″ hard drives (platters, not SSDs), I can find racks that will fit 2×2.5″ HDDs into a single 3.5″ drive bay with around 1″ height. That will fit into a 1U enclosure without any difficulty, and two can fit side by side as well, still leaving plenty of room for a 1U power supply and any internal cables, provided I get an enclsoure with the right depth. And those options are available off the shelf or for immediate order. Again, though, that would require I buy 4×2.5″ laptop drives, and the ones I would buy are $65 each currently, meaning we’re talking a $260 expense just in hard drives. Adding two additional desktop WD Blue HDDs would be only around $106 total currently on Amazon.

Most 3.5″ hard drive racks are tray or trayless options that fit into a single 5.25″ drive slot — which is 1.65″ tall and 5.75″ wide. 1U is only 1.75″ and no enclosure has an internal dimension allowing for that, so using those would require a 2U enclosure, and I could only fit 3 of them into a 2U enclosure. From there are options that fit three drives into a dual 5.25″ slot, which would require a 3U enclosure. And up from there.

So I’m having to go custom on this. And for that I’ve turned to iStarUSA.

iStarUSA has a few intriguing options for this project. Under their “Custom & OEM” category for internal drive cages are items T-35HD2-SA and T-C35HD-TLK. Both are single-drive hot-swap options. The former is only 1.1″ (28 mm) tall, while the latter is 1.34″ (34 mm) tall. Both of these can easily fit into a 1U enclosure. Both are about 4″ wide as well, meaning 4 can sit side by side in a 1U enclosure and leave about 1″ to 1.5″ of clearance left. iStarUSA also has available item T-C35HD4-TLK, which is 4xT-C35HD-TLK already bracketed together with a power/data board connecting all of them together. Unfortunately none of these are immediately available for order. So instead I’ve requested an evaluation on item T-35HD2-SA, since I feel it’ll best meet my needs. I’ll try to also get a quote on 4 of them as well, provided the unit meets additional build requirements I have in mind for this. I’m thinking about taking 4 of these and building them into a 2×2 setup inside a 2U enclosure, at least 10″ depth to allow room for fans and cables behind the cages.

Now another option that comes to mind is just taking something off the shelf and modding it to meet whatever needs I have. And that is certainly an option, but I’d rather not go that route as it could, in the end, be more expensive overall than going with what I’ve found, depending on what I’m quoted to purchase the item I have in mind.

So now that I’ve got that out of the way, let’s talk about the requirements for this project. The main reason against an external enclosure that supports RAID is I already have a RAID card already configured to RAID 1 with my hard drives in two separate external enclosures. I want to make that into a RAID 10, with the card still handling the setup. To do this, I need 4 hard drives, and having them in a rack mount enclosure in the RAST rack mount cabinet I’ve made would be easier. Sure it’d be less expensive buying two additional enclosures, but that’d require two additional power plugs and more cable bulk on my desk. Building it into a rack mount would just be much easier. I’d still have 4 eSATA cables given the current plan, but I’d have only 1 AC power cable instead of 4 wall warts.

Why not just mount 4 hard drives into the enclosure with fans and a power supply and call it a day? I’ve considered that option as well, but if I ever needed to replace one of the drives, I’d rather not have to pull the entire thing apart to do so. My existing setup already requires I practically take apart an enclosure to replace one of the drives.

Plus I’m interested to see how much it’ll cost to completely build this out compared to what is already available as a finished product.