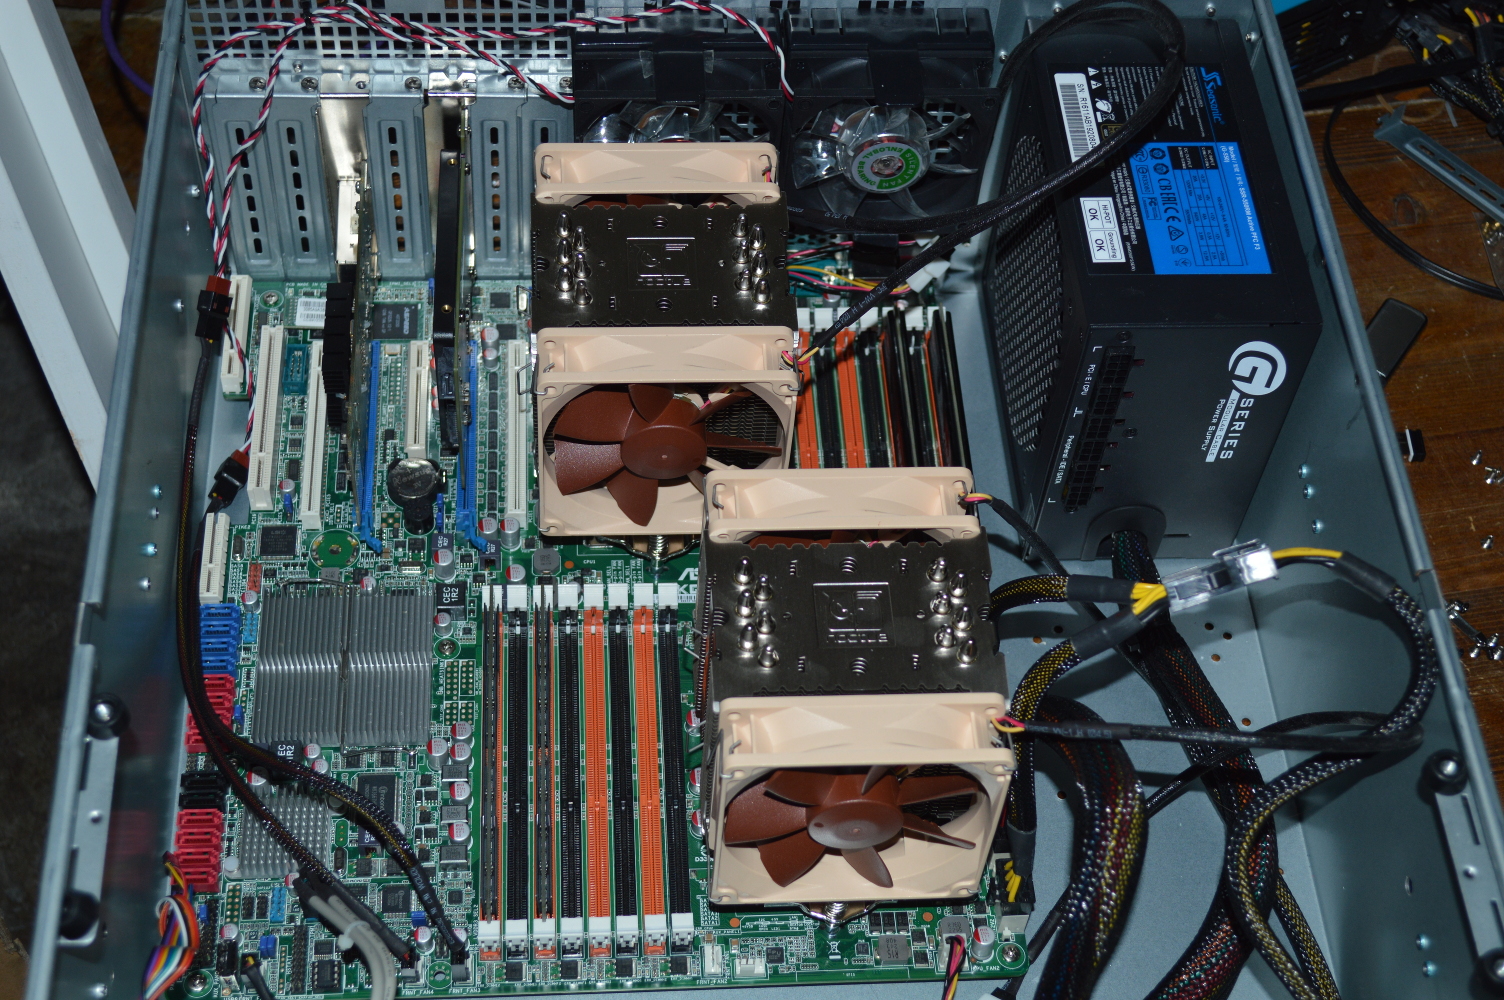
The road to 5Gb

Build Log:

In the mention of my custom router, I talked about how Google Fiber would soon be introducing 5Gb and 8Gb service. Recently I was upgraded to the 5Gb service and… let’s just say it isn’t what I expected.

I had a feeling this would be the outcome as well.

The service overall felt snappier compared to the 2Gb service. But maintaining line speeds above 2Gb or 3Gb was proving difficult, even during off-peak hours. Running a speed test from the router using the SpeedTest CLI demonstrated this. Upload speeds would have no issue breaking 4Gb or even 5Gb, but download speeds would typically max out at 3Gb.

So what gives? In short, it’s the router itself. I just don’t think the APU can keep up with the demand. It has no issue keeping up with 2Gb service or less. But beyond 2Gb it becomes inconsistent.

But I’m not about to switch back to using Google’s router. For one that would require adding back in the 10GbE RJ45 SFP+ module, which runs hot, and the active cooling to go with it. Or using a media converter.

So instead, I need to upgrade my custom router. The big question is what platform to jump to: 990FX or X99? Now reading that question, you’re probably already shouting “How is that even up for debate?”

Current specs

Before going too far, here’s what I’m starting with.

CPU:AMD A8-7600 APU with Noctua NH-D9L
Mainboard:Gigabyte GA-F2A88X-D3HP
RAM:16GB DDR3-1600
PSU:EVGA 650 G2
Storage:Inland Professional 128GB 2.5″ SATA SSD
WAN NIC:10Gtek X540-10G-1T-X8 10GbE RJ45
LAN NIC:Mellanox ConnectX-2 10GbE SFP+
Chassis:Silverstone GD09
Operating system:OPNsense (with latest updates as of this writing)

Which path forward?

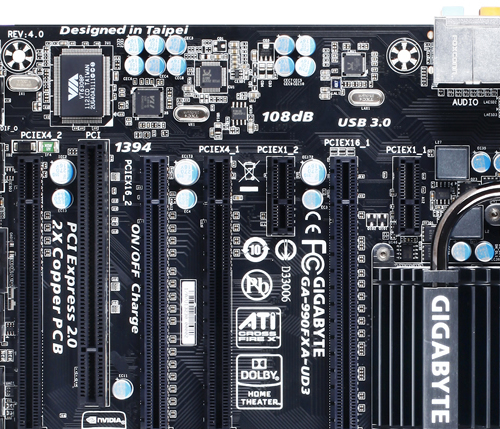
In a previous article about doing a platform upgrade on Nasira, I mentioned I have a 990FXA-UD3 mainboard from Gigabyte. Talking specifically about how it does its PCI-E lane assignments before revealing, ultimately, that I went with a spare X99 board for Nasira due to memory prices. And that gave the benefit of PCI-E 3.0 as well, which was important for the NVMe drive I was using as an SLOG.

For a router, PCI-Express 3.0 isn’t nearly as important so long as you pay attention to lane assignments. Though for a gigabit router, even that doesn’t matter much. Both cards were on at least 4-lanes and running at their full speeds – 5.0GT/s for both.

So if lanes aren’t the problem, that leaves the memory or processor. And there isn’t much benefit to bumping from DDR3-1600 to DDR3-1866 for this use case. The memory just isn’t going to make that much of a difference here since the memory already provides more than enough bandwidth to handle this use case.

So that leaves the processor.

990FX with FX-8320E

Compared to even an FX-8320E, the AMD A8-7600 APU is underpowered. The onboard GPU is the only benefit in this use case. The FX-8320E doesn’t provide much of a bump on clocks, starting out at 3.2GHz but boosting to 4GHz. Performance metrics put the FX-8320E as the better CPU by a significant margin. The FX-8350 would be better still, but not by much over the FX-8320E.

So while it’s the better CPU and platform on paper compared to the APU and the A88X chipset, is it enough to serve as a 5Gb router?

Well I didn’t try that. I decided to jump to the other spare X99 board instead.

Or, rather, the X99 with i7-5820k

So again you were probably asking why I was even considering the 990FX to begin with? And it’s simply because I had one lying around not being used. Specifically the Sabertooth 990FX from Nasira still assembled with its 32GB DDR3-1600 ECC, FX-8350, and 92mm Noctua cooler. And I actually have a few 990FX boards not being used.

But I also had the Sabertooth X99 board that was in Mira still mostly assembled. It hadn’t been used in a while and just never torn down, so it was relatively easy to migrate for this.

So why the leap to the X99 over the 990FX? In short, it’s the specifications for the official pfSense and OPNsense appliances.

The Netgate 1537 and 1541 on the pfSense front are built using the Xeon-D D-1537 and D-1541, respectively, which are 8-core/16-thread processors, and DDR4 RAM. Both are rated for over 18Gb throughput.

And OPNsense’s appliances use either quad-core or better AMD Ryzen Embedded or Epyc processors. The DEC740 uses a 4-core/8-thread Ryzen with only 4GB DDR4, while the slightly better DEC750 doubles the RAM. Both are rated for 10Gb throughput.

But their DEC695 has a 4-core/4-thread AMD G-series processor and DDR3 RAM, and is rated for only 3.3Gb of throughput. Hmm… that sounds very familiar…

Quad-channel memory is where the X99 platform wins out, compared to dual-channel support for the aforementioned Ryzen and Xeon CPUs. But to get started, I ran with dual-channel since two sticks of DDR4-3200 is all I had available at the moment. If everything worked out, that would be replaced with 4x4GB for quad-channel RAM and a Xeon E5-2667 v4, which should yield overkill performance.
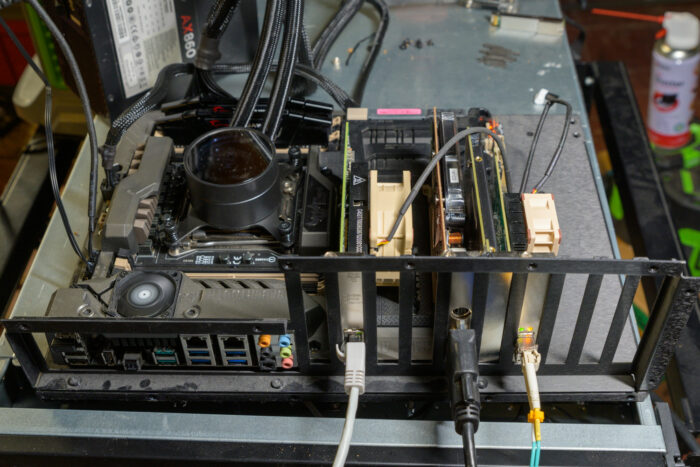
Tell someone this is your router, and they likely won’t believe you.

Here’s the temporary specs:

CPU:Intel i7-5820k with NZXT Kraken M22
Mainboard:ASUS Sabertooth X99
Memory:16GB (2x8GB) DDR4-3200 running at XMP

Side note: I was able to move the SSD onto the new platform without having to reinstall OPNsense. It booted without issue. I still backed up the configuration before starting just. in. case.

So was this able to more consistently sustain 5Gb? Oh yeah!

One rather odd thing I noticed with the speed test, both on the old and new router setups: when trying to speed test against Google Fiber’s server, it capped out at 2Gb. But in talking to the Misaka Network server, shown in the screenshot, it now consistently gets 5Gb at the router.

Note: The command-line tool allows you to specify a server to test against. So going forward with my speed testing from the router, I’ll need to remember that.

With the AMD APU, it wasn’t getting close. And the FX-8320E or FX-8350 on the 990FX probably would’ve done better, but clearly it was best that I jumped right to the X99 board.

So what does this mean going forward?

Road forward

So with the outstanding test results, this will be getting a few hardware changes.

The CPU and memory are the major ones, and the mainboard will also get changed out. Something about either the processor or mainboard isn’t working right, and none of the memory slots to the left of the CPU are working – as the image above shows. This tells me it’s the mainboard, the CPU socket specifically (e.g. bent pins), but it could be the CPU as well.

Either way it means I can’t run quad-channel memory. And while the above speed test shows that quad-channel memory isn’t needed, I’d still rather have it, honestly.

But I have an X99 mainboard and Xeon processor on the way which will become the new router. Quad-channel memory is the more important detail here since Xeons do not support XMP. That does mean saving money on the memory, though, since DDR4-2400 is less expensive.

The Xeon on the way is the aforementioned E5-2667 v4. That’s a 40-lane CPU with 8-cores and 16-threads. Definitely overkill and I’m not going to see any performance improvement compared to the i7-5820k. As mentioned, it does not support XMP, so the fastest RAM I’ll be able to run is DDR4-2400. But in quad-channel.

The Xeon does also allow me to use ECC RAM, and the mainboard that is on the way supports it. While the router chugs along perfectly fine with non-ECC RAM, ECC is just going to be better given the much higher bandwidth this router needs to support.
Throwing a short pass

Build Log:

In the previous iteration, I mentioned my intent to add more NVMe drives to Nasira. Right now there is only one that is being used as an SLOG, which I’m debating on removing. But the desire to add more is so I can create a metadata vdev.

Unfortunately doing that with the Sabertooth 990FX mainboard currently in Nasira is going to be more trouble than it’s worth. So to find something easier to work with, I considered ordering in a Gigabyte GA-990FXA-UD5 through eBay. But I realized I had a GA-990FXA-UD3 lying around unused. So I did some research into whether that would suit my needs.

And it looks like it will.

What’s the issue?

First, let’s discuss what’s going on here.

With the AMD FX processors, the chipset controlled the PCI-E lanes, not the CPU. This was a significant difference between AMD and Intel at the time. Though the CPU now controls the PCI-E lanes and lane counts with Ryzen.

And the 990FX chipset has 42 PCI-E lanes. This surpasses the lane count available on any Intel desktop processor at the time. The Intel i7-5960X had 40 lanes. Only Intel’s Xeon surpassed it, and only if you used more than one of them.

How they were divvied up between slots was up to the motherboard manufacturers, but generally every 990FX board gave you two (2) x16 slots so you could use Crossfire or SLI. What you could run and at what speed it ran depended heavily on the mainboard, since the mainboard determined lane assignments to slots. I’ve previously discussed how the Sabertooth 990FX assigns PCI-E lanes, showing the counter-intuitive chart from the user manual, so now let’s look at the Gigabyte lineup.

Gigabyte released three 990FX board models (with several revisions thereto) as part of their “Ultra Durable” lineup: the GA-990FXA-UD3, -UD5, and -UD7. And each has different lane assignments. The -UD7 is easily the most flexible, guaranteeing four (4) full-length slots at x8 or better. The UD5 guaranteed three (3) slots at x8 or better.

The -UD3 is a little different. That board also has 6 PCI-E slots: 2 x16, 2 x4, and 2 x1. And unlike the -UD5 and -UD7, the -UD3 does not share lanes between any of the slots or onboard features. Each slot has its own dedicated lanes. What you see is what you get. Or, at least, that is what the specifications heavily imply.

Why does this matter?

Obviously lane counts matter when you’re talking about high-bandwidth devices. You shouldn’t just randomly insert cards into slots without paying attention to how many lanes it’ll receive.

While any PCI-E device can operate on as little as just one lane – something anyone familiar with crypto-mining can attest – you definitely want to give bandwidth-critical devices all the lanes they require. SAS cards. 10GbE NICs. NVMe SSDs. You know, the hardware in Nasira.

So when the NVMe SSD I installed as an SLOG reported up that it had only a x1 link, I needed to swap slots to get it running at a full x4. The Sabertooth 990FX divvies up its PCI-E lanes in a very counter-intuitive way, leading me to believe the NVMe drive would have its needed 4 lanes in the furthest-out slot where I wanted to run it. And it turned out that wasn’t the case.

Had I swapped out the board sooner for the -UD3 I have on hand (it wasn’t available when I initially built Nasira), I wouldn’t have run into that issue.

That this was all on a 990FX mainboard is immaterial. Indeed the issue is more acute on many Intel mainboards unless you’re running one of the Extreme-edition processors or a Xeon due to PCI-E lane count limitations.

And many mainboards have a mix of PCI-E versions, so you need to pay attention to that as well to avoid, for example, a PCI-E 3.0 card being choked off by PCI-E 2.0 speeds. This is why many older 10GbE NICs are PCI-E 2.0×8 cards. PCI-E 2.0×4 has just enough bandwidth for two (2) 10GbE ports, but 1.0×8 really has enough bandwidth for only one (1). While PCI-E 1.0×8 should, on paper, allow for dual 10GbE ports, in practice you won’t see that saturated on such PCI-E 1.0 mainboards.

And 3.0 x4 10GbE NICs, such as the Mellanox ConnectX-3 MCX311A, will run fine in a 2.0 x4 slot – such as the slots in my virtualization server and the X470 mainboard in Mira. And I think it’s only a matter of time before we see PCI-E 4.0×1 10GbE NICs, though they’ll more likely be PCI-E 4.0×2 or x4 cards to allow them to be used in 3.0 slots.

Thermals is the other consideration. You typically want breathing room around your cards for heat to dissipate and fans to work. SAS cards can run hot, so much so that I wanted to add a fan to the one in Nasira after realizing how to add one to the 10GbE NICs in my OPNsense router. And even for 10mm fans, I need at least one slot space available to give room for the fan and airflow.

So with all of that in mind, I swapped out the Sabertooth 990FX board for the ASUS X99-PRO/USB 3.1.

Wait, hang on a sec…

So after initially jettisoning the idea of a platform upgrade, why am I doing a platform upgrade? In short… memory prices right now. I was able to grab 64GB of DDR4-3200 RAM from Micro Center for about 200 USD (plus tax) – about 48 USD for each 2x8GB kit. Double the memory, plus quad-channel.

And PCI-E 3.0. That was the detail that pushed me to upgrade after looking at the PCI-E lane assignments with the 5820k, which is a 28-lane CPU. Fewer lanes compared to the 990FX, but still enough for the planned NVMe upgrade. (4 lanes to the 10GbE NIC, 8 to the SAS card, 16 to the NVMe carrier card.) While upgrading to the 5960X is an option to get more PCI-E lanes – they’re going for around 50USD on eBay as of when I write this – it isn’t something I anticipate needing unless I upgrade the SAS card.

It’s also kind of poetic that it’s my wife’s X99 mainboard and i7-5820k that will be the platform upgrade for Nasira. Since acquiring that board and processor freed up her Sabertooth 990FX and FX-8350 to build Nasira in the first place.

Performance

So how does the new platform perform compared to the old? Well this probably speaks for itself:

That is a multi-threaded robocopy of picture files from a WD SN750 1TB to one of the Samba shares on Nasira. That’s the first time I’ve ever seen near. full. 10GbE. saturation. That transfer rate is 1,025,054,911 bytes per second, which is about 997.6 megabytes per second. I never saw anything near that with the Sabertooth 990FX. Sure I got somewhat better performance after adding the SLOG, but it’s clear the platform was holding it back.

More and faster memory. Faster processor. PCI-E 3.0.

But… ECC….!!!

Hopefully by now the religious zealotry and doomsday catastrophizing around not using ECC with ZFS has died down. Or does it persist because everyone is copying and pasting the same posts from 2013? It seems a lot of people got a particular idea in their heads and just ran with it merely because it made them sound superior.

The move to the 5820k does mean moving to non-ECC RAM. And no, there isn’t nearly the risk to my pool that people think… I went with ECC initially merely because the price at the time wasn’t significantly more expensive than non-ECC, and the mainboard/processor combination I was using supported it.

And when I wrote the initial article introducing Nasira, I said to use ECC if you can. Here, though, I cannot. The X99 board in question doesn’t support ECC, and neither does the processor. And getting both plus the ECC DDR4 is not cheap. It’d require an X99 mainboard that supports it, plus a Xeon processor. Probably two Xeons depending on PCI-E lane counts and assignments. And as of when I write this, the memory alone would be over 50 USD per 8GB stick, whereas, again, the memory I acquired was under 50 USD per pair of 8GB sticks.

But, again, by now the risk of using non-ECC with ZFS has likely been demonstrated to have been well and truly overblown. Even Matt Ahrens, one of the initial devs behind the ZFS filesystem, said plainly there is nothing about ZFS that requires ECC RAM. So I’m not worried.

And if your response to this is along the lines of, “Don’t come crying when your pool is corrupted!”, kindly fuck off.

Because let’s be honest here for a moment, shall we? It’s been 7 years since I built Nasira. In that time, there have probably been thousands of others who’ve taken up a home NAS project using FreeNAS/TrueNAS and ZFS. With a lot of those likely also using non-ECC simply to avoid the expense needed to get a platform that supports ECC RAM along with the memory itself. A lot of them likely followed a similar story to how I first built out Nasira: platform upgrade that freed up a mainboad/processor, so decided to put it to use. Meaning desktop or gaming mainboard, desktop processor or APU, and non-ECC DDR3 or DDR4.

Now presuming a small percentage of those systems suffered pool corruption or failures, how many of those could be legitimately attributed to being purely because of non-ECC RAM with no other cause?

In all likelihood – and let’s, again, be completely honest here – it’s NEXT. TO. NONE. OF. THEM.

And with Nasira, if anything is going to cause data corruption, it’s likely to be the drive cables, power cables, or the 10+ year-old power supply frying something when it gives up the ghost. Which is why I’m looking to replace it later this year for the same reason as the other pair of 4TB hard drives: age.

Again, use quality parts. Use a UPS. Back up the critical stuff, preferably offsite.

Now that’s not to say there is no downside to not using ECC, as there is one: you’ll get quite a lot of checksum errors during scrubs. (Note: actually if you aren’t using ECC RAM and you do see checksum errors during scrubs or normal use, change out your mainboard battery.)

Current specs and upgrade path

So with the upgrade, here are the current specifications.

CPU: Intel i7-5820k with Noctua NH-D9DX i4 3U cooler
RAM: 64GB (8x8GB) G-Skill Ripjaws V DDR4-3200 (running at XMP)
Mainboard: ASUS X99-PRO/USB 3.1
Power: Corsair CX750M green label
Boot drive: ADATA ISSS314 32GB
SLOG: HP EX900 Pro 256GB
HBA: LSI 9201-16i with Noctua NF-A4x10 FLX attached
NIC: Mellanox ConnectX-3 MCX311A-XCAT with 10GBASE-SR module

The vdevs are six (6) mirrored pairs totaling about 54TB.

Soon I will be adding a metadata vdev, which will be two NVMe mirrored drives on, likely, a Sonnet Fusion M.2 4×4 carrier card. The SLOG will be moved to this card as well. That card doesn’t require PCI-E bifurcation, unlike other NVMe expansion cards like the ASUS Hyper M.2 x16 and similar cards, since it uses a PLX chip. But that’s why the Sonnet Fusion card is also more expensive. (X99 mainboards almost always require a modded BIOS to support bifurcation.)

There’s also the SuperMicro AOC-SHG3-4M2P carrier card. But that is x8, compared to x16 for the Sonnet Fusion. And the manual says it may require bifurcation whereas, again, the Sonnet Fusion explicitly does not.

There are off-brand cards as well. And 10Gtek sells NVMe carrier cards as well that do or do not need bifurcation. Most of what you’ll find is x8, though. 10Gtek has a x16 card, but I can’t find it for sale anywhere. And I may opt for a x8 card over the Sonnet Fusion since overall performance is unlikely to completely saturate the x8 interface under typical use cases. And PCI-E 3.0×8 is far, far more bandwidth than can be saturated with even 10GbE.

So stay tuned for updates.

Pool corruption!

So in the course of this upgrade, I suffered pool corruption. Talk about bad timing on it as well since it happened pretty much as I was trying to get the new mainboard online with my ZFS pool attached to it. So was it the non-ECC RAM? Have I been wrong this entire time and will now repent to the overlords who proclaim that one must never use non-ECC RAM with ZFS?

Yeah, no.

Initially I thought it was a drive going bad. TrueNAS reported one of the Seagate 10TB drives experienced a hardware malfunction – not just an “unrecoverable read error” or something like that. A lot of read errors and a lot more write errors being reported in the TrueNAS UI. And various error messages were showing on the console screen as well with the drive marked as “FAULTED”.

Thankfully Micro Center had a couple 10TB drives on hand, so I was able to pick up a replacement. Only to find out the drive wasn’t the issue as the new drive showed the exact same errors. The problem? The drive cable harness. If only I’d thought to try that first.

Something about how I was pulling things apart and putting them back together damaged the cable. And that it affected only one of the drives on the harness was the confusing bit. I’m sure most seeing what I observed would’ve thought the same, that the drive was going instead of the cable harness.

Unfortunately the back and forth of trying to figure that out resulted in data corruption errors on the pool, but thankfully to files that I could rebuild or re-download from external sources or restore from a backup. An automatic second resilver on the drive, which started immediately after the first finished, saved me from needing to do that and corrected the data corruption issue. At the cost of another 16 hour wait to copy about 8TB of data, about the typical 2 hours per TB I’ve seen from 7200RPM drives. (5400RPM drives tend to go at 2.5 hours per TB.)

So lesson learned: if TrueNAS starts reporting all kinds of weird drive errors out of the blue, replace the drive cable harness first and see if that solves the problem.

On the plus side, I have a spare 10TB drive that I thought was dead. But it came at a cost I wouldn’t have had to spend if I was a bit more diligent in my troubleshooting. Again, lesson learned.

Since the resilver finished, the pool has been working just fine. Better, actually, than when it was attached to the AMD FX, though the cooling fan on the SAS card is probably helping there, too.

Coming full circle

Build Log:

When I first built Nasira almost 7 years ago, I knew the day would come when the first pair of 4TB hard drives would be pulled and replaced. Whether due to failure or wanting to evict them for larger capacity drives. In late 2021 I wrote about needing to replace one of the second pair of 4TB drives due to a drive failure.

Now it’s for needing more storage space. First, here are the current specifications:

CPU: AMD FX-8350 with Noctua NH-D9L
Memory: 4x8GB Crucial DDR3-1600 ECC
Mainboard: ASUS Sabertooth 990FX R2.0
Chassis: Rosewill RSV-L4500 with three 4-HDD hot-swap bays
Power: Corsair CX750M (green label)
OS: TrueNAS SCALE 22.12
Storage: 2x 16 TB, 2x 4 TB, 4x 6 TB, 2x 10TB, 2x 12 TB

Somehow, despite its bad reputation, the Corsair CX750M green label I bought back in 2013 is still chugging along with no signs of failure. Yet. But it’s connected to a pure sine wave UPS and running under a modest load at best, so that “yet” is likely a ways off.

Due to our ever-expanding collection of movies and television shows – of which Game of Thrones on 4K was the latest acquisition, at around 300GB per season – plus the push to upgrade our 1080p movies to 4K releases, where available, we were fast running out of room. Plus my photography really took off last year, so I had a lot more RAW photo files than in previous years.

All of that adds up to terabytes of data.

So when I saw that I could get a pair of 16TB drives for 500 USD – yes, you read that right – I just couldn’t pass them up. A single 16TB drive for less than I paid for a pair of 4TB drives 7 years ago.

So out with the old, and in with the new.

Swapping ’em out

Replacing the drives was straightforward using TrueNAS’s user interface. It’s the same process you’ll follow to replace a dead drive. The only difference is you’re doing it for all drives in a vdev. And since my pool is made up of nothing but mirrored pairs, I’m replacing just two drives.

Here’s where having a drive map will come in very handy. I mentioned in my aforementioned article about the drive failure that you should have a chart you can readily reference that shows you which drive bay has which HDD so you eliminate the need to shut down the system to find it. And it’s difficult to overstate how handy that was during this exercise.

The first resilver finished in about 9 hours, 46 minutes, or about 107 MiB/s to copy 3.59 TiB. The second resilver went a little quicker, though, finishing in a little over 6-1/2 hours and running at an average shy of 160 MiB/s. The new drives are Seagate Ironwolf Pro drives, ST16000NE000 specifically, which their data sheet lists as having a max sustained transfer rate of 255 MB/s.

So now the pool has a total raw capacity of 54 TB, effective capacity (as reported by TrueNAS) of 48.66 TiB.

The pool also showed the capacity immediately after the second 4TB drive was replaced and the resilver had just started. If this was a RAID-Zx vdev, it wouldn’t show the newer capacity till the last drive was replaced. This was one of the central arguments for going with mirrored pairs I raised in my initial article.

Replacing more drives

It’s quite likely that later this year I’ll replace the other 4TB pair with another 16B pair. Less for needing space, more because of the age of the drives. That second pair is where one had to be replaced, and the other drive is approaching 7 years old. Sure no signs of dying that I can see, no SMART errors being reported on it, but probably still a good idea to replace it before ZFS starts reporting read errors with it.

And when I replace those, I’ll have a much faster option: removing the mirrored pair from the pool rather than replacing the drives in-place. This will ultimately be much faster since the remove operation will copy all the data off to the other vdevs – meaning it’s only copied once. Then just pop out the old drives and pop in the new ones, as if I was adding more drives to the pool instead of merely replacing existing ones.

Had I realized that option was already there, I would’ve used it instead of relying on rebuilding each disk individually.

And while the option of removing a vdev entirely isn’t available for RAID-Zx vdevs, it’ll likely be coming in a later ZFS update. Removing mirrored vdevs was likely a lot easier to implement and test up front.

Why replace when you can just add?

Let’s take a brief aside to discuss why I’m doing things this way. Replacing an existing pair of drives rather than adding new drives to the pool. There are two reasons.

The main reason is simply that I don’t have any more available drive bays. Adding more drives would require finding an external JBOD enclosure or migrating everything – again! – into another 4U chassis that can support more hot-swap bays. Or pulling out the existing hot-swap enclosures for 5×3 enclosures, which is just kicking the can down the road. Or… any other multitude of things just to get two more drives attached to the pool.

No.

But the secondary reason is the age of the drives that I replaced. The two drives in question had been running near continuously for almost 7 years. They probably still have a lot of life in them, no doubt, especially since they were under very light load when in service, and will be repurposed for lesser-critical functions.

Yes I’m aware that meant getting 12TB additional storage for the price of 16TB, something I pointed out in the article describing moving Nasira to its current chassis. But then if you’ve ever swapped out existing storage for new, you’re also only getting less additional storage compared to what you paid for. Paying for a 2TB SSD to replace a 1TB, for example.

Next steps

I’ve been considering a platform upgrade. Not out of any need for performance, but merely to get higher memory capacities. But ZFS in-memory caching seems to be a lot more under control migrating from TrueNAS Core to SCALE. And the existing platform still works just fine with no signs of giving up the ghost.

But the next step for Nasira is taking advantage of another new ZFS feature: metadata vdevs. And taking full advantage of that will come with another benefit: rebalancing the pool. Since fully taking advantage of it will require moving files around – moving them off and back onto the pool or moving them around.

And special vdevs is a great feature to come to ZFS since it allows for a hybrid SSD/HDD setup, meaning the most frequently-accessed data is now on high-speed storage. Deduplication has the same benefit with a dedup vdev.

Whether you’ll benefit is, of course, dependent on your use case.

In my instance, two of my datasets will benefit heavily from the metadata vdev: music and photos. Now I do need to clean up the photos dataset since I know there are plenty of duplicate files in there. I have a main “card dump” folder along with several smaller folders to where I copy the files specific to a photo shoot. Overall that dataset contains… several tens of thousands of files.

And the music folder is similar. Several hundred folders for individual albums, meaning several thousand tracks. And since my wife and I tend to stream our music selection using a Plex playlist set to randomize, the benefit here is reduced latency jumping between tracks since the metadata will be on higher-speed, lower-latency storage. The TV folder is similar to the music folder in that we have several thousand individual files, but contained in fewer folders.

The movies folder, though, won’t really benefit since it’s only a few hundred files overall.

Really any use case where you have a LOT of files will benefit from a metadata vdev. And it’ll be better than the metadata caching ZFS already does since it won’t require accessing everything first before you see the performance benefit. Nor do you have to worry about that cached data being flushed later and needing to be refreshed from slow disks since you’re supposed to build the special vdev using SSDs.

Now I just need to figure out how to get more NVMe drives onto Nasira’s AMD 990FX mainboard…

Virtualization server gets more storage

An NVMe solid-state drive in a dual-Opteron server… Just ponder that for a moment. Why in the world would anyone do that?

The big reason: storage is cheap. And for 80 USD, a 2TB NVMe solid-state drive is really cheap. And given this is a much older virtualization server, there is no need to go with anything high end.

Specs:

  • CPU: 2x AMD Opteron 6278
  • RAM: 64GB Registered DDR-3 1600Mhz
  • Storage: Samsung 850 EVO M.2 500GB

Recall that back in March 2018, I replaced an older dual-Xeon HP workstation with a dual-Opteron server setup for virtualization. Going away from a system made in the late 2000s to one with hardware from the early 2010s. But in doing that I was doubling the available core count. From a dual quad-core with HyperThreading, so 8 logical cores per processor, to two processors with 16 cores each. Later I upgraded the RAM to 64GB Registered ECC – after I accidentally bought registered sticks for Nasira and couldn’t sell them off.

And in building the system, I wanted to eliminate cables as best as possible. The CPU and ATX power connectors to the mainboard were unavoidable. But if a power or data cable could be avoided, I wanted to avoid it. The fans are powered off the mainboard, the GPU is onboard, so that leaves the storage.

And here, an SSD was the obvious choice. I had a 500GB Samsung 850 EVO I mistakenly bought for my wife’s upgrade to an i7-5820k for a mainboard that wouldn’t support it, and a StarTech M.2 to 2.5″ enclosure to use it in something else. But the enclosure still requires a power and data cable. So how to get around that? Thankfully I was able to buy a PCI-E adapter board that handled the power and data, so no additional cables.

Storage requirements

For most virtualization setups, 500GB is more than enough. My Plex VM sits on 32GB storage and uses about… half of it. (It runs off Fedora Server.) I have an OpenVPN instance on another VM that’s also 32GB and also running off about half of the space. And my only other virtual machine (at this moment, at least) is a mail server sitting on 64GB, but using 1/4th of that.

I’d been planning to upgrade the storage for a while as there are other projects I want to get into. And when I saw Micro Center having a sale on their Inland NVMe SSDs, and saw a 2TB NVMe SSD for only 80 USD, there was no way I could say No.

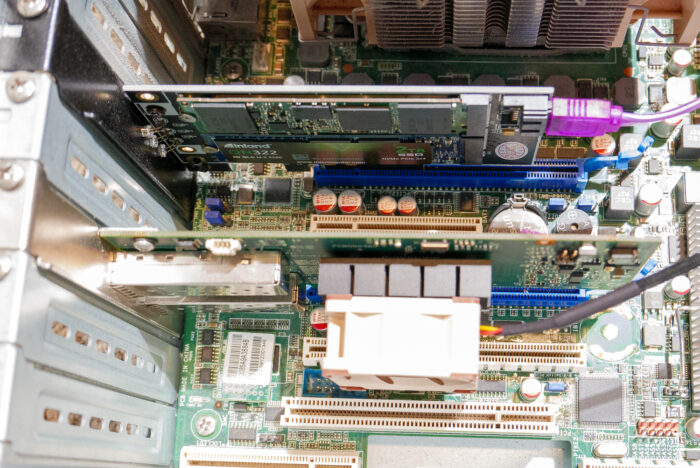
Alongside that I found an adapter board that could take one each of SATA M.2 and NVMe M.2 on the same board. It does require a SATA cable for the SATA M.2, unlike the previous adapter board, but nothing more. Both drives are powered by the PCI-E slot.

Wait, it works? But… bottleneck!

So did the system even recognize the drive? Well of course it did. And I had no reason to think it wouldn’t.

NVMe SSDs are PCI-Express devices after all, and the PCI-Express specification means that a PCI-Express 3.0 device can be used in a PCI-Express 2.0 slot. I already have that in Nasira, actually, where I’m using an NVMe drive as an SLOG.

But how well does it perform? Better than the SATA drive, I’ve definitely noticed. Plex is a lot snappier and the VMs load much faster. System updates on each VM are faster, too. And that along with the much better capacity was the point of that exercise.

It’s also a QLC drive with a rated top synchronous read speed only just a little higher than what PCI-E 2.0×4 can provide, so it was never going to saturate a PCI-E 3.0×4 connection anyway. And under this use case will never saturate a 2.0×4 connection. But it’s still be far better than a SATA SSD and doesn’t need any cables.

I was after the storage real estate, primarily. That it came in an NVMe SSD that I could install with an interface board and not have to worry about additional cables is the major bonus.

Cooling everything down

10GbE cards can run hot. Very hot, actually. So much so that I’ve actually considered watercooling the one in Mira. But as I discovered building my OPNsense router, the solution is simple: quiet 40mm fan and VHB tape to stick it to the heatsink. Problem solved. You don’t need to use a Noctua fan specifically, as there are plenty of quiet 40mm fans on the market. I just happened to have a Noctua 40mm fan that I wasn’t using for anything.

Goodbye, Proxmox!

As of the time I installed the new NVMe SSD, the server was still running Proxmox 5. And not even the latest minor version of that. Merely upgrading it to the latest 5.x version, let alone installing Proxmox 7 – the latest version as of this article – would require… a lot of work.

The easiest route would be to jettison the VMs and install Proxmox 7 clean. Trying to upgrade in-place would’ve been… “time consuming” wouldn’t adequately explain it. But that would only get me up to the latest version. Keeping it up to date is the greater chore.

Without a support subscription – €190 (€95 per CPU socket) per year for this box for the lowest tier – the only way to get minor version updates to keep Proxmox updated is through the DVD image. Then there’s the continual nagging whenever I log in that I don’t have a subscription:

So… I’m done with it. Just completely done with it.

So back to VMware, then, or what?

Hello, VirtualBox!

I was jettisoning the existing VMs regardless. Plex is easy to migrate, I no longer use the OpenVPN VM since building an OPNsense router, and the mail server was migrated to a physical box.

But for a much smoother and flexible upgrade path going forward, I moved to VirtualBox and Docker. And I went the full headless route, meaning creating and controlling the VMs through the command line. Sure it means creating VMs is a little more of a chore without a script to automate the process. Which is something that’ll be relatively easy to set up since my VMs will usually have pretty similar settings – core count, storage space, or memory will vary as needed. But the upgrade path is a LOT more flexible.

How so?

Ubuntu and Fedora (among others) allow for in-place upgrade to the next major version. My Plex VM, for example, had been getting upgraded in-place (using the dnf-plugin-system-upgrade package) since I first built this virtualization server with a fresh VM for Plex. That was Fedora 27. Didn’t need to touch it till now when I created the new VM with VirtualBox.

And VirtualBox can be upgraded via the official repository or – as is the case already with Plex, unless you enable the repository – manually on my own watch. Docker containers allow similar flexibility. Being able to use Windows Remote Desktop instead of the browser to interact with the VM’s terminal is also a bonus.

Now sure, updates on the bare metal system does mean shutting down all the VMs. But I’d have to do that with Proxmox or any virtualization system anyway.

Building a router

Build Log:

Amazing that it’s been… 6 years (as of this writing) since I decided to pursue 10GbE.

First trying to build a custom switch, then dropping all that when I learned that a lot of retired Quanta 10GbE switches dropped on eBay. Then dropping that switch two years later for the far quieter, lighter, and just better overall MikroTik CRS317. Even ordering it direct from Latvia. And then last year replacing the fans with the far quieter, Noctua NF-A4x20 FLX.

So why am I now talking about building a router?

Google Fiber’s buggy interface

Before Google Fiber, I was with Time Warner Cable (now Spectrum), and I used my own cable modem and router. Never had any issues as a result. With Google Fiber, though, we were given their router box from the outset. As much as I don’t like not being able to use my own hardware, I didn’t really have a choice here. (Or so I thought, actually… Apparently I could’ve used my own router from the outset, but their documentation didn’t make it look that way.)

Google Fiber has changed how their routers are configured a few times. Initially, like most every router out there, you connected to it directly via the IP address. Then they made it so everything is configured by the Google Fiber site. The latter was better, since it allowed you to handle things remotely but still securely, such as enabling or disabling any port forwarding, allowing you to enable/disable it more-or-less on demand from anywhere.

Recently this has become more frustrating and buggy. Port forwarding in particular. Plus I didn’t have nearly as much control over other aspects as I would like.

Thankfully Google Fiber has an account option allowing me to use my own router and put theirs into “bridge mode”. So I did just that and switched over to using the MikroTik CRS317 as the router.

[Insert Nuke’s Top 5 voice-over]: It did not go well.

RouterOS performance

Sure port forwarding was far easier than using Google Fiber’s buggy interface. But performance… fell off a cliff. Instead of getting 2Gb down, I was getting around 500Mb. Something my research told me was largely unavoidable. Both with RouterOS versions 6 and 7.

Hardware is the primary reason. It’s just too underpowered with a dual-core ARM 32-bit processor running at only 800Mhz. That’s more than capable as a 10GbE switch, especially if you’re not loading up all of the ports. (I’m using 7 of 16 as of this writing, one being a link to a MikroTik CSS610.) As a router, though… not so much.

So the solution then is… building my own router using spare hardware I have lying around.

Requirements and Specs

The requirements are simple: gateway between the MikroTik switch and the Google Fiber box while being able to handle 2Gb up, 1Gb down without a problem. So what level of hardware would work?

Linus Tech Tips most recent video about building a router used an old Dell Optiplex 7010 with an Intel i5-3770. And with that being just a Gigabit gateway, the CPU was barely being touched.

And the hardware for the official pfSense appliances is also very lightweight. The Netgate 4100 is the lightest that would still meet my requirements. And it has an Intel Atom C338R 1.8GHz dual-core processor with 4GB RAM and sipping only a few watts of power.

I’m going a little overkill merely because I have this lying around not being used:

CPU:AMD A8-7600 APU with Noctua NH-D9L
Mainboard:Gigabyte GA-F2A88X-D3HP
RAM:16GB DDR3-1600
PSU:EVGA 650 G2
Storage:Inland Professional 128GB 2.5″ SATA SSD
WAN NIC:10Gtek X540-10G-1T-X8 10GbE RJ45
LAN NIC:Mellanox ConnectX-2 10GbE SFP+
Chassis:Silverstone GD09
Operating system:OPNsense (with latest updates as of this writing)

Okay, not all of it I had lying around. The 10Gtek card I needed to acquire, along with replacing the fans in the chassis, but that was it.

Now why a 10GbE card for the WAN link when I only have 2Gb service? So I don’t need to upgrade it later.

Google Fiber is rolling out 5Gb and 8Gb full-duplex service starting early 2023, so I’m already set for either option. I don’t need to swap out any hardware to support it. And with the 10GbE switch as the backbone of my home network with a 10GbE card in mine and my wife’s desktop systems, we’re already well positioned to take full advantage of it.

And if your router needs to handle faster-than-Gigabit traffic to the Internet, pay attention to PCI-E lanes with your mainboard and processor combination, in particular with slot bandwidth when you have certain slots populated to ensure you’re not cutting off bandwidth to your card(s). 2.5GbE NICs should run in a PCI-E 2.0×1 slot without issue. 5GbE and 10GbE cards require additional consideration.

Thankfully the FM2+ board and APU have enough lanes. The PCI-Express slot with the Mellanox card is wired for full x16 while the full-length slot with the 10Gtek card is wired for x4. PCI-E 2.0×4 is more than enough to handle 10GbE.

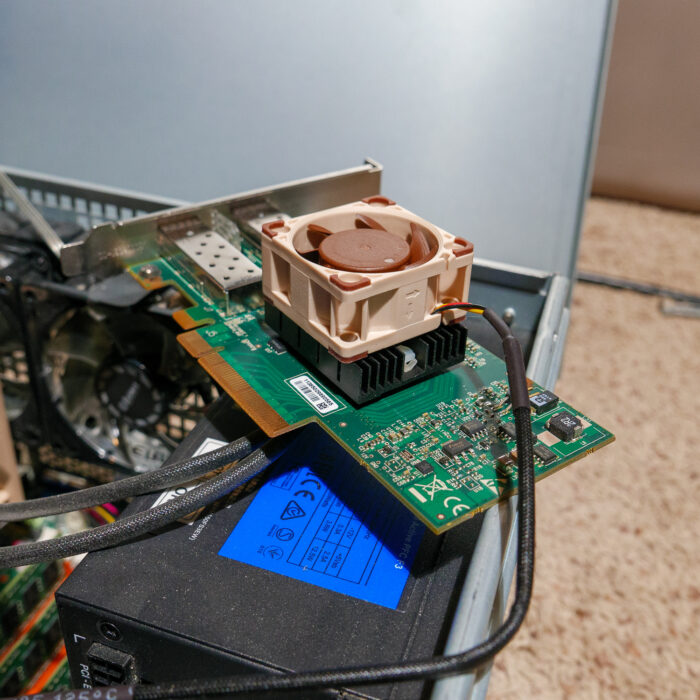
And to keep the NICs running at peak performance and cooler temperatures while still remaining nearly silent, I used 3M VHB to attach a Noctua 60mm fan to the 10Gtek NIC, and a Noctua 40mm fan to the Mellanox.

And I went with OPNsense due to it running on the newer version of FreeBSD – pfSense still uses FreeBSD 12 as of this writing but will update to version 14 with the next major release, which isn’t slated to release until July 2023.

OPNsense and Mellanox

The Mellanox card wasn’t being used out of the gate. Some searching led me to an obscure article mentioning the solution. I needed to create the file /boot/loader.conf.local with this line, which comes from the FreeBSD documentation:

mlx4en_load="YES"

But that leaves the question of why OPNsense does not have support for Mellanox cards enabled by default. Given how popular Mellanox cards are with DIY and homelab setups, they really need to have that enabled by default in future distributions. TrueNAS has that support by default. And I’m pretty sure pfSense has it, too.

So why did OPNsense not do that?

Router-hosted VPN

I have been relying on OpenVPN for a while. First installing it in a Docker container, then moving to a dedicated virtual machine. Neither was optimal, but it was really the only way I could have a self-hosted VPN.

OPNsense allowed me to move the VPN service to the router, allowing me to jettison one of my VMs. This cuts out the extra steps of the router sending traffic to what is, in essence, a second router to determine where to send the traffic.

OpenVPN is installed by default with OPNsense, but I took this as a chance to change over to the lightweight and better-performing Wireguard. And the VPN performance has been much snappier as well. Moving to Wireguard was probably a lesser part of that performance jump compared to being able to have the VPN service on the router.

Going wireless

WiFi 6 is integrated into the Google Fiber router. I do have an older Tenda AC1900 wireless router, but I wanted to keep the WiFi 6 capability. Enter TP-Link and their EAP670 WiFi 6 access point. It has a 2.5Gb RJ45 port that can also be powered via POE+ or the included 12V adapter. I have it connected directly to the 10GbE switch through another RJ45 adapter.

The beauty here is not just cost – I found it for about $150 at Micro Center – but expansion. If I need greater coverage of my house, I can install a second and set up a virtual machine as an Omada controller for hand-off with all of that configuration staying local. It also has the capability for guest networks, though I haven’t used this yet.

Performance and recommendations

My network configuration is now back to what it once was but with a couple slight improvements.

First being the custom router itself. Objectively and subjectively, it’s allowing for a much better connection to the Internet. The speed test when I put the new router into service was higher than the initial speed tests when I first got the Internet service upgrade. Probably about 15% better and it was the first time I saw >2000Mbps on the downlink during a speed test.

And there are two reasons for that improvement. The custom router being one, being able to perform a lot better than the Google Fiber router. The hardware providing the physical connections being the other.

In my last article about the CRS317, I said I used a MikroTik S+RJ10 module to connect the switch to the Google Fiber router. That’s a very high latency connection. Even with a Cat7 cable. Higher still than using dedicated RJ45 hardware. It’s just the nature of the beast.

This changeover allowed me to use an optical fiber connection between the switch and router – the first time I’ve been able to do that. Optical fiber has virtually zero latency across short runs.

And the connection from the router to the Google Fiber box is going through dedicated RJ45 hardware, not an SFP+ RJ45 module that gets very hot. No, seriously. Even with a fan, it was running at over 60°C continuously while the optical fiber modules had no issue with temperature. And with this upgrade, I was able to remove the fan I had blowing down onto the SFP+ module.

So what can you take away from this if you want to build your own router?

1. Have a high-performance switch as the backbone for your network

Avoid the cheap desktop switches. Like the ones that are under $30 for 8 ports.

Two things to look for are 1. whether it supports full-duplex and 2. the switch bandwidth. The switch bandwidth should be higher than the all the ports combined at half-duplex – e.g. an 8-port GbE switch should have switch bandwidth higher than 8Gbps. If the switch specifications don’t even mention “switch bandwidth”, then don’t bother with it as your network’s backbone.

The uplink of the switch will also matter as you’ll need to make sure it’s faster than your Internet connection. So if you’re sticking with Gigabit Ethernet but have a faster-than-Gigabit Internet connection, then something like the MikroTik CSS610 will be perfect as a backbone switch. Just make sure, again, to use an optical fiber connection between that switch and your custom router.

2. Build the router with only one (1) WAN and LAN port, if possible

Don’t build your custom router to also act as a switch. Build it only as a router. This means one port for the LAN, one for the WAN. The LAN port goes to your backbone, the WAN port to your modem or, in my case, ISP-provided router configured to act as a bridge. Even if you want to segment your network so one part is isolated from another, you can generally accomplish that far better and still maintain line-speed or near line-speed performance with a managed switch – e.g., the MikroTik CSS610.

Both ports should be also faster than your Internet connection. For example, if you have a Gigabit Internet connection, buy 2.5GbE NICs. This should ensure that you are able to max out your Internet connection. And if you have less-than-Gigabit Internet, don’t rely on any onboard Ethernet controller unless it’s an Intel chip.

Your custom router will rely on software for moving packets around, so keep it relegated to just one task – moving packets into and out of your home network while blocking everything else you didn’t explicitly request. Having it also move packets between other interfaces will only degrade performance.

So if you’re acquiring hardware to make your custom router, stick with a single dual-port card. I have two separate cards only because I’m using different media – optical fiber between the router and switch, Cat7 between the router and the Google Fiber box. Just make sure the mainboard and processor combination will have enough PCI-E lanes to allow for it. Use an AMD APU or integrated Intel graphics where possible to free up slots and lanes.

3. Connect only the switch to the router. Nothing else.

Sure this kind of seems like a duplicate of #2, but I’m mentioning it in case you decide to use a card with more than two ports.

The switch will handle everything about funneling traffic to and from your router. And if you have any other services on your network, it can prevent traffic from clashing so you can still access those services (e.g., a Plex Media Server) without impacting or being impacted by anyone else’s Internet activity. Provided you aren’t relying on a cheap switch.

4. Don’t forget the UPS

Unfortunately OPNsense appears to support only APC via a plugin you can install, but that only matters if you require monitoring and auto-shutdown. Make sure to get one rated for about… double what your router requires to operate and pay attention to the half-load battery runtime.

Metamask – 2022-12-12

Another phishing attempt. The metamask.io URL was set to link to a phishing site. That’s one of the ways they get you to click on these sites and enter your credentials so they can either sell the credentials or drain your account. They’ll then also change the access credentials if they sell off the account.

Metamask – 2022-12-07

It’s easy to tell for me, at least, when emails are phishing attempts. Especially when they come from companies for whom I have zero relationship. Like Metamask – since I avoid NFTs and most cryptocurrencies like the plague. (And I took the step of removing the link that would’ve been accessible by clicking “Verify My Metamask”. And, obviously, it did NOT take you to Metamask’s website.)


Verify your Metamask

Our system has shown that your Metamask has not yet been verified, this verification can be done easily via the button below. Unverified accounts will be suspended on:
Friday, 09 December, 2022.

We are sorry for any inconvenience caused by this, but please note that our intention is to keep our customers safe and happy. Safety is and remains our priority

Note: Never share your word Secret Recovery Phrase (SRP) or private keys.

Verify My Metamask


Variation – 2022-12-13:

I recently received this variation of the above message. The only significant difference is the last paragraph before the button being removed.


Verify your MetaMask Wallet

Our system has shown that your MetaMask wallet has not yet been verified, this verification can be done easily via the button below. Unverified accounts will be suspended on:
Friday, 16 December, 2022.

We are sorry for any inconvenience caused by this, but please note that our intention is to keep our customers safe and happy. Safety is and remains our priority.

Verify My MetaMask

Crypto phishing email – 2022-12-05

And, of course, the buttons for “Cancel Transaction” and “Log In” go to fake login pages. Classic phishing scam email.

Text for accessibility:

Blockchain.com Wallet

Your funds have been sent

You’ve sent 0.13506102 BTC from your Private Key Wallet. Your transaction is pending confirmation from the BTC network. You can also view this transaction in your transaction history.

If this wasn’t you, please cancel the transaction immediately by clicking the button below, then follow the steps on our website.

Best,

The Blockchain.com Team

Extended warranties and repair plans

“Extended warranties” have a bad rep in retail. In large part because they are pushed by cashiers and sales persons who earn a commission selling them. But they do actually have a purpose. Though anymore, they aren’t called “extended warranties”, but “protection plans”.

Often what creates the bad taste in people’s mouths about these plans is the fact that taking advantage of one can be difficult. And which option you have is entirely up to the retailer selling you the item on which they’re also trying to sell the protection plan. Things have, thankfully, gotten a lot easier. But you still need to be vigilant to protect your consumer rights.

As I’ve detailed on a couple articles on this blog, I’m a photographer. And two years ago I treated myself to a new Nikon Z5 mirrorless camera as an upgrade to my D7200 DSLR. This past summer I also purchased an electric scooter to take some of the burden off my vehicle for maneuvering around to find shots to take around town.

On Sept 24, I was heading out on the scooter when I hit a bump and went down. And my Z5 went down with me. The lens, thankfully, is fine and still working. The Z5, however, showed an error on the screen: “Press shutter-release button to reset.” Except pressing the shutter release did nothing.

When I bought the Z5 from Adorama, I bought a protection plan with it. The plan went through New Leaf Service Contracts, LLC. (All plans Adorama currently sells now go through Extend.) I filed the claim online that same day, providing some basic details of what happened. In the mean time, I also looked at other repair options, including sending it directly to Nikon. (Which would’ve been $400 up front, possibly more later depending on what they found.)

New Leaf called me the following Monday to discuss the claim and get some additional details. About an hour later, I got a follow-up voice mail saying they were denying the claim because the camera was not “properly secured”.

Great…

I tried calling back the same day, but I was told the claim was denied by a manager, so I’d need to speak to a manager, but none were at the office at the time. Unfortunately I wasn’t able to call back in during the needed hours. The initial email I received when the claim was approved included a follow-up email address, so I sent this message to that email:

Good day,

I intended to call in about this to speak to a manager but didn’t have the time today, unfortunately. I received a voice mail yesterday late afternoon informing me this claim had been rejected. According to the voice mail, it was due to my camera not being “properly secured” at the time the drop occurred.

I cannot recall exactly what I said over the phone, but I do not recall being asked whether I had the camera secured in any fashion, and how it was secured if I did. Nor do I recall giving any details of such. I want to clarify that I had the camera secured on a cross-body strap. And a cross-body camera strap is a common means of carrying around a camera. Again, I do not recall ever being asked whether or how I had the camera secured, so hopefully this provides some clarification.

Please re-open this claim in light of this information.

That went on Sept 27.

There is an exception in the coverage policy for “mishandling”, which is understandable. The protection plan covers accidental damage to the camera, and I have the same protection plan over one of my lenses. So clear negligence is not covered, and that’s reasonable.

But as my email above shows, I wasn’t mishandling the camera. And I wasn’t given a chance to say that I had the camera secured let alone how I had the camera secured.

In the interim, I looked at my options for repair, even considering Best Buy’s Geek Squad. And I set up an appointment to drop off the camera body on Sept 30 for mid-afternoon. And who should call about two hours before that appointment? New Leaf.

They re-opened and approved the claim and forwarded everything off to Photo Tech Repair Services. They reached out to me on October 3rd, and I had a shipping label the next day. It went out via FedEx on October 6th and arrived at the repair center the following Monday. Their email said to expect the repairs to take about 2 to 3 weeks, depending on whether they needed to order in parts.

My only complaint with the process was never getting any kind of status update during the repair. No ETA. If they had a page where I could log in and see the repair progress, I was never informed of it. The only indication the repairs were complete came in the form of a FedEx shipping alert the camera was being sent back to me.

So are extended warranties worth it? That really depends on what you’re buying one against and how much it’ll cost to repair versus replace. I say No to a lot of inquiries to purchase repair/replacement plans simply because the device in question is inexpensive to replace.

For expensive electronics, like my aforementioned camera, and major home appliances, they make sense. The repair plan will cost less than the repair cost, especially looking at the quote from Nikon, and it’s certainly far less than the replacement cost.

So in my instance, I definitely came out ahead – once I told the insurance company I wasn’t being cavalier with the camera.

Insurrection, the Fourteenth Amendment, and the President of the United States

The Fourteenth Amendment at Section 3 says this:

No person shall be a Senator or Representative in Congress, or elector of President and Vice-President, or hold any office, civil or military, under the United States, or under any State, who, having previously taken an oath, as a member of Congress, or as an officer of the United States, or as a member of any State legislature, or as an executive or judicial officer of any State, to support the Constitution of the United States, shall have engaged in insurrection or rebellion against the same, or given aid or comfort to the enemies thereof. But Congress may by a vote of two-thirds of each House, remove such disability.

And Section 5 gives Congress the power to “enforce, by appropriate legislation, the provisions of this article”.

The United States Code declares such at 18 USC §2383:

Whoever incites, sets on foot, assists, or engages in any rebellion or insurrection against the authority of the United States or the laws thereof, or gives aid or comfort thereto, shall be fined under this title or imprisoned not more than ten years, or both; and shall be incapable of holding any office under the United States.

Since all the discussion on this is about Donald Trump, the question comes down to this and the presumption that January 6, 2021, was an “insurrection”: could he be disqualified under the Fourteenth Amendment from holding Federal office?

Not letting him campaign

If you’re looking to disqualify him before the fact, your only option is to indict him with violating the Federal insurrection statute – 18 USC §2383 – and winning a conviction that is not then overturned on appeal. There is no other option available.

Congress can pass a resolution declaring Trump ineligible, citing what happened on January 6, 2021, as justification. But resolutions have no force of law.

Bills do have the force of law, but only if properly passed by Congress and signed by the President. So let’s say that Rep. Davide Cicilline (D-RI) gets his wish and gets a bill through the ringer declaring Trump specifically to be ineligible under the Fourteenth Amendment. What then?

It’ll die in the Court the moment Trump challenges it because it’d be a bill of attainder.

So, then, let’s say he gets on the ballot and wins reelection in 2024. What now? Is there no remedy?

Impeach him… yet again

The House always has the power to impeach the President, Vice President, or any civil officer for really… any reason they want. This means if Trump is reelected in 2024 and is sworn into office in 2025, the House could bring impeachment articles against him the moment he is sworn in.

They tried to do that in 2017, so why not? Only this time it’d be on allegation he’s disqualified under the Fourteenth Amendment. He’s already been tried twice, acquitted both times, so.. third time’s a charm?

Writ of quo warranto

There is another option. This could be exercised if the House does not impeach him or the Senate fails to convict or decides against holding a trial. It’s called a writ of quo warranto. I should elaborate first that the writ itself doesn’t remove the person from public office. It leads to a Court trial to determine, by a preponderance of the evidence, whether they should be removed.

Not long after the Fourteenth Amendment was ratified came the Enforcement Act of 1870. Section 14 of that Act required a United States District Attorney to initiate a writ of quo warranto action against any person suspected of holding an office in violation of Section 3, excluding “a member of Congress or of some State legislature”.1“That whenever any person shall hold office, except as a member of Congress or of some State legislature, contrary to the provisions of the third section of the fourteenth article of amendment of the Constitution of the United States, it shall be the duty of the district attorney of the United States for the district in which such person shall hold office, as aforesaid, to proceed against such person, by writ of quo warranto, returnable to the circuit or district court of the United States in such district, and to prosecute the same to the removal of such person from office;”

Why that exclusion? Under the Constitution of the United States, only the House and Senate has the power to remove its own members.2Article I, Section 5: “Each House shall be the Judge of the Elections, Returns and Qualifications of its own Members… Each House may determine the Rules of its Proceedings, punish its Members for disorderly Behavior, and, with the Concurrence of two thirds, expel a member.” And excluding members of a State legislature is about preserving the separation of sovereignty between the Federal and State governments.

That section was repealed in 1948 as being obsolete. Which it actually was by that time. The political landscape even then was far different from 1870 when the Enforcement Act was enacted. Congress chose the writ was an option to remove quickly any Confederates who may have been elected or appointed to Federal office in contradiction of the Fourteenth Amendment. The statute even provided that any writs requested by a United States District Attorney be given priority over all other entries on the docket at a Circuit or District Court.3“and any writ of quo warranto so brought, as aforesaid, shall take precedence of all other cases on the docket of the court to which it is made returnable”

The repeal left behind the existing insurrection statute enacted as part of the Confiscation Act of 1862. That Act also declared that someone guilty of those crimes is “forever incapable and disqualified to hold any office under the United States”. But Congress realized that statutes cannot expand upon the qualifications laid out in the Constitution. Meaning Congress cannot then declare their own where the Constitution is silent. Further the Act was passed in 1862, meaning under the prohibition of ex post facto laws, it couldn’t apply to anyone already engaged in insurrection before the statute was signed into law.

The repeal, though, does not mean quo warranto is not a remedy. Only that no officer of the United States is specifically charged with the “duty” of pursuing one.

The existing quo warranto statute4Chapter 35 of the Code of the District of Columbia says the Attorney General “may” bring action against a person who “unlawfully holds or exercises… a public office of the United States”.

But Trump would easily have a… trump card: insurrection is a specifically-defined crime under the United States Code. As the Fourteenth Amendment grants only Congress the power to enforce Section 3, the argument could easily be made that Congress chose the Federal criminal code as the means of enforcing it, nullifying the writ of quo warranto as an option.

That Congress previously had enacted quo warranto specifically as an option for enforcing Section 3, then later repealed it, supports that argument. That the insurrection criminal statute specifically declares disqualification from office as part of the penalty for conviction also supports it.

Congress intends for a criminal conviction to invoke the Fourteenth Amendment, not mere assertion exercised via a quo warranto action that someone engaged in an insurrection.

This means quo warranto doesn’t become an option unless the person has been previously convicted of insurrection or removed from office via impeachment.

That is, unless Congress makes it one again.

Does Section 3 even apply to Trump?

But then there’s this question: does Section 3 of the Fourteenth Amendment apply to the Office of the President of the United States? This debate is arising out of this clause: “having previously taken an oath, as a member of Congress, or as an officer of the United States”.

The President is not an “officer of the United States”. He commissions them. We see this in Article II of the Constitution at Section 2:

[The President] shall nominate, and by and with the Advice and Consent of the Senate, shall appoint Ambassadors, other public Ministers and Consuls, Judges of the supreme Court, and all other Officers of the United States…

And in the same at Section 4:

The President, Vice President and all civil Officers of the United States, shall be removed from Office on Impeachment for, and Conviction of, Treason, Bribery, or other high Crimes and Misdemeanors.

The President is separately listed from “officers of the United States”. As such the President is exempt from Section 3 of the Fourteenth Amendment. That is a plain reading of the Constitution.

This also means no person who served as President who is then convicted of insurrection under 18 USC §2383 for acts undertaken while that person was President cannot be disqualified from office. The provision of 18 USC §2383 could not apply. To apply it would mean a statute enacting an additional qualification for office beyond that stated in the Constitution.

Amending the Constitution is the only way to make it stick.

State legislatures and the Electors

No one has so far described this as another remedy, so I just wanted to put it out there to get ahead of it: State legislatures declaring that the Electors they appoint cannot cast a vote for Donald Trump.

I’ve said before that the State legislatures have the sole power to determine how the Electoral Votes are cast. That they put that question before the people of that State is a mere courtesy and one that can be revoked at any time.

But I’ve also said this in arguing that the National Popular Vote Interstate Compact is unconstitutional: “If a State turns to the People therein to determine how to award the Electoral Votes, then they must not award them in such fashion that is obviously contrary to how those people vote.”

So could the State legislatures pass a binding resolution forbidding Electors from casting votes for Donald Trump? No. Not only would such be unconstitutional since it would amount to casting votes in contradiction to how the people of that State voted, it could also be construed as a bill of attainder.

Conclusion

In short, absent an amendment to the Constitution enacting otherwise, impeachment by the House and conviction by the Senate is the only way Donald Trump can be deemed ineligible by the Constitution of the United States from ever again holding any office under the United States.

References[+]