10Gb home network – Retrospective

Build Log:

Significant time and some not-insignificant expense went into bringing this project to fruition. Only to be surpassed by something significantly better and less complicated.

That is a risk you take with projects like this, though. And the question is how you anticipate and respond to it.

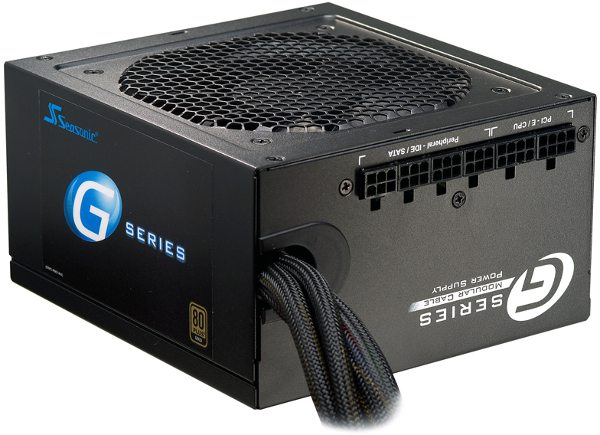
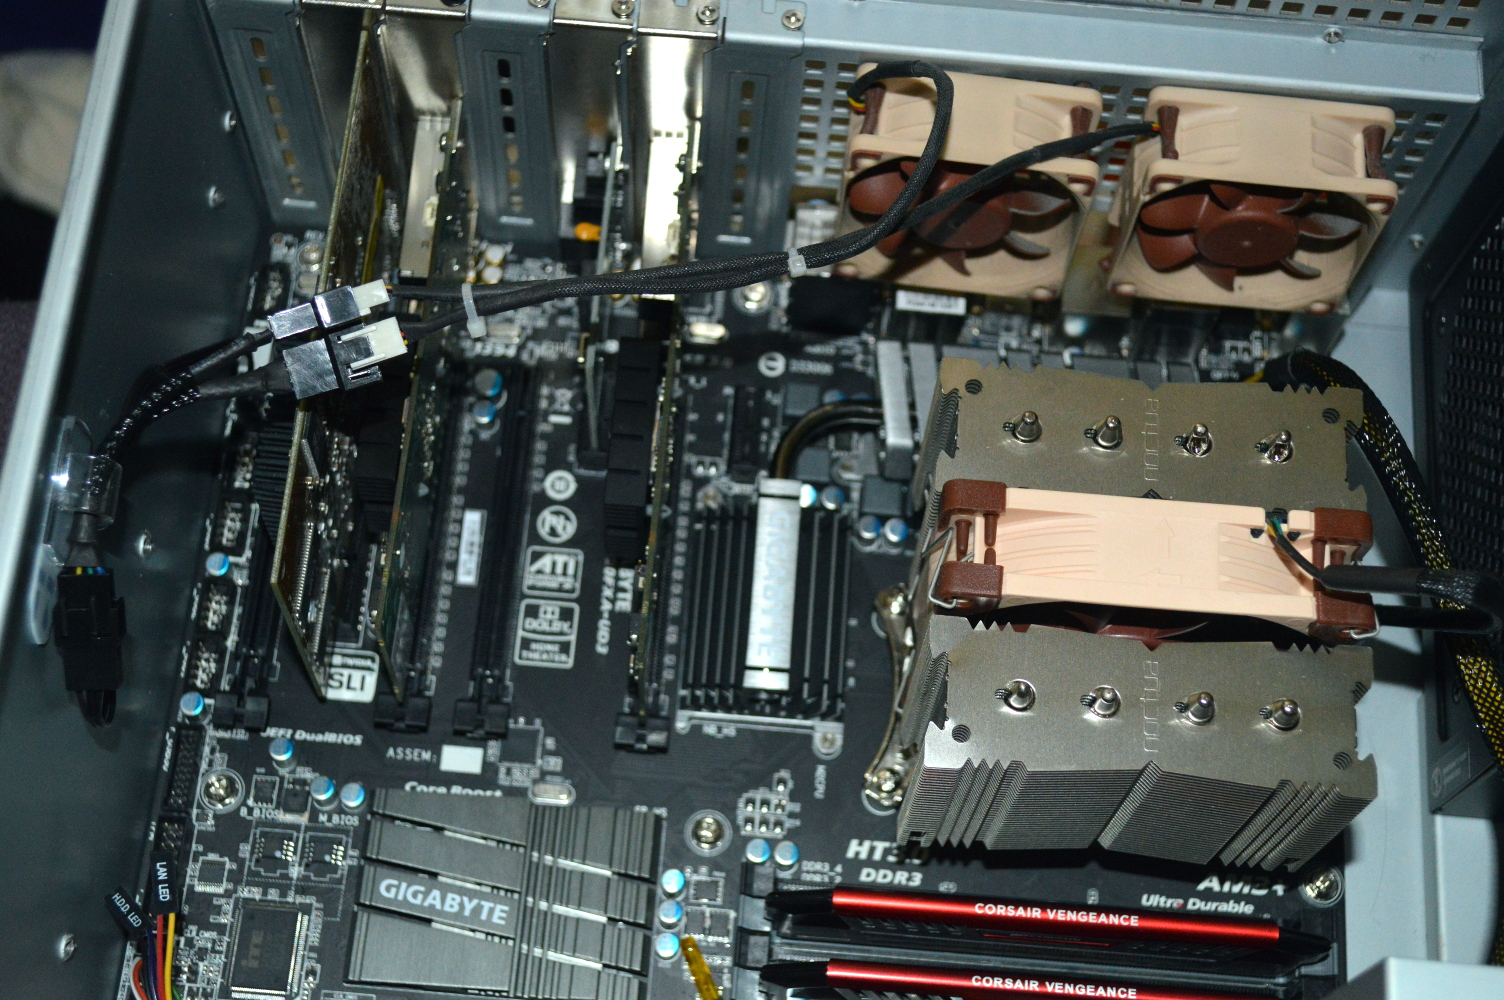
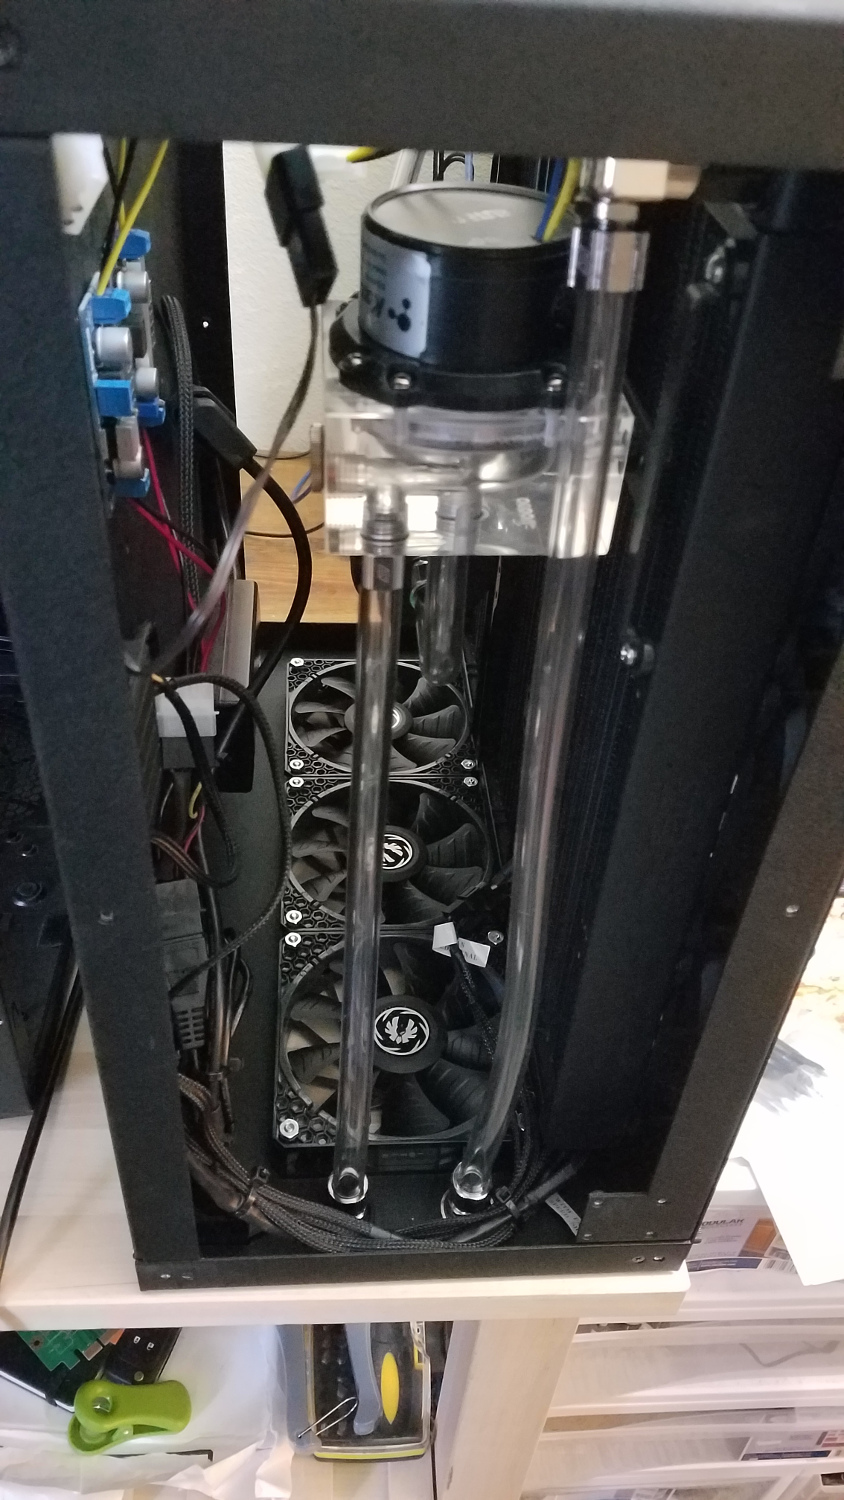
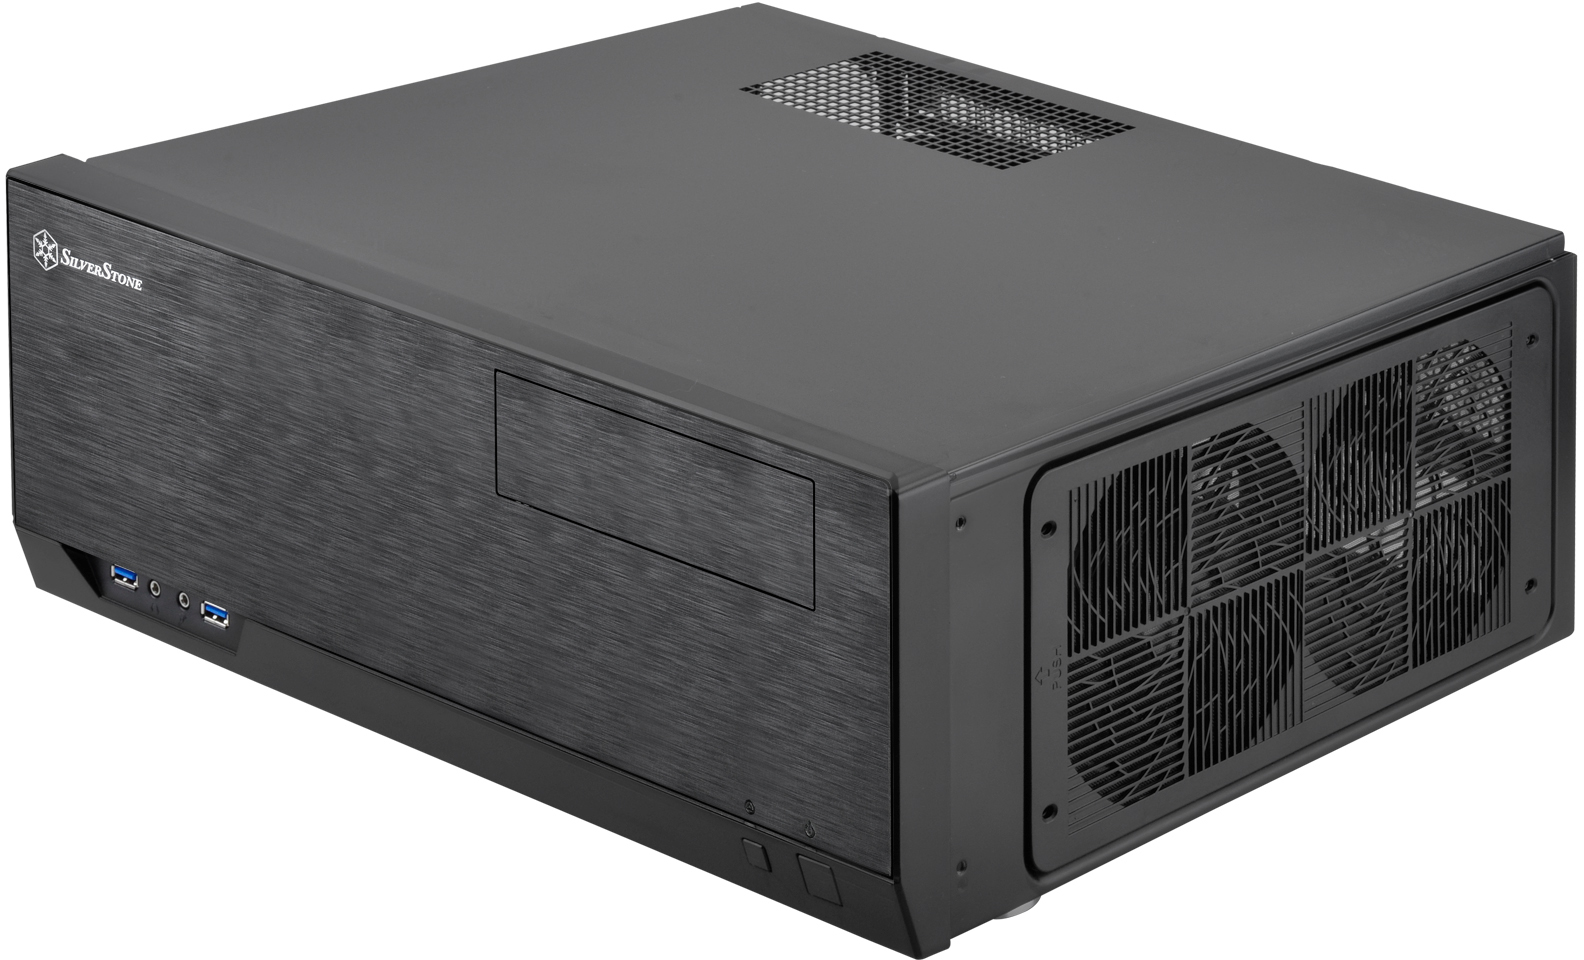
I anticipated the risk by using as much of my existing hardware as possible. Aside from the transceivers and cables, and also the network cards, only two new pieces of hardware were acquired for this project: the Noctua NH-D9L, and the SeaSonic power supply. And there was also the Silverstone GD09 chassis for the switch that ultimately didn’t get used. Everything else was hardware I already had. So the out of pocket risk was light, staying under 200 USD combined.

And then I discovered recently, courtesy of Linus Tech Tips (video below), that a lot of surplus, refurbished 10GbE SFP+ switches were recently dropped on eBay.

The switch in question is the Quanta LB6M, which is a 24-port SFP+ 10GbE switch, 1U rack height, and most of the listings on eBay (as of the time I write this) are for 250 USD or less, with varying costs for shipping. So I decided to acquire one to replace my custom switch. I don’t have it as of the time this article goes live, but it’ll basically be a drop-in replacement to the existing switch when I do receive it.

The only downside is they are built for server rooms, meaning they are loud out of the box. I will be seeing what I can do to quiet it down, so keep an eye out for a revisit on that. Whether I can will depend on the specifications for the fans and power supplies, as well as how the switch is constructed.

Brand new switches with that port count are several thousand dollars, with lower port counts typically starting at around a thousand dollars. And they’re built to connect clusters into 10GbE connections, such as for high performance computing clusters or storage-area networks using optical fiber.

So… yeah. A lot of time and effort displaced… by an eBay listing.

And I kept an eye on eBay during the course of this project. It’s why I tried to keep the out of pocket cost low. Easily the single greatest expense in this whole project were the transceivers and cables. Though the 10GbE cards run a close second in aggregate cost, given how many I acquired. Most of which will probably be sold off depending on what I decide to do with them.

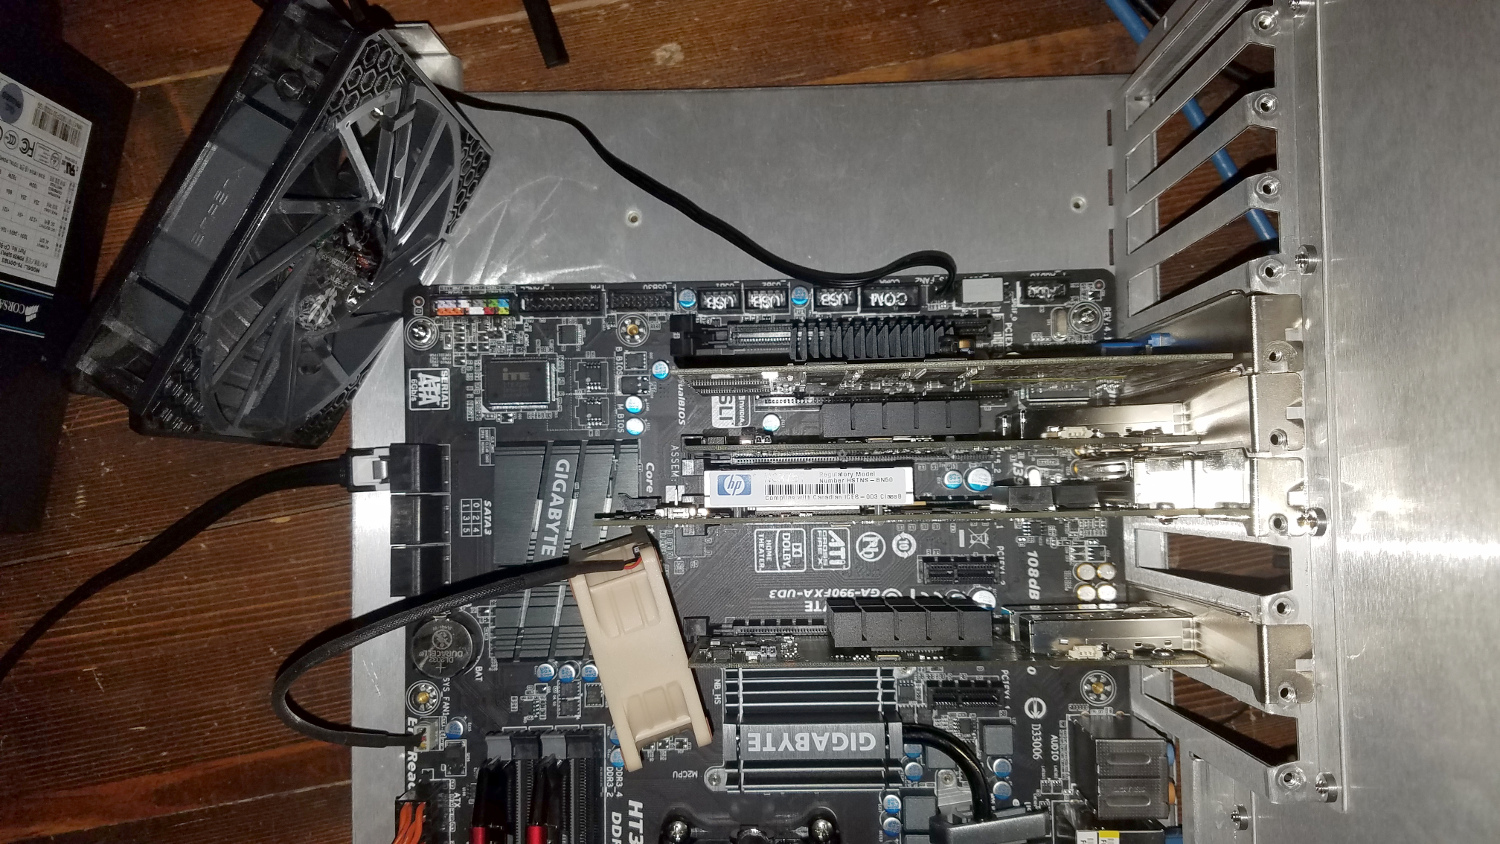
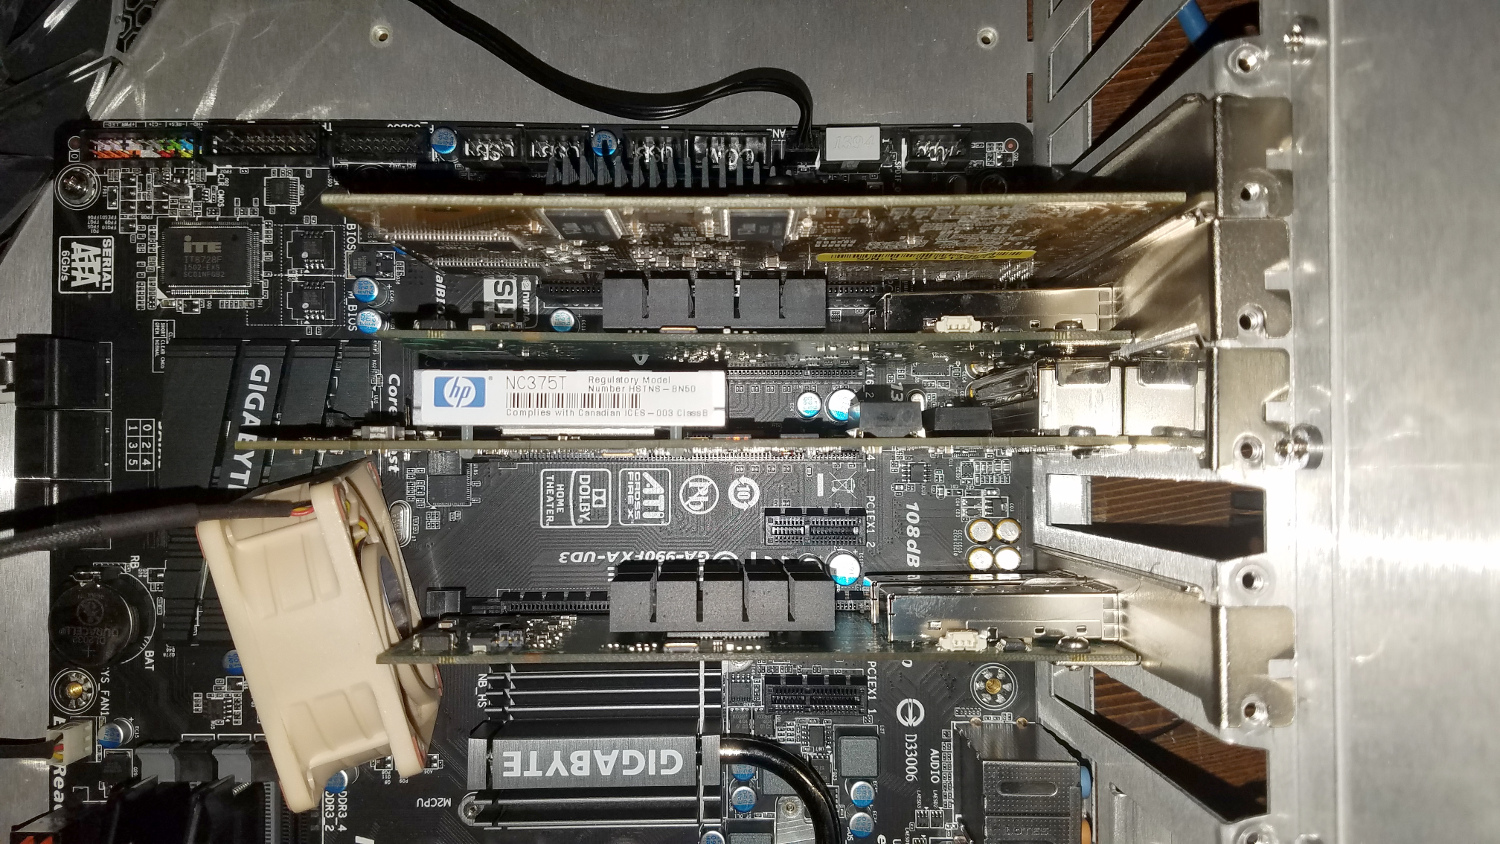
Now if you were to replicate that switch, purchasing everything, the cost would be significant. Even going through eBay to buy the parts used, you’re still looking at nearly 150 USD for just the processor and mainboard. The 4U chassis I had this built into is 100 USD on its own plus shipping brand new.

And that’s why, for the most part, I stuck with hardware I already had.

Custom switches

So I basically scrapped the entire custom switch project for an off-the-shelf switch. Most of the hardware will be repurposed. I do intend to get a GPU computing cluster back up and running, and some of it will be repurposed to that.

I ventured into building a custom switch from hardware I already had due to not being able to find anything off the shelf at a price I was willing to pay. I thought ultimately that I could do this for less than what it’d cost buying something off the shelf.

It was only after I hit “Publish” on the previous iteration in this log that I became aware of the surplus listings on eBay. Despite me not finding anything when I searched just last month.

And that is one recommendation I’ll make up front: always lean toward an off the shelf solution, and only build custom if you can’t find something that will meet your requirements within a price point you find acceptable.

But along those lines, should you consider building your own custom 10GbE switch? That’s a tough case to make. And about the only way I could see that case being made is if you had multiple 10GbE media in one network segment. For example if you have SFP+ and Cat6A media in the same network segment, then building a custom switch to combine those together may be worthwhile to keep costs down.

But first ask: for the devices using Cat6A or Cat7 for 10GbE, would it be possible to switch those over to using an SFP+ card?

10GBASE-T SFP+ transceivers are starting to show up on the market, though their lower power capability (limitation of the SFP+ standard) means they are limited in length to about 30m or less. And they are not cheap. Same with 10GbE SFP+ to RJ45 media converters.

Update: 10GbE RJ45 transceivers are MUCH more affordable today compared to when I originally wrote this article. But pay attention to the documentation for any SFP+ switch or router you buy, as there may be a limit to how many of these can be used.

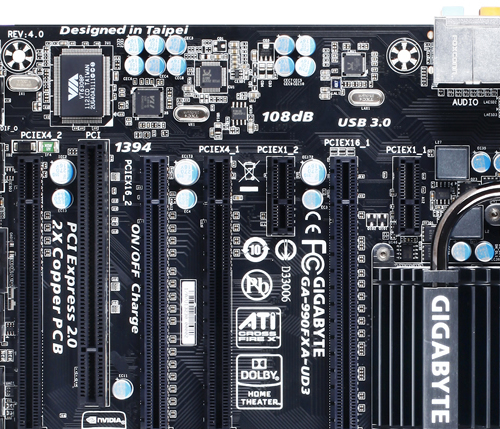
If you need to combine disparate media across Layer 3 — e.g. you’re needing to join Infiniband, Fibre Channel, and/or Ethernet on an IP network — then a custom switch is likely your only option. In which case make sure to pay attention to PCI-Express slot layouts and lane requirements with the hardware you intend to use.

Recommendations

So let’s talk recommendations based on what I’ve learned through this project. Well there’s really only one recommendation I can make that is still relevant: use optical fiber. Optical fiber allows you to keep the transceivers and use whatever cable length you need. And it’s easy and inexpensive to swap out for another length if you need it later.

Avoid direct-attached copper. The cables are expensive. And if you need a different length later, you’d need to order another complete cable.

And, again, don’t build a custom switch unless you’re sure you have little other choice. And be ready to abandon your custom switch if a better option presents itself.

10 gigabit (10Gb) home network – Zone 2 switch – Part 2

Build Log:

Last I left I mentioned that I was waiting for some hardware to arrive. The SFP+ transceivers and optical fiber cables along with a power supply from EVGA’s RMA department. I mentioned that I also considered not waiting for the power supply to ship so I could finish the switch sooner. And I went for that option.

Power supply

Courtesy of some nice incentives on NewEgg’s website, I opted to the Seasonic SSR-550RM. It’s initial list price was 60 USD, but there was an active special allowing for a 5 USD coupon code plus 15 USD mail-in rebate. It’s a 550W gold-rated power supply, which should be more than enough for this project while hopefully allowing it to always run nearly silent. And it has a 9.6 rating from Jonny Guru.

It’s not fully-modular, unlike the EVGA 650 G2 I’m waiting on RMA return, but is semi-modular. The 24-pin ATX and 8-pin CPU cables are attached. I may be able to get away with not needing anything else, but that may be unlikely.

No more wireless. For now.

I purchased the TP-Link AC1900 wireless card with the aim of creating a Wi-Fi hotspot with it. I was able to get the card working with NDISWrapper, after some finagling including blacklisting the built-in Broadcom driver. But I wasn’t able to turn it into a hotspot. Likely the driver is the concern here.

But there was something else I didn’t realize till after I tried to set it up as a hotspot: I wouldn’t be able to run it in 2.4GHz and 5GHz concurrently that I could find, basically negating the reasons to set it up as a hotspot.

So I’m going to figure out something else to do with the TP-Link card and just buy an access point to replace the WiFi built into the router.

A redo

In doing this whole project, I realized that there was a significantly better way of handling all of this, and it’s something I should’ve considered before starting the Zone 2 switch. You live, you learn, I guess.

Basically if you’ve followed this series, you’ve probably predicted this move. The Zone 1 switch has only three 10GbE ports. The Zone 2 switch has four 10GbE ports. But I have only four systems that could be upgraded to 10GbE. So the thought was simply: why not consolidate?

So I took what was the Zone 2 switch and basically made it the only 10GbE switch on the network, removing the quad-port Gigabit card. I could have just moved one of the dual-port cards into Zone 1, but I wanted to keep the PCI graphics card in the switch. And the ASRock 990FX Extreme6 board that was in Zone 1 does not have a PCI slot.

This creates for a much less complicated setup overall. The original Gigabit switch will be retained and used for the entertainment center. And two 30m optical fiber cables will run from Mira and Absinthe to the switch, while the long Cat5E cable will run to the router.

This move won’t improve throughput. It shouldn’t degrade it either given the 8-core processor. Again, it’s about consolidation. So with that, on to specifications.

Final specifications on the switch:

  • CPU: AMD FX-8350 (stock speed) with Noctua NH-D9L
  • Mainboard: Gigabyte 990FXA-UD3 Rev 4.1
  • RAM: 2x4GB Corsair Vengeance Pro DDR3-1866
  • GPU: GeForce 2 MX400 PCI
  • Storage: Samsung Fit 32GB USB 3.0

Networking hardware:

  • Gigabit: TP-Link TG-3468
  • 10GbE: 2xMellanox ConnectX-2 (MNPH29-XTR)
  • Transceivers: Fiber Store Generic 10GBase-SR
  • Cable: OM4 LC to LC

The two blank slots at the back, to the right of the Gigabit card and to the right of the VGA card, are x4 slots, which would allow for two additional single-port cards if I so desired. All of the cards are directly cooled by a 120mm Nanoxia Deep Silence fan.

Installing Mellanox EN driver for Fedora 24 Server

Note: to make a bridge with the Mellanox chipset 10GbE cards, you MUST use the Mellanox driver. The mlnx4_core driver distributed with most Linux distros won’t work for this, at least not out of the box.

After downloading and extracting the files from their repository, run these commands:

dnf install lm_sensors 'perl(Term::ANSIColor)' redhat-rpm-config python-libxml2 rpm-build kernel-devel createrepo
./install --add-kernel-support
/etc/init.d/mlnx-en.d restart

The first makes sure you have the right packages installed — lm_sensors is a good one to have for hardware monitoring, and it will install perl and a few other required packages as part of its dependencies. Another utility to consider is nmon.

The second command builds and installs the drivers for your kernel. If you get an error about the package command not being found, just re-run the command. I’ve sometimes had to run it multiple times for some reason.

While not required, you should also reboot after installing the driver.

Fedora 25 and later: You might be able to force support of the driver for Fedora 25 by changing the scripts to look for “fc25” instead of “fc24”. I have not tried this, so I cannot speak to whether it will work.

Throughput and jumbo frames

In many discussions about 10GbE, jumbo frames comes up. Many have wondered if they need to use jumbo frames to maximize throughput or performance. And the answer largely is “that depends”.

If you are using optical fiber with 10GBase-SR transceivers, jumbo frames is completely unnecessary since optical fiber has a super low latency and is virtually immune to interference.

It largely depends on what you use to measure throughput. iPerf, I’ve found, is far from accurate. It’s great for measuring throughput between two points in a network, but not for hopping junctions.

For example, iPerf reports throughput between my NAS (Nasira) and the switch of about 9.4Gbit, probably as good as I’m going to get. And it reports about 9.3Gbit to 9.4Gbit between Mira and the switch. But between Mira and Nasira, hopping across the switch and jumping between NICs, it reported 4.4Gbit. So what gives?

Have a look at these two file transfers:

This is transferring a file from the Nasira to Mira. Jumbo frames off. The same connection for which iPerf reported 4.4Gbit throughput. The difference is the first transfer was a non-cached transfer: FreeNAS was reading the file from the ZFS array directly and serving it back to me. Pretty impressive transfer speed unto itself.

But the faster transfer speed, the one sticking to about 850MB per second, is a cached transfer, meaning FreeNAS had the file cached in RAM. Still not a full 10Gbit transfer, but I doubt jumbo frames would max it out since FreeNAS is likely the limitation here since my SSD is a Samsung 950 Pro.

So you should not need to enable jumbo frames to see maximum performance.

Next article for this project will be a retrospective in which I summarize what I’ve discovered during this and provide some tips to determine if this project is right for you.

Making decisions

Recently came across this gem from Occupy Democrats Logic on Facebook:

This is yet another of the many contradictions with regard to the left and standing laws. And also how authoritarian and anti-family they’ve become.

The main point of the “Under 13” item is this idea that kids who have not yet reached puberty are generally capable of determining if they are “transgender”, including the determination of what treatment options they need, all while not being legally able to drink, buy certain video games, have sex, or even work. So the law doesn’t extend trust to minors of such relatively minor decisions, yet many on the left think minors who haven’t reached puberty can somehow discern that they have gender dysphoria.

Except no one can determine for certain they have gender dysphoria without the aid of a psychiatrist, just as no person can determine they have depression or anxiety disorder without the aid of a psychiatrist.

Quoting the British NHS (emphasis mine):

Children with gender dysphoria may display some, or all, of these behaviours. However, in many cases, behaviours such as these are just a part of childhood and don’t necessarily mean your child has gender dysphoria.

For example, many girls behave in a way that can be described as “tomboyish”, which is often seen as part of normal female development. It’s also not uncommon for boys to roleplay as girls and to dress up in their mother’s or sister’s clothes. This is usually just a phase.

Most children who behave in these ways don’t have gender dysphoria and don’t become transsexuals. Only in rare cases does the behaviour persist into the teenage years and adulthood.

And then with regard to teenagers:

The way gender dysphoria affects teenagers and adults is different to the way it affects children. If you’re a teenager or adult with gender dysphoria, you may feel:

  • without doubt that your gender identity is at odds with your biological sex
  • comfortable only when in the gender role of your preferred gender identity
  • a strong desire to hide or be rid of the physical signs of your sex, such as breasts, body hair or muscle definition
  • a strong dislike for – and a strong desire to change or be rid of – the genitalia of your biological sex

Without appropriate help and support, some people may try to suppress their feelings and attempt to live the life of their biological sex. Ultimately, however, most people are unable to keep this up.

Having or suppressing these feelings is often very difficult to deal with and, as a result, many transsexuals and people with gender dysphoria experience depression, self-harm or suicidal thoughts.

The psychological or psychiatric component is what is ultimately necessary to diagnose gender dysphoria. It is often not present in children. And it is extremely rare, rarer than rare, when it does genuinely present.

But this hasn’t stopped the growing trend wherein parents are being “gender fluid” or “gender non-specific” with raising their children. Things such as using “gender neutral” pronouns around their kids to avoid “gender indoctrination” or “gender assignment”. I wish I was making that up. The “trans-trender” phenomenon of social media has leached into parenting.

While transgender awareness is certainly a great thing, just as homosexual and bisexual awareness is also a great thing for society, it’s something that has now gone way too far. Beyond the point of sanity. The logic is one that escapes me: a kid who wants to play with toys of the opposite sex or otherwise act as the opposite sex is presumed to be transgender rather than interpreting it as just a phase. And adults who do not feel 100% masculine or 100% feminine 100% of the time are now called “genderqueer”.

And that trend has been lambasted by transgender activists, most notably from my experience being Blair White, who is a male-to-female transsexual:

https://www.youtube.com/watch?v=4gtx7OVYby0

Those who are genuinely transsexual, genuinely gender dysphoric, are a tiny minority. And within that tiny minority is an extremely tiny minority of those who are, without doubt, present as such before reaching puberty. In general, though, the psychiatric component of gender dysphoria must also present at that young age for it to actually be gender dysphoria instead of it being just a phase.

Now sure in some children it could be a strong presentation of wanting to act like the opposite sex, one that causes the child’s parents to question if it’s just a phase. And it’s a legitimate concern at that point as well. That doesn’t mean you indulge it, whole-hog, though, without openly and continually questioning it.

The rarity of such genuinely dysphoric, prepubescent individuals makes them generally newsworthy, and they’ve typically received press coverage. I can think of only three examples off the top of my head: Kim Petras, Jackie Green, and Jazz Jennings. Kim Petras and Jackie Green underwent sex reassignment surgery and the full male-to-female gender transition as minors. With medical advice and parental consent. I do not know if Jazz Jennings has started the medical transition process.

But there are numerous concepts that many falsely assert as gender dysphoria. For one, transvestism is not gender dysphoria. Your son or daughter wanting to dress as the opposite sex or play with toys typically associated with the opposite sex is not gender dysphoria and does not make your son or daughter transsexual or transgender. Without the psychiatric components, it cannot be gender dysphoria. Instead, again, it is likely just a phase, one that comes about as a child becomes more self-aware and tries to establish greater levels of independence.

As such, a minor asserting they are the opposite sex and wanting to live as the opposite sex should be evaluated by a psychiatrist, provided it is not a phase.

But proper evaluation and diagnosis can take YEARS to assess whether the person is legitimately gender dysphoric. That time is also necessary to asses the risks posed by treatment options and evaluate what treatment options would be proper and when they should occur.

And that is true for both minors and adults.

The concern with minors, however, is that hormone therapies during puberty can have risks that are significantly reduced by waiting for puberty to complete. They can also exacerbate other risks that would otherwise not present if the therapies never started, such as risks for certain cancers. This is not something to take lightly.

As such, it is not a decision that a minor can make on their own. They are likely not mature enough to fully understand the consequences of that level of decision-making. It’s not even one that adults are permitted under current medical guidelines to make on their own due to the long-term risks and consequences. Guidance from several specialists is necessary and required.

If you believe you are gender dysphoric and want to transition to the opposite gender, before actually starting any kind of transition, you need to get under the care and supervision of a psychiatrist who has a well-documented track record with regard to gender dysphoria. Same if you are a parent who, for some reason, believes your child’s desire to play with toys and dress in clothes normally associated with the opposite sex is more than just a phase.

Again this is not something minors can or should be permitted to do on their own. And it is not something that should be encouraged in minors either, especially prepubescent minors.


Another pass by Mira – II

Build Log:

Not long after posting the last part of this build log, I discovered that AlphaCool distributed their own decoupling fastener kit. Four fasteners, screws, washers, and nuts. Everything M4 thread. Specifically the AlphaCool SKU is 13701.

They make another one that is similar, but with male threads on both ends instead of a male and female.

Decouplers are basically two fasteners connected by a rubber cylinder, and prevent virtually all vibration from being transferred from the object to its mount, provided they’re used with objects within their specifications.

A few adjustments to the radiator box

In the original setup for this radiator box, I initially had the pump mounted to the floor, but with double-sided 3M VHB tape. There was virtually no vibration isolation. And with the second revision, the pump was mounted to a UN Z2 bracket with 00 rubber washers providing some vibration isolation, but not anywhere near the degree needed. The entire case vibrated, and you could feel it by just resting your finger on any panel.

Mounting the pump using the decouplers required drilling a few holes into the aluminum panel using a 3/16″ drill bit for the M4 fasteners. Along with the vibration decouplers, I retained several of the rubber washers for additional padding and isolation.

Performance and noise reduction

So how well did it work? Previously virtually the entire chassis was vibrating while now it no longer is. But there is still a significant amount of vibration being transferred from the pump to the bottom panel. And that vibration is also still being transferred up the sides. Initially this was causing a large amount of noise, but it settled after several hours.

Initially I had the pump running at the 16.5V that Martin’s Liquid Lab specifies provides for maximum flow. I turned it down to 12.5V and that reduced the vibration significantly and I left it overnight and the vibration noise on the pump was virtually gone. The pump itself, though, is still being loud, and there is still some vibration transfer between the pump and bottom panel that is creating noise.

I currently have Startech’s case feet on the bottom panel. These aren’t made for anti-vibration. And I wonder if the vibration I’m feeling in the case is actually feedback. Perhaps changing them out for anti-vibration feet, such as the AcoustiFeet by Acousti Products, would virtually eliminate the vibration.

By the way, having the flow down that far didn’t sacrifice temperatures in the least since it’s just the CPU being cooled currently. I ran another video conversion using Handbrake and the temperatures stayed in the upper-30s°C, occasionally touching at 40°C or 41°C, with the fans down to 6V and the CPU pegged at its 3.6GHz boost clock.

There’s been some back and forth on this, and there are competing sides wherein one says that pump speed does matter while others say it doesn’t. JayzTwoCents actually called it a “myth” that pump speed affects cooling performance: “increasing your pump speed does not increase the cooling capacity of your system”. He also tries testing pump speed and temperatures in a later video. And ends up showing that it does.

Sure it doesn’t increase your cooling capacity, since that is determined by your radiators and the overall fluid volume in your loop. I’ve seen “cooling capacity” misused time and time again when the person saying that actually means “cooling capability“. And on that, pump speed absolutely matters. To a degree.

And that degree is called resistance. Most blocks today actually have a pretty high resistance to flow. Especially CPU blocks.

If you don’t have a pump that can push through that resistance, you’ll end up with poor flow, which can translate into temperatures not as good as you could otherwise get. For example if I exchange the D5 Strong for a D5 Vario, run it at 12V, and have it at level 1, I doubt I’d get any flow. Because I doubt it’d be strong enough to push through the resistance it would face.

It’s why aquarium pumps aren’t used today for water cooling. Which it’s a minor shame since they’re submersible, eliminating the need for a separate reservoir. But most, especially the inexpensive ones, don’t have the head pressure to push through a loop with a modern CPU block. And the ones that do are likely unacceptably loud.

I have the D5 Strong  due to its higher line pressure to overcome resistance. That resistance initially being two GPU blocks in parallel and a CPU block (EK Supremacy EVO) plus three triple-120mm radiators. And let’s not forget having to push that fluid against gravity.

There was also a flaw in the original design that didn’t help things. The original radiator box design had case fans pulling air into the chassis as an intake. The fittings between the radiators were toward the rear of the chassis near the bulkhead fittings. As such there was a major source of restriction that also impacted flow greatly.

I’m not sure how well you can see it, but look in the upper-middle of the picture. That fitting configuration that is out of focus is comprised of several fittings: an extension fitting going to a Koolance 180° fitting, to another 90° rotary fitting before entering the radiator. That was a tight setup.

And all of that resistance to flow was too much for the D5 Vario at 12V, and I never tried putting a voltage up-converter on the Vario to get it higher. The CPU temperatures on my FX-8350 would climb into the upper-50s and lower-60sC under load. So I swapped it out for the D5 Strong, pushed it over 12V, and saw a drastic reduction in temperatures.

Above a certain point, though, pump speed won’t matter. But that point is determined by the components and design of your loop. More resistance requires a stronger pump to see the same flow level through your loop. And that flow level is one of the factors in your loop’s cooling performance.

I overcame that design flaw when I revisited the radiator box with Mira. I turned everything around so the radiator fittings were at the front of the chassis and the case fans acted as an exhaust at the rear. This allowed a long piece of tubing to go from the return bulkhead to the radiators, drastically reducing the flow resistance by eliminating the tight bends.

As such, this has me wondering about switching the system to a D5 Vario. Neither pump can run below 12V. And while the Strong at 12V is more powerful than the Vario at level 5 at 12V, the difference isn’t significant, but the Strong maintains better line pressure.

At least the Vario at 12V allows you to control the pump speed to as low as you need it, allowing for better control over noise and vibration.

But till I get the GPU block, I can’t know whether I can make the switch. Temperature performance on the CPU and GPU blocks will be the determining factors in whether I can keep the pump turned down low and possibly switch to the D5 Vario to have it turned down further.

If it introduces too much resistance such that I have to retain the D5 Strong, then I’ll need to look at some way of damping the pump’s sound.

Finding the right decouplers

While it appears they may not be ideal, the AlphaCool decouplers are working to isolate a lot of the vibration. You’ll never be able to completely isolate all of it, but you obviously want to minimize the vibration transfer as much as possible.

AquaComputer distributes their own set of decouplers allegedly made with a softer rubber. I’ve also seen decouplers that are made for RC applications that use clear silicone rubber. These may provide for a much lesser vibration transfer based on my research. I went with AlphaCool’s decouplers first because they were less expensive.

Karmann Rubber gives a good synopsis on shopping for decouplers: excessive under-load of the fastener will actually not provide satisfactory isolation, while overloading can cause it to fail or fail prematurely while also eliminating any potential isolation. There are several terms involved here as well, with spring rate, compression load, and shear load being the more important ones.

You want to find a decoupler with the lowest spring rate that supports the shear and compression load it’ll bear. The compression load for a D5 pump is the weight of the pump plus its housing, about 2lbs to 2.5lbs. Shear load varies with the pump RPM.

Softer materials tend to have lower spring rates, but at the trade-off of supporting lower compression and shear loads due to lower density. To a degree. So the softer rubber of Aquacomputer’s decouplers might allow for greater vibration isolation for a D5 pump and the lighter DDC pumps. Provided they are actually softer. According to one reviewer on Performance-PCs, AquaComputer’s set is identical to AlphaCool’s decouplers (item no. 13505), just a different color. So perhaps I just need to find something else.

But the problem of under-loading an isolator is also important to keep in mind. With the AcoustiFeet, for example, you don’t want to buy the kit rated for 70lbs for an HTPC build that weights just 15lbs as it probably won’t provide for any isolation. You want to buy isolators that are rated for a compression and shear load about around what is experienced to get the benefit. It’s kind of like the “Price is Right” in that matter: get as close as you can without going over.

Now we wait…

With the GTX 1070 in the system, the CPU is now the only component on the 9x120mm of radiator space. Currently I’m using distilled water with copper sulfate as the coolant, though I’ll be swapping over to PrimoChill’s coolant concentrate. The small bottle that comes with their tubing that gets mixed into a gallon of distilled water. Just simply because it’s easier. I don’t have enough Mayhem’s X1 on hand for this and am not planning to order more.

So the wait now is for figuring out the full-cover block. According to EK, this particular GTX 1070 is a reference card, and NVIDIA did the super-smart thing of building the GTX 1080 and GTX 1070 using the same reference design, making all GTX 1080 reference blocks instantly compatible with any reference GTX 1070. Talk about a win.

So that means I can go with the same block I used in Absinthe: the Aquacomputer krygraphics. And that’s likely the direction I’ll be leaning on this. Hopefully without having to order it from Germany.

In the mean time I’m also going to be continuing research into vibration isolation to see if I can completely silence this D5 Strong pump. Provided I need to keep it. If having this pump down at 12V still provides for adequate flow across the entire system (temperatures will be the determining factor), then I may swap it out for a D5 Vario, which is a lot easier to keep quiet due to its lower RPM.

So it’ll be interesting to see what the next couple weeks brings.

Micro-cheating

I’ve defended flirting while married or in a committed relationship. I believe it’s something that can be a part of a healthy relationship, provided jealousy isn’t part of the picture as well. And I already knew going into writing that article that plenty of disagreement already abounds with regard to flirting in general. Basically that if a guy or gal is in a relationship, he or she basically has to tune their flirting with surgical precision so it only comes on when around their significant other.

Wait, that’s not quite right. Because typically the articles that are out there always present the situation wherein men are the cheaters and their jilted girlfriends are the victims and never the cheaters as well. It’s always his fault.

But at the time I wrote the article, unbeknownst to me, some clever writers out there devised a word that incorporates “flirting while married”: “micro-cheating”.

Micro-aggressions. Micro-oppressions. Even micro-flirting. And now, micro-cheating. Which sounds like something an instructor would accuse a student of doing. But, no, this is a term applied to relationships. And if you do a Google search, you’ll see that the vast majority of articles on the topic, likely safe to say virtually all articles, are written by women with regard to their male partners:

Only one article that I found in all that searching addressed women directly as being “micro-cheaters”. And this is a relatively new phenomenon: all the articles listed above were written in 2016. I couldn’t find any that were older. This despite the term first showing up on Urban Dictionary in 2008. Perhaps Zoe was trying to anticipate something and wanted to make sure she coined the term first. Why this obsession with the prefix “micro-“?

And reading through those lists, one can’t help but think the women behind them are paranoid, controlling psychos. Granted some of the items on the list are valid points and causes for concern, but that doesn’t justify going overboard with the rest of them. Such as with this item from the Cosmo article: “You’ve legit watched him flirt with girls when you’re out places and it made you feel like a psycho.”

It’s almost as if bitter, heartbroken women with a superiority or inferiority complex are looking for ways to excuse anything they may have done to lead to the downfall of a relationship or marriage. And so now we have “micro-cheating”. If hypochondria is being constantly anxious about the state of your health, what is it called to be constantly anxious about whether your significant other is being faithful?

From Berry:

Of course, instances of micro-cheating can be harmless in and of themselves, and we’re not advocating for paranoia or unhealthy jealousy in relationships. However, these examples of micro-cheating can sometimes be the first sentence in a story, and can lead to messier emotional (or physical) affairs down the road.

So while they’re not advocating paranoia, they are implicitly granting license for it by providing yet another checklist.

If you think your significant other is cheating and you have items checked off on the various “signs he’s unfaithful” and “micro-cheating” lists to back you up, your significant other may, in fact, actually NOT be cheating on you. You may have diagnosed influenza or worse where there was instead only just a cold. Or a heart attack when there was only heartburn.

In which case you’ve just wasted a ton of energy, built up a nice level of paranoia, for absolutely no reason. Along with being the one to actually destroy the trust in your relationship. Once that seed is planted in your mind, it becomes like a weed, always coming back until you eradicate it at the root. Provided that’s even possible.

Along with the mere allegation, the seed being planted, will come confirmation bias, wherein you will look for anything proving your allegation true. “He never lets me see his phone. He talks a lot about Heather, his co-worker.” Which will demonstrate you no longer trust your significant other.

It’s been said that a rape accusation can be worse if it’s unsubstantiated or false than if it’s genuine and true. Just the allegation of rape can and has destroyed lives. By extension the mere allegation of cheating can be enough to destroy a relationship by completely washing away any trust. The mere thought or insinuation that your significant other is cheating can be enough to completely erode your trust in them.

They, in turn, will lose their trust in you with the mere allegation and their defense against it. Because now your partner will wonder how anything he does will be interpreted by you. And you’ll likely always be interpreting any little action by your significant other as a “micro cheat” or a sign your partner is being unfaithful.

And neither likely can ever trust the other again.

Perhaps “micro-cheating” is just another manifestation of an overall heightened level of paranoia in our society. Regardless it’s not healthy. Not for your relationship, and certainly not for you.

Let’s talk about 2016

So I’m not allowed to talk about my two nephews being born, the new better job I started at the start of the year, delivering a computer project to a friend in Vegas, moving to a better part of the KC metro, and all-in-all doing all kinds of other things that I enjoyed including helping my three teenage nieces with a brand new bed setup?

Seriously, there was plenty of bad that happened in 2016. Not talking about it doesn’t make it go away. Talking about it is how you devise ways of it not happening again.

But you also have to talk about them HONESTLY instead of bullshitting yourself. 2016 showed that plenty on the left were bullshitting themselves while unwittingly setting themselves up for failure and electoral loss. Because they made a lot of assumptions that turned out to not be true.

If you don’t want to talk about 2016, then fine. Go sulk in your corner. But don’t fucking act like nothing good happened in 2016 either. Don’t fucking act like Trump being elected somehow undid all the good that happened in 2016, or the last 6 fucking DECADES for that matter.

If you’re seriously going to be that narrow-minded about things, get off the Internet and go and live a little.

10 gigabit (10Gb) home network – Zone 2 switch – Part 1

Build Log:

With the first zone effectively done, it was time to plan the second switch. The requirements here are a little more involved than the Zone 1 switch:

  • 10GbE uplink to Zone 1
  • 2x10GbE connections for Mira and Absinthe
  • Multiple 1GbE connections with Auto-MDIX
  • Wireless support to create a hotspot

To this end, this is the main system hardware:

  • CPU: AMD FX-8350
  • Mainboard: Gigabyte 990FXA-UD3
  • Memory: 2x4GB DDR3
  • Storage: SanDisk Cruzer Fit 16GB USB 2.0
  • Graphics: nVidia GeForce2 MX400 PCI

Networking hardware:

The mainboard has a PCI-Express configuration to support this setup. The 990FXA-UD3 mainboard has two each of x16, x4, and x1 PCI-Express 2.0 slots, which would support this configuration:

  • x16 – Mellanox ConnectX-2
  • x1 – TP-Link AC1900
  • x4 – Quad-port Gigabit
  • x16 – Mellanox ConnectX-2
  • PCI – GeForce2 MX400

Mmm…. look at all those expansion slots, just waiting to have something… inserted into them.

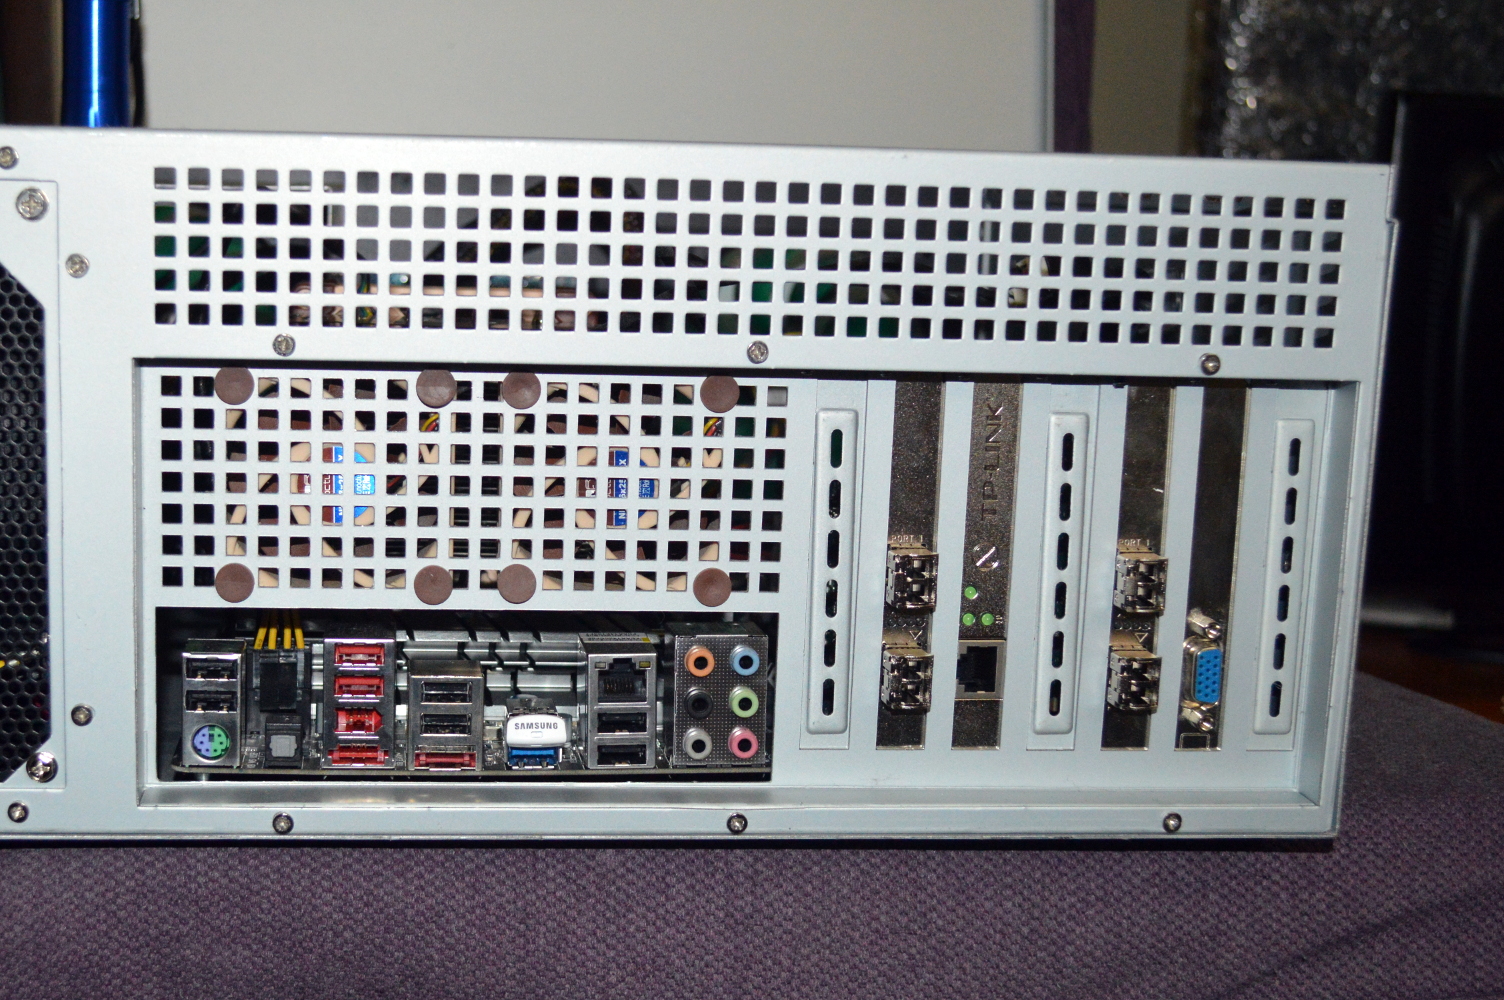
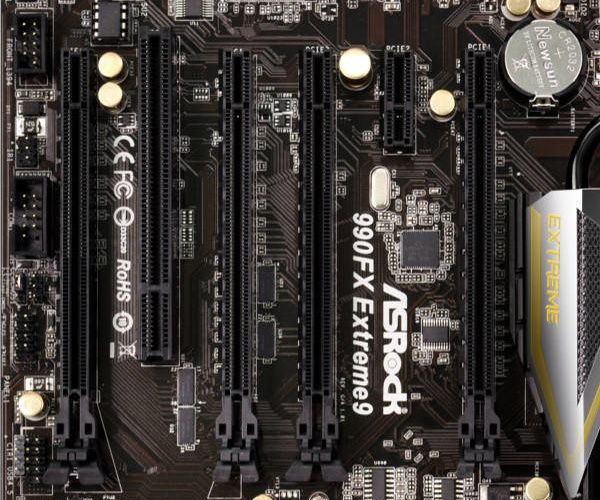
And for this switch I’ve opted to use an old PCI graphics card, a
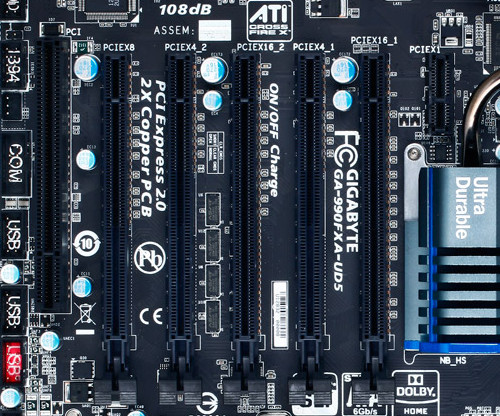
 GeForce2 MX400. I think that chipset came out around the time my oldest niece was born (she’s 15 as of when I write this). I bought it when I was still in college as an upgrade for a Riva TNT AGP card, opting for the PCI version since it was less expensive than the AGP version when I bought it. The PCI card will keep the last x4 slot open.

If I needed three dual-port 10GbE cards, I could’ve used the Gigabyte 990FXA-UD5. It has a primary x16 slot and two x8 slots while still having two x4 slots, a x1, and a PCI slot. The position of the x1 slot limits you to short cards. The ASRock 990FX Extreme9 has a similar slot configuration but only one x4 slot as it has 6 slots overall. But the x1 slot is better positioned for longer cards, such as the intended AC1900.

For cables and transceivers, I went back to Fiber Store. This time the order was for six (6) 10GBase-SR transceivers and three LC to LC OM4 optical fiber cables: two 10m cables for connecting Mira and Absinthe to the switch, and a 30m cable for connecting Zone 2 to Zone 1.


Intel PRO/1000

One lesson I learned in this is to not use the Intel PRO/1000 chipset Ethernet adapters. In doing some research, I found one comment on Amazon that alludes to this chipset not supporting anything other than PCI-E 1.0. A Reddit thread alludes to the same. So if your mainboard can downgrade specific slots to older PCI-E standards, you may be good, but it’s no guarantee.

In the case of the 990FX, you’re out of luck. It wouldn’t light up for me, and under Linux would not show up in the lspci device listing. I’ll try it later with one of the Athlon X2 boards I have to see if it’ll light up there, though I’m not sure what I’d do with it if it does. Perhaps use it to create a master for a small cluster.

So if you’re going to look for a quad-port Ethernet card, stay away from the Intel PRO/1000 PT cards you can find all over eBay unless you can confirm compatibility with the mainboard you’re intending to use.

Buying surplus retired server hardware can come with a few gambles. And apparently with some chipsets, you need to be aware of Chinese fakes.

Mellanox ConnectX-2

A lot of Mellanox cards you’ll find on the market are OEM cards, so compatibility with the Mellanox drivers may not be guaranteed across all platforms. The listings should have the part number in the title or somewhere in the body to allow you to research. Unfortunately information on specific part numbers can be sparse. Thankfully you’re likely to find specific part numbers on any sale listings.

Look for the Mellanox-specific model numbers to ensure the greatest chance of getting ones that will work: MNPH29-XTR for a dual-port ConnectX-2 card, or MNPA19-XTR for a single-port. On the Zone 1 switch, I mentioned another part number that saw success: 81Y1541, which is a dual-port ConnectX-2 OEM-branded by IBM.

Part number 59Y1906, also OEM-branded IBM, gave me nothing but trouble. The Mellanox EN driver for Fedora 24 refused to do anything with either card. The default mlnx4_core driver that comes with Fedora 24 and the latest kernel continually displayed error messages to the screen about a command failing. Installing the Mellanox EN driver only made things worse. And all of the Mellanox tools for querying the device returned the error code MFE_UNSUPPORTED_DEVICE.

Despite the A1 sticker on the card, all utilities that could read the data from the card showed the chip revision to be A0. And that I think is the reason the Mellanox utilities refused to support it.

Interestingly they did work under Windows 10 with the latest Mellanox WinOFED driver (WinOF 5.22). Or at least they weren’t giving me errors continually. If I had both cards plugged in, though, one would fail to operate with Windows reporting a Code 43. I think the problem there might have been the fact it was not Windows Server, and I didn’t try them with Windows Server.

So if you obtain that part number, be aware that you may not be able to use it under Linux, but you should be able to use it under Windows. Just make sure to install the latest WinOFED driver to get all the configuration features that are available. The command-line utilities under Windows also reported them as being unsupported even though the drivers appeared operational.

There may be other part numbers that may or may not work, so do some quick research before buying to save yourself the headache I’ve endured.

Blending in

Given this one will be near our entertainment center, I opted toward an HTPC chassis to blend in. Specifically I went with the Silverstone GD09.

I’m not too fond of the potential airflow options. But this chassis actually has an expansion slot situated above the other expansion slots:

A rather interesting position. And actually the perfect position for a slot bracket for fans, such as what you can find on modDIY. The grill is wide enough for an 80mm fan, but too slim for anything larger. A better option is using expansion slot fan mounts that mount above the cards, such as this other one from modDIY (check eBay for better prices), to mount a pair of 60mm or 70mm fans above the cards to take advantage of the width of the vent for overall better airflow.

And the fan positions over the mainboard I/O are 80mm. All other fan positions are 120mm. The cards on the test bench show as well how important cooling will be for this setup.

And while the cross flow isn’t the greatest on the Silverstone GD09, there are ways of maneuvering the air where I need it. Specifically I may be able to use the 120mm fan mount that is adjacent to the power supply as an intake with a duct (such as this one from Akust) to direct air onto the cards.

Continuing…

That’s it for now. I’m waiting for the last of the hardware to arrive from Fiber Store.

The power supply I have planned for this is also an RMA I’m waiting to receive from EVGA. Unfortunately they aren’t going to resume any shipments until January 3, 2017. I may shortcut that and just buy another power supply from Micro Center, since I also still need to buy the USB drive. We’ll see. But for now this is where I’ll leave it.

Electoral College math experiment

With a lot of buzz going about the Electoral College and the fact that Trump won the electoral vote despite Clinton winning the popular vote, I opted to conduct a little experiment. I used the poll numbers available from the New York Times as of December 23, 2016, when this article was published. I realize they’re not the final, official numbers, but likely close enough for this experiment, and the final numbers are unlikely to change the outcomes, though I’m willing to revisit this when those numbers are readily available.

Now I’ve advocated for the Nebraska model to become universal with regard to how the electoral votes are divvied up. Nebraska I believe divides by congressional district or population, with the popular vote winner getting the two votes representing the Senate. As such, though the State almost always goes Republican, the Democrats can usually expect to pick up a vote from that State.

So if the Nebraska model were universal, and presuming they divide the electoral votes by population with the two Senate votes going to the population winner which will about represent the congressional district model, what would be the totals? Note: some rounding errors had to be corrected manually for this result, but the outcomes were not affected by the corrections.

  • Trump: 272
  • Clinton: 258
  • Johnson: 7
  • McMullen: 1 (Utah)

Trump would still win, but only just barely. And Clinton would’ve had more votes overall due to picking up votes in Texas and Florida, but would’ve lost votes in California and New York. McMullen you’ll see would’ve picked up an electoral vote in Utah, and that would’ve been due to his close run behind Clinton in that State. Trump would’ve picked up the remaining two population votes and the two Senate votes.

Also worth noting is that Clinton and Trump would’ve had votes in every State with the exception of the 7 States plus the District of Columbia that are allocated only three votes.

Now what if the popular vote was divvied up entirely by population. Would Clinton have won the electoral vote since she also won the popular vote? No.

  • Trump: 263
  • Clinton: 266
  • Johnson: 8
  • McMullen: 1 (Utah)

Clinton would’ve won the plurality, but no candidate would’ve won a clear majority. This vote result would’ve gone to the House to resolve, and at one vote per State, it likely would’ve gone to Trump.

The electoral college exists, in part, to lessen the capability of one State to control the outcome of the election for President. In both scenarios above, and in the actual outcome, that purpose is well served. Clinton’s popular vote win is fueled largely by her win in California, where she won by a larger vote margin than she did in the overall popular vote. And she won California by a vote count that surpasses the populations of about half the States in the United States.

One must also remember that the United States is not and never has been a democracy. We are a federated republic of independent, sovereign States. And the electoral vote system preserves that. The electoral vote system would stop serving that purpose if the 12 largest States all banded together to select the President, regardless of who the other States selected.

Now what about close races? Let’s look at 2000, pulling the official tallies from the Federal Election Commission. In that outcome, going by the Nebraska model, same presumption, this would’ve been the Electoral College result:

  • Bush: 275
  • Gore: 258
  • Nader: 5

The result is a little more interesting if you divide the electoral vote proportional to the popular vote:

  • Bush: 263
  • Gore: 269
  • Nader: 6

That vote would’ve gone to the House, and given the breakdown of the 107th Congress, it could’ve gone either way.

And if you really want to see how much it neutralizes the power of the largest States, let’s look at the 1972 election. In that election, Richard Nixon won 520 of the available 538 electoral votes. What would’ve been the result had the Nebraska model been in play at that time (actual total in parentheses)?

  • Nixon: 366 (520)
  • McGovern: 165 (17)
  • Schmitz: 1 (0)

Now that’s a striking difference. Nixon’s lead is cut down enormously, and John Schmitz of California, running as an American Independent, would’ve received 1 electoral vote from California. The result is still the same, and Nixon still wins by over 200 votes, but it would not have been anywhere near the landslide it was.

And we can see similar results with the 1984 election of Ronald Reagan vs. Walter Mondale, which is a larger landslide than Nixon’s re-election in 1972 and the largest victory margin since the 1788 and 1792 elections of George Washington. Again, applying the Nebraska model to the popular vote (actual in parentheses):

  • Reagan: 352 (525)
  • Mondale: 186 (13)

Again, very striking difference. Result is still the same with Reagan winning by nearly 2 to 1 in the electoral vote count, but that’s much more reflective of his actual popular vote margin of 58.8%, instead of winning under 60% of the popular vote but carrying almost 98% of the electoral college.

But clearly the case here is that the Nebraska model allows for third parties to pick up votes (provided the base votes are divided by overall popular vote instead of by congressional district), while also allowing both parties to pick up votes in most States. So it’s a much more fair breakdown in my opinion while still also preventing what could be a lot of elections being decided by the House of Representatives. It also diminishes the power of the largest States in the election.

Now again the numbers represented herein are presuming that the popular vote about proportionally represents how congressional districts would have voted. I’m aware that gerrymandering could affect this result. I’ll revisit this later once I have better numbers.

Another pass by Mira

Build Log:

Well the time has come again to take another pass by the distant binary star system Mira… Okay, perhaps not. Instead the time has come to revisit the computer system that I’ve called Mira: an Intel i7-5820k built into the NZXT H440 with water cooling provided by a custom radiator box.

Last we left, I mentioned the desire to upgrade the graphics cards in Mira away from the pair of PNY GTX 770s (which are basically the same as a pair of GTX 680s) for something a bit more recent. In my wife’s sytem Absinthe, I upgraded her to the GTX 1080, but I’m not going that high. I stayed one step lower and went with the GTX 1070. Specifically the EVGA GTX 1070 SC Black Edition.

When installed it’ll put the CPU as the only hot item on 9x120mm of radiator space until I get a water block. The temperatures are already phenomenal (38C average core temperature while encoding video), so I’m not expecting much improvement on that. Going from dual graphics cards to a single GTX 1070 will also free up a slot on the mainboard for a 10GbE SFP+ card as part of my 10GbE home network upgrade.

Cable management will need to be redone in the H440 as well since I’ll be going from two graphics cards requiring four PCI-E power connectors to one graphics card requiring just one 8-pin connector.

I’m also taking this as an opportunity to revisit the radiator box. Again. This time it’ll be with the aim of silencing the D5 Strong pump.

I ordered an anti-vibration pad and I’ve been looking at other ideas for vibration isolation with the intent of doing what I can to isolate the pump. One idea I’m currently entertaining is using the pad as a base for creating a small bag for enclosing the pump entirely, with the hope of not only isolating it for vibration but also any sound. I derived this idea from the YouTube channel DIY Perks. In his video about an ultra-silent PC build called “Cloud Unit” (embedded below), Matt housed a laptop HDD in a small bag made from an old towel to absorb sound and vibration.

There’s not nearly the concern about heat with a D5 pump since it’s designed to dump its heat into the fluid it’s pumping.

And while silence would certainly be golden, vibration is the thing to tackle first. And there are a lot of products and entire companies out there for this purpose. You’re probably familiar with the anti-vibration pads, washers, and the like. I’ve attempted to use plumbing washers for anti-vibration as well — they work well for a D5 Vario, but not so well for the D5 Strong.

There’s also a plethora of fasteners designed for isolation. It’s just a matter of what’s available and compatible with the pump housings and the setup in question. Again there are a lot of products available for isolation, some that may not look all that great in a computer build, so plenty of research to be done in the interim. But for now I’m going to see how well the anti-vibration pad I purchased will work while considering other ideas. At under 5 USD, it’s an inexpensive experiment that should give some value.

The new GTX 1070 is sitting in a test setup as well to make sure it’ll work as expected and determine the extent of any coil whine. The hope is anticipating a potential RMA before tearing down Mira. The test setup is an FX-8350 on a 990FX mainboard that will be used for a second 10GbE switch in my home network once the last of that hardware arrives.

One interesting observation to make: while running Valley or Heaven Benchmark, the fan never started on the 800W power supply I’m using to power the test setup. It’s certainly great to see that NVIDIA’s Pascal GPU core can provide greater performance over Maxwell (with the GTX 1070 outpacing even the Titan X Maxwell) at significantly reduced power requirements. In initial testing, the GPU core never broke 70C with EVGA’s ACX 3.0 cooler.

White Lightning – Finished

While it happened in December, the upgrade to this system occurred a little sooner than I expected. The ASRock mainboard with the A8-7600 just would not remain stable. And then what forced my hand is the power supply dying. Thankfully EVGA makes RMAs easy. But I didn’t wait for the RMA to turn around. I just bought another power supply from my local Micro Center and went on with the build.

So with that, I pushed forward. System specifications:

  • CPU: AMD Athlon X4 860k
  • Cooling: Corsair H115i with Corsair Link
  • Memory: 4x4GB EVGA DDR3-1600 (running at XMP profile)
  • Mainboard: Gigabyte GA-F2A88X-D3HP
  • Graphics: Gigabyte RX 470 Windforce 4G
  • Power supply: EVGA 650 G2
  • Storage: Kingston UV400 480GB SSD
  • Chassis: NZXT S340 White

Philosophy

I’ve gotten into quite a few… conversations online about the Athlon X4 processor. Namely by people who feel that the processor should not be used in any system since Skylake is available. One person resorted to insults when I wouldn’t bow to his obviously lesser-experienced and overly narrow-minded opinion.

Every system has a budget. The question is whether it will allow building a system meeting your specific requirements or desires. And in my opinion, if you’re going out of your way to get a particular processor and you end up skimping on parts that are, frankly, a hell of a lot more important overall, you’re doing it wrong. I said such to one of my adversaries on YouTube with regard to Skylake specifically:

But pushing for a quality power supply and reasonable chassis could push other options out of reach. I mean if you’re so focused on getting someone Skylake within their limited budget that you skimp on the power supply, memory capacity, cooling, or other things that are, frankly, more important, then you’re doing it wrong.

This is especially the case if you have never built a system before, meaning you are starting from scratch. As such, you’ll want to set yourself up for the long term by selecting a good chassis allowing for good cooling (plenty of options today compared with years past) and a quality power supply.

At the same time, set yourself up with a good CPU cooler. Almost all have universal socket support, and thankfully AMD and Intel have been consistent in socket designs for mounting hardware. It’s not an essential purchase at the outset, though, if your budget won’t allow for it. It’s just that the stock cooler that comes with the CPU tends to be loud or annoying, not adequate, or both.

The power supply will matter more. A good power supply with a great warranty and a company that stands behind that warranty with good RMA service will keep you running smoothly for years. And I opted for the EVGA G2 brand for its 10 year warranty. Plus, as noted above, I have experience with EVGA’s RMA process. Corsair’s as well.

Select a mediocre chassis and you’ll set yourself up for frustration not only building your first computer, but upgrading it in the future. In trying to find a chassis, select one that will serve you for the long run. There are many good selections available regardless of what size system you want to build. A lot of that has been fueled by healthy competition in the PC building market over the last several years as more move away from buying pre-built PCs to building their own.

Why the Athlon X4?

I know that when most see this particular hardware pairing — or an AMD processor used at all — the word “bottleneck” gets screamed. And as I’ve said before, you have to look at how the system will be used.

World of Warcraft will be the most taxing thing this system will run, and it likely still won’t tax it that much since WoW’s system requirements are such to cast a wide net of players. This system won’t be used for AAA titles. The GPU selection is more to make it look pretty, and I selected it primarily due to cost. It is an overkill GPU for this purpose, but that also means it shouldn’t ever run all that hot. I probably could’ve left the GTX 660 in her system without issue, except I wanted that card back.

NZXT S340 mini review

Like it’s bigger brother the H440, the S340 is an interesting chassis in which to build. It’s a great value while still having room for the massive dual-140mm H115i.

Cable management behind the motherboard tray is reasonable as well, and the cabin at the bottom for the power supply aids in this somewhat. The vertical white bar in the white version gives a great way to hide cables as well. You still have to plan your cable management, though, so don’t think this allows you to get away with a sloppy job.

But there is no ventilation for the 3½” HDD cage in the basement. That HDD cage is also not removable. This is a poor design decision given that modern HDDs still run rather warm when excited. So if you intend to use an HDD for this build, opt to a 2½” laptop HDD to have it up in the main compartment. Laptop HDDs and SSDs are also designed to run with less airflow, so you can use a 2½” to 3½” sled in the HDD cage to have it out of the way.

The little sister to the H440 is still a great option for lighter builds. A full ATX mainboard looks a little cramped in this setup, though, so opt for a microATX mainboard unless you need the extra slots. That will also allow for better reach to the front panel connectors while still giving good clearance around the rest of the hardware.

Overall I would certainly still prefer and recommend the larger H440 to the S340 since it also has more fan capacity (S340 only has four fan mount positions). But if space is a little bit of a premium around your desk, this is still a great option at a great price. The included fans can be a little noisy running at a full 12V, so consider undervolting them or hooking them to the mainboard to control noise. Or you can swap them out altogether for a quieter option.

Next setup

There is a companion system planned. The mainboard and processor will be the same, but the chassis will be different. Since the chassis can dictate cooling options, that also means the CPU cooler will be different, but I’m not entirely sure what I’m going to do. I might lean toward an AIO again, or I’ll find a good, quiet air cooler, such as the Noctua NH-D9L that I’m currently using in my NAS.

The power supply will likely be the same, or I may lean toward another brand while sticking with the same wattage. And I’ll likely also pick up another RX 470 for that build, depending on what prices look like for other GPUs.

The chassis isn’t set in stone for that build. I’m leaning toward the InWin 303, also white. But since desk space is at a heavier premium than around this system, I may opt for an HTPC chassis such as the Silverstone GD09, or even go ultra-SFF with the Node 202, which would require a different mainboard and power supply.

So stay tuned for that build.