Beta Orionis – Part XXIV

Build Log:

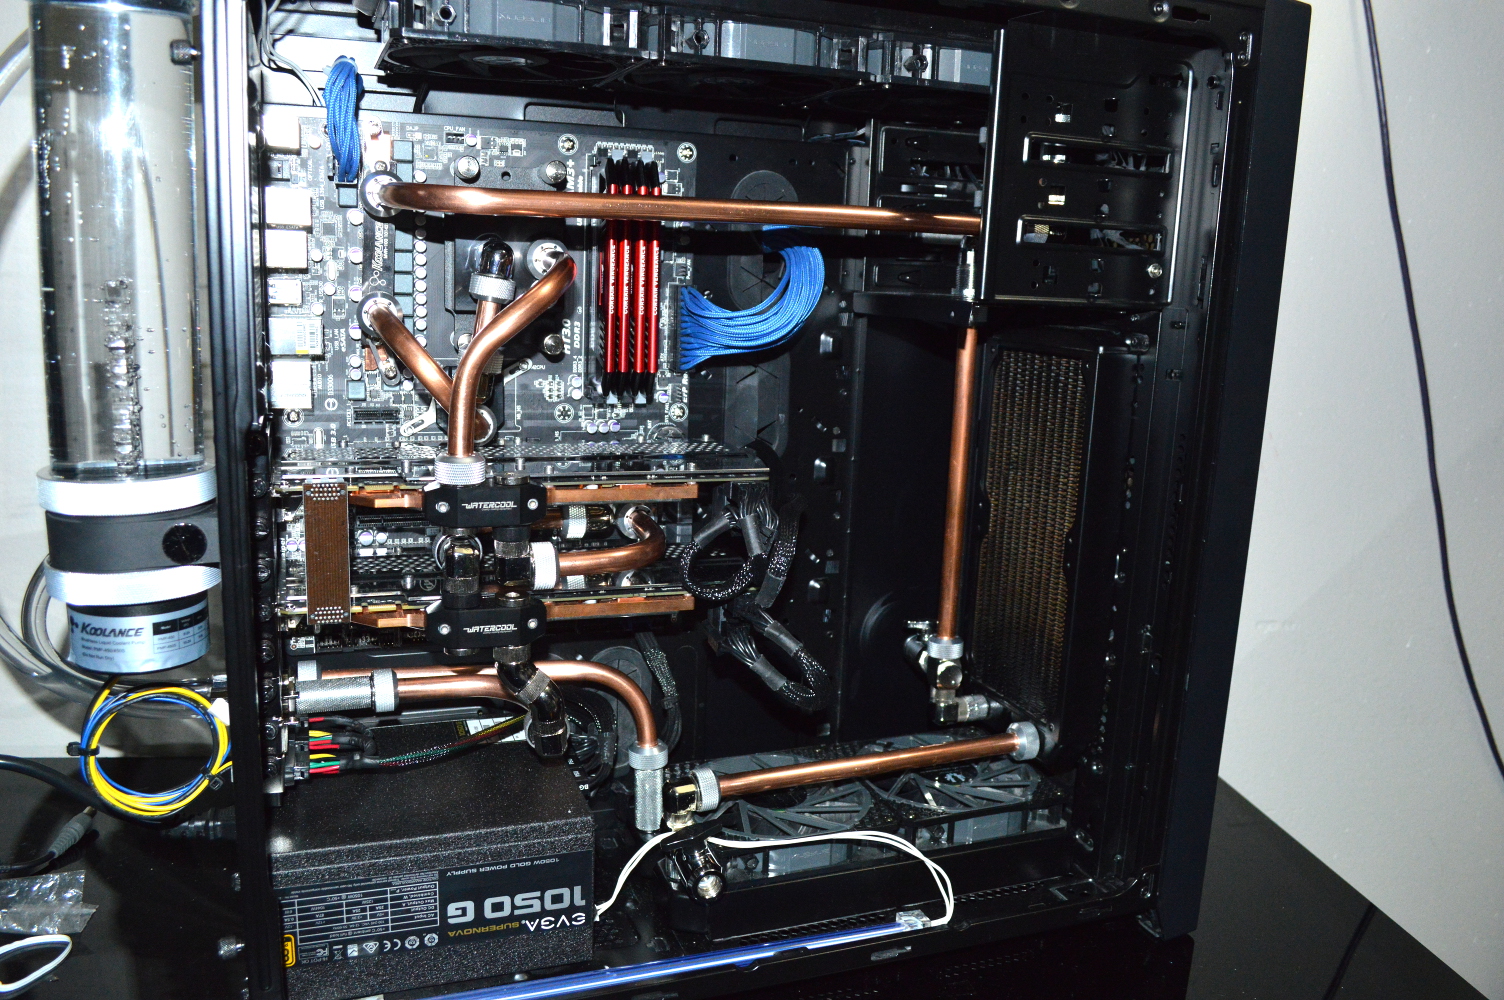
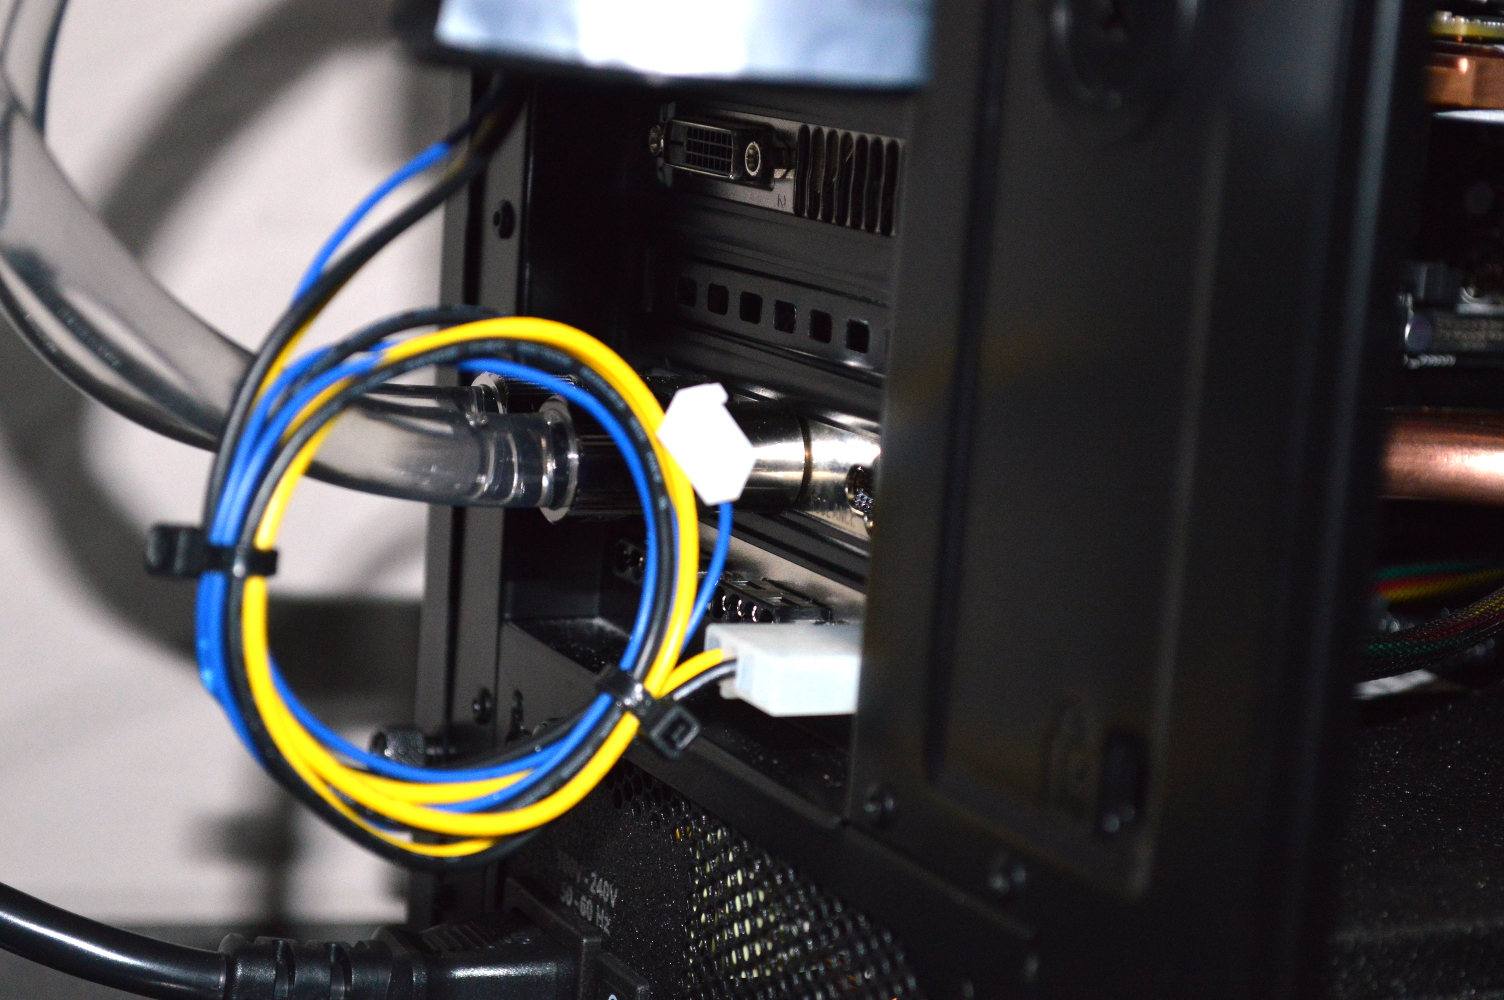
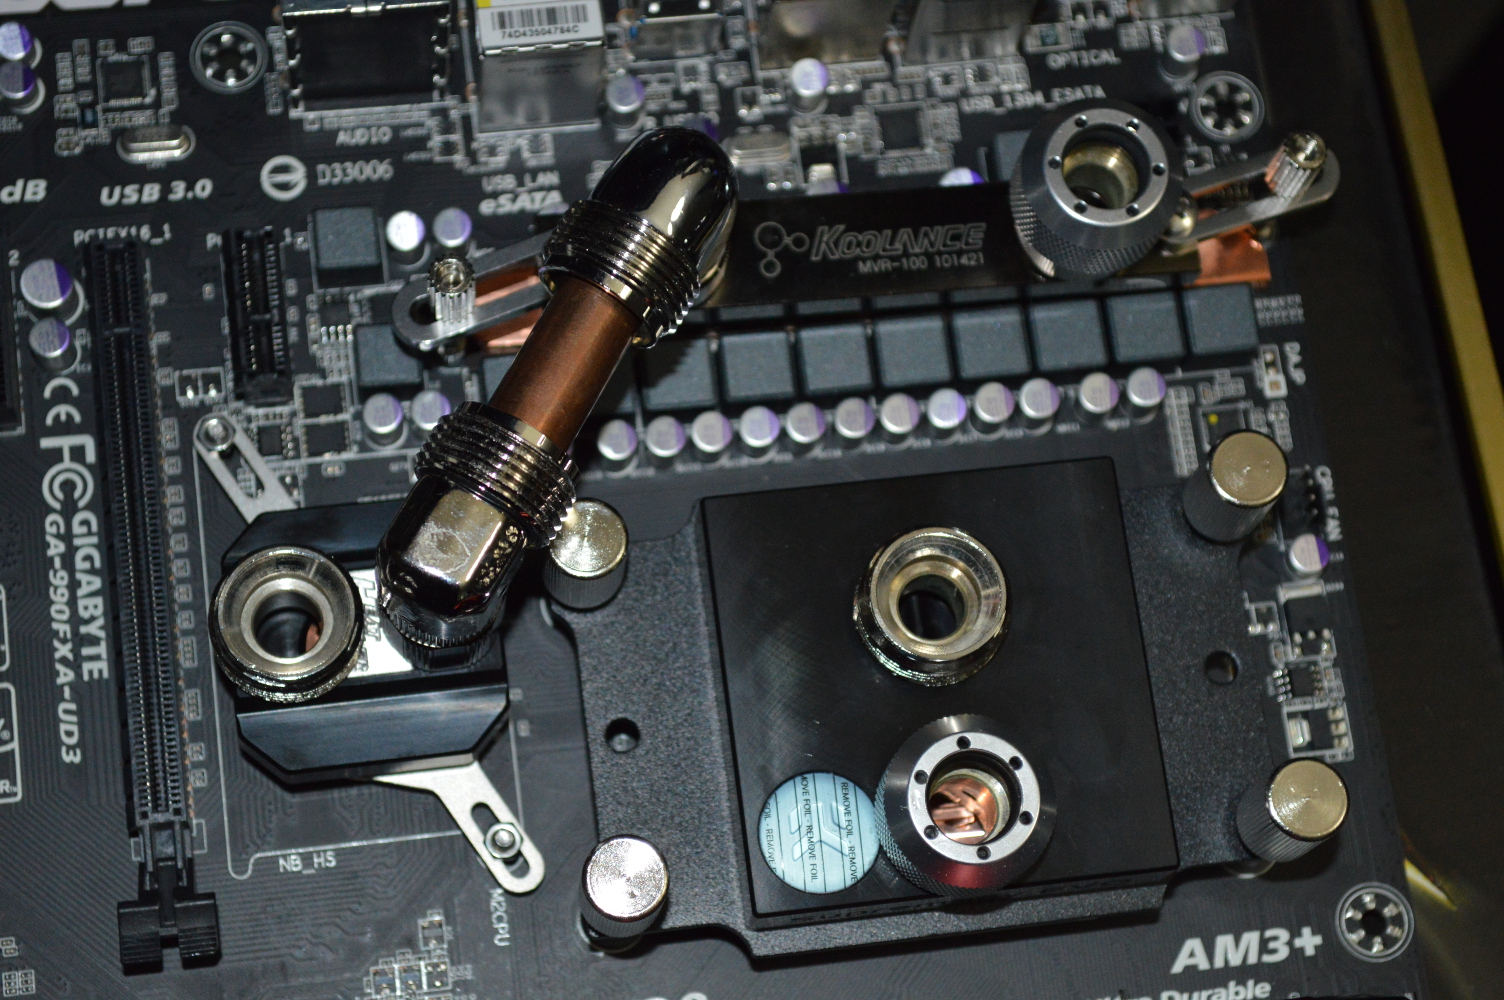
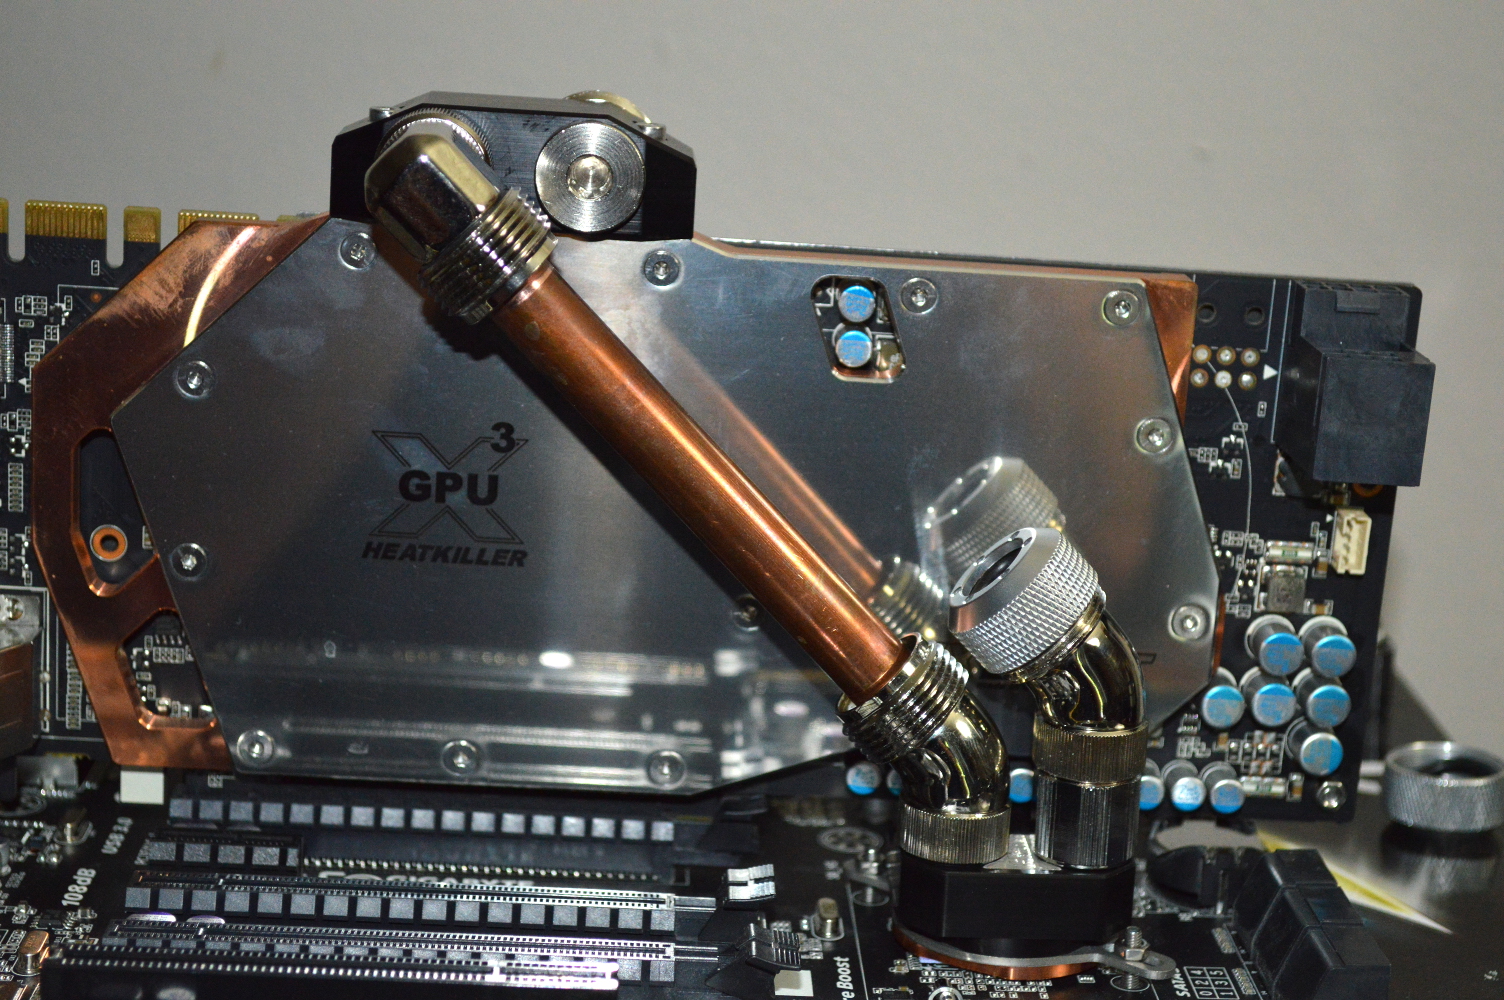
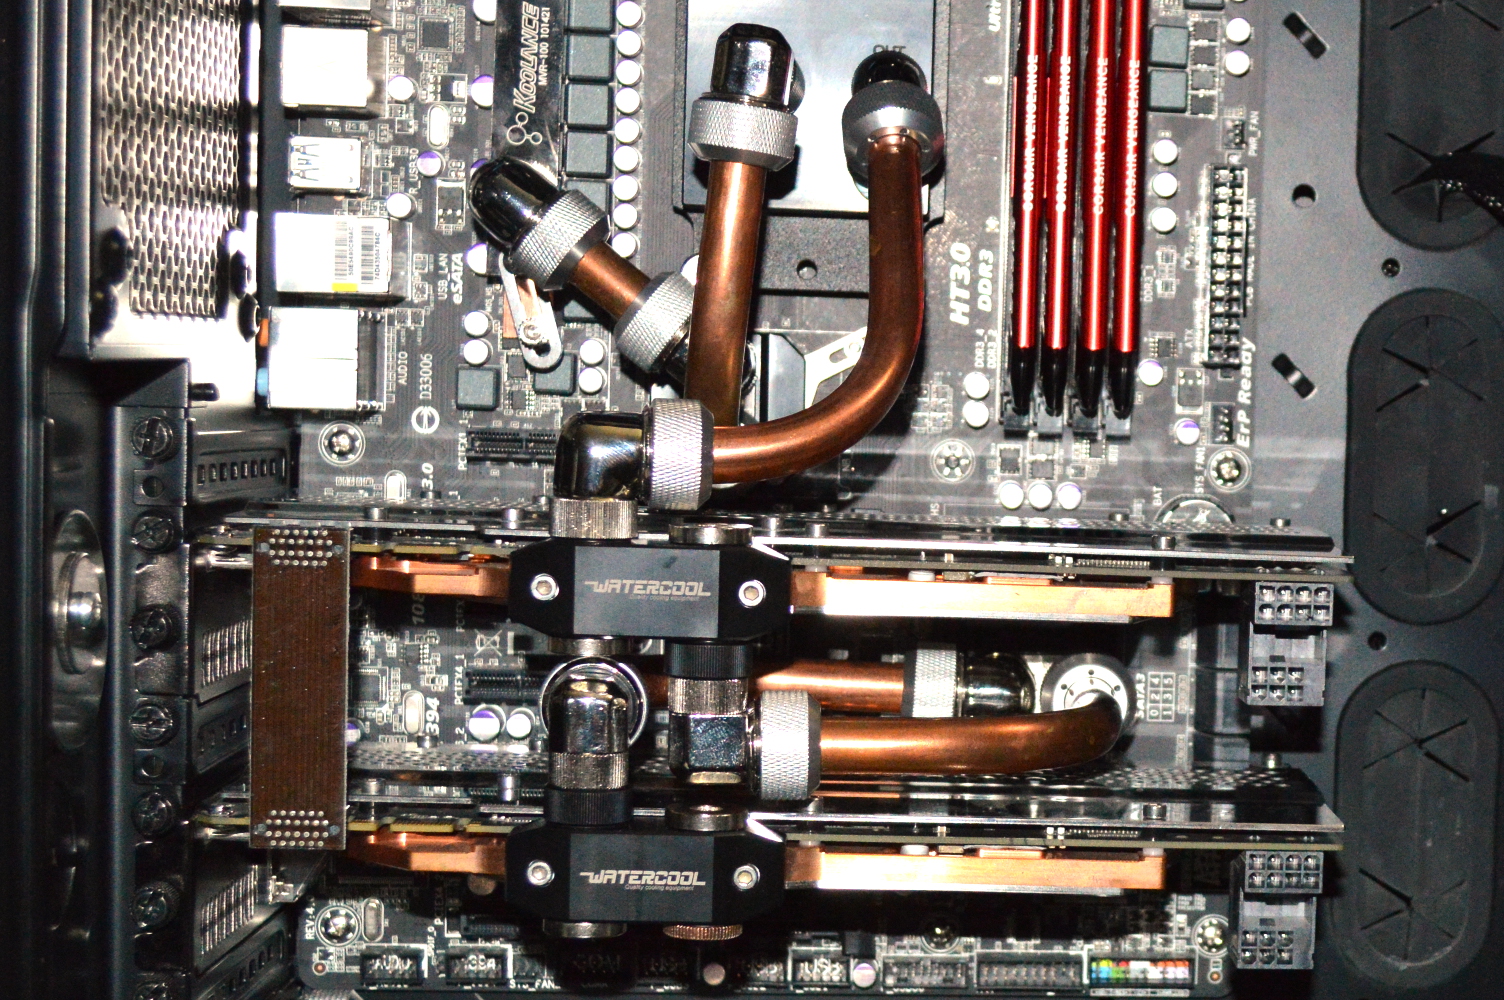
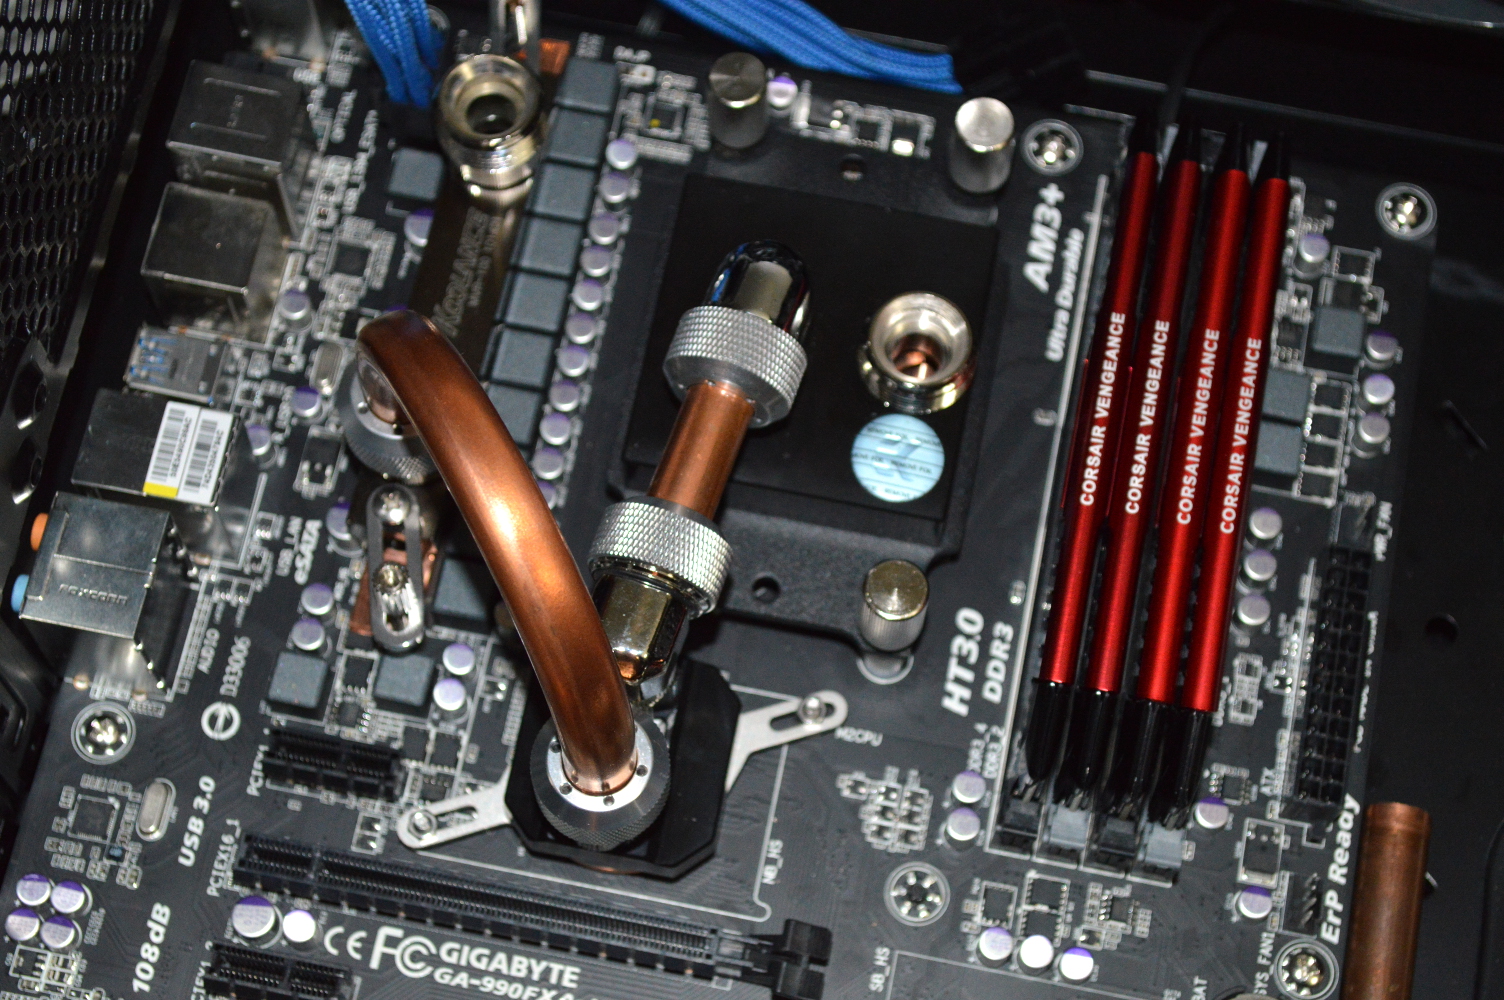
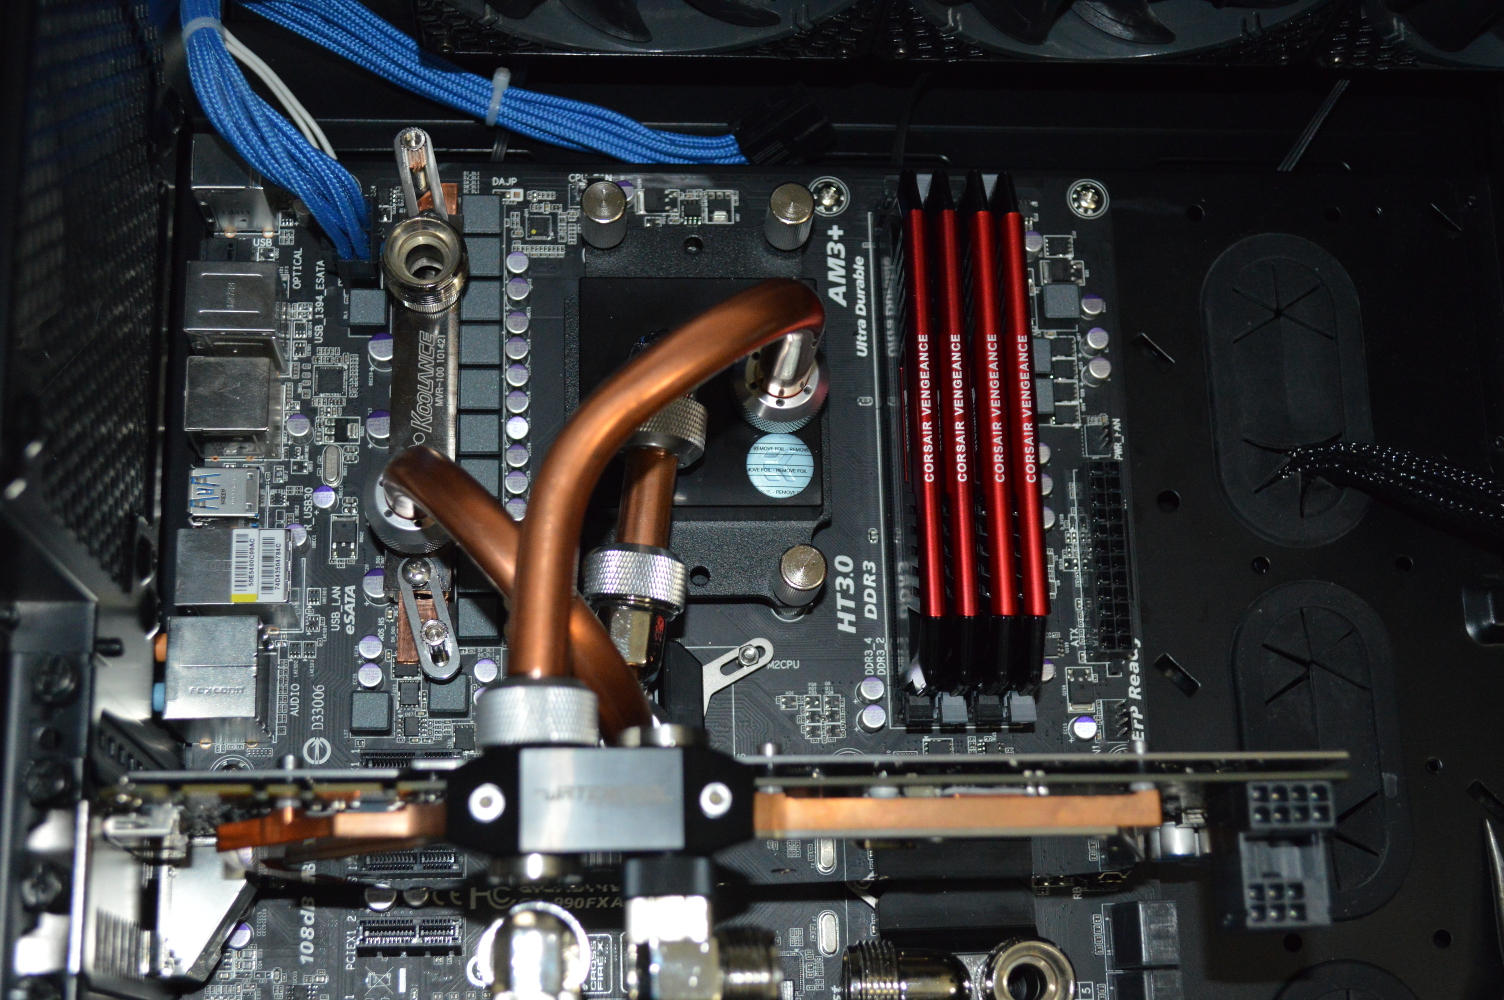
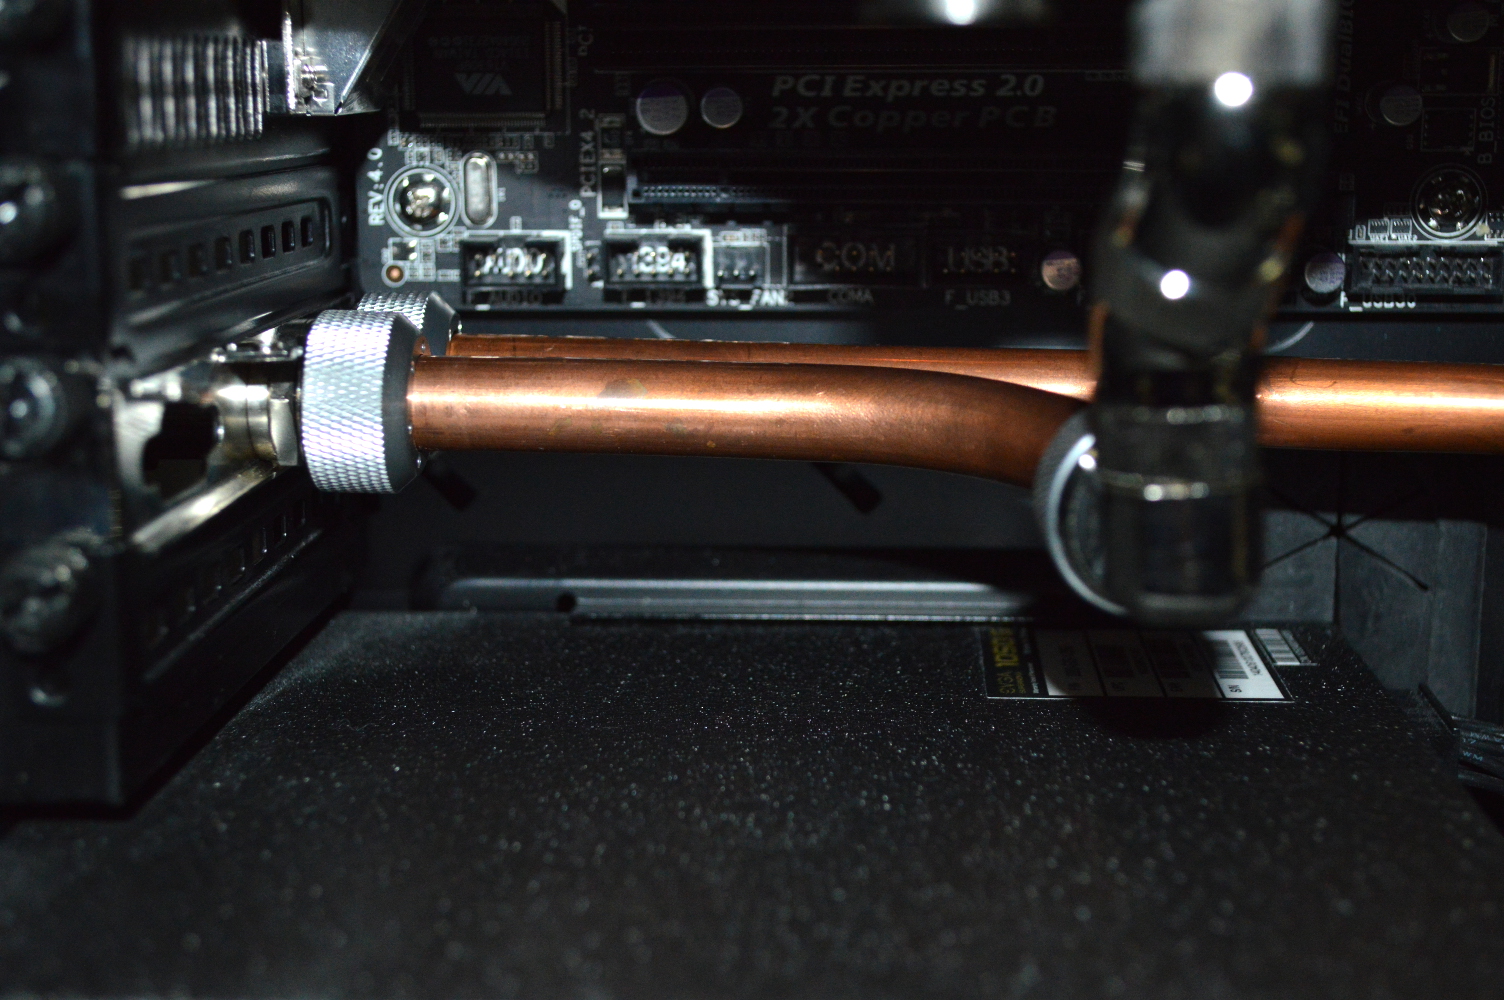
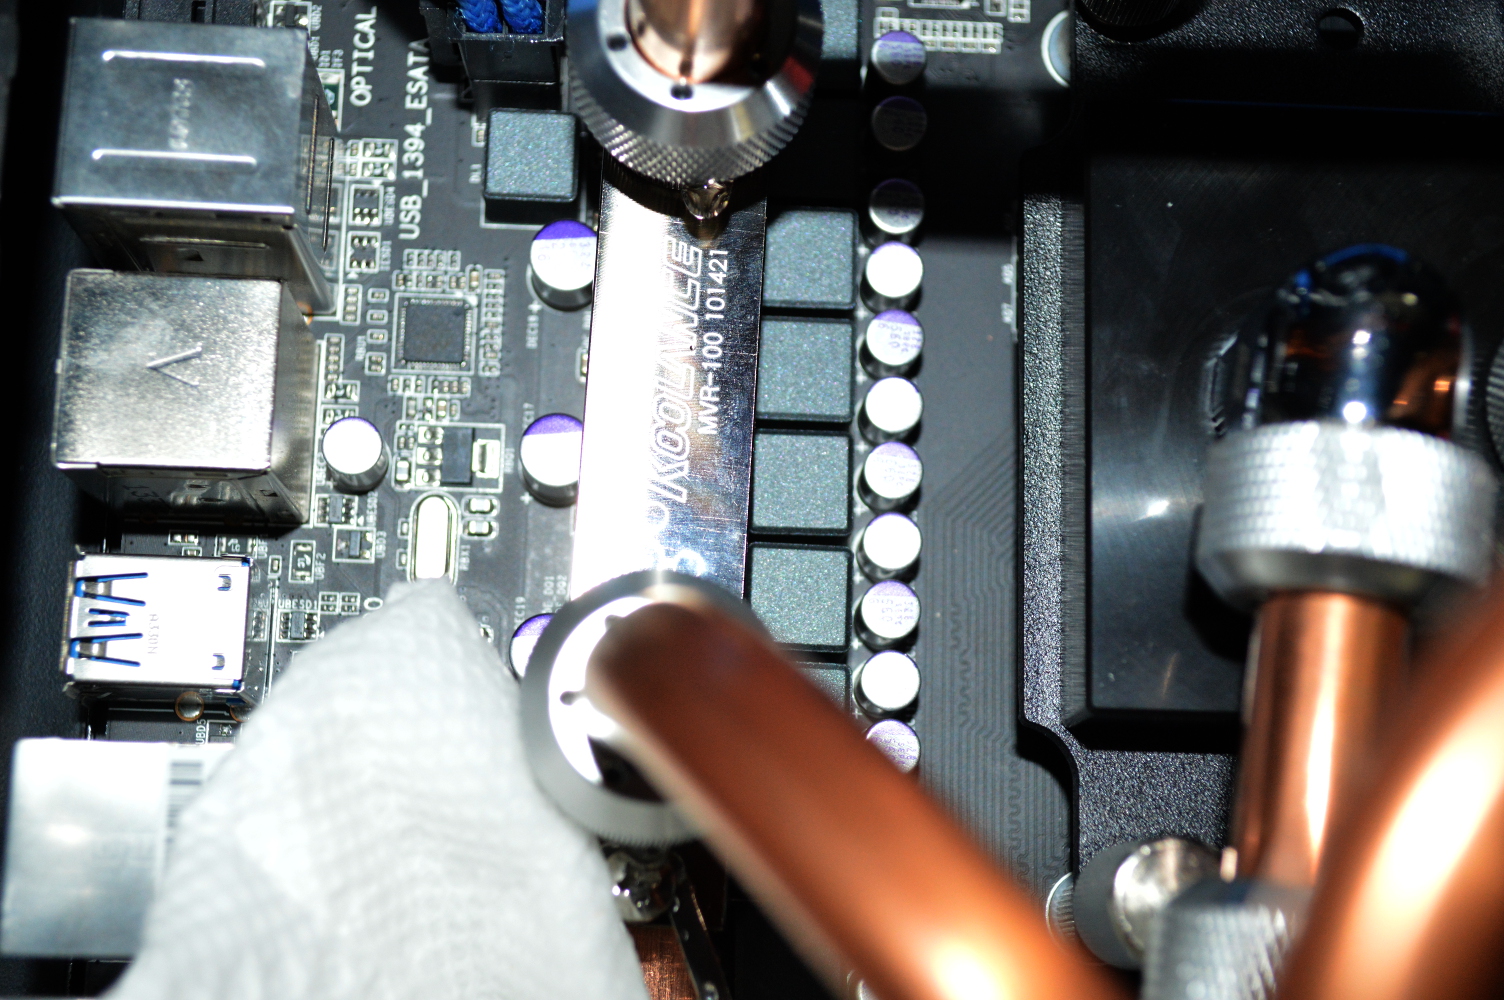
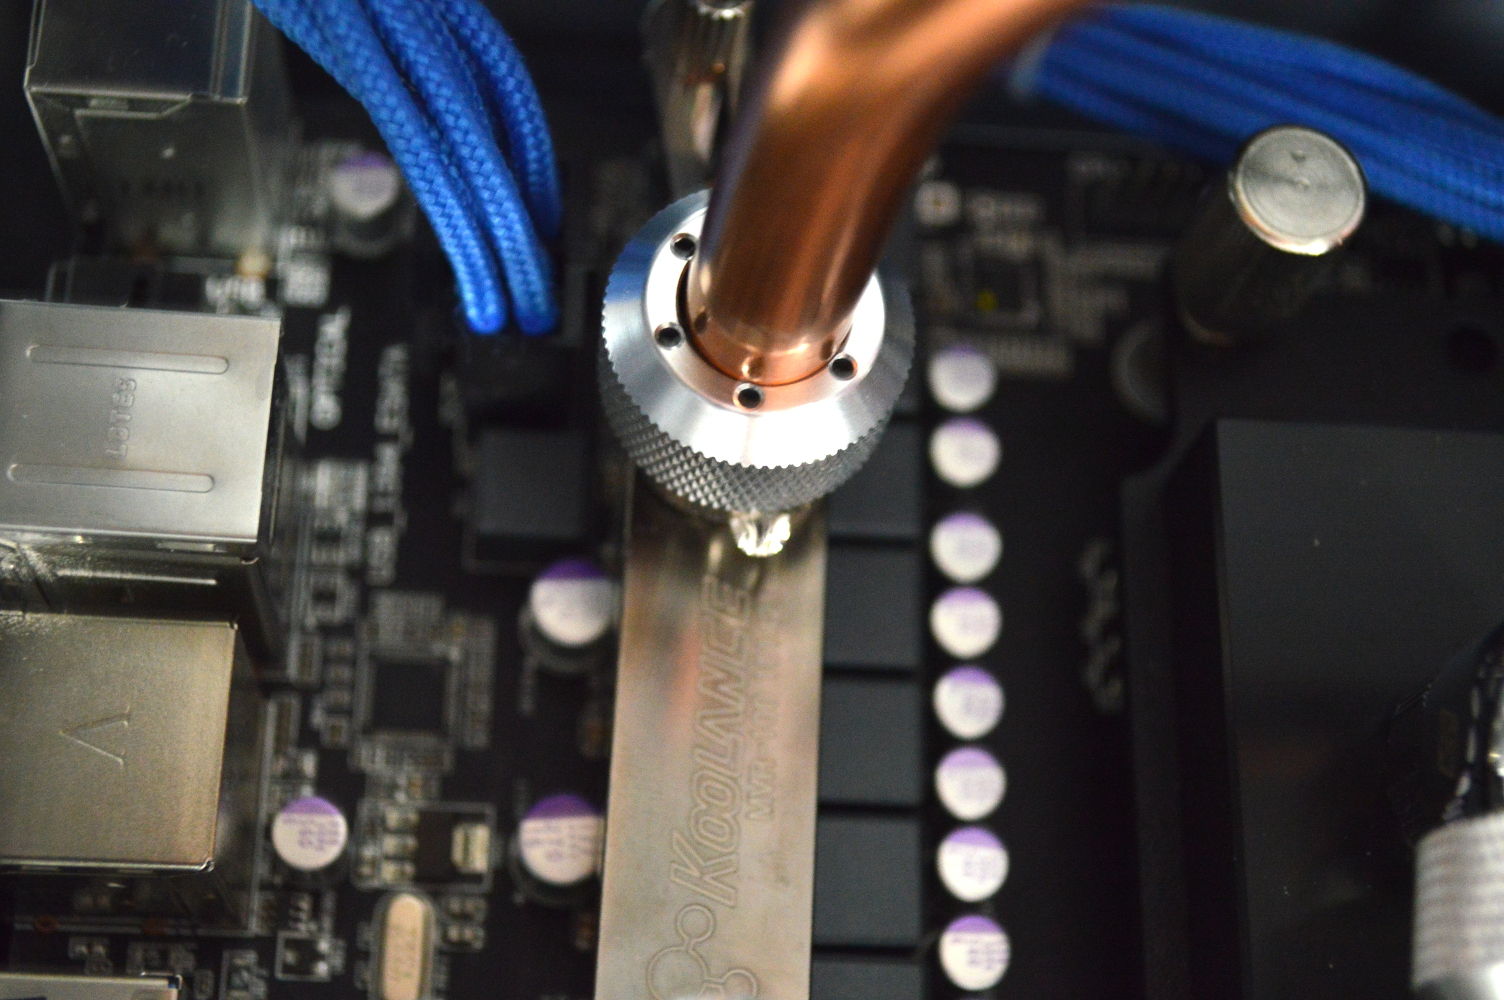
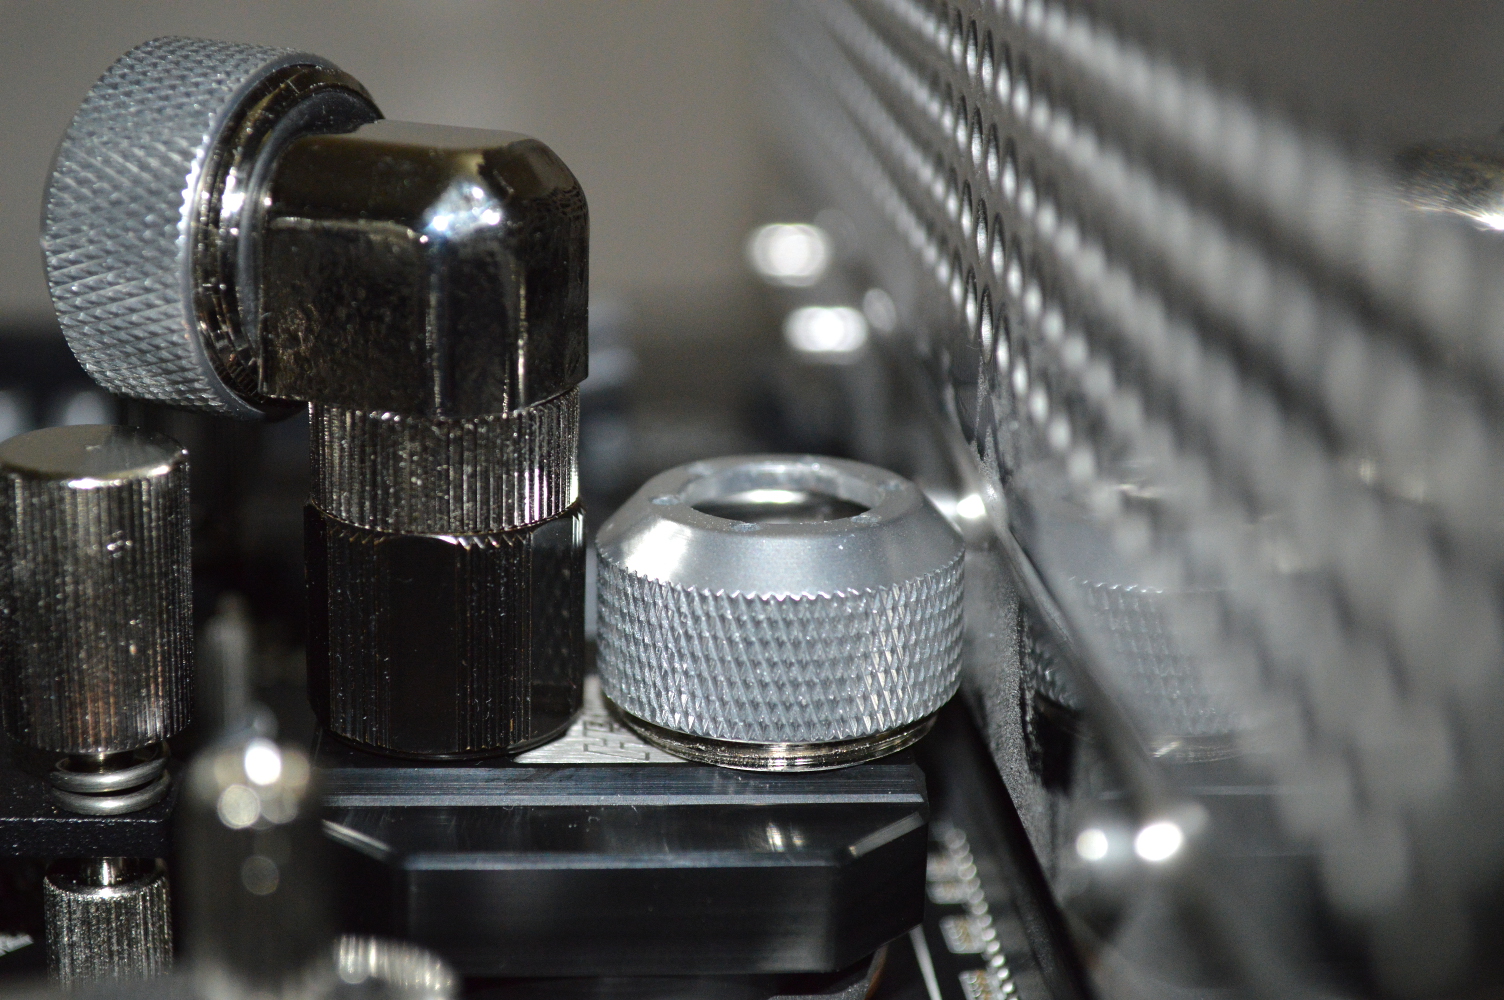
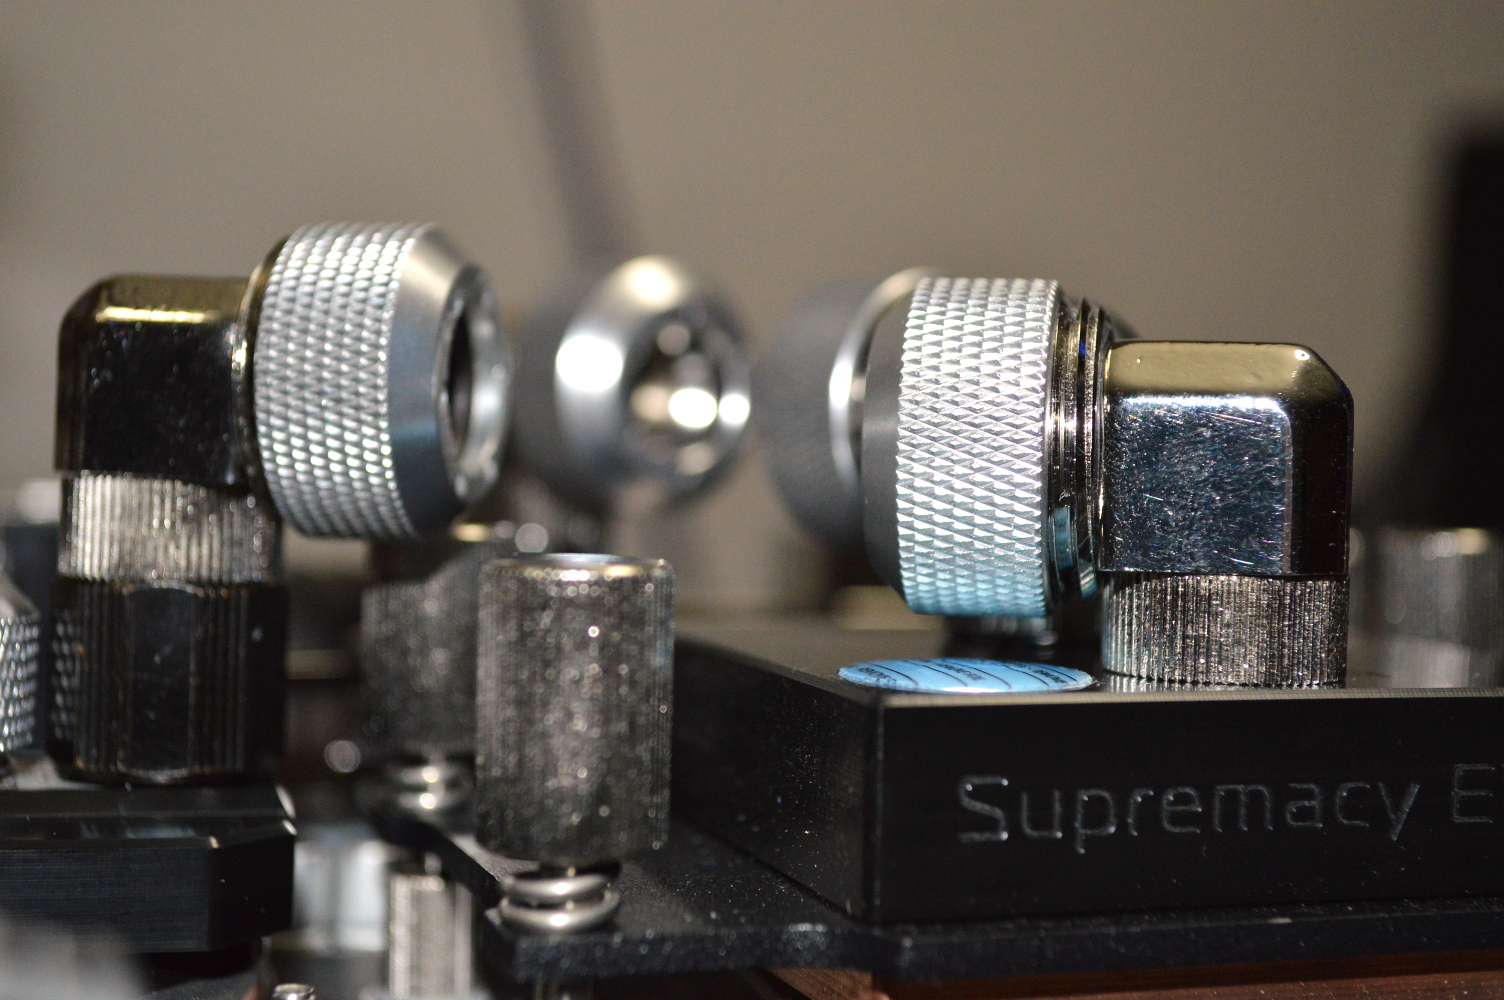
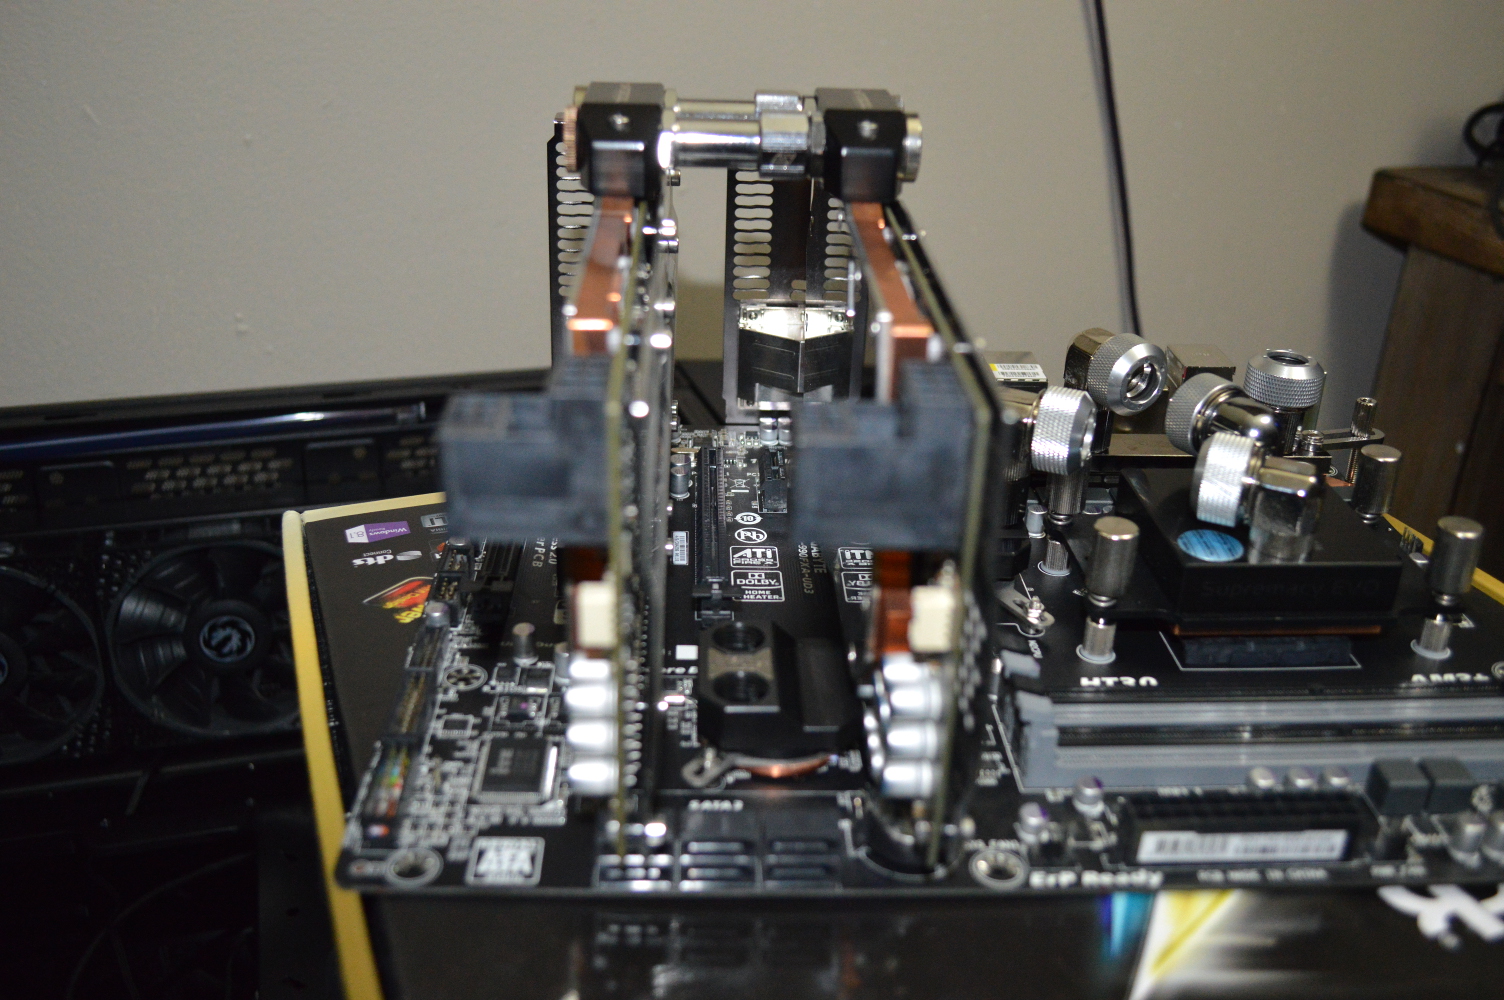
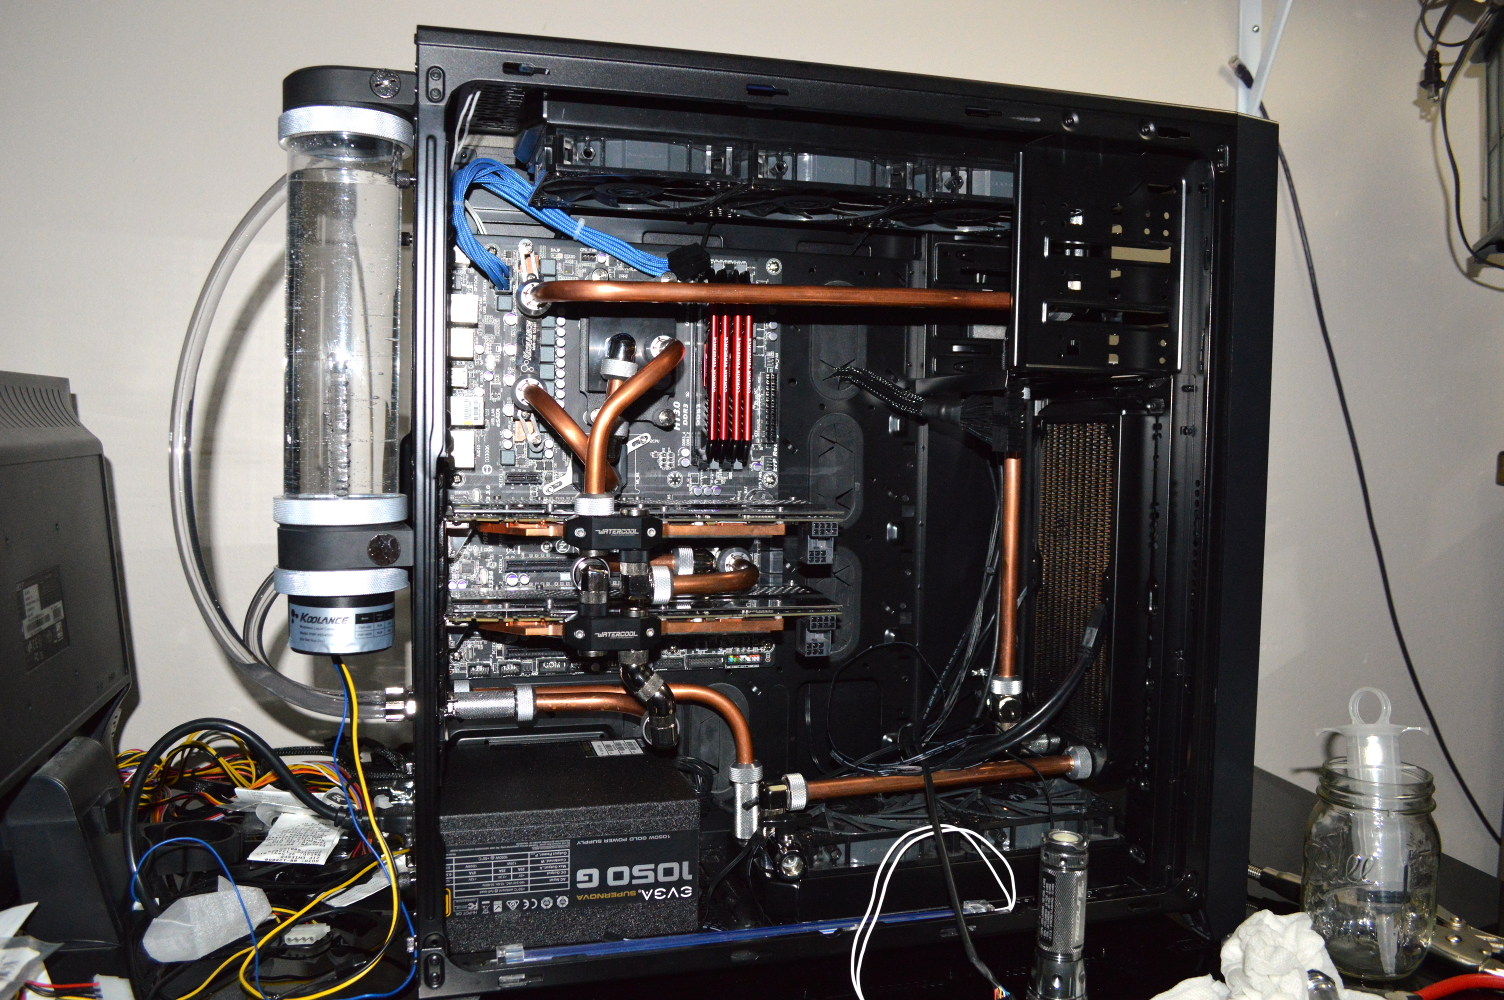
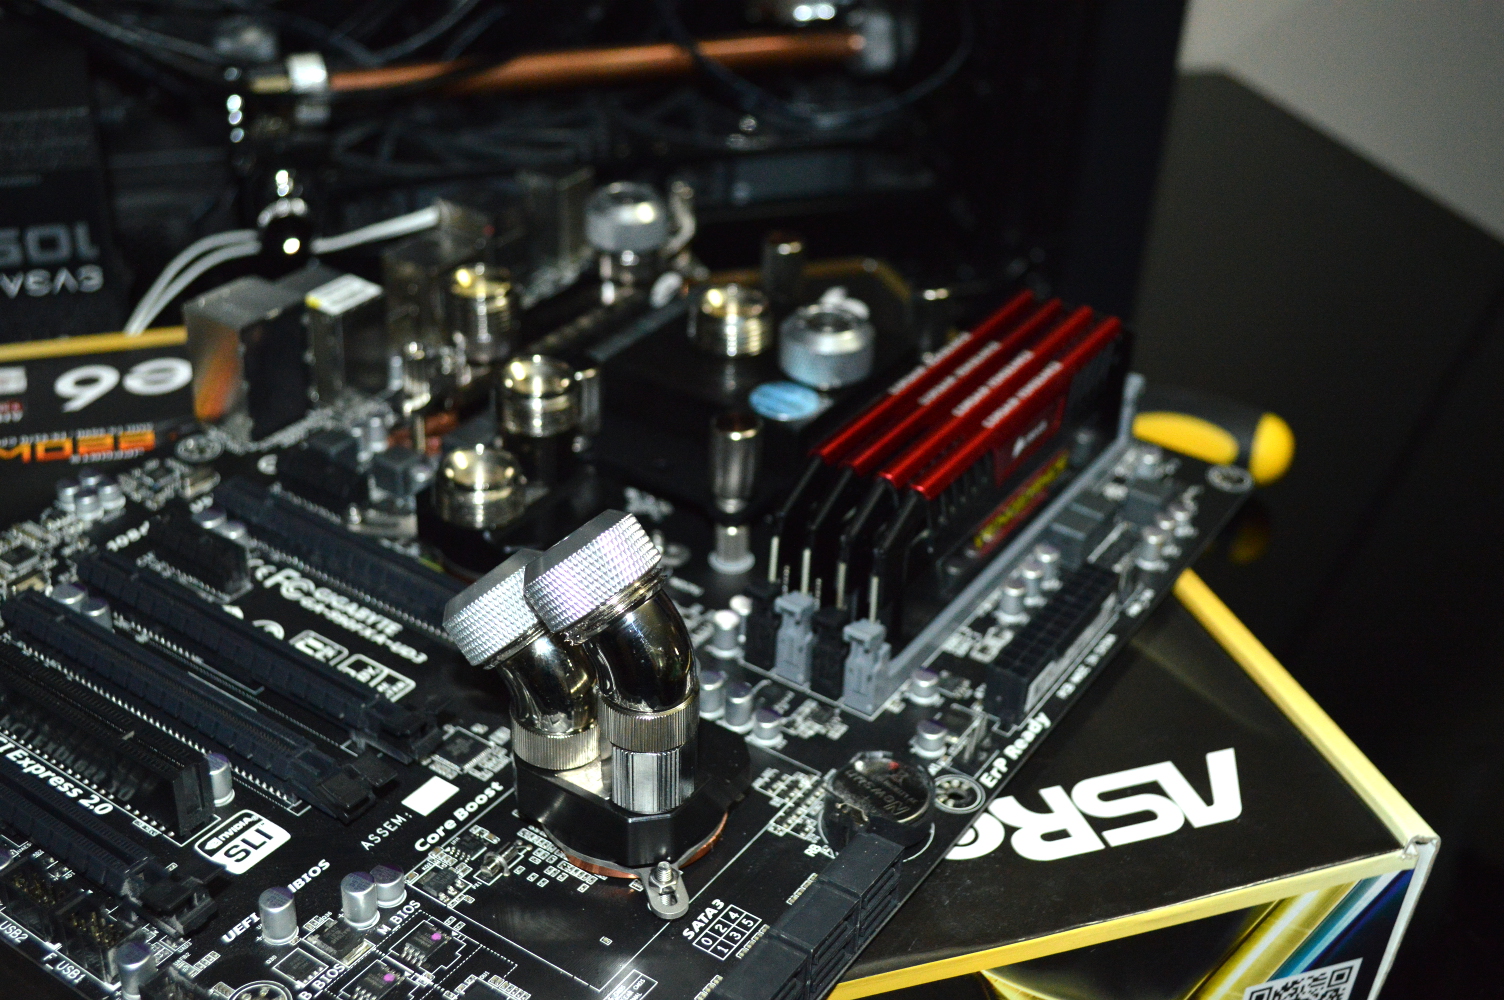
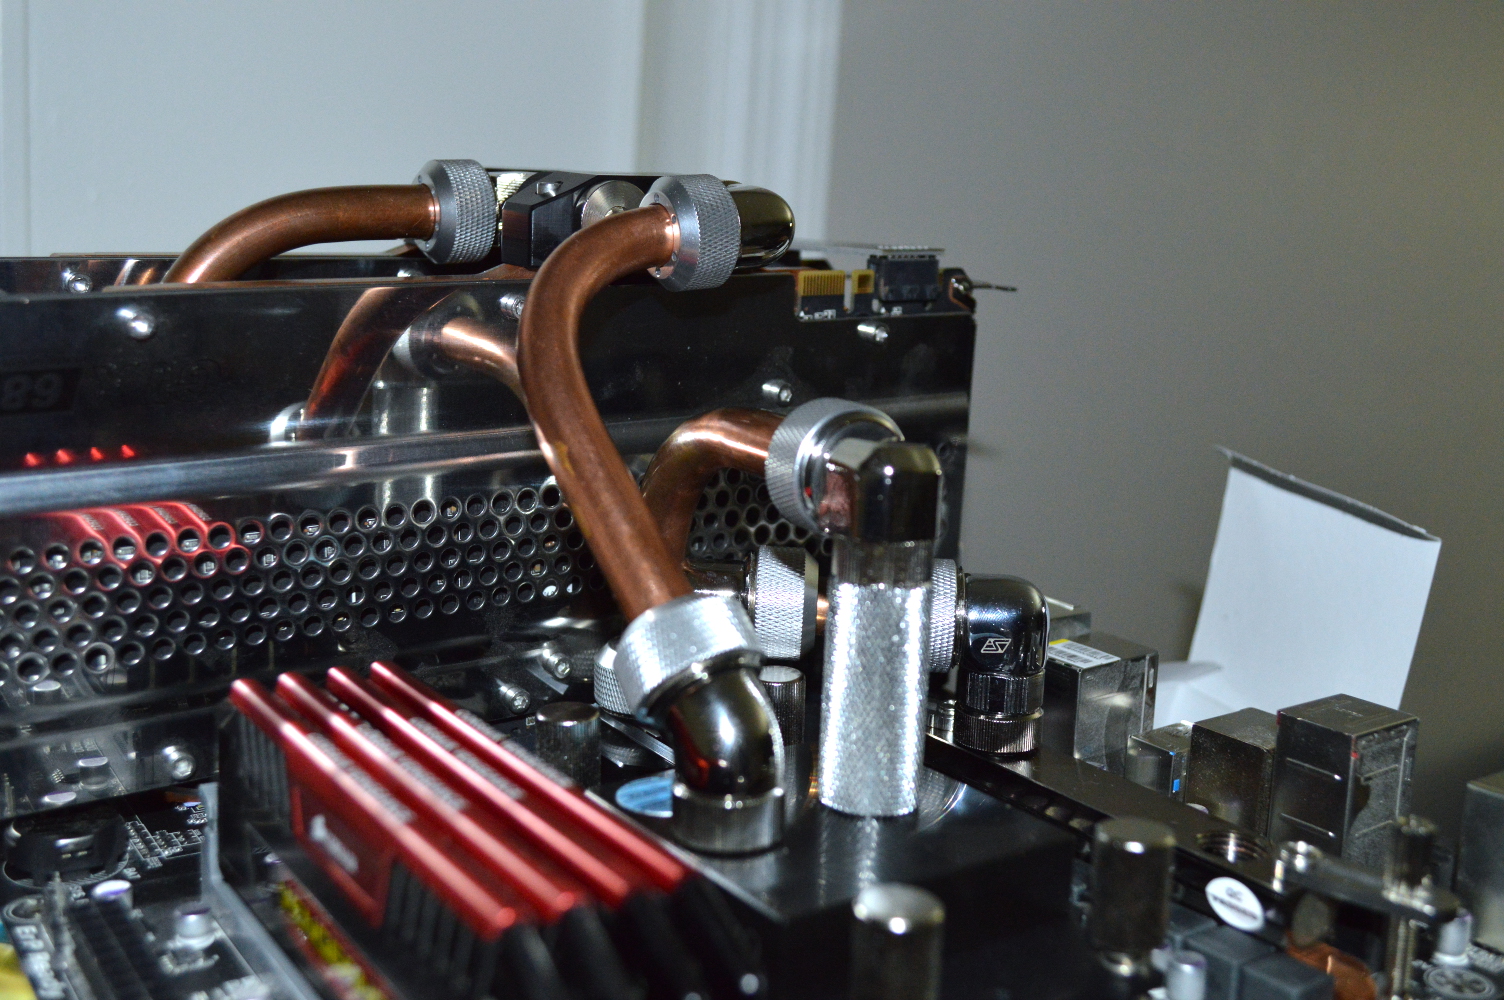
In going to Micro Center, I picked up a pair of Swiftech extension fittings and seated them. While a little tight, I was actually able to seat the tubing without modifying it as well. But this didn’t completely end the leaks. One of the fittings on the pass-through bracket just would not stop leaking regardless of what I did, so I just ended up replacing it. And finally I got a leak test that didn’t result in a leak.

It almost looks like it’s connected to an IV now.
leaktest

leaktest2

plugs

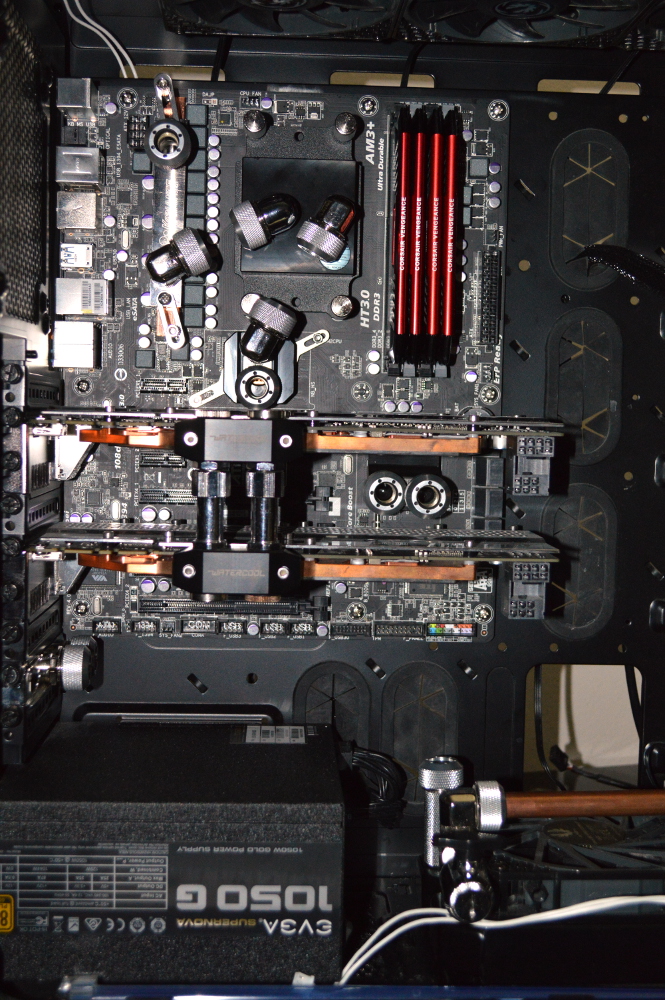
Being lazy it would be a couple more nights before I finished up the system, getting the cables tied up and everything. I accidentally forgot to plug in both CCFLs, so only the top one is lit, but it provides a nice contrast.

finished

* * * * *

So why did I do this? In short to show that water cooling doesn’t have to be restricted to the inside of the case. Several other external water-cooling projects have occurred with others. For example, a guy going by the name AntVenom has his water cooling system — except the blocks, of course — entirely external to his system. The coolant travels through pipes going through his floor and into his basement, where it passes through the radiators and is circulated using a high powered pump.

I’m also planning something similar for both Beta Orionis and Absinthe. Similar to what I have planned for water cooling graphics cards with the Colony West project, it’ll be two triple-120mm radiators instead of the triple and two dual-120mm radiators currently in both setups. The fact all radiators will be external to the system should provide for much better cooling. Plus with Absinthe, the system will be moved back into a case that is far, far from ideal for water cooling:

X-CRUISER-BL-1_500

This chassis has only four fan slots, three of which are for 80mm fans. I’ll be adding another front intake for a 120mm fan similar to how I already have Absinthe. And all the fans will be replaced with silent fans. The 120mm fans will likely be two of the Bitfenix Spectre Pros currently in Absinthe since they are relatively quiet.

For the radiators, I’m leaning toward Cougar Vortex HDB fans. I have two of them in the graphics box for Colony West and love how silent they are. Compared to the Spectre Pro, they have 4 CFM greater airflow, 40% greater static pressure, and a lower noise rating. They’re also focus-flow fans like Noctua, but for a much less price. Having six in close proximity, however, could still prove interesting as far as noise is concerned. I’ll be finding out how well that’ll work first with Colony West, as I’m not using SP120s on the two radiators in that project.

This is the one part that I feel the need to explain why it’s happening. My wife picked out that case back in 2007 to match a Mustang that her friend drove. The lack of fan capacity is why her system was moved into a Corsair 750D when she upgraded to the AMD FX-8350. More airflow was needed. Now that the system is water cooled, airflow isn’t nearly as important. Don’t get me wrong. It’s still important, but since the majority of the heat can be carried out of the chassis through a coolant line, it becomes much less important for cooling and system stability.

So in talking about the plans for Colony West during a drive, I talked about how this project could demonstrate that you don’t need to upgrade your case to have a well-performing water cooling system. This spawned the idea in my wife’s mind to demonstrate that with her case. Move Absinthe back into her blue Apevia case with it all being externally water cooled. A Koolance bracket would provide the coolant lines into and out of the chassis — likely still using copper for most everything inside — and having radiators mounted to an external setup.

The Koolance bracket can be used with most any chassis to provide a coolant line into a system, and while miniITX cases can be an exception to that, other options exist. The radiators need not be mounted internally, as AntVenom demonstrated and as I’ll be demonstrating with Colony West. Instead the radiators will be mounted into an external box of some kind — probably adapted from the IKEA RAST night stand with another wood panel with fan holes to hold the radiators unless I build something up from scratch. The pump and reservoir will be mounted in that box as well such that the coolant basically goes to the box and back, though in my setup I can use just a standard D5 pump, or any quiet pump for which I can adapt fittings and get enough flow and pressure.

Now this kind of setup does require some ingenuity, which is why I don’t see most people who are getting into water cooling doing something like this. Many of the threads I see asking about water cooling boil down to “what should I buy?” or “is this a good setup?”. No attempt to think outside the box — err… chassis.

On that I actually lay fault with the water cooling and modding communities. I know much of the emphasis on water cooling has been with getting everything into the computer case. To this end, computer cases have been designed to allow for more radiator space. But what if you could have any size radiators you want with any chassis you want? That is what I aim to demonstrate.

I could even go further. Instead of two triple-120mm radiators, I could have two triple-140mm radiators. Or quad-120mm or quad-140mm radiators. Or however many radiators I want. AntVenom used just one quad-120mm radiator. And it’s a cooling setup that isn’t tied to your case.

You can even have dual loops if you still want with it all still being external to your case! Once the chassis is removed from the consideration, the possibilities become pretty endless. All you’d need to ensure is that the pump you select can push through it. And I’d highly recommend using quick disconnects on the lines running external between the cooling box and the chassis.

So that’s it for the rant on this for now, I guess. Next iteration of this will probably feature me mostly disassembling this again for moving the radiators external. That should allow me to seriously undervolt these fans — possibly all the way down to 7V or even 6V — and still keep good airflow in the case. And I should be able to use quiet fans on the external radiators allowing for a very quiet setup overall.
Beta Orionis – Part XXIII

Build Log:

In figuring out how to tube up the mainboard, I half felt like I didn’t know what I was doing given how much I tried to change up things.

Friday night I stopped by Micro Center on my way home from work with the intent of buying fittings. Specifically I was there for some 8mm EK extension fittings to use on the VRMs instead of the 15mm Swiftech extension fittings. I also picked up a pair of 45-degree EK fittings with the intent of using those on the southbridge.

southbridge1

On that there would be some changes of plans that would require that I go back to Micro Center on Saturday to acquire another pair of 8mm EK extension fittings, and I picked up a pair of 90-degree fittings as well. More on that in a bit.

But the intention, going off the previous entry in the log, was to see about using 180-degree bends between the northbridge, VRMs, and CPU. Unfortunately that wasn’t possible. Recall from the previous article that I said the minimum distance between the fittings had to be 3″. The tubing bender I own has a CLR — center-line radius — of 1½”, meaning for a 180-degree bend, the fittings had to be a minimum of 3″ on center.

Ideally it should be exactly 3″ on center so I didn’t have to do anything odd to get a tube bent.

And none of the distances between fittings met that requirement. Only one of the distances exceeded 3″: from the lower fitting on the northbridge to the inlet on the CPU, which came in at 3½”. Getting that kind of 180-degree bend would’ve required doing a 90-degree bend, then finding a way to get a ½” offset in the tubing before doing another 90-degree bend. My initial attempt failed and I decided against trying for it. There might be a way to get it to work, but for now I’m not going to consider it.

So to go from the northbridge to the CPU, I instead used a 40mm extension fitting off the CPU inlet with a 90-degree fitting. I didn’t like the result. And to go from the CPU to the first graphics card, I took kind of a cheap shortcut that I also didn’t like: a 45-degree fitting with a 90-degree bend to a 90-degree fitting. Again, I don’t like the look.

cpu_north_gpu

On the plus side, for the VRM to the northbridge, I did somehow manage to get that lined up about perfectly straight. That’s a Swiftech 90-degree fitting sitting on an 8mm EK extension going to a Koolance 90-degree fitting sitting on a 15mm Swiftech extension.

vrm_north

The graphics cards were a little more complicated. One thing I discovered up front was that the lower 45-degree fitting in the above picture lined up straight with a 90-degree fitting coming off the left-side of the graphics card.

gpu_south

Unfortunately that setup would interfere when trying to use a 90-degree fitting with a 90-degree bend going to the other southbridge fitting, and I wouldn’t be able to use the two 45-degree fittings together on the southbridge. Oh well. What I managed to figure out in the end does work, though.

gpu_south2

From the top card it goes out of a 90-degree Koolance fitting through a 90-degree bend into the southbridge, then out through a 90-degree fitting through another 90-degree bend into a 90-degree fitting on the second card. I’m not sure yet if I’m going to keep this setup or try to figure out something else.

So the CPU, VRM, northbridge setup will be getting redone. I don’t like it, and I’ve been considering my options, including going back to the 90-degree setup in the previous section. But to get from the pass-through bracket to the lower radiator, that required just a straight run of tubing with a 90-degree bend and just a slight offset to get it lined up.

Still left to figure out is the top radiator to the VRMs and lower graphics card to the outlet, once I have the upper mainboard area redone.

* * * * *

Reworking the loop was definitely worth the time. I managed to figure out that I could do a 180-degree bend between the VRMs and the northbridge. And a Koolance 90-degree fitting on a 15mm Swiftech extension fitting lined up perfectly with a Swiftech 90-degree fitting on the CPU’s inlet. The line from the CPU to the graphics card was fun to figure out, but I managed to do so in just one try. It’s not perfect, but it’ll get the job done.

vrm_180

gpu_cpu

For the line from the lower graphics card the outlet, I took a half-assed approach simply because it was the last thing to figure out and I wanted this done. I used two 45-degree fittings to create a makeshift dual-rotary fitting along with a 90-degree fitting to line up with the outlet with a piece of copper I had left over.

gpu_outlet

So that was it for that. The line going from the top radiator to the VRMs was a simple 90-degree bend. Nothing fancy. I connected some 3/8″x1/2″ tubing to the compression fittings on the reservoir and started a leak test.

And it leaked. A lot.

The reason is the 8mm EK extension fittings on the VRM block. In trying to install them I noticed how they weren’t seating completely flat, but it still looked like the O-rings would seal. Even wrenching them didn’t get them completely flat. So since I’m out of other extension fittings, I’ll have to run to Micro Center to get another pair. This will also mean some slight modifications to the two copper tubes involved, but if it results in that not leaking, it’ll be worth it.

leak1

leak2

So lesson learned: do not use EK fittings with the Koolance MVR-100 or MVR-40. Hopefully the Swiftech extension fittings will have better luck.

Beta Orionis – Part XXII

Build Log:

I wasn’t done with the mainboard yet. After the last segment, I started with preparing the EK Supremacy EVO block. The backplate was first, then I made the needed adjustments to the block’s jet plate and mounting bracket. That’s pretty much as far as I can get before draining and tearing down the loop.

mainboard

Let’s go over the plan for the loop first — as in the order of operation.

Inflow and outflow will be in the lowest expansion slot right above the power supply. The inflow will go to to the radiators — bottom, front, then top — before getting to the VRMs. It’ll be one long piece of tubing from the front to the back. Currently I’m planning to go from the VRMs to the northbridge, then the CPU, because it looks like that’ll be easier to tube up, but I might go from the VRMs to the CPU, then the northbridge. Either way, the next path is to the top graphics card, then southbridge, then bottom graphics card and to the outflow.

This will require replacing virtually all of the tubing, so good thing I’ve got about 10′ of it waiting. I’m not sure yet if I’ll need any additional fittings, but I’m going to see what I can accomplish with what I have. If push comes to shove, my local Micro Center has started stocking EK’s fittings.

Tearing down the computer

First order of business with trying this was to get the system torn down as much as possible before I either passed out, my back gave out, or I gave up and threw the thing out the window.

The three drain ports I’ve mentioned come in quite handy for draining as much out of the loop as possible. A syringe helps take care of some areas where it still gets trapped, such as the bottom radiator. I had earlier picked up several gallons of distilled water from my local HyVee to flush out everything. What I should also have picked up was an industrial-sized duster — seriously after six months this system picked up some serious dust. The fact it was running without a back cover for a couple months probably didn’t help, but most of the dust was on the top and front radiators.

Well, enough about that.

I flushed the graphics cards and the radiators, and then reinstalled them into the system. Given the pump and reservoir will be moved externally, the front and bottom radiators are directly connected by a straight line of tubing, such as what I used in Absinthe. That piece was cut from another piece of tubing I know I won’t be reusing.

After re-installing the radiators and connecting a couple pieces of tubing, I tucked all the cables in, remounted the graphics cards, and closed up the case for the night. I have a 11-week old kitten now, meaning curious beyond the point of frustration, and I can’t have her risking the system. But then she’s also the reason I’ve had the power supply plugged into the wall virtually the entire time I’ve been working on this system.

I didn’t get far the next day, in part because of my back. Above anything else, the reservoir needed to be mounted where I planned, and that is what I managed to get. I discovered a couple things as well.

I assumed the pump outlet would likely interfere with the top graphics card, and that was confirmed. There is, unfortunately, no way around that. The HDMI port is directly blocked, but whether the DVI-D ports are blocked will depend on how I run the tubing from the pump to the inlet, so for my television, I might have to use a DVI-D to HDMI converter, depending on how it’s blocked.

For the outlet back to the reservoir, I initially wanted to run that back to the far side of the reservoir, where the coolant would come back in from the bottom. Unfortunately that fitting is going to interfere with the side panel, so I’ll have to run the tubing back up to the fitting on the top of the reservoir on the same side as the pump’s outlet. I’ll figure out the specifics on that later.

It would be a couple days from that before I got back to the system, in part because I wanted to get to Micro Center to buy some more fittings. In particular I wanted Swiftech 3/8″x1/2″ fittings for the pump and reservoir. Yes, I’ll be using soft tubing externally and copper internally.

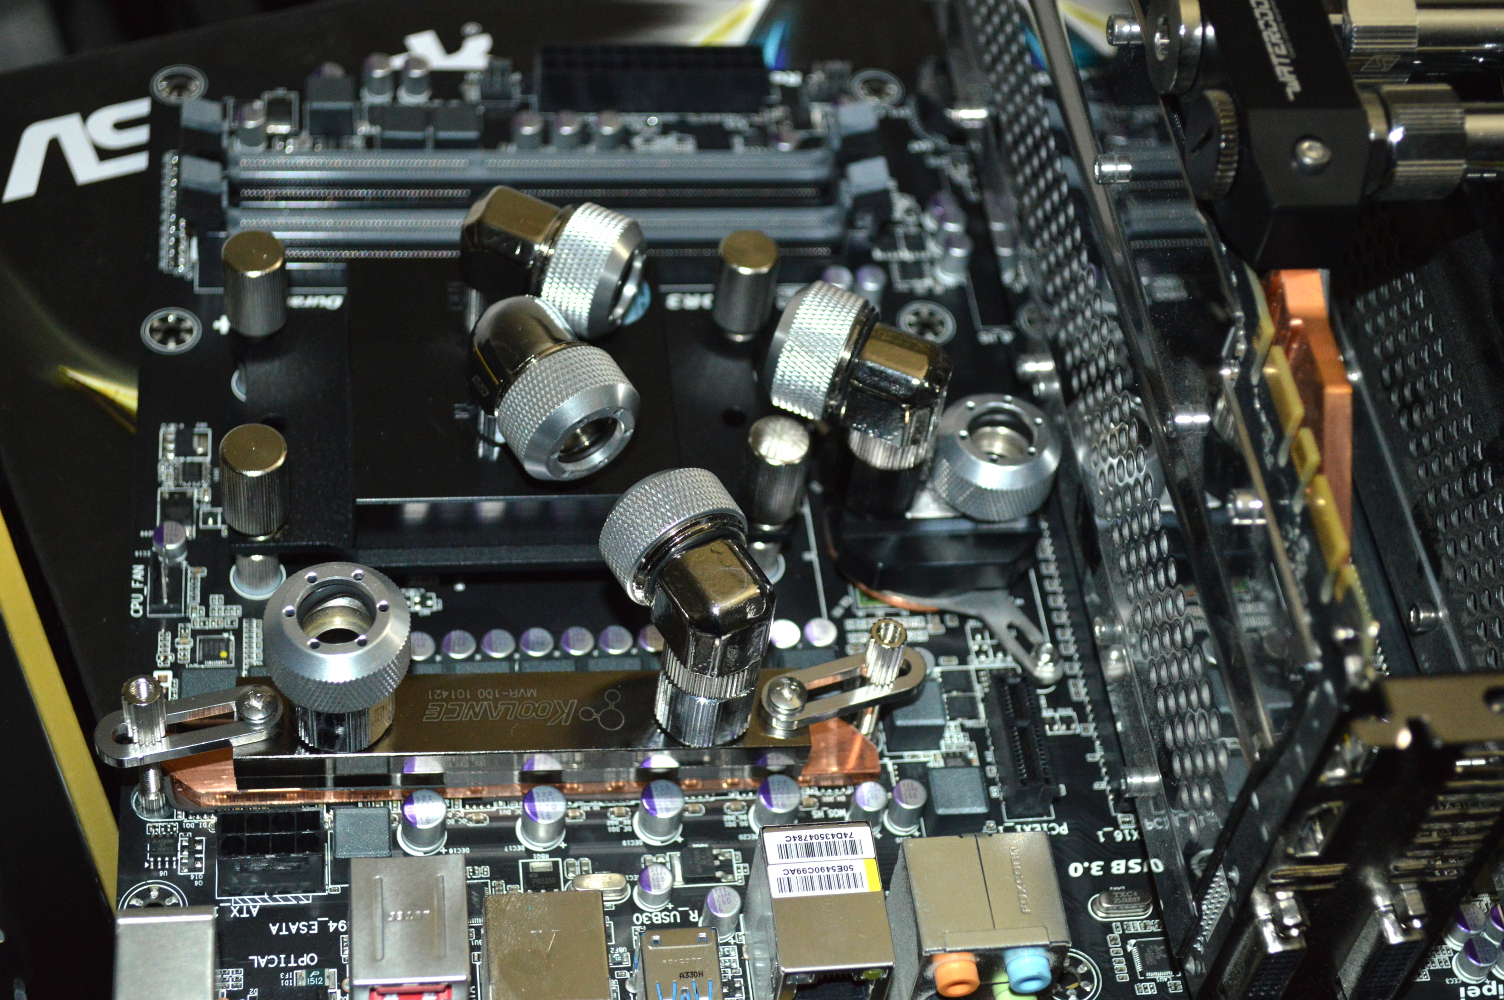
And that night I went about pulling off the Koolance block so I could get to the CPU and clean it. I installed it into the Gigabyte board, flushed the EK block, and started adding fittings into the mix, making sure to have the graphics cards in the board as well to make sure clearance is fully tested. A few things are worth noting on this. First, a Koolance 90-degree fittingin a 15mm extension fitting on the MVR-100 was level with a Swiftech 90° fitting in the EK block. How that worked out I have no idea, but I’m not going to question it.

Now going from the Supremacy EVO’s outlet to the inlet on the northbridge is a little more difficult to line up. The 15mm extension fitting puts it too high, and it appears to be by only a few millimeters. I’m wondering if lowering that to a 10mm extension would line that up. Needless to say I’ve got orders to place, especially since I’m out of 90° fittings and I’m short a couple to finish the loop. There are some parts I can tube up in the interim, and I’ll handle that later.

Depending on distance, I may just loop from the CPU to the northbridge with a 180° bend to the fitting closest to the graphics cards, which would make it easier to tube up from the northbridge to the top graphics card. I could even see about doing that to get from the VRMs to the CPU as well to eliminate the need for the 90-degree fittings. That would free up four of them. Options abound, and the only requirement for the 180 bends is that the fittings be 3″ apart on center. I don’t think I’ll have any concerns on that.

The clearance between the northbridge and the graphics cards was also only just enough. As in it looks to be a millimeter. And the northbridge is also off alignment from the graphics card by only a few millimeters as well, so lining that up is going to be an interesting exercise. I might just look into that alternative I mentioned as well.

After figuring that out, I mounted the mainboard into the case along with the graphics cards and shut everything in to keep it away from the kitten.

mainboard1

mainboard2

mainboard3

mainboard4

mainboard5

No cabinet, yet…

Build Log:

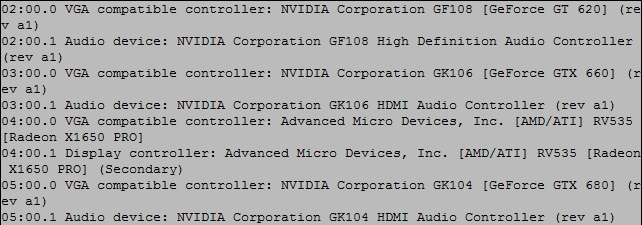
Not long after publishing the last part to this series, I decided to test whether I could get four graphics cards recognized through the USB plugs. The fourth card is a Radeon X1650. And it was detected.

4gpus

Four graphics cards: GT 620, GTX 660, Radeon X1650, and GTX 680. I could only leave it connected for a short while because the fan on this card is rather noisy — plus it can’t be used for Berkeley — but it was a good proof of concept. With that behind me, I ordered another GTX 680 off eBay — this time a Zotac GTX 680 2GB Amp! Edition (ZT-60102-10P, which EK’s Cooling Configurator confirms is a reference card). Interestingly the Zotac GTX 680 uses two 6-pin PCI-Express connectors instead of one 6-pin and one 8-pin like the EVGA.

But now things will get a little interesting, mainly because of the power connector requirements for all of these cards. The GTX 680s both take two power connectors while the GTX 660 takes only 1. Plus all 4 of the cards will still need to be powered by 4-pin Molex connectors. I think I’m going to need some more 3M Commander clips to keep things in order.

This is also where trying to power all of this might become an interesting problem and something I’ll need to keep in mind for the future. A while back I ordered a couple ATX breakout boards that were built for Bitcoin miners. This style of breakout is intended to be used with bare wire 6-pin PCI-Express connectors with all of the 12V lines lit to power mining hardware. And I’m thinking it can be similarly used to power graphics cards, when a few things are taken into account.

In a standard 6-pin PCI-Express connector, only 2 of the 12V lines are used (look at a dual 4-pin Molex to 6-pin PCI-Express dongle), even though in modern power supplies all three of the 12V lines will be lit — this is how a 6+2 connector is supported. On cards requiring an 8-pin connector, however, such as the EVGA GTX 680 in the setup, all 3 of the 12V lines must be lit.

For now, though, I’m going to rely just on the connectors on the power supply. There are enough to power two GTX 680s and two GTX 660s. The break-out board with the extra 6-pin PCI-Express connectors (with 8-pin adapters where necessary) will allow for connecting more than is typically supported since it’ll be drawing from other 12V connectors available on the power supply.

The only other thing I’ll need to figure out is just how to power it all on once it’s in the chassis, and there are a couple directions I can go with that.

Speaking of the chassis…

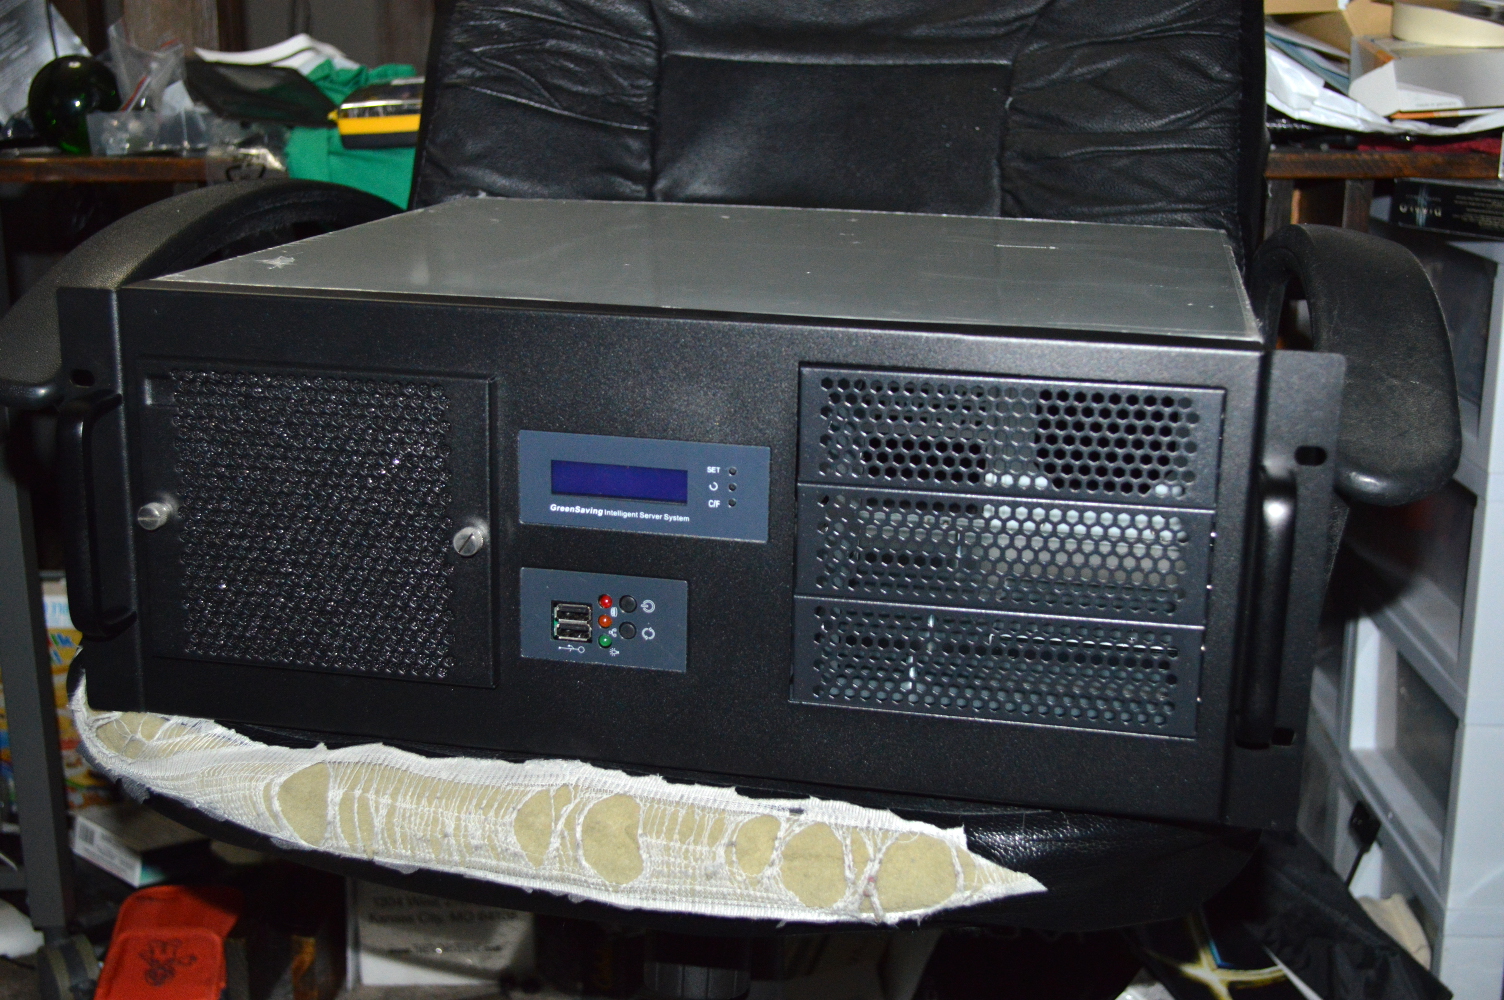
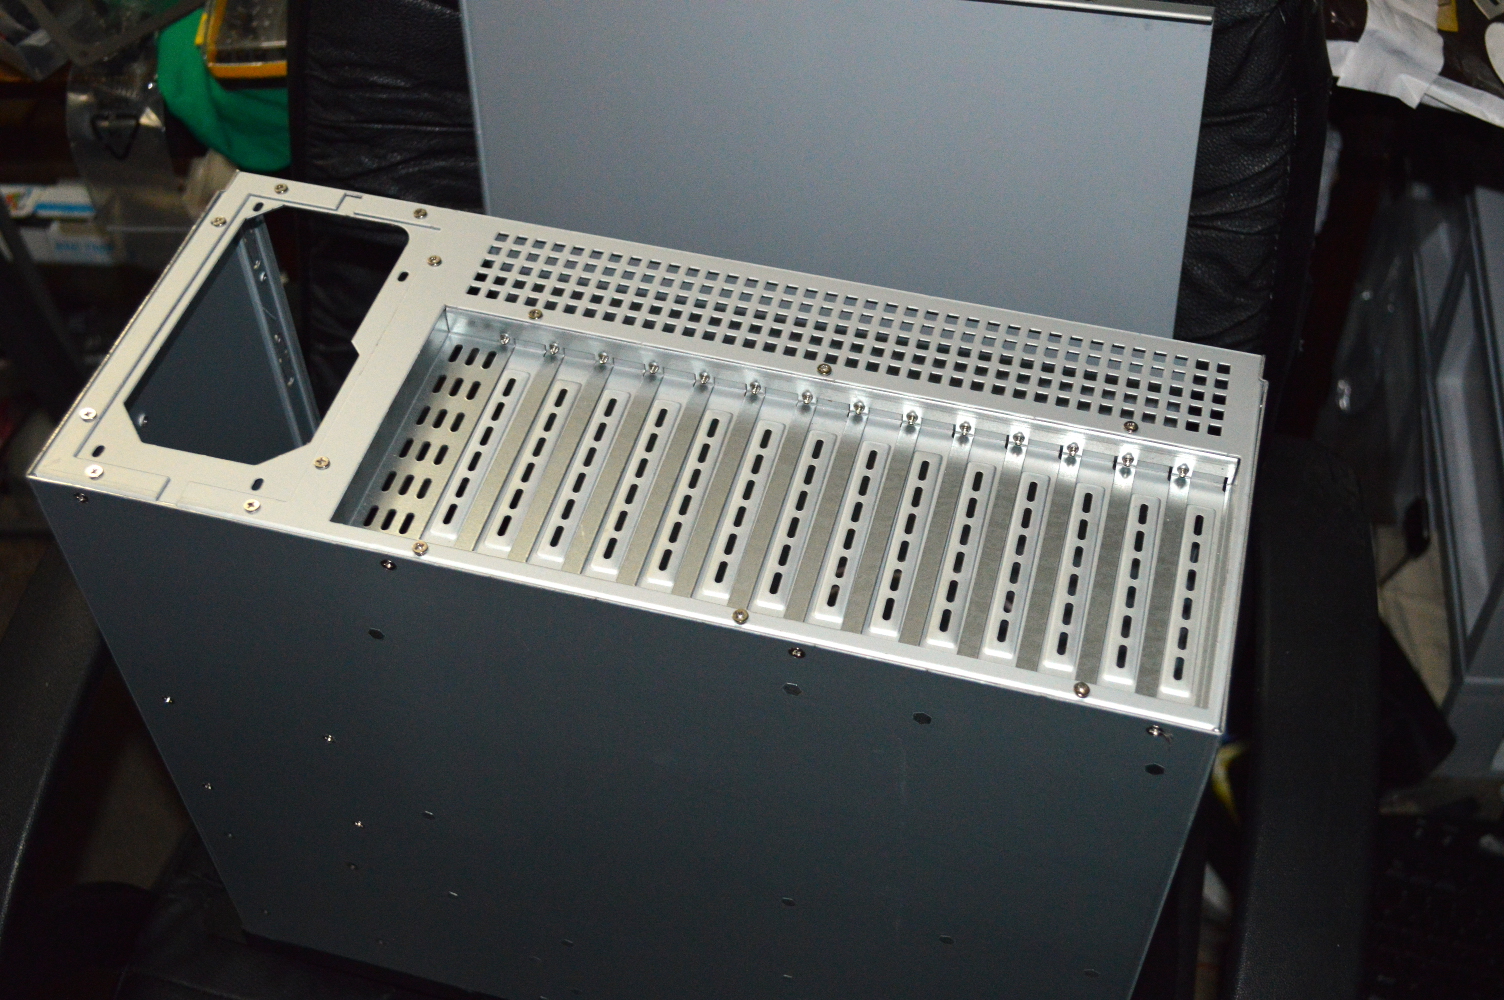
4U chassis for the graphics cards

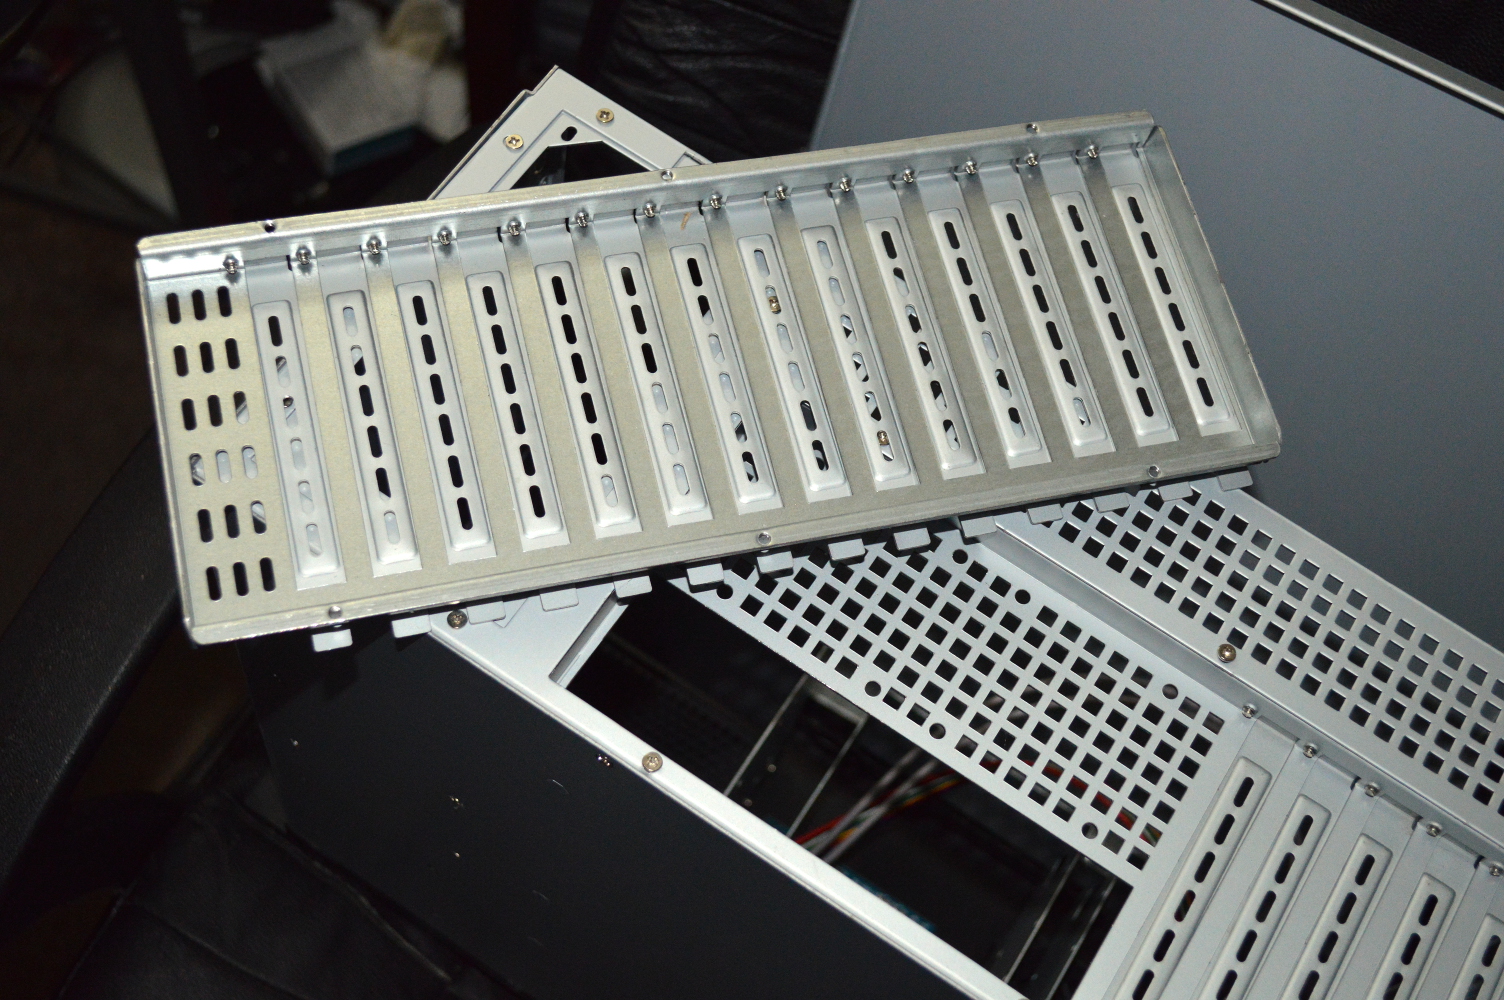
I mentioned in an early article that the graphics cards would be going into a 4U chassis with a 14-slot rear panel. This kind of chassis is typically made for PICMG 1.3 backplanes and SBCs. I won’t go into detail on that other than to say it’s a very interesting topic. Some even support Intel “Haswell” processors.

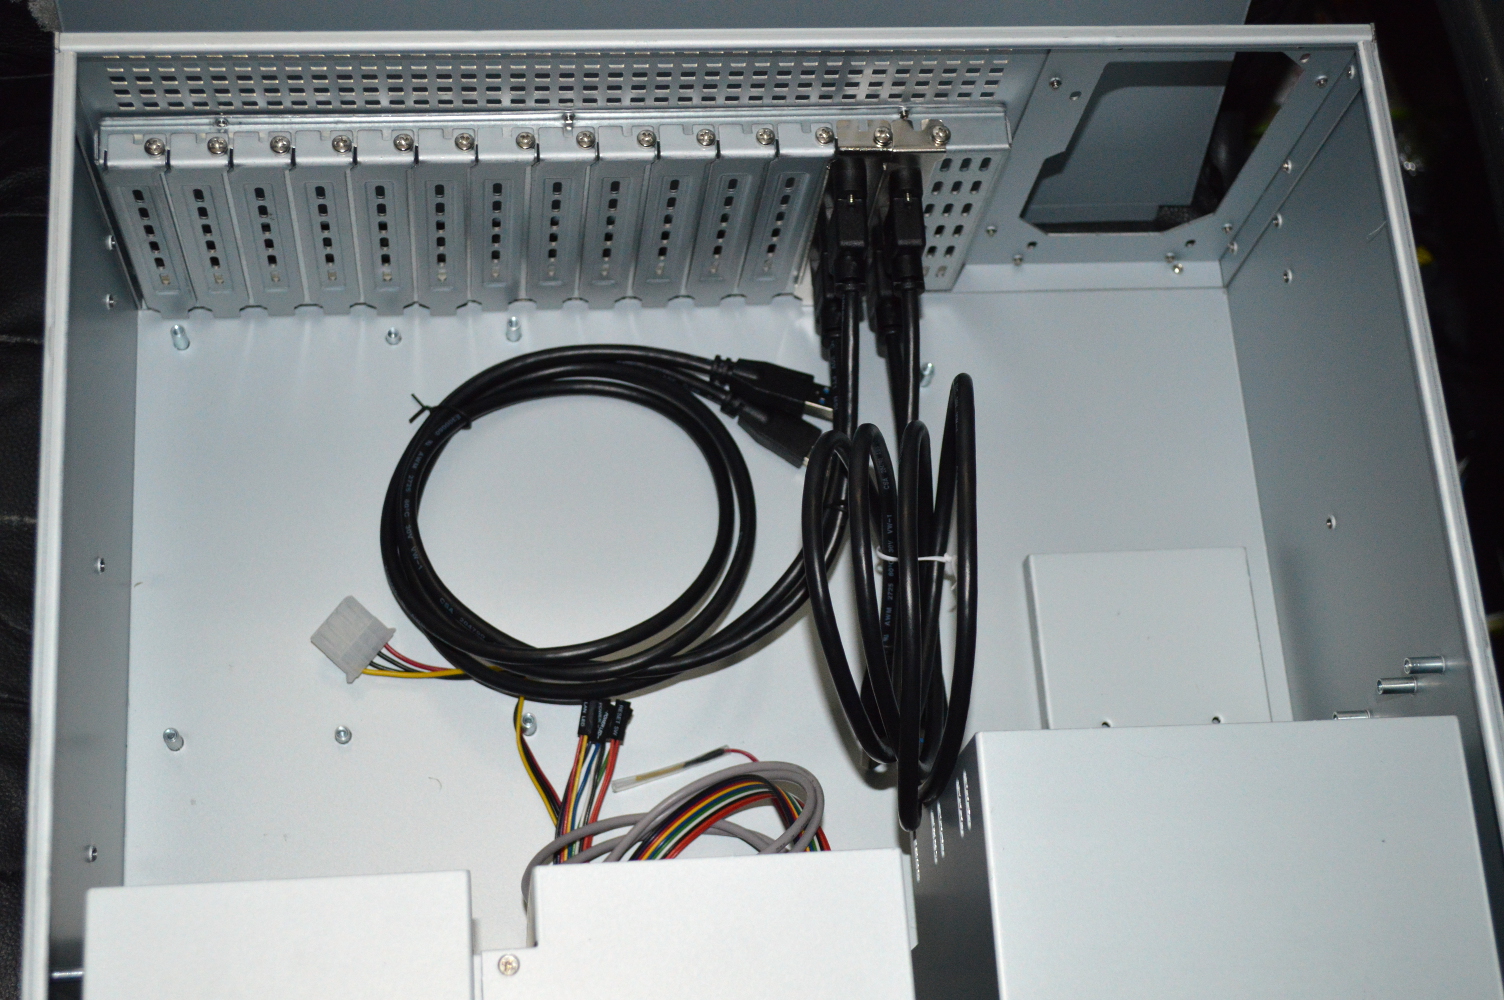
But the existence of these chassis is great when you’ve got a lot of discrete hardware to support in some fashion. In this instance, it’s multiple graphics cards that need to be housed with USB connectors, powered, and, eventually, water cooled. Initially when I mentioned the chassis, I linked to an option by iStarUSA that was, frankly, ugly. Some searching around found other options, but in looking at PlinkUSA, I noticed that for some of their 4U chassis they have a 14-slot back plate for just $20, item 4U-14S-BP (I wonder what that stands for). So with that pretty much making up my mind, I ordered item IPC-G4380S, another “intelligent” chassis with a temperature display, with the optional 14-slot back plate.

Eventually I’ll order another fan mount bracket from Mountain Mods, but for now I’ll monitor temperatures with a single 120mm fan to see how well things work. I can always use double-sided tape to attach a second 120mm fan into the 5¼” drive bays if necessary.

Radiator panels

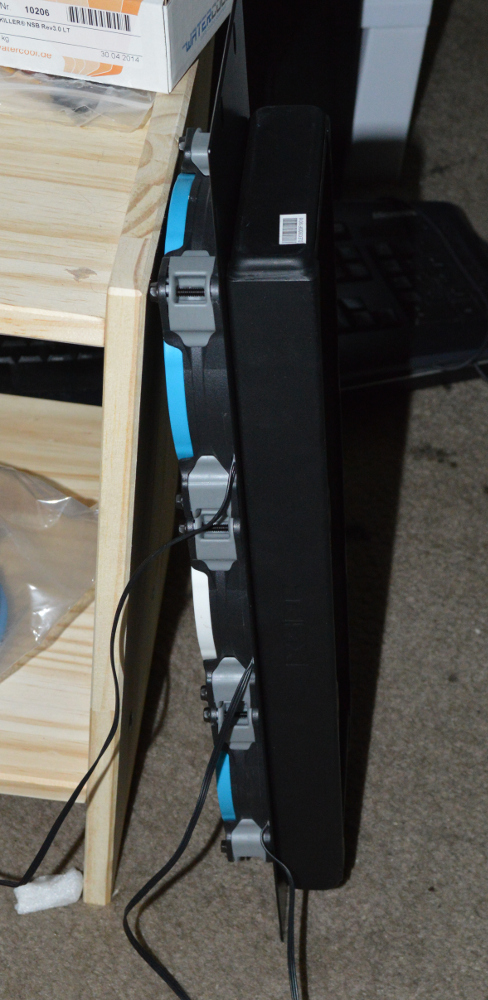
The radiator panels arrived from the United Kingdom a little earlier than expected. And I picked up an EX360 radiator from my local Micro Center. The second radiator I’ll order from Performance-PCs along with another D5 pump when I’m actually ready to build out everything.

The panels do flex a little — they’re made of only 1.5mm steel with a lot of mass cut away — but sandwiching it between fans and the radiator makes it perfectly rigid. I’ll just need to figure out how to get the fan cables behind the panel for wiring up for power — either drill a hole through the panel or use a 1U panel between the radiators panels for that. I considered doing pull on these as well, but this configuration I think provides the best strength.

panel1

panel2

panel3

Boxing up the graphics cards

I’ll say up front that the 120mm fan that comes with this chassis will be getting replaced with something better. It comes with a Yate Loon 120mm fan — cheap and effective, but loud (rated at 28.8 dB/A), and I want quiet. And the 5¼” drive bays will get swapped out for another 120mm fan mount, or I might use double-sided tape to secure the fan.

The only thing I don’t like about PlinkUSA’s chassis is the fact they come with all of the bare panels covered in plastic. I understand why the do this, but I still reserve the right to voice complaint about it. It just reminds me of the aftermath of some really, really bad sunburns when I was 8.

4uchassis1

14slot1

14slot2

The 14-slot back plate was easy to install — just six screws at the back to take out the original ATX back plate and insert the 14-slot option. I assembled the USB panels as well. The USB 3.0 cables came from Cable Leader. I ordered the 3′ options on all of them because I’m considering mounting those above the graphics cards eventually instead of using back plates. That’ll depend on a couple factors, though.

usbpanels

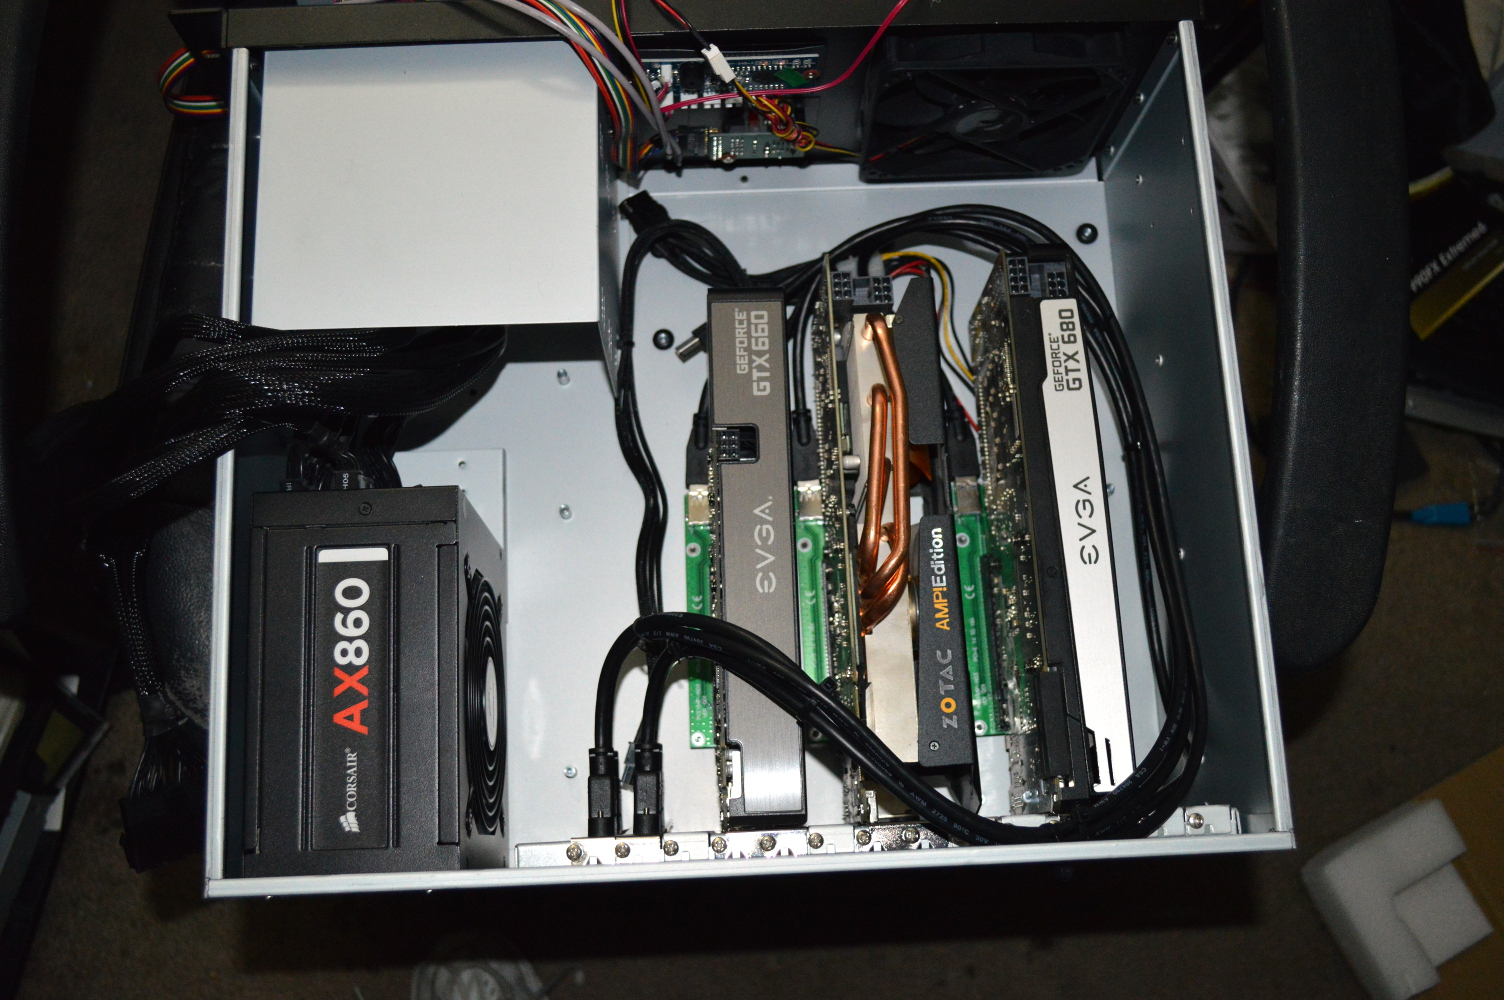
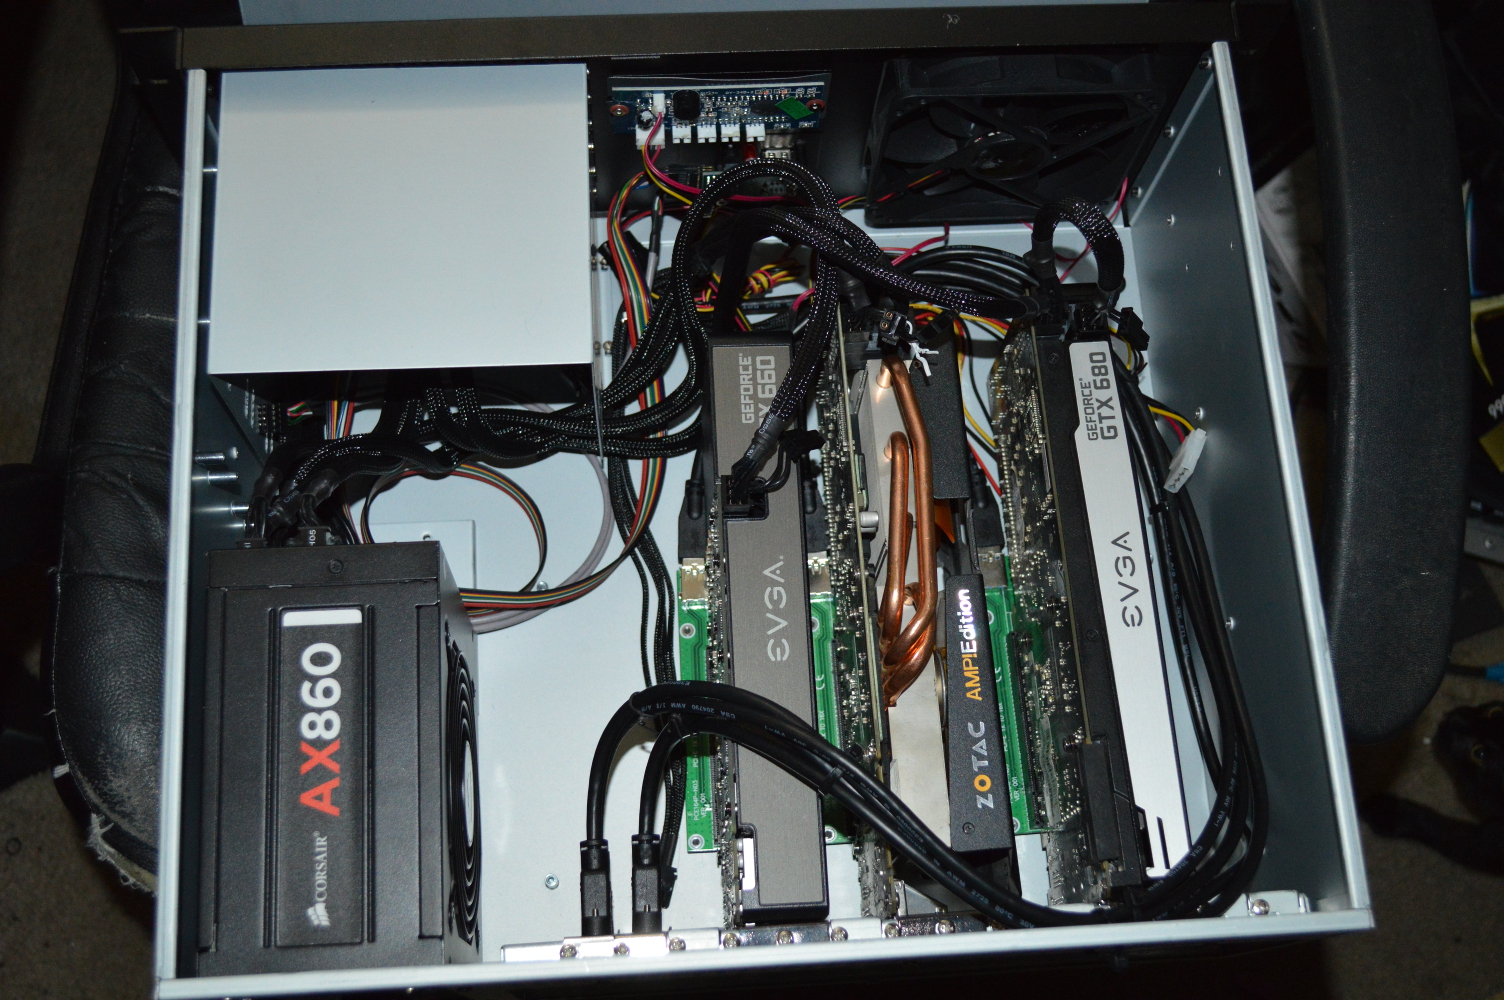
Before I started preparing the case, I set the MilkyWay project to not load new tasks — it was the only one I had running right now — before disassembling everything. This is where the fun starts because the bottoms of the slot panels aren’t held in by anything. Only the screw will be securing the graphics card to the chassis, so I needed to think of something for securing the PCI-Express expansion board to the chassis as well so the graphics cards don’t go everywhere.

The Zotac card also gave me some cause for concern given the copper heat pipes that stick up off the top of it.

installed1

installed2

rack

For powering this, I’m relying on a jumper plug on the 24-pin cable. I’m intending on using an Arduino Nano to try to use the case power switch to control the power supply — instructions for what I’m intending can be found over at Instructables.

As with the previous two systems, the fan controller on this isn’t connected to anything, but I’m still using the temperature sensor to show the internal temperature of the chassis — something rather important with these graphics cards. As was expected, the temperatures on the cards was higher than when they were exposed. I don’t know if a second fan would help that, or perhaps changing the installed 120mm to an SP120.

It’ll be interesting getting these hooked up for water cooling. At least going that route I can have the cards right next to each other instead of spaced out, so hopefully the system won’t look nearly as cramped. Some 3M Commander clips will help as well.

And now it’s collarbones

In Woodford County, Kentucky, a young woman named Stephanie Hughes was allegedly released from school for a dress code violation. Here’s what she wore:

The story says she was released because the shirt showed her collarbones. Except she’s not wearing a shirt. She’s wearing a tank top with a sweater-like garment over top — pardon my lack of knowledge of female fashion.

Here’s the dress code for the school in question regarding shirts (emphasis mine):

Rounded crewneck shirts are to be worn by all students. The only exception is when they wear a button down shirt (polo style or dress shirt) which may only have the top button open. A crewneck is defined as a rounded neck t-shirt that does not extend below the collarbone. Turtlenecks and mock turtlenecks may be worn in place of a crewneck shirt. All scoop neck, v-neck and tank tops are prohibited unless worn with a crewneck shirt. Other shirts may be worn in addition to the crewneck shirt. All shirts must meet the following criteria:

  • Sleeve must have a measurable underarm seam
  • Must be able to be tucked in even during movement (although does not have to be tucked in)
  • Midriff should remain covered at all times
  • Must not extend below the collarbone

As emphasized above, the dress code applies to all students. And it’s clear that Stephanie violated it, willingly and, I’m willing to bet, knowingly. And her mother is complaining when it’s both hers and her daughter’s combined responsibility to ensure she is compliant with the dress code.

Hey look, mothers and fathers, dress codes exist in schools for a reason: they exist in the professional world as well. The best time for them to get used to these dress codes is while they’re still in school. About 1 in 5 public schools have even gone so far as to require a uniform.

Yet these dress codes are routinely criticized as being misogynistic and biased against girls and young women. Or at the least disproportionately enforced against girls and young women. But if that’s the case, it’s likely because young women are more likely to violate the dress code. Given how much of young women’s fashion has clashed with dress codes, I’d say it’s a reasonable hypothesis. While men also wear flip flops, women seem more inclined to do so, along with wearing shorts that don’t extend far enough to satisfy a number of dress codes.

The dress code, as quoted above, is pretty clear as to what is not allowed, and what Stephanie chose to wear to school qualifies on that mark. Did she actually read the dress code?

The above image was also posted to Imgur (from where I’m embedding it), and a follow-up to it was posted on August 15:

Our dress code states that all students must wear a crewneck shirt. This was instituted to remove any subjectivity from the dress code (because really how does one measure cleavage appropriately?). Of course, students began to push the boundaries and administrators were forced to define what a crewneck shirt meant. They stated that it must cover your collarbones.

No one ever said that collarbones were too sexy or distracting to be in a learning environment. Our school just wanted a simple way to enforce the dress code. And, yes, I think appropriate dress is a reasonable expectation at school. It’s not about whether boys are distracted by girls, it’s about professionalism.

Lastly, this girl wasn’t suddenly sent home witout [sic] warning. Everyone in our county knows the crewneck rule, it’s been around forever. So don’t give me that crap about parents being burdened by having to leave work to come pick up their kids. Everyone involved consciously chose to break the rule.

So a dress code has been around a long time, everyone knows about it, it’s worded in such a way as to remove subjectivity — making it enforceable against everyone in a consistent manner — and school dress codes are misogynistic? Give me a fucking break.

The jury, the death penalty, and James Holmes

It was a bit of a shock twist yesterday, August 7, when the jury in State of Colorado v. James Holmes failed to turn over a required unanimous verdict in any of the 24 death-eligible charges that would’ve left Holmes eligible for the death penalty. In response, as we’ve seen with Casey Anthony and George Zimmerman, many are denigrating the jury.

According to reports there was only one holdout juror who was refusing to hand down a sentence of death, while two others apparently wavered. It’s a paradox I’ve seen time and again when I’ve studied capital punishment. A person who says at the start of a trial that they are willing to impose the death penalty in a case may waver when the time actually comes to decide if that sentence should be imposed. It is actually one of the striking features of the capital punishment sentencing process and the primary reason it exists.

As heinous as Holmes’ actions were, apparently they weren’t heinous enough to convince one of the twelve jurors to impose the death penalty. This is actually a good thing, because it is more likely this one person was not voting for the death penalty out of emotion. And this ensures that cases where someone is sentenced to death are cases that ring so true in a person that there is no hesitation by any reasonable juror. Even in Holmes’ case, a person may reasonably be certain in a sentence of death or reasonably hesitant.

A sentence of death is not one that should be handed down out due to emotion or out of any need or desire for vengeance on anyone’s part.

Hands up if you remember the case against Terry Nichols. For those who have forgotten — or never knew to begin with — Terry Nichols is the convicted co-conspirator to the 1994 Oklahoma City bombing. He also was twice exonerated of the death penalty: once by a Federal jury and again by a jury in Oklahoma. He is now spending the rest of his days at the super-max prison known as ADX. Even with the heinousness of that event, and the overwhelming evidence of Nichols’ involvement, two juries couldn’t summon whatever was needed to sentence him to death.

And the only reason the State of Oklahoma put him on trial is the fact a Federal jury did not sentence him to death. The people of Oklahoma wanted him dead, and petitioned out for a trial of emotion, and thankfully the Oklahoma jury would not capitulate to that.

The law requires a unanimous verdict, and as much as the remainder would’ve liked to see Holmes sentenced to death, they also couldn’t bully the holdout into a sentence of death. The jury would’ve likely been polled to confirm the verdict was unanimous, in which case the lone holdout would’ve been required under oath to say that their vote of “death” was not genuine, in which case the judge would’ve vacated the verdict.

That is the way of it.

While the death penalty has a rather cavalier history in the United States, we have since grown to recognize it to not be something to just be thrown around. And while I would agree with many other Americans that Holmes would be a case worthy of the death penalty, I must still recognize that it is not my decision to make, and I must respect the decision made by those with that authority.

One notion too many forget is that the Court of Law does not answer to the People. A jury does not answer to the People either. In the courtroom, the jury is the ultimate arbiter of, well, everything. All notions of law and fact are rendered in a verdict with all the detail stripped out and ample room for speculation left. We’ve seen it time and again. Casey Anthony. Darren Wilson (grand jury, not actual trial). George Zimmerman.

And when the jury does not rule the way the people feel the jury should rule, the jury is denigrated, and sometimes the entire jury system is attacked by extension. That is what we must avoid.

Disagree with the jury’s decision all you want, but the moment you start attacking the jury itself simply for not liking an outcome, you are, by extension, attacking everyone’s right to a jury under the Sixth Amendment. You can disagree with the jury without attacking the jury, yet too many seem unwilling to do such. If a person doesn’t come to the same conclusion as us, we conclude there is something wrong with the person as opposed to their reasoning. Again, we’ve seen the same with Casey Anthony (I wrote about that here) and George Zimmerman.

My hope for the future is that the people will let just this case go and won’t call for the Department of Justice to exercise dual sovereignty as a means of exposing Holmes to the death penalty again.

Some basic math for Occupy Democrats

Occupy Democrats has been posting a bunch of memes to Facebook talking about the call for a $15 minimum wage. And the way they are trying to support the idea is comparing against the “hourly wage” of a corporation’s CEO. The idea is flawed for two reasons: CEOs don’t work the “traditional” 40/hrs per week — a lot of them work a hell of a lot more than that because they have to — but also because of simple arithmetic.

And this makes me wonder about the future intelligence of this country.

So if you take the “hourly wage” of a corporation’s CEO and divide it by 15, you’ll see quite clearly why it is that many corporations cannot afford $15/hr for their employees, even if their CEO was paid nothing. For example, let’s look at Wal-Mart.

According to Salary.com, Wal-Mart’s CEO, C. Douglas McMillion, received a total cash compensation of $4,079,202 for 2014. Divide that by 2080 (40 hours per week, 52 weeks per year) and you get $1961.15 per hour (again, C-level executives tend to work a lot more hours than that, meaning their actual per hour rate is lower). Divide that by 15, and you get 130 (rounding down). In other words, if you zeroed out the CEO’s cash compensation, you’ll be able to pay 130 employees $15/hour at 40 hours per week for 52 weeks.

Just 130 employees. Wal-Mart employs over 1 million people just in the United States, over 2 million worldwide.

But let’s go further and zero out the cash compensation for all of the listed C-level executives. According to Salary.com, if I didn’t fumble on the calculator, the total on that is $18,302,268. That’s not really a lot, when you think about it. And how many employees would that support at $15/hour full time? Only 586.

Now, I can hear the argument, “That’s for new employees. That would be used to give employees raises to $15/hour.” Okay, let’s presume you’ll use that money to raise up all employees currently making the current Federal minimum of $7.25/hour to $15/hour. How many people would get that raise? Just 1,135.

If you want an idea of how many employees a C-level executive’s cash compensation will support at $15/hour, take the reported number and divide it by 31,200. To see how many employees would be raised from a minimum wage (which varies by State and locale) to $15/hour by zeroing out executive cash compensation, multiply 2080 by the difference between $15 and the current minimum wage and divide the executive cash compensation by that result. If you have no idea how to figure that out reading the preceding sentences, you need to go back to school and re-learn basic arithmetic.

And if you seriously think that C-level executive pay is the problem, and that if they were just paid less those corporations could afford $15/hour for their employees, again, you need to go back to school and re-learn basic arithmetic and algebra, and a couple business classes wouldn’t hurt either.

Beta Orionis – Part XXI

Build Log:

Nothing like a holiday weekend to continue a build, especially since I’ve been putting this off for a lot longer than I originally anticipated. Okay I didn’t get to it over the holiday weekend, but much, much later.

I started off with the Gigabyte mainboard as I could get the north and southbridge blocks installed to it without having to drain the loop. I also still wasn’t entirely sure how I was going to mount the pump and reservoir, so the mainboard was the best place to start.

northandsouthbridge

The northbridge and southbridge blocks went without difficulty. Only a couple minor adjustments to get them seated properly and attached without looking crooked. The VRM block, on the other hand, wasn’t so simple.

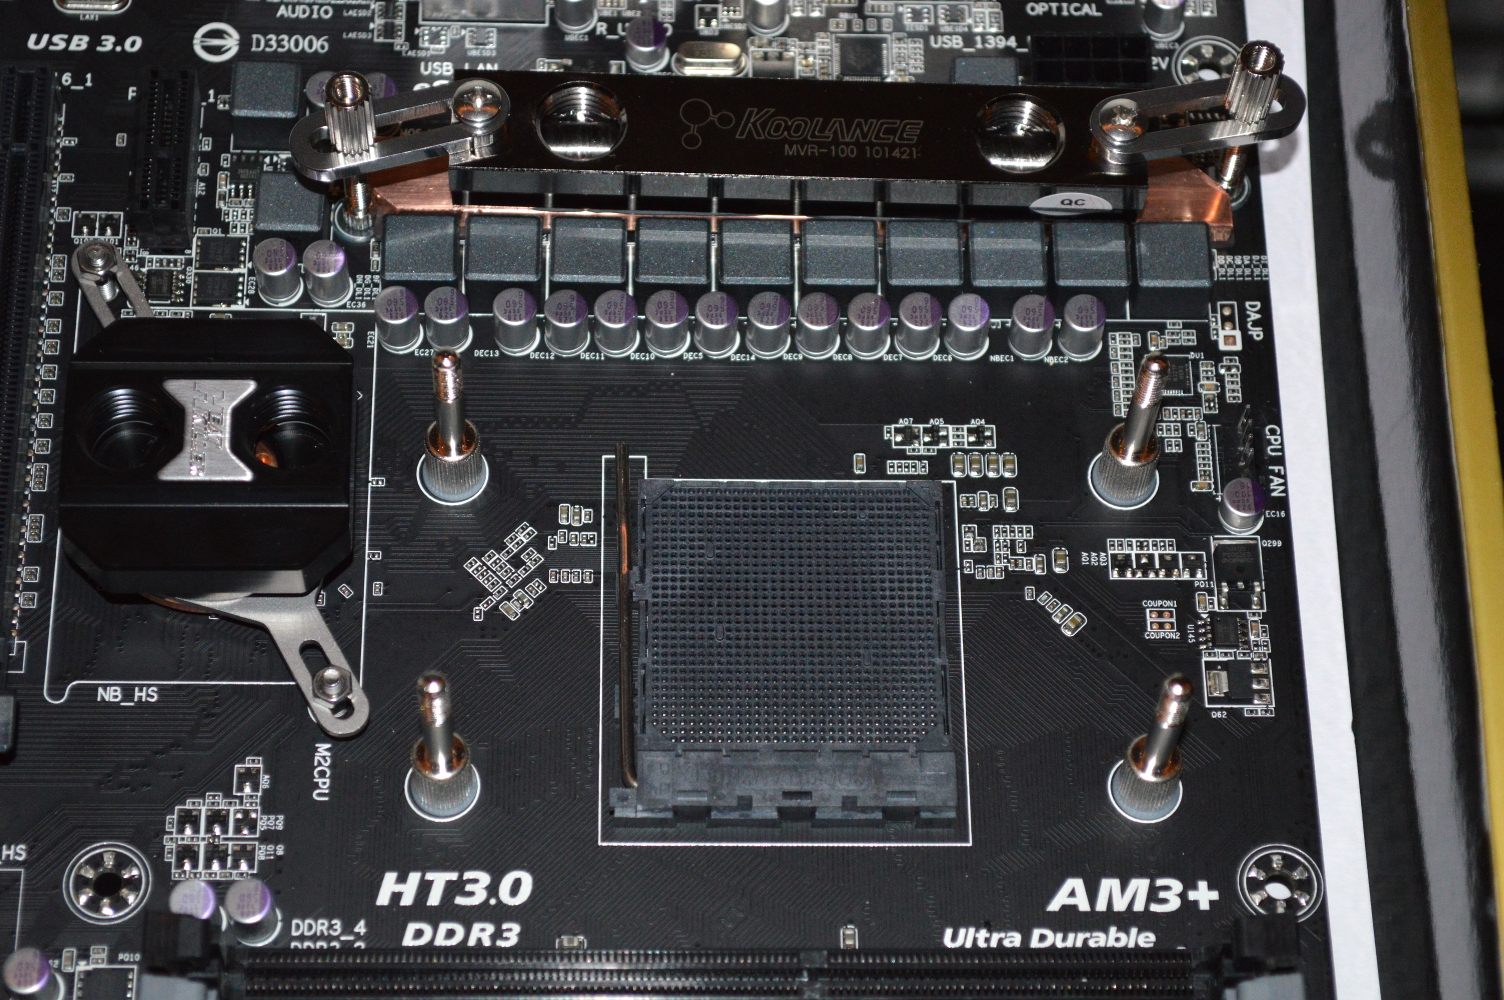
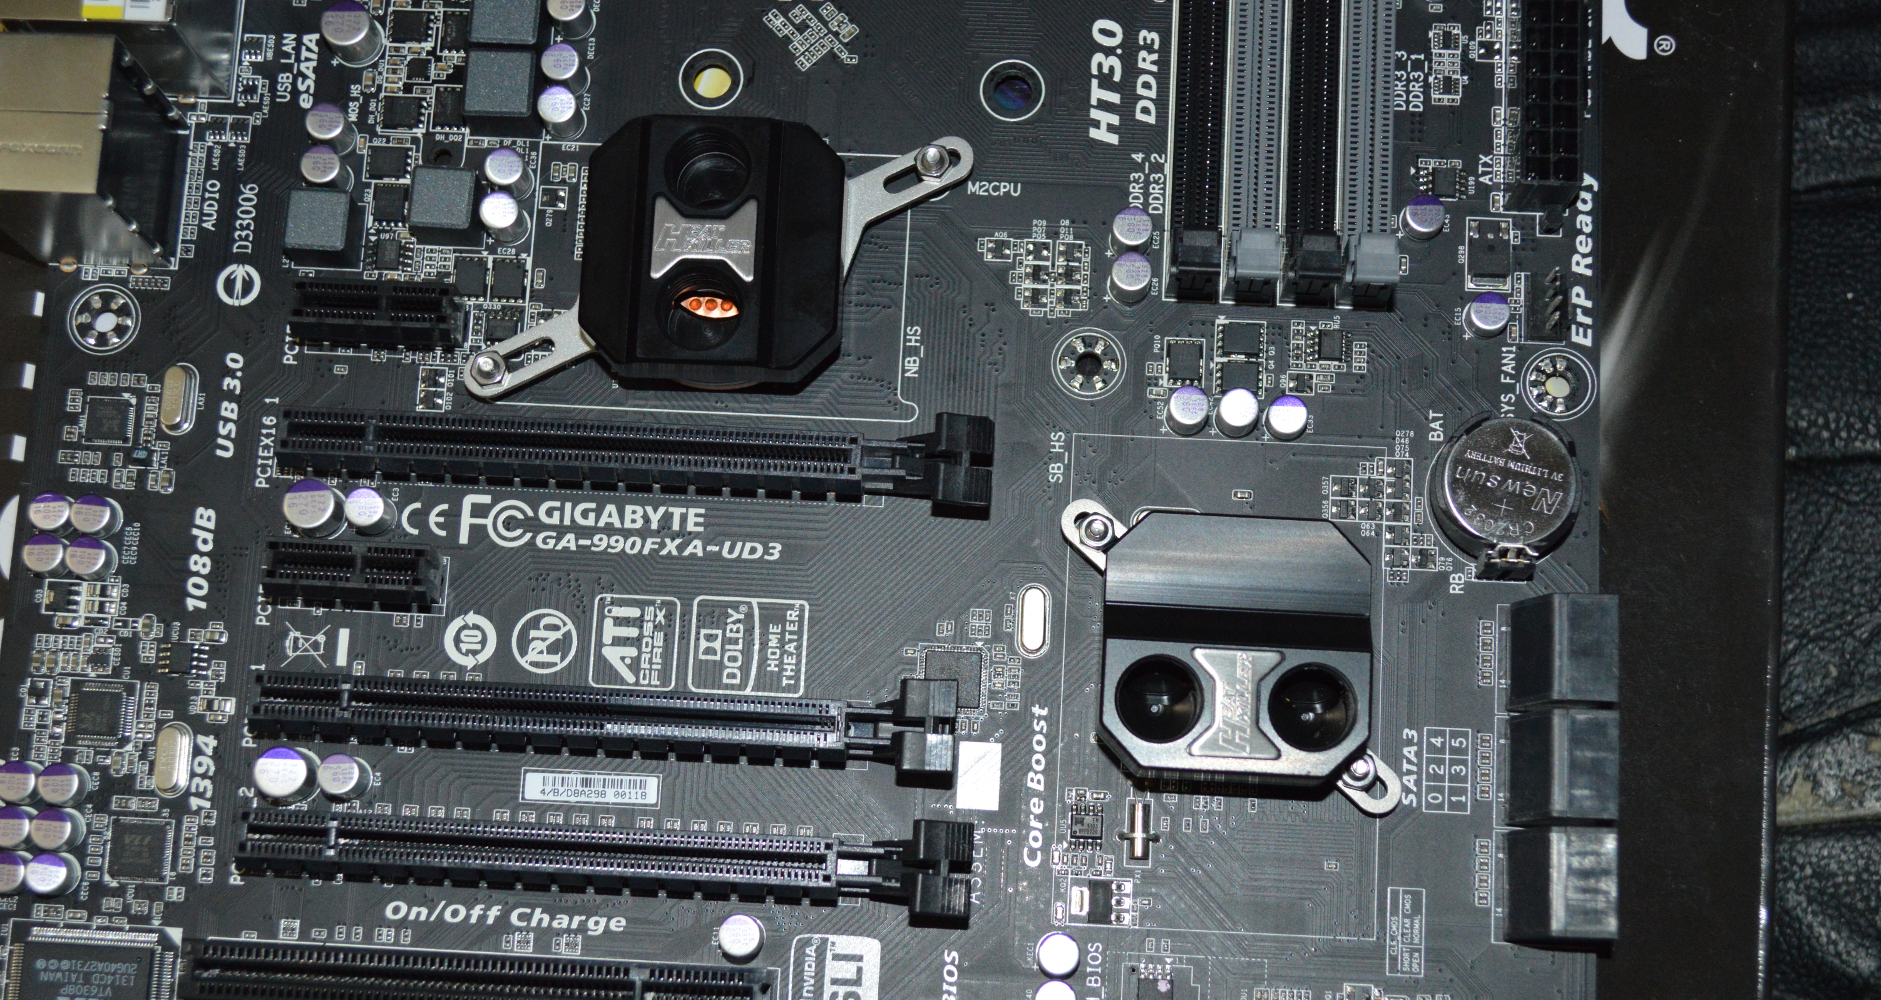
The Koolance 140mm plate is a little long for the VRMs on the board, but I was willing to modify the plate in order to get it seated. But it’s too wide. Drilling holes I was willing to do. Shaving off the side, though… But recall from a previous article that I ordered both the MVR-100 and MVR-40 VRM blocks. According to Koolance, the MVR-40 is actually 58mm long, while the MVR-100 is actually 100mm, so trying to use both together wouldn’t work.

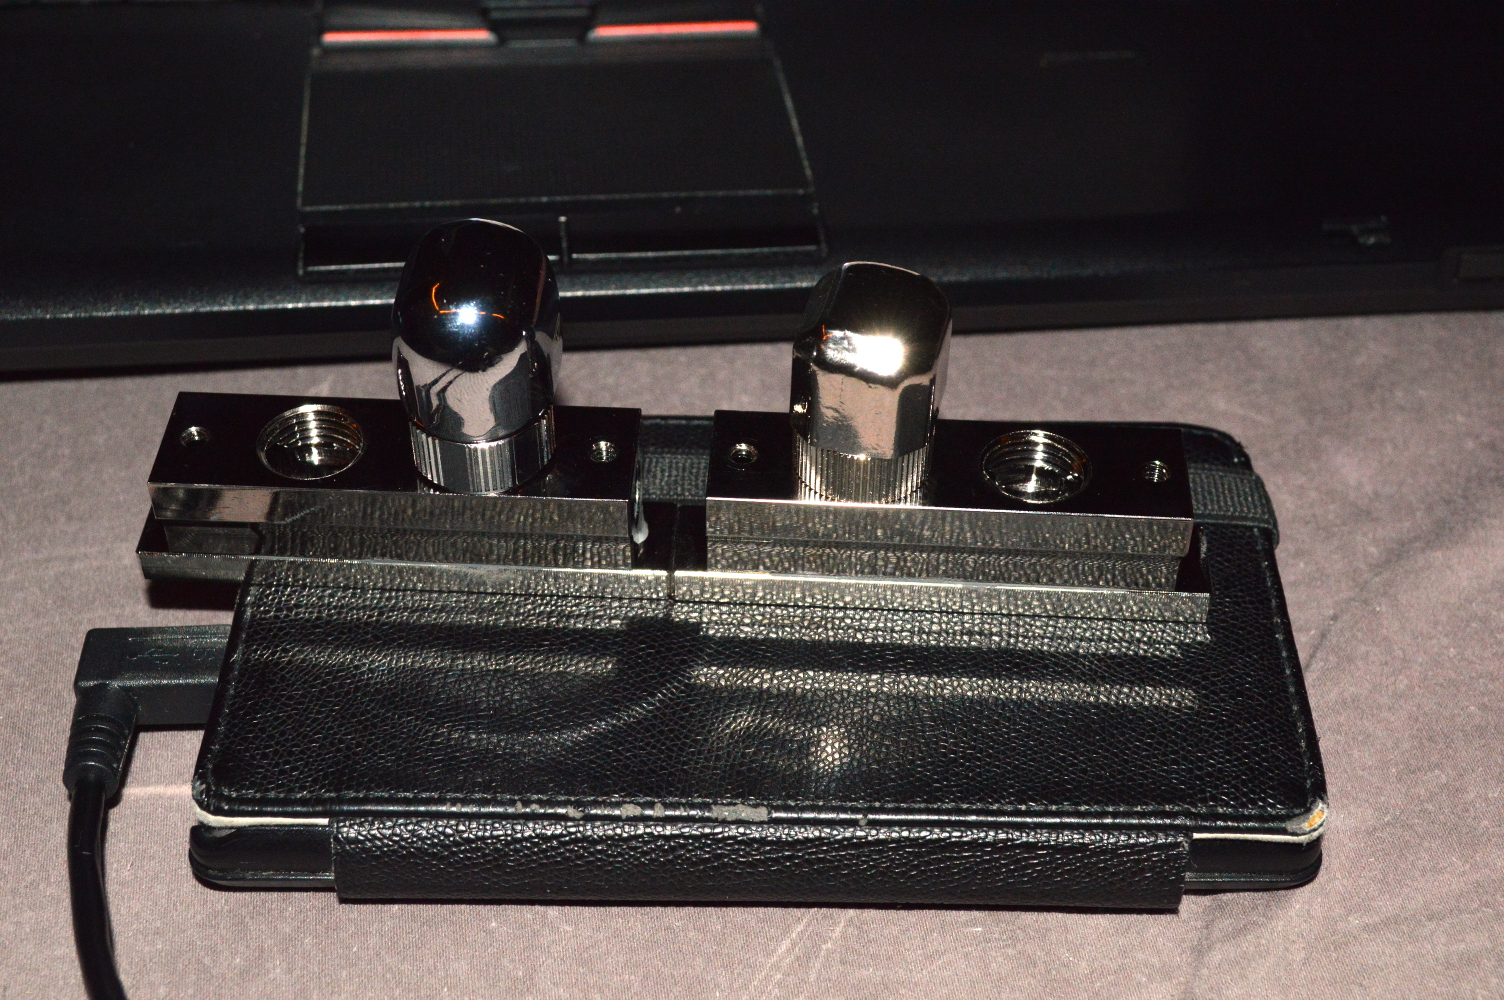
But for the MVR-40, Koolance does sell a 67mm plate which is 13mm wide. Another MVR-40 plus two 67mm plates should net me a 134mm long VRM plate. The trouble with doing that is finding a way to keep the two blocks together and rigid in the middle. I’m hoping the gap between the blocks will be enough that I can use the included hold-down, and that said hold-down is strong enough that it’ll hold everything rigid.

Additionally I have some fittings that may assist on that matter. Some fittings are going to be relocated in the re-build of the loop, so I’ll take that into account. Basically what I have in mind is using two Koolance 90-degree fittings with a Bitspower mini D-plug (specifically item BP-WTP-C28), which is 15mm long, and another Swiftech 15mm extension fitting between them. If my math on the diagrams is correct, that should do the trick.

The Koolance order arrives

So after trying to figure all that out, I went ahead and ordered another MVR-40 and two of the 67mm plates direct from Koolance. It would be a few days before I could get to assembling them, though, due to a new arrival to the family. A kitten. A 6-week old (at the time we adopted her) kitten we call Alice. Anyway…

When I assembled the blocks with the expansion plates and did a test fit on the hardware, things were unfortunately not going to work as I’d hoped… because I didn’t properly measure things before placing orders.

mvr40s

Recall from earlier that the MVR-40 is actually 58mm long. I ordered two of the 67mm extension plates for this. Well had I taken calipers to the VRMs before placing the order, I would’ve found that the span of the VRMs is about 122mm, with about 130mm between the mounting holes for the original heatsink. So two 67mm plates is too long. Two of the MVR-40s is two short by just a couple millimeters. But what’s about perfect — though it’ll look a little odd — is one MVR-40 with the 67mm plate and one without. The one without will also be about 5mm lower than the one with, so to line up fittings I’ll need a 5mm extension fitting.

There’s a secondary consideration. To keep the blocks together and rigid in the middle, I will need a way of attaching them together so it appears to be one rigid piece even though it isn’t, since I doubt the fittings will be able to do such. Rotary fittings typically have a little give to them. So there really isn’t a good option available on that front.

But I still have the MVR-100 laying around. Unfortunately it appears that Koolance never distributed a 120mm or 125mm plate for the MVR-100, so to do this and leave it looking clean, custom seems to be my only option.

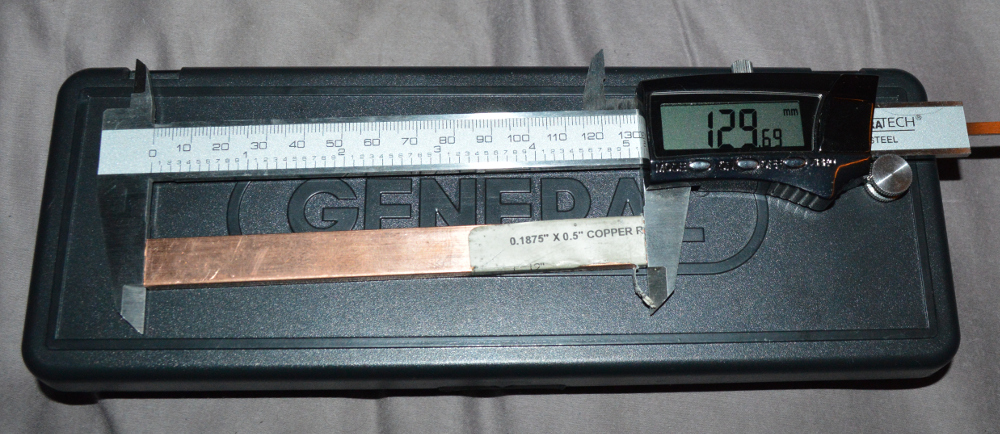
Enter OnlineMetals.com, owned by ThyssenKrupp. From there I was able to purchase a few copper plates for a pretty small cost. With a shipping discount code, four plates about 3/16″ thick, 5″ long, and 1/2″ wide came to a hair over $15 (shipping by USPS Flat Rate). I’ve never purchased copper like this — it’s quite different when you’re able to pull copper tubing off the shelf at Home Depot, or buy copper fittings or other copper parts where the decision making process comes down to simply “what size?”

The main concern came down to alloy, and after doing a bit of reading online, I limited my choice to two: 101 and 110. The latter is “annealed”, meaning heat treated so it’s supposed to be easier to machine, while the former is near pure copper — read: ideal for water blocks. The concern is machining it. I only have a hand drill, but even if I had a press it may still not be ideal, simply because that’s the nature of machining metals.

From what I’ve read online, cobalt bits are supposed to provide the ideal situation. For such a thin distance — only 3/16″ thickness — a little lubricant (something like synthetic motor oil, possibly gun oil) plus the cobalt bit should allow me to cut through the 110 and possibly even the 101. I ordered two of each to allow me to try drilling one of them myself, and taking the other to a machining shop if necessary. The bit I’ll need is a 3/16″ bit to allow clearance for a #6-32 screw. I have a countersink bit to follow the original, but I’m not sure how well it’ll work on copper, and the holes will need to be countersunk.

Drilling copper

Nothing like going a little ghetto to water cool a system. Sometimes this is needed to get all of what you want. For example if you want to full water cool a non-reference graphics card, you might need to do something like this — do a universal GPU block on the processor, and MVR-40s or an MVR-100 with heat transfer plates, custom if needed, on the other heat generating components. Use barbs with thin vinyl tubing between them to keep it light while making it look a little freakish…

That gives me an idea for the future.

First order of business after getting the copper in was checking fit. 1/2″ is just under 13mm, but virtually any material you order online for industrial supply is going to have a tolerance to the measurement they quote. So it’s always a good idea to check fits before you start doing anything to it. And while the width was about spot on for what I wanted, the length was a little bit of a concern, but I knew it would be going in.

I ordered the pieces to be a 5″ long. What arrived were six copper plates, three of each kind (instead of two, but hey, more room for error), but of slightly varying lengths. Getting something that fit was going to require milling corners in some fashion. Why didn’t I set the length specifically to what I knew would fit? Because it’s a difference of under 1/10th of an inch, and they have a 1/8th tolerance on their lengths. I’d be risking getting pieces that were too short in that instance. The shortest piece was only slightly too long, it measured at shy of 130mm, so it’s either drill the corners or see if I can grind it down. If it was 127mm, or about 5″ exactly, then it likely would’ve been the perfect length. It’s a risk.

According to Koolance’s diagram for the MVR-100, the holes are to be spaced 92mm apart, or 46mm off-center for each. If push comes to shove, I can do the same thing Koolance already has with the 140mm heat transfer plate and drill a couple holes toward each edge of the copper plate and tap them for #6-32.

The cobalt bit came from Home Depot — 3/16″ cobalt bit by Ridgid. The hand drill is a Black and Decker cordless drill, and I used a standard V-Drillguide for guiding the bit and a C-clamp for holding it together. The holes on the first piece weren’t completely centered and straight down the middle, but I got close enough. To countersink the screws I just used a step bit. The bit started out at 1/4″, so the tapered end was perfect for that.

And as I forgot to charge the drill before trying this, I had only enough juice to get one hole countersunk and the second barely sunk enough.

As you can see a test fit followed. The “tolerance” in the screw holes allowed the plate to still line up straight. Even though there will be thermal pads between this and the VRMs, I decided to sink the hole a little better after letting the drill charge.

block1

block2

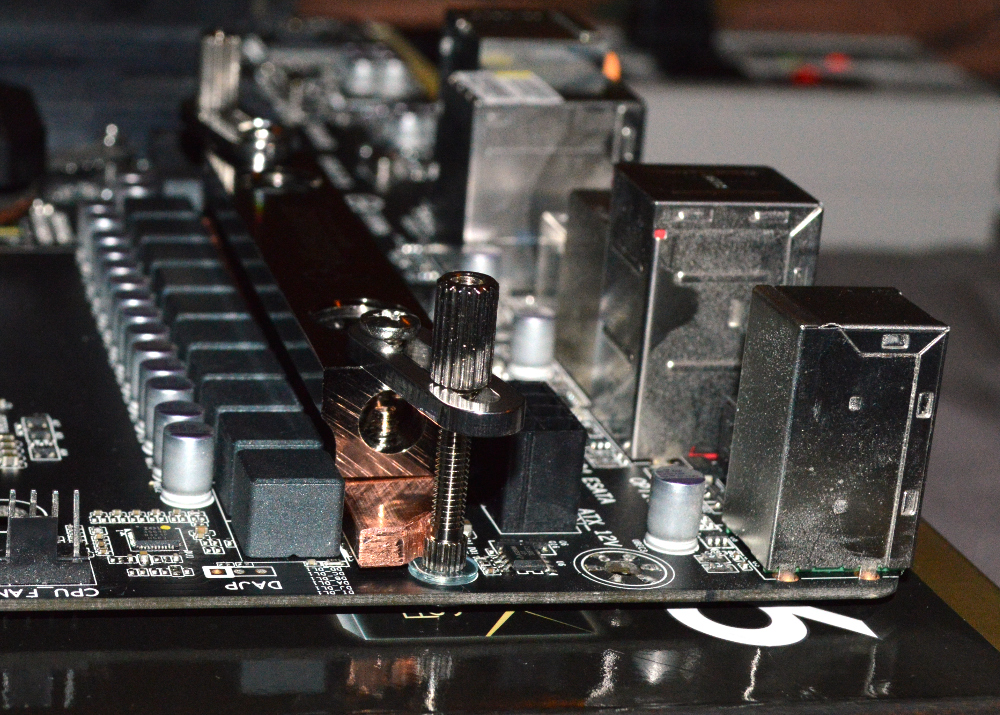
I used a rasp to shave down the corners. The drill bit didn’t want to hold still even with the guide over it, so I just took the file to it. Took a bit of time — and a sore back — but I managed to get the corners knocked down enough to get it to fit. This also preserved as much of the copper’s mass as possible, which will aid a little bit in cooling — not much, but it’ll still help.

An alternative to this would’ve been to order the plates longer — probably closer to 6″ instead of 5″ — and drill and tap holes to secure it through the mainboard. But to do that I would’ve needed a press to ensure I could drill properly without worrying about the bit slipping since the mounting hole would’ve been off to the side closer to the edge instead of centered. But then if I had a press, I could’ve drilled off the ends on this plate as well instead of using a rasp and a ton of elbow grease.

With a confirmed fit, I cleaned the copper plate, applied the thermal compound, and mounted the block to the mainboard.

Reply to Gov. Martin O’Malley regarding “gun reform”

Martin O’Malley is the former governor of Maryland who is also seeking the Democratic nomination for the 2016 presidential election cycle. Recently he penned an op-ed that was published in the Boston Globe called “Congress needs to act on gun reform“. I think it’s quite telling where he sits on the gun control fence, but let’s get into this.

These tragedies aren’t isolated incidents or even “accidents” as some have called them — they’re part of a full-blown epidemic.

We cannot let this become the new normal. As we mourn for the lives cut short — for the victims and the loved ones they leave behind — we can’t just sit by and wait for another tragedy to happen again.

We need comprehensive gun safety laws to save lives.

Ah another politician using the words “gun safety” when they really mean “gun control”. That is one thing that has certainly become the new normal. Okay, Governor, if you want the gun safety rules codified, I can go for that. Except they already are in one way or another. Which is why I know you’re not talking about the gun safety rules.

For those who aren’t aware, there are four rules typically listed, and most provide the list published by the NRA (in no particular order): 1. keep your finger off the trigger until you’re ready to fire, 2. do not point the barrel at anything you do not intend to destroy (i.e. always keep the barrel pointing in a safe direction), 3. know your target and what is around it, and 4. always treat a firearm as loaded until you confirm it is not.

All of these rules, and the consequences for not following them, are already covered in our laws. I detailed the laws for the State of Missouri in an earlier article, and I’m sure Maryland is no different.

Which, again, is why you’re not talking about “gun safety”. You’re talking about gun control. So stop using the terms “gun safety” unless you’re talking about the generally accepted rules for gun safety.

This is where we should start: The federal government should limit the sale of firearms to tightly regulated, licensed dealers. That means closing the “gun show loophole” once and for all, and banning unlicensed private individuals from selling guns.

And how do you think this will “save lives”? You see typically the way things are supposed to work in the United States is that a politician doesn’t just espouse a policy with some vague goal of “saving lives”. Instead they have to justify the policy they wish to enact. And nowhere in your op-ed do you justify how this policy will “save lives”.

Since you’ve already cited mass shootings, here’s something you should know: the vast majority of guns used in crimes were not obtained through private transfers. James Holmes purchased his firearms through licensed dealers. So did Jared Loughner. Adam Lanza stole what he used by first killing his mother, but those firearms were still obtained legally through licensed dealers — I haven’t seen a report that says otherwise.

So again, how will this policy “save lives”? And how many do you think it’ll save? Would it have stopped any of the mass shootings that have occurred so far this year?

We should also impose greater restrictions on what, to whom, and where dealers can sell guns. That means banning the sale of assault weapons, increasing inspections, and establishing a national gun registry to help law enforcement track down dangerous criminals. It also means requiring gun owners to secure and safely store all firearms in their homes.

Except the assault weapons ban of 1994 did nothing for crime according to the FBI, so why you’re still calling for a failed policy is beyond me. Actually I know exactly why: the guns the AWB would ban look scary and the people you’re pandering to are easily scared. Yet when anti-gunners are introduced to firearms in a controlled manner and shown the reality of firearms and their owners, they actually become pro-gun.

A national gun registry also won’t do jack for crime. In New York they’re actually having difficulty enforcing their registration laws. It’s estimated that over a million guns are not legally registered. What kind of contribution is that having to crime? Hard to say, but it’s also quite likely that everyone eschewing registration is otherwise law-abiding and won’t be using their guns to kill or injure people in mass, and to presume such — which gun control and registration laws do — is unfair in the kindest terms. What happened to the concept of “innocent until proven guilty”? Or does that only apply where you think it should apply?

There is also no evidence that a gun registry will “help law enforcement track down dangerous criminals”, and tells me you have no idea how registries work. A registry merely lists gun owners and the guns they own — at least the ones who voluntarily submit to registration. So if law enforcement finds a weapon — one with discernable serial numbers still on it — they can look up the serial number in the registry and get the registered owner, provided the firearm was actually registered. Is that person the same one who committed the crime? I’ll say that the possibility is extremely slim, because those who will voluntarily submit to registration are going to be the least likely to commit a crime.

So registration doesn’t make it easier to “track down dangerous criminals”, it’s a waste of time as an investigative tool because it’ll provide a false lead at best. And the few instances where it might aid in solving a crime will be far outnumbered by the money wasted maintaining it.

The reforms we put in place included required licensing, fingerprinting, background checks, and safety training. We ensured that these requirements applied to all buyers, whether they were acquiring a gun from a dealer, a secondary sale, or as a private gift.

And at the same time you’ve made it more difficult for the lesser-advantaged in Maryland to acquire a firearm. This is why I say that gun control is racist in its motives and implementation. And again all the people who would voluntarily submit to this are not the people that you need to worry about.

We banned the sale of assault weapons and limited the size of magazines. And, if a firearm was lost or stolen, we required it to be reported immediately to law enforcement.

And if the FBI’s own reports are anything to go by — you know, being the most cited law enforcement agency in the country, since they are the top law enforcement agency — then you’ve actually done nothing to curtail gun crime and violence. Instead you’ve only impaired the law abiding. And as Eliot Roger showed, a person can patiently wade through whatever laws you pass in order to commit mayhem. Regardless of what laws you pass, they will either adjust for them, or find a way to go around them.

One question about the magazine limit: does it apply to law enforcement as well? Have all law enforcement agencies also limited their magazine capacities down to the new legal limit? I’m guessing not,

Our goal in Maryland, as it should be for the nation, was to reduce mass shootings and keep guns out of the hands of criminals.

ShootingTracker.com shows six “mass shootings” in Baltimore so far for 2015, one in Capitol Heights and another in Springdale, for a total of eight. For 2014, they’re showing one in Baltimore, one in Camp Spring, and one in Seat Pleasant. Just three for 2014.

And those laws were passed and implemented starting in 2013. Nice try, Governor. Looks like your laws aren’t doing jack shit.

While the public strongly backs common-sense gun safety reforms, Congress has refused to act on them.

Actually the polls are misleading and results mixed.

And you’re trying to call them “common sense gun safety reforms” when the majority of law enforcement — you know, the ones who are actually quite well versed on how all of this words — don’t believe they will work. They don’t back any of the ideas that gun control proponents have devised and do not feel they will actually help reduce crime.

Their fear of retribution has led them to block even the most basic gun safety reforms.

So the NRA is to blame for all of this? Oh no, Governor. The NRA is backed by millions of gun owners across the country, but they represent only a fraction of the gun owning population. Most don’t belong to any organization or provide any kind of donation or support to them. It is that otherwise silent majority of gun owners that even Democrats fear. The same silent majority that cost Democrats the House and Senate in 1994, the election year in which even Senator Dianne Feinstein barely held on to her seat.

A lot of senior Democrats — Feinstein excluded — remember what happened in 1994. That is why they overwhelmingly rejected gun control in 2013. It has cost politicians their jobs, and will continue to do so.

Stopping the preventable deaths of American citizens should not be a partisan issue, or the purview of special interests. These members of Congress need to find the courage to do the right thing, without fear of the NRA’s clout, come next election.

It’s not enough just to “have the conversation.” It’s time for actual leadership and action.

In other words, it’s time to implement what you want, the rest of the public be damned, because you know what’s best for all of us. Do I have that right, Governor?

We’ve been having the conversation. You just don’t like the direction it has gone. As I showed above, the laws your State enacted in 2013 have not met the goals you expect, and probably never will. Gun control is a failed policy. We’ve seen it time and again. The FBI said that the assault weapons ban did nothing for crime in the United States. The top States in the US for crime rates are predominantly gun control states.

And gun control in other countries shows it to be a monumental failure: while gun crime may have declined, other crimes rose to take its place. Even countries that have banned guns still have problems with gun crime. How does that work if your pesky laws are supposed to save the world, save lives, and prevent senseless deaths? In Australia after their 1996 draconian laws were passed, assaults actually rose. Murders and manslaughters declined, but mass murders still continued, including this past December when Cairns buried 8 minors between the ages of 18 months and 14 years, all killed in by knife.

So spare me your gun control rhetoric, Governor, that you’re trying to dress up under the guise of “gun safety”. We’ve all heard it before. You’re just not liking that a lot of the people aren’t buying into it. It’s one of the reasons I’m hoping Bernie Sanders gets the Democrat nomination. At least he knows that gun control on the by and large does not and has not worked.b

$150,000 medical bill for snakebite

By now I’m sure you’ve heard about the $150,000 medical bill that one “adventurer” incurred when he attempted to take a “selfie” with a rattlesnake. Over half the bill, almost $84,000, was for “pharmaceuticals” — i.e. the antivenin plus other drugs which would’ve included painkillers, saline fluids for hydration, antibiotics, and whatever else was administered during his visit to the emergency room.

Now a lot of people are looking purely at the numbers and not thinking beyond that. Accusations of “gouging” are abundant with regard to this case. Two hospitals were drained of antivenin treating this guy. So how is it that can result in a bill of $150,000?

Quite simply: the cost of producing the antivenin.

Now articles point out that there is only one licensed supplier of antivenin for the United States. Automatically this makes people think “monopoly” and that the producer is charging exorbitant prices simply because they can. Without competition, what’s to stop them? And it’s not like governments can stop them from importing the antivenin simply because that would mean condemning a lot of treatable cases.

While a valid concern, it hides the primary detail with regard to antivenin and why it is so expensive: the risks with its production.

The production of antivenin requires one thing: venom. There are not many people in the world qualified to actually properly handle these animals in order to obtain the venom safely. So if you think you’re qualified to handle snakes, spiders, and other venomous creatures in order to milk them of their venom, feel free to go into competition with the other venom suppliers — the few that exist — and provide the venom a at price that undercuts the other suppliers. All you need is several of each type of animal, the facilities and personnel to house and manage them, and, of course, the facilities for storing and milking the venom. And all the various licenses and certifications that go along with that.

Beyond that, there’s the venom itself. As I said, there aren’t many people in the entire world qualified to handle snakes and spiders for the purpose of milking them — such as those who collect and harvest venom from the vicious and infamous Sydney funnel-web.

And different animals produce differing amounts of venom. The Sydney funnel-web, for example, doesn’t produce much. Harvesting will only get one or two mL per spider, meaning to get a decent quantity for making antivenin, you need a lot of spiders. And in Australia there is only one supplier for that venom: the Australian Reptile Park. And they house, if I recall the video correctly, over a hundred spiders. For many venomous animals, there is only one or a few suppliers.

So this puts supply in short supply, and when it comes to the law of supply and demand, short supply but high demand means prices don’t stay low. They aren’t charging a particular price for the venom simply because they can, but because they have their own costs to cover — storing and maintaining the animals, and insuring against the risks with handling them, among others. That is the basics of economics, and when you add up all of those costs, you get a rather eye-opening number.

Given the life-saving treatments that they are helping produce, you would basically have to presume that the people making the pricing decisions are cold-hearted or heartless assholes who are just out to make a buck instead of cover their costs with a slight markup. But that is likely how a lot of people see anyone working in the medical industry in any capacity who is not giving away their services for free.

Antivenin is also quite specialized — read: costly — in its production. Popular Mechanics lays out the steps:

1. Harvesting the venom — As I already said, this is specialized work, and often there are only one or a few venom suppliers for any given species. But if you think you have the skills to do it, feel free to go into competition with the other suppliers.

2. Cold storage and labeling — it’s extremely important that the venom be properly labeled. Some antivenins, particularly those for spiders, must be specific to the venom they target. CroFab is more generalized simply because of the nature of the venoms they target.

3. Selecting a host animal — That’s right, the venom is injected into an animal (usually a horse) so that their immune systems can create antibodies against the venom material. Don’t worry, it’s only a really tiny, dilute quantity that is injected.

4. Preparing the “vaccine” — This is the most important part. Diluted venom, sometimes with an additional adjuvant, is prepared as a kind of “vaccine” to be injected into the host animal. The animal is injected multiple times in very tiny quantities (under a milliliter) in different locations on the body. Multiple venoms may also be injected into the same animal to get a variety of antibodies, allowing one antivenin to work against multiple species. An example is CroFab, the only antivenin in the United States licensed for snakebites, and known to work against all North American snake venoms except the Coral snake — i.e. “red and yell, kill a fellow”.

Coral snake antivenom was produced by Pfizer, but they ceased production due to mounting losses — i.e. not enough people are bit by coral snakes every year to justify the cost of producing the antivenin — though they announced in 2013 that they would resume production. Foreign manufacturers have produced coral snake antivenin, but the licensing requirements and costs to introduce it to the United States have stalled availability.

5. Purifying and licensing — After waiting enough time for the animal to develop antibodies against the venom, blood is drawn and the plasma is separated from the blood. The antivenin is derived from the animal’s plasma. Popular Mechanics also notes that one of the biggest hurdles, adding into the mix a significant cost as well, to bringing the antivenin to market in the US is FDA licensing, which can take as long as 10 years and cost hundreds of millions of dollars if not over a billion dollars.

6. Human use — Once licensed and cleared for human use, the antivenin is freeze dried or distilled into a powdered concentrate, and must be stored refrigerated or below-freezing as well. It usually takes between 25 and 30 of vials of antivenin for a single patient. The concentrate is diluted into saline and administered to the patient. The antibodies in the solution bind to the venom and neutralize it, and the liver and kidneys carry it out of the body.

Beyond the steps, the antivenin is only one part of the ER visit. For example while waiting for antivenin for a Timber rattlesnake bite to “kick in”, a person may need to be put on antihemophilic drugs to counteract the hemophiliac effect of the venom. Neurotoxic venom, such as the aforementioned coral snake, mean that the patient will need to be on artificial respiration or a negative pressure ventilator to keep the patient alive during respiratory paralysis.

The cost per vial of antivenin is going to vary. CroFab costs upwards of $2,000 per vial to the hospital and has a shelf life of three years. The cost reflects the costs that go into the antivenin, including the risks involved at all stages. This cost will be passed on to the patient or the taxpayers, and means that a snakebite can leave someone who is uninsured with a massive amount of financial liability.

And yet many want all of this basically given away for free.

The only thing that will bring down the cost of the antivenin is greater production and availability of it. For this we need market competition — i.e. more venom harvesters selling venom to more antivenin producers. Unfortunately the very nature of harvesting the venom is what will keep supplies low and suppliers few, as it is a very high risk profession for which there is bound to be very high insurance and payroll costs.