Your child’s welfare

Let’s present a scenario:

A mother is putting her baby on her back in a baby carrier when another woman, thinking the practice dangerous, grabs the child from the carrier and begins to lecture the mother on safety, refusing to give the child back.

Will your passion for your loved ones kill them?” (since re-named to “Realities and Legalities of Child Snatching: Part One”) is the question presented in the article where I came across the above scenario. In the article in question the author, Melody Lauer (“Lima”) explores what is legally justifiable in this scenario. And in the three bullet points she gives, the last one is arguably the most important: the “reasonable man” doctrine. Basically how this doctrine is employed is the jurors will construct in their minds their image of who they consider to be a reasonable person, and evaluate your actions against that imaginary individual.

The comments in response to the article are rather telling. One person said:

This is my initial gut reaction. If the person refuses to give the child back but does not run away with your child you have options. You politely request the child back and inform the person that the child was in no danger. Then if they continue to refuse to give you back your child then you call the police and ask them to show up because a person is holding your child and is refusing to return them.

If the person runs away…that crosses a line into kidnapping, and I would treat it as such.

The question needs to be asked: what kind of treatment do you feel a kidnapping warrants? Another person responded (errors theirs):

in my state you have the right to use deadly force for someone else if they have the righ to use it for themself but dont have the ability. if someome was kidnapping you would you use deadly force? then why would you not for your child that cant protect it self?

Now I’m not a parent. In a way that gives me a little greater ability to look at these situations from an unbiased perspective because I’m not inclined to react with the kind of emotional bravado that seems to be telling of a lot of parents, “armchair tacticians” as Melody called them in another article.

But to me it sounds like Melody is ignoring one key aspect of the scenario she presents in describing what is an allowable response: the child. Even in parts 2 and 3 to the series she wrote, she doesn’t touch on it enough.

While the second quoted commenter above is correct, such a right still carries with it two responsibilities: you can only act to an extent that is justifiable by the circumstances, and you must not act recklessly. If you go too far, or you act in a reckless manner, you’ve eliminated any justification to defending self or others, and any injuries or deaths that can be directly attributed to your actions become your criminal responsibility.

And using physical force on someone who is holding your child but otherwise not posing any harm to them could be seen as recklessly endangering your child.

In the scenario Melody presents in her article, the other woman already has the child in her arms. Anything physical you attempt or actually use against this woman could result in injury to the child. And you could be liable for those injuries as your actions could be interpreted as acting recklessly.

Further the other woman believes she is acting with the child’s welfare and safety in mind, meaning she could likely justify her actions as defending the child from harm or injury. Even if she were to flee with the child, deadly force is still not justifiable and likely will be seen as acting recklessly. Since you’d be shooting at someone running away from you, which is almost never justifiable. And you’d be shooting at someone carrying your child.

Yes you will be freaking out because someone else has your baby. But so long as they are not actually harming your child and show no intent to harm your child, you have no recourse other than to try to de-escalate the situation and call the police if you are unable to make progress. Other civilians may be able to assist in detaining the woman to ensure she doesn’t go anywhere, but even they may not be able to employ force to do so — because of the child in her arms.

And if she does flee with the child, you still may have no recourse other than to just call the police or call other civilians in to assist in recovering the child and detaining the kidnapper. The law puts a lot of emphasis on the welfare of children, and frowns upon anything that compromises that child’s welfare.

As hard as such a reality may be to grasp, your first and foremost consideration should always be on your child, and on recovering your child with as little harm coming to them as possible. I know parents really want to intervene because we are talking about their child. But that likely is almost never the best course of action. And rationality virtually always cedes to emotion, meaning not only would intervening not be the right course of action, but you wouldn’t see it as not being the right course of action.

Let me give you a scenario from my book.

One afternoon about 15 years ago, I was working as a shift supervisor at a K-Mart. I had just gone to my lunch break when a floor associate walked into the break room to inform me there was a parent who could not find her child.

I dropped everything and went to find the parent who, thankfully, had not gone anywhere. I got a basic description from the parent and told the floor associate to stay with the parent and that they were to not. go. anywhere. I put out the alert over the PA. A few minutes later, the alert was canceled and my associate number was called to the front of the store, where the on-duty manager was waiting with the child. Only once the call cancel came in did I permit her to leave the area, and only by following me.

The parent easily could’ve started searching the store for her child, but that would not have been the right move. She did not know the store as well as the floor associates. And there are places the child could’ve gone that we would not permit her to go, such as the stock room. It was best for her and her child that she followed my direction and stayed put. I and the other associates on shift that day had the training on how to respond to such a scenario. The mother probably did not. And, compounding the situation, she was frantic.

Would she have been acting in the best interest of her child by searching the store? No.

And that, I think, is what mostly escapes the parents that Melody called “armchair tacticians”. They think that, because they are a parent, they always know what is best for their child and will always act without fail in the best interest of their child. Melody was able to point the fallacy of this out to a class she taught. After showing a video to her class of a blatant kidnapping in a Walmart, one mother responded saying she would’ve shot the guy who kidnapped the child, to which there was plenty of agreement from the audience.

Melody then challenged them:

He has your child in his arms. He has a knife to her. Are you even carrying your gun or did you decide you were just going to the grocery store so you don’t need it? If you you don’t have your gun what are you going to do? If you do have your gun and you decide to take that shot where would you shoot him? How do you make sure he doesn’t cut your child in the process? Would you stand back or would you try to make a contact shot? Do you know how to make sure your firearm doesn’t jam when attempt a contact shot? How to shoot so the bullet doesn’t exit him and hit your child?

When your child is in danger, there will be times where all you can realistically and reasonably do is just sit back and watch, where doing anything more will only put your child in more danger, as Melody notes above, and may also put you in danger in the process.

Speaking of which, hands up if you are a parent who has ever said, “I’d die for my child!”

Just think about that for a moment. Sacrificing yourself. Depriving your family of your presence. Leaving any other children you have without one of their parents. Leaving your spouse without their spouse. All for one of your children. And if you’re a single mother, you’d leave your child an orphan.

The loss doesn’t justify the gain. Especially since the gain is far from guaranteed.

If you believe you must put your own life in danger to save your child, you either 1. don’t know how to respond to the scenario, or 2. your child is beyond the point of being saved. The latter I know is something most parents likely never want to consider.

But it’s amazing the shit people say when emotions are the fuel behind their words.

It seems the concept of there being worse things than death constantly escapes people, especially those hyped up and frantic or with too much emotional investment to the point they are incapable of considering a situation with any kind of rationality.

One of the most annoying things that parents say to non-parents is along the lines of “you don’t have kids, so whatever you have to say is invalid”. Sure there are things I cannot know without having kids of my own, but there’s a hell of a lot I can figure out without needing kids in the picture. And one thing I can figure out is how best (note: not necessarily the quickest way) to end a situation in which a child is in danger. I can look at such situations with a much higher degree of rationality since I don’t have much of an emotional stake in the outcome.

At the same time, it is easier for a parent to determine the best way to end a situation that doesn’t involve their own kids over situations that do.

Having an emotional stake in the outcome is a sign you’re likely not going to think rationally about the situation. Your emotions will cloud your judgment and make it impossible for you to see that you don’t know how to respond in such a situation. As hard as it can be, again, oftentimes the only thing you can realistically and reasonably do is just sit back and watch, where doing anything more will only make the situation worse.

Melody concluded her three-part series with one hell of a piece of advice, and it’s a fitting closing here:

Don’t let your passion for your loved one get them killed by your own lack of knowledge, training or skill–or worse, by your own delusion that such a situation is easy (legally, tactically, emotionally or physically).
Water cooling build in my wife’s computer – Part IV

Build Log:

I used the time between the order and the time I picked up the overnight shipment at my local FedEx Office to make sure I had everything I needed. One thing I made sure to pick up was a pair of 8″ needle-nose pliers. What for? To double check all the little rotary fittings around what was left of the loop and ensure everything was going to be nice and tight. Now you can’t go too tight on those, but you can definitely give it a couple more turns, helping to make sure everything is snug and won’t leak.

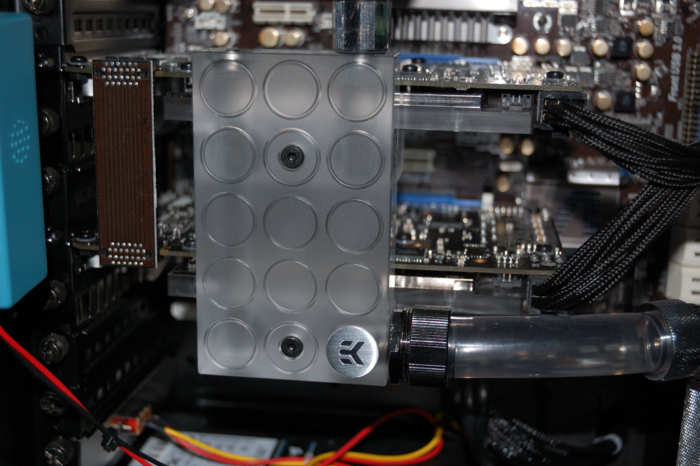
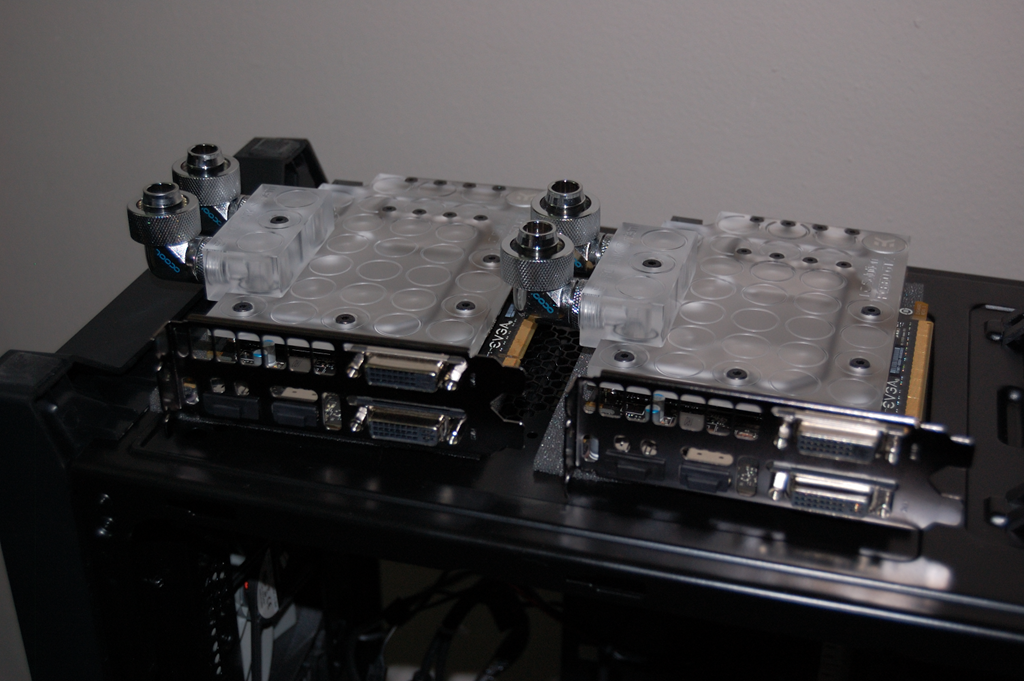
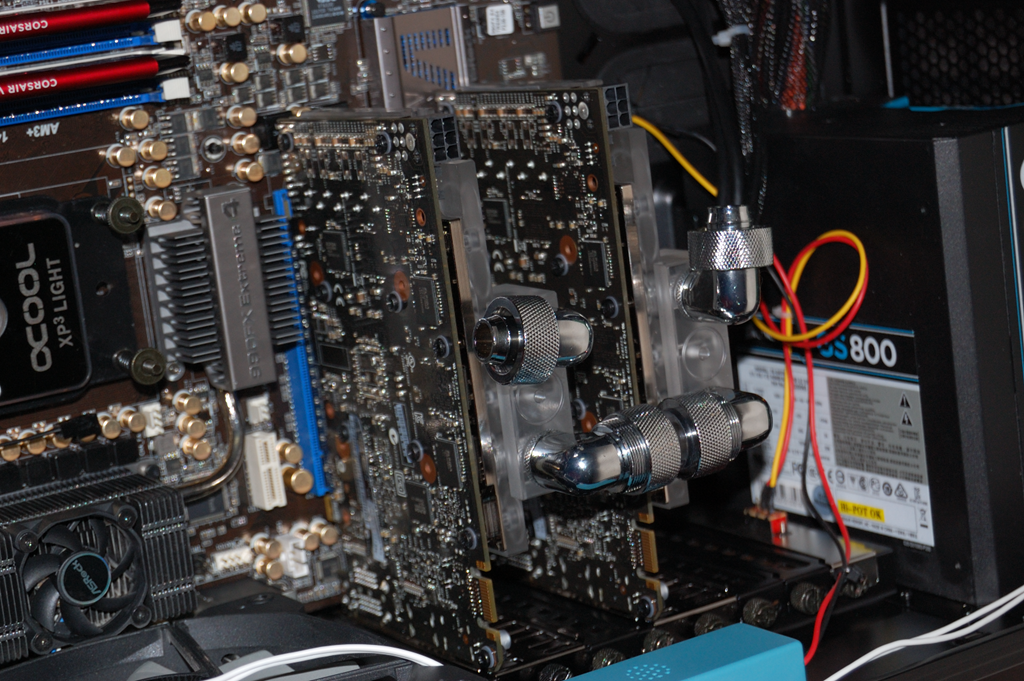
The overnight order had the EK SLI bridge and three 40mm Bitspower extension fittings. As soon as I got it home, I went right to work on the loop, starting with the SLI bridge. Once the SLI bridge was put together and the graphics cards installed back into the system, I put a single compression fitting on the intake of the SLI bridge and set to tube it up to the pump.

That’s where one of the 40mm extension fittings comes in.

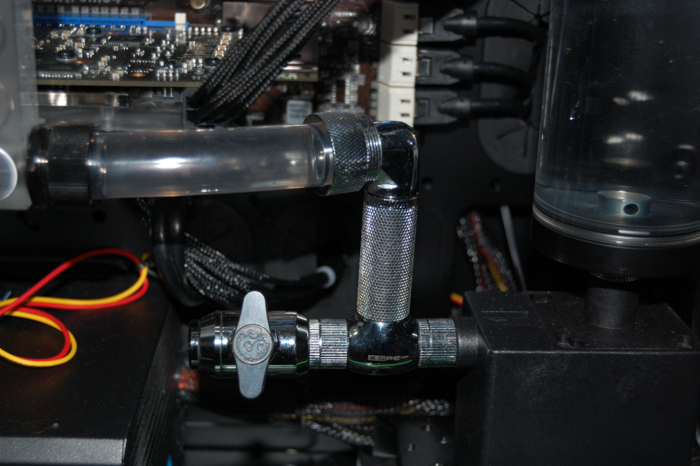
I changed the section of the loop coming from the pump with regard to the T-fitting. Coming straight out of the pump went to the Bitspower valve, while the 90-degree turn went up through the 40mm fitting and into a 90-degree single rotary. The 90-degree rotary tubed into the single compression fitting on the SLI bridge. I measured that to within a couple millimeters and it came out pretty spot on.

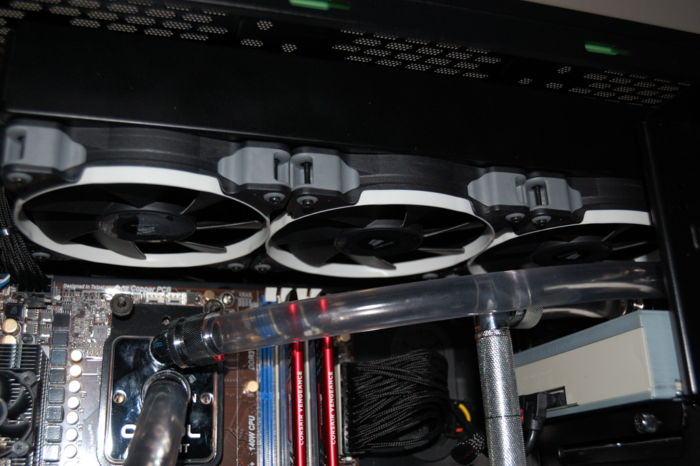
The other two 40mm extension fittings linked up to another 90-degree single rotary that was fed from the outlet on the radiator. It dropped down into the reservoir so the reservoir is part of the loop as I had always intended.

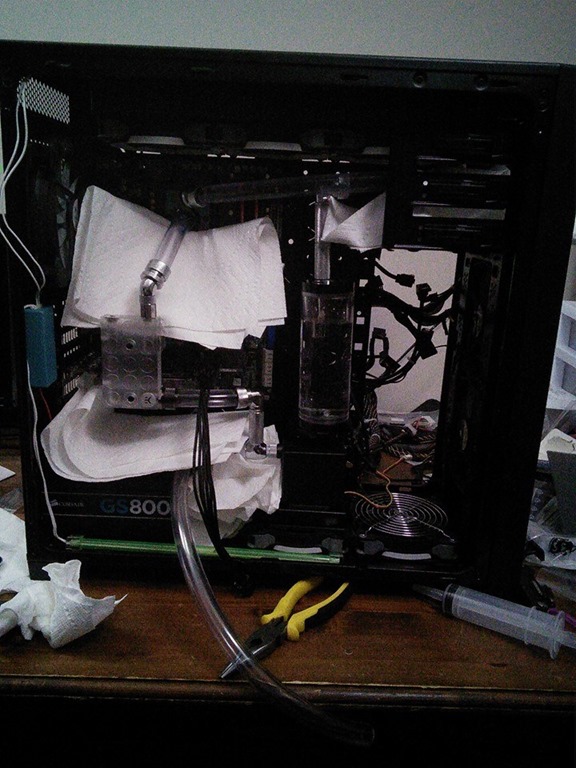
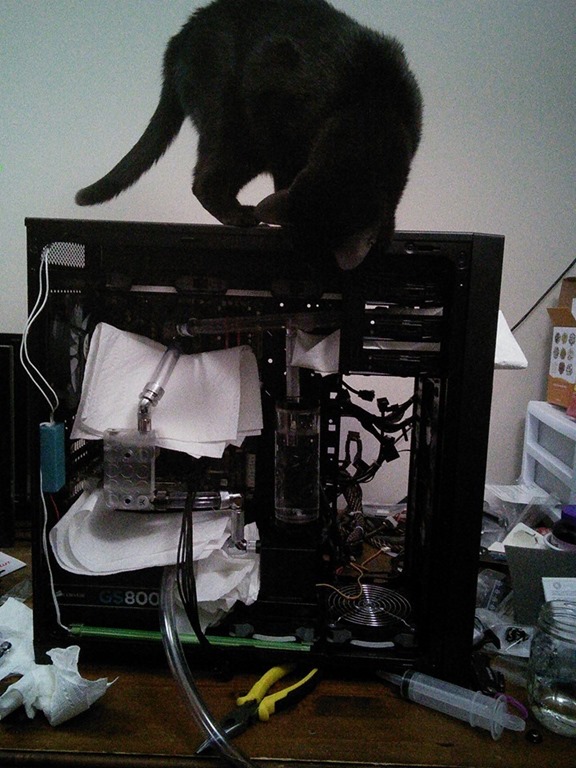
Once everything was tubed up and all the fittings double, triple and quadruple checked, it was time for another leak test.

10012610_10152072135471267_989640542_n.jpg

And I think I should mention that my cat was certainly interested in what was going on, once he started hearing the water flowing through the loop and remaining so.

1932228_10152072135571267_1583482234_n.jpg

Yes, this leak test went smoothly, thankfully. And to ensure it remained such, I left the loop running for several hours before draining it and filling it back up and continuing the leak test – recall from Part 3 that I said that not only should have a drain in your loop – something continually asserted by Singularity Computers – but it should be tested as well. That’s why I did the leak testing with plain distilled water. For the duration of the leak test, the distilled water was not going to be in contact with the components anywhere near long enough to cause harm, and at under $1 per gallon for the water versus $12 for a 150mL concentrate for the coolant, doing a leak and drain test with the water just made sense.

But as the leak tests were occurring late into the night, I would have to save the coolant for the next day.

And getting home from work that Wednesday night, knowing what I would be finishing up when I got home – it made for an interesting day. I was eager to get underway and get this finished up.

As the loop had been sitting all night very nearly completely empty, my first task was to flush it again with new distilled water and drain it. While the loop was running with the fresh distilled water, I took the chance to finish out any wiring that needed it such that when the loop was filled, all I needed to do was plug the pump into the power supply for the computer and let it go.

For the coolant, I poured about half the bottle into a pint mason jar and splash mixed it with distilled water. Using a syringe, I filled the reservoir with the coolant, and did the same routine as before with the distilled water. Only this time it was definitely for real. For the next round, I used the last of the coolant and more distilled water. I didn’t really mix everything all that well because I knew the concentration would equalize within the loop as the coolant flowed through.

And after everything was filled and as much of the air out as I could manage and maneuver on my own, I disconnected the pump from the external power supply and connected it to the power supply inside the case. The moment of truth. I closed up the back of the case and plugged up everything external the way it needed.

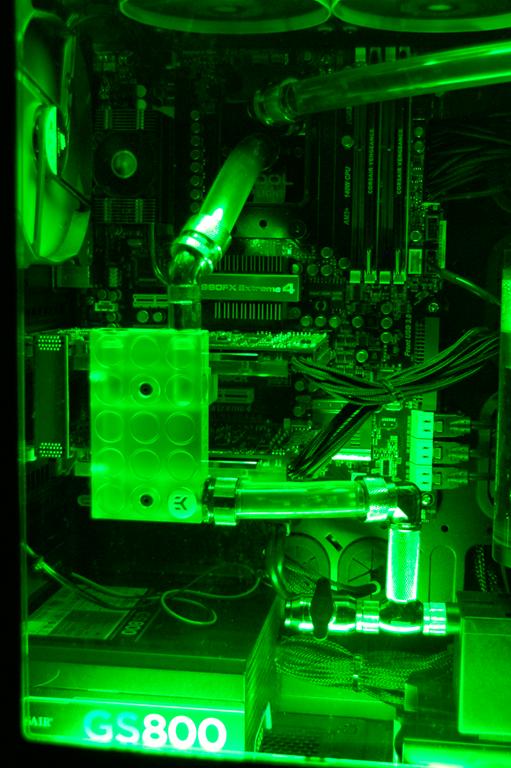
Several days of work culminating in one press of the button on her Corsair 750D case. It gave me a sense of awe and an enormous sense of relief at the same time watching everything come to life.

After letting it just sit running idle for about an hour, I put it through a couple stress tests for initial benchmarking.

Running Prime95 small FFT, the CPU struggled to make 52C, which is an improvement over the ThermalTake. Running the Valley Benchmark on the GTX 660 SLI pair, the temperature never went above 50C and stayed around 45C on both cards for much of the test, maybe topping out at 46C or 47C. So those were significant improvements in temperatures over the stock cooler – and that is what I was after.

One thing to note, with the SLI serial bridge I used, there was a stubborn bubble under the plug that just did not want to go away and took several days to finally disappear. The same with a bubble in the fitting coming out of the CPU.

But because the loop has only been running for a couple weeks, and I have two graphics cards plus the CPU all on a single 360mm radiator, currently we’re not doing any overclocking. All of that will come later when I get a 240mm radiator to put in the floor of her case, which will require some extra fittings and a slight redesign of the loop, but that will come several months down the road, probably about the time I look at replicating my success in my own computer, hopefully minus the monumental failure I talked about in the previous part.

The computer has been running steadily since that initial press of the power button. All the air is out of the loop – no bubbles at all in any of the tubing – and the system appears stable. My wife has been able to run her games on it without issue and everything is staying nice and cool.

So that concludes this retrospective on my attempt at a custom water loop, so I’ll leave you with some pictures of the build. Enjoy!

* * * * *

Since many often ask those who’ve built water cooling loops what parts and fittings were used, here’s a complete parts list:

Components: Loop components:

  • Phobya DC12-400 pump
  • Bitspower Z-Multi 150 reservoir
  • EK-FC660 full-cover water block (x 2)
  • EK-FC Bridge DUAL Serial 3-Slot CSQ – Plexi
  • AlphaCool NexXxoS XP3 Light-Plexi
  • AlphaCool NexXxoS XT45 360mm radiator

Fans:

  • Corsair SP120 High Performance (x 4)
  • Corsair AF120 Quiet

Note: Corsair Obsidian 750D comes with 3x140mm fans

Tubing: Watts 1/2″ x 3/4″ PVC tubing

Accessory: Bitspower X-Station I (green)

Fittings: Note: All fittings to connect tubing are for 1/2″x3/4″From pump:

  • Alphacool G1/4″ male-to-male rotary extender
  • XS-PC G1/4″ 3-way fitting

Drain from 3-way:

  • Alphacool G1/4″ male-to-male rotary extender
  • Bitspower Valve (silver sparkle)
  • Monsoon stop fitting (Black chrome)

Graphics cards from 3-way:

  • Bitspower 40mm extender (silver sparkle)
  • Alphacool 90-degree single-rotary
  • Swiftech compression fitting

Graphics cards to CPU:

  • Swiftech 15mm extension fitting
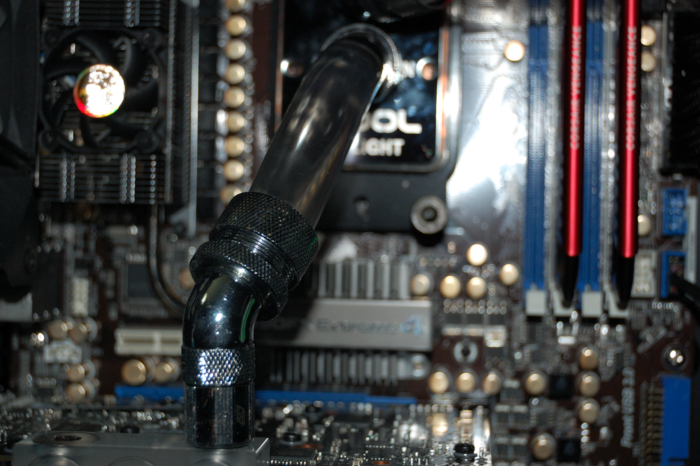
  • Alphacool 45-degree single-rotary
  • Swiftech compression fitting

CPU to radiator:

  • Alphacool 45-degree single-rotary
  • Alphacool 90-degree single-rotary
  • Swiftech 15mm extension (x 2)

Radiator to reservoir:

  • Swiftech 15mm extension (x2)
  • Alphacool 90-degree single-rotary (x2)
  • Bitspower 40mm extender (silver sparkle) (x 2)

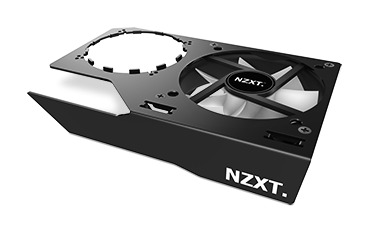
Kraken G10

black-swatch370x370.pngLet’s have a look at the NZXT Kraken G10.
You’ll likely recognize the cooling solution if you’ve read my article introducing the water cooling loop that I built out in my wife’s computer, as it’s the one that came straight from her system.

Now the interesting thing about the PNY video card is it’s a GTX 770 processor on a GTX 680 reference board – this’ll make it easy to find a full-cover water block if I build out a full custom loop. But this also made it easy to find out what I needed with regard to the heatsinks. To get an idea of what I’d need, I found a picture of the video card with the stock cooler removed courtesy of EK’s cooling configurator. It was pretty easy to discern what would need heatsinks courtesy of the installation guide – unfortunately the R22 inductors can’t receive heatsinks because of their height under the G10.

Now for the Kraken G10, the heatsinks need to be short, but it’s better having something than nothing, especially on the VRMs as those can really get warm. So I found several heatsinks on Performance-PCs.com that were 6mm, but wide enough to cover what was needed:

  • 34mm square x 4mm tall (x 2) for the VRMs next to the R22 inductors
  • 20mm square x 6mm tall for the VRMs toward the top of the card

With the 92mm fan blowing directly onto these, the VRMs should stay nice and cool – unfortunately I don’t have any real way of confirming for certain. NZXT has said with regard to the Kraken G10 that the VRMs and memory don’t need heatsinks because the water cooling against the GPU should ensure that everything else stays cooler as well under the 92mm fan. Except various tests have shown that to not hold true, especially when Radeon cards are discussed.

For my card, the additional heatsinks were not necessary.

Under the PNY’s cooler are several heatsinks over the memory and VRMs. I did not see those in any picture of the card that I found, but it was great to find because it meant that I didn’t need the heatsinks I bought. Unfortunately I’m also out about $20 because the company from where I purchased them won’t accept returns for unneeded hardware.

DSC_0038.jpg

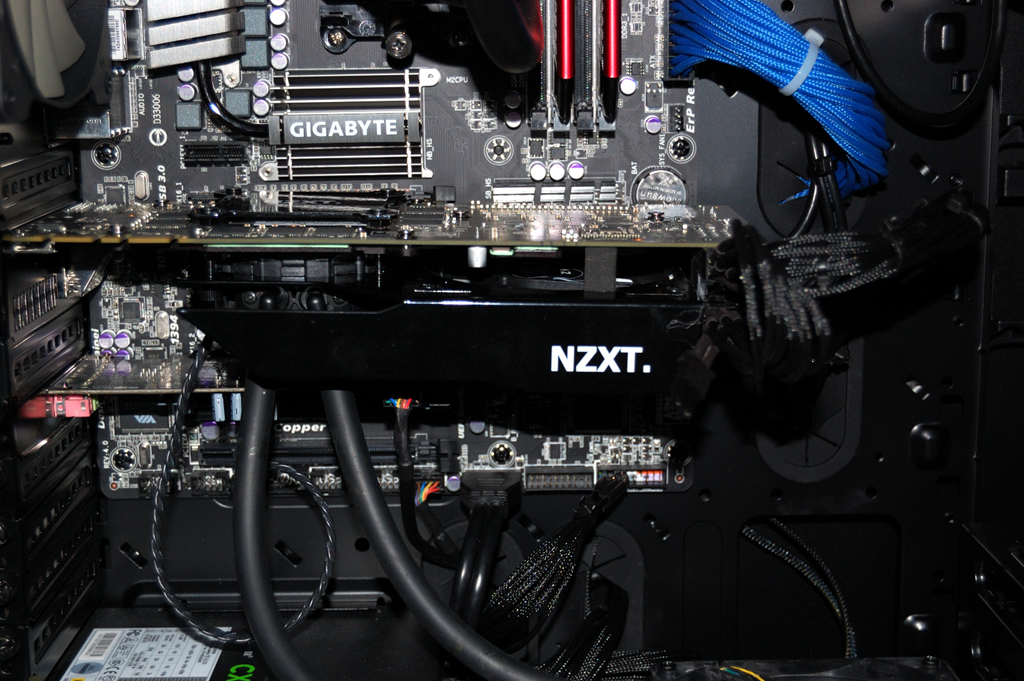
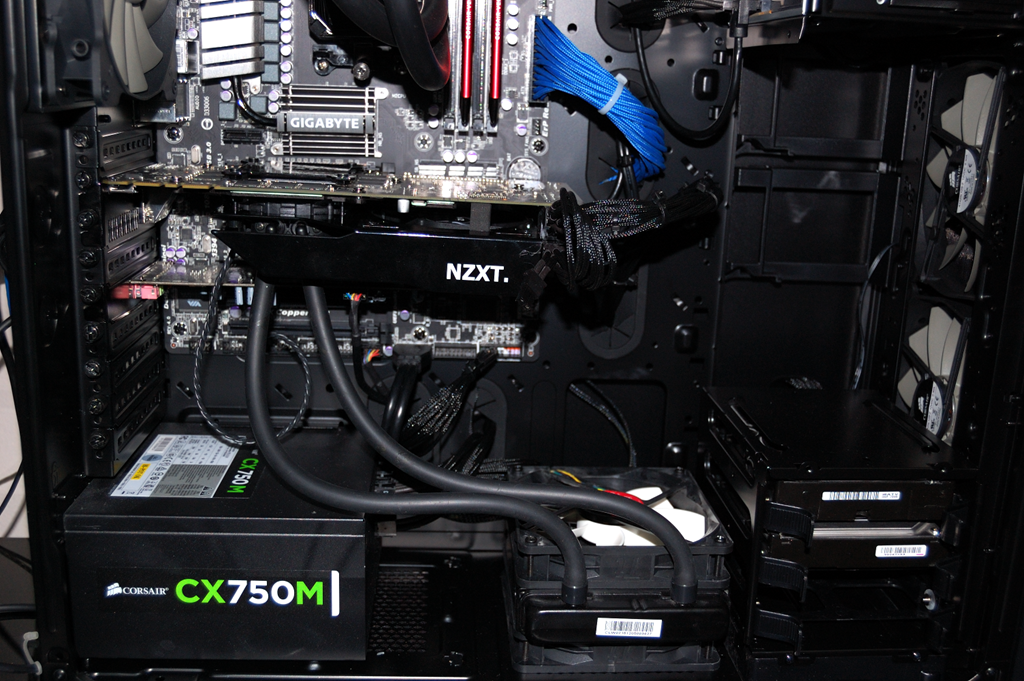
Installing the Kraken G10 to the card was relatively straightforward, though finding a mount point for the radiator in my case was interesting – ultimately I mounted it to the bottom with it pulling in air from beneath the case. I recently acquired an NZXT Grid for plugging in all the fans in my system (I have a Corsair H60 plus the case fans plugged into it). The only downside is the fans on the ThermalTake cooler are loud… I’ll have to rectify that at some time with some Corsair SP120s, methinks.

kraken1.png

kraken2.png

So how about the temperatures?

At idle it’s about 27C as I’m writing this. That’s between 5C and 10C less than where it was idling with the PNY stock cooler. Under load running Valley Benchmark, the card could easily get near 80C, and when playing Bioshock Infinite, it could climb above 80C with the stock cooler. With the Kraken G10 and the ThermalTake cooler running the Valley Benchmark on its highest settings, it reached 42C and I think touched 43C. Running MSI Kombustor’s GPU burn-in test on benchmark with everything turned up, it got up to 49C within the time before it was cut off. And with Bioshock Infinite, it made it to about 47C.

So that’s certainly significantly better than before with the stock cooler.

But like water cooling, this is not something to just do. You need to plan it out what you’re going to do, just not nearly to the same degree, as all you really need to figure out in advance is where you’re going to mount the radiator for the all-in-one. You might also need a fan hub like the NZXT Grid or Bitspower X-Station to ensure you can plug up everything you need. Some fan extension cables should be in order as well to help get clean cable runs.

You also need to know whether the Kraken G10 will even work with your card, so check the compatibility chart to see. If you want an idea of whether your card is “reference”, go to EK’s Cooling Configurator and that should be able to tell you. If a full-cover water block is available, that’s a good sign. As for whether the G10 will work with your video card, about all I can really tell you is to check the reviews. You should also be able to determine then if you need additional heatsinks for VRMs and memory chips.

Water cooling build in my wife’s computer – Part III

Build Log:

Ah Saturday. It’s typically my day for getting stuff done as my wife sleeps off her overnight shift at work. And that day’s errands started with a trip to Home Depot and Microcenter. At Home Depot, I bought the M3 screws I needed to mount the radiator to the case and some additional tubing that I didn’t actually need in the end – but I’m hanging on to it anyway because I know I’ll need it eventually. Following that was a trip to Microcenter where I bought some additional fittings along with a couple PCI-e power extension cables – the power cables coming off my wife’s power supply would fit, but they did look a little ugly and I wanted to dress things up a little.

After getting home, I continued work on the loop, starting with the graphics cards. I knew that before I could really get a full idea of what would be involved, I needed to see how the graphics cards would look with the water blocks and sitting in the computer.

The water block installation actually went fairly quick and uneventful.

gtx660_waterblock.png

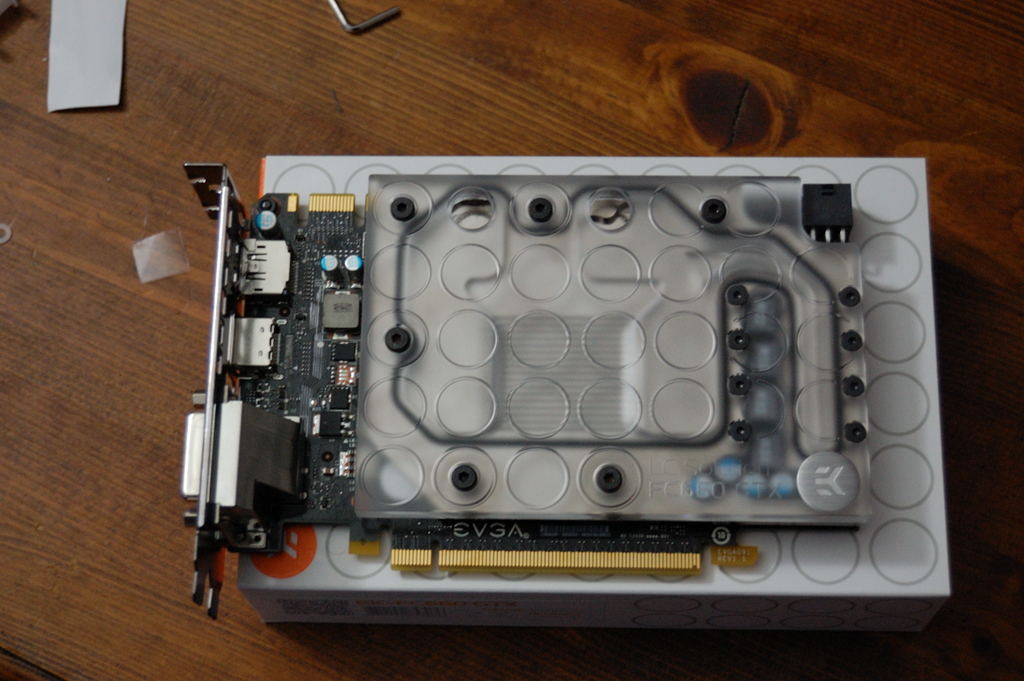
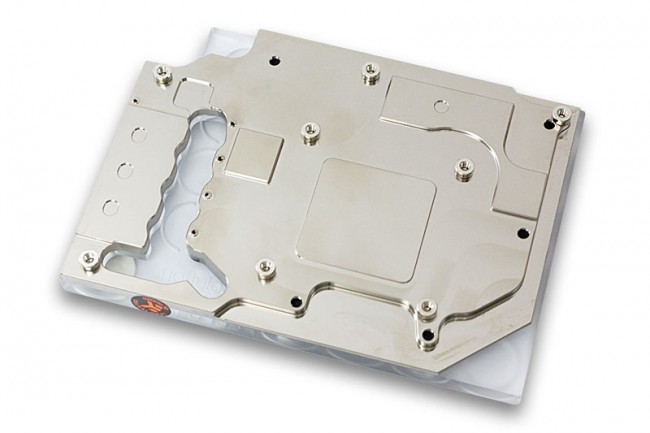
One thing that helped is the groove in the underside of the block for the T-line of capacitors and inductors (picture below). To line that up, I worked to align the graphics card to the water block, not the water block to the graphics card. By that I mean I had the water block laying on the table with the contact plate facing up, then positioned the card over that. It was just a matter of getting the capacitors and inductors into the groove, and that had me pretty spot on with the screw hole alignment.

ek-fc660-gtx-nickel_front_800.jpg

Plus as the graphics card was lighter than the water block, it was much easier lining up the graphics card to the block than the other way around, and I recommend doing that for installing the water block where possible as it’s just much easier.

And just as under the CPU block, I used Innovation Cooling‘s IC Diamond compound on the water blocks.

Now the way I had actually planned the loop was to use 90-degree fittings between the two cards, not any kind of SLI bridge or Bitspower Crystal Link.

gtx660_fittings.png

gtx660_installed.png

Yeah it looks ugly, but I was still kind of going for function over form here, and this was relatively easy to put together. And when I had everything in place, it made putting together the rest of the loop relatively easy – even though it still took several more hours. One thing I had planned from the outset was a drainage system for the loop, comprised of a Bitspower valve on a T-fitting between the pump and the graphics cards.

And from the pump to the graphics cards, the line went through the T-fitting to a 45-degree fitting tubed up to the 90-degree fitting on the graphics card water block. And the outlet from the reservoir went down into the top of the reservoir.

After that was the leak test and padding down everything with paper towels just in case there is a problem.

Unfortunately I don’t have any pictures of the initial leak test, so I’ll just have to describe it. First, I didn’t mix up any coolant. I used only distilled water for the leak test: the water was only 90 cents per gallon at my local Wal-Mart, while the coolant was $12 for 150mL concentrate. Plus I could always go get more water if I needed it, while I’d have to wait for an order of the concentrate to arrive, even if I overnighted it.

So for building a loop, if you’re new to this like I was, use distilled water to do your initial leak test. Not only will you be testing for leaks, but it’ll give you a chance to test your drainage system as well – provided you actually installed one into your loop. And part of testing your loop should be doing a test drain on it as well.

So how did the leak test go? Umm… not good.

For one, I forgot to double-check all of the fittings before I started, and the fittings on the graphics cards had come loose, leading to a major leak. Rather than tighten the fittings, though, I decided to just pull it apart. The extent of the leak meant the cards need to come out anyway so they could be dried off and left to sit for a complete dry.

And instead of planning to reassemble the graphics cards fittings the way I initially ran them, I decided to do what I should’ve done in the first place and order the EK SLI bridge. I probably could’ve made the fittings work, making sure to use a pair of needle-nose pliers to ensure they were tight, but in the end it also wouldn’t really have looked all that great. So I ordered the 3-slot dual SLI bridge, serial instead of parallel.

As this would change the way the pump is tubed into the graphics cards, I also ordered a couple spacer fittings to redesign how that was tubed up. There were problems with how the tubing was run from the pump to the graphics card as well that resulted in a small leak. So all of this was certainly for the better.

The new order was overnighted from Performance-PCs. It shipped out the following Monday, which gave everything plenty of time to dry out before I picked up the package Tuesday night from my local FedEx Office.

Water cooling build in my wife’s computer – Part II

Build Log:

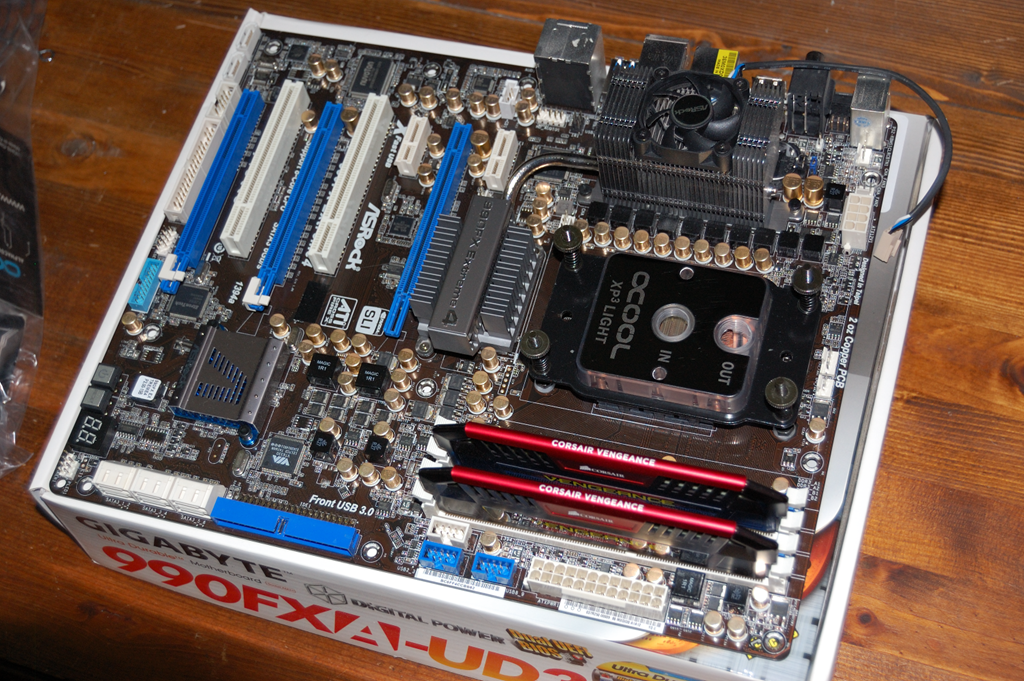
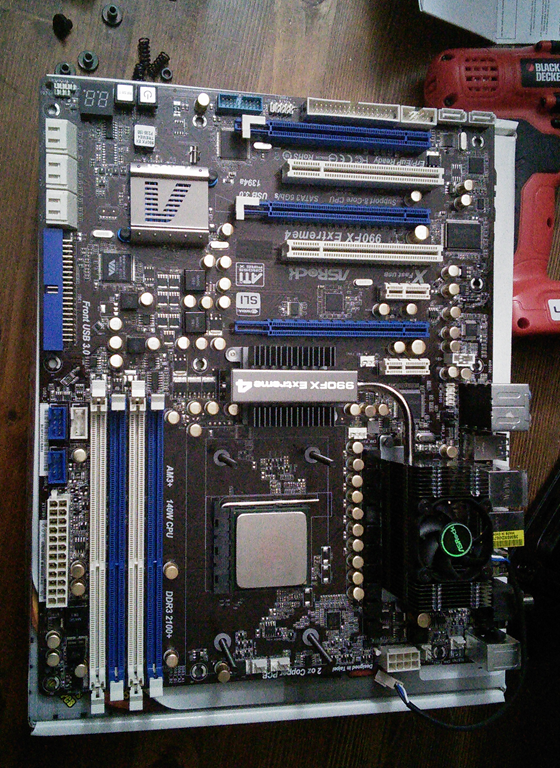
Let’s continue where I left off, with mounting the water block to the CPU.

mainboard.png

mainboard_installed.png

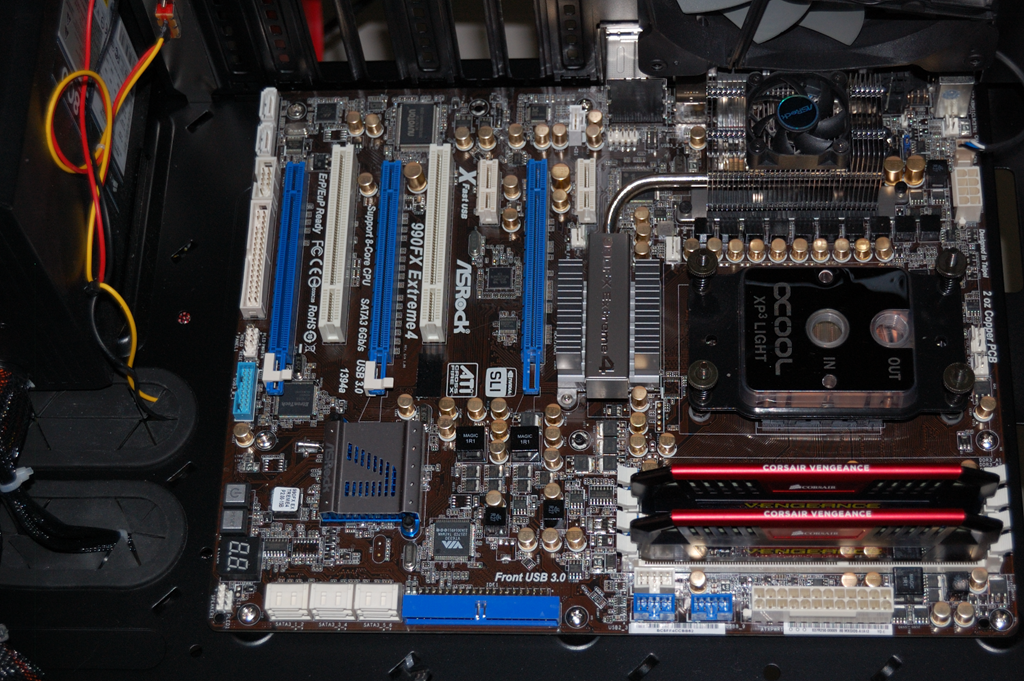
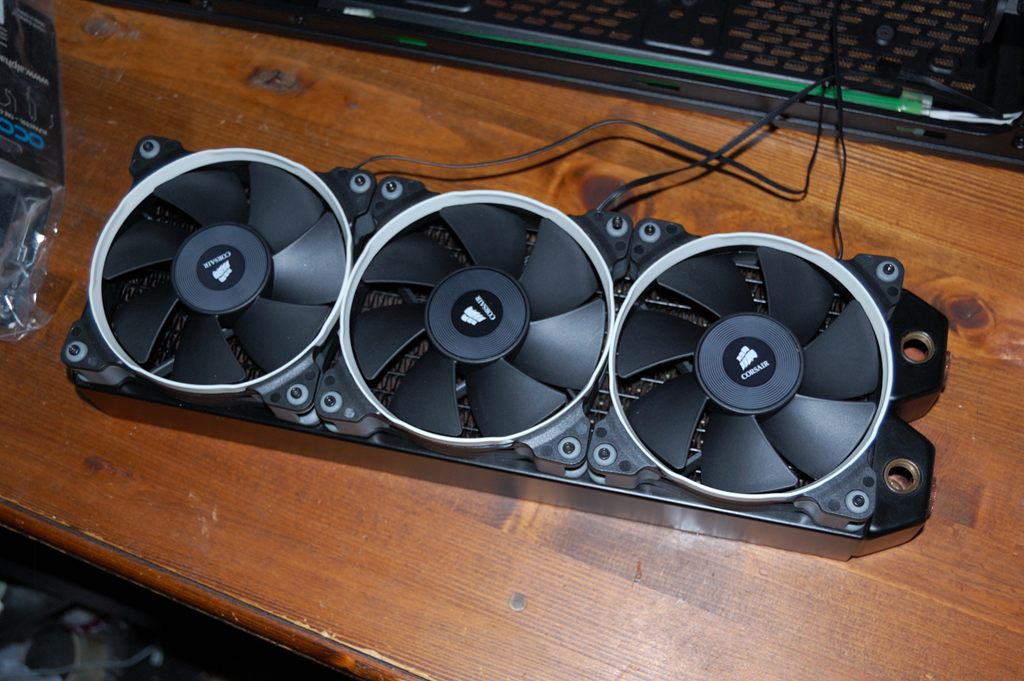
After this point, I mounted the mainboard back into the case and turned my attention to the radiator and mounting the Corsair SP120 fans to it. The fans come with three rings: red, blue and white. As the light kit in her computer is green, I decided to change the rings on the fins to the white rings. As the fans will be mounted in a push configuration, the rings will be visible on the radiator, and the red or blue rings I don’t think would’ve really looked right.

radiator.png

As you can tell by the picture, I initially intended to mount the radiator with the inlet and outlet to the rear of the case, as that is what most builds do from what I’ve seen. Actually, come to think of it, I don’t recall a build that doesn’t do that. The fans were mounted such that the fan cables would’ve been going behind the mainboard tray, for those who aren’t familiar with water cooling builds.

And as you might be able to discern from the picture, the case is upside down on the table. That was intentional as it gave me the best way to see how the radiator would look without having to try to hold it in place. Plus, the radiator didn’t come with any short screws for mounting the radiator to the case, the radiator has M3 threads, and I didn’t have any short M3 screws sitting around either, so it was kind of out of necessity. Needless to say, Home Depot was on my list of places to go the next morning.

So the time came to start actually planning the tubing routing. Initially I wanted to go from the graphics cards to the CPU block, then to the radiator, and I mounted fittings with that configuration being the intention.

fittings.png

Now I chose this configuration to have the water coming out of the pump and going through all of the water blocks before traveling through the radiator.

And as the picture shows, the 90-degree fitting on a 15mm spacer coming out of the CPU block going into a 45-degree fitting also on a 15mm spacer into the radiator seems to offer near perfect alignment. Except, recall what I said in the introduction about the tubing I’m using being stiff. This close of a gap would’ve been difficult to tube up after mounting the radiator to the case, even with the case upside down.

fittings_zommed.png

So I decided on an alternate configuration – one that, as I said, I almost never see.

reverse.png

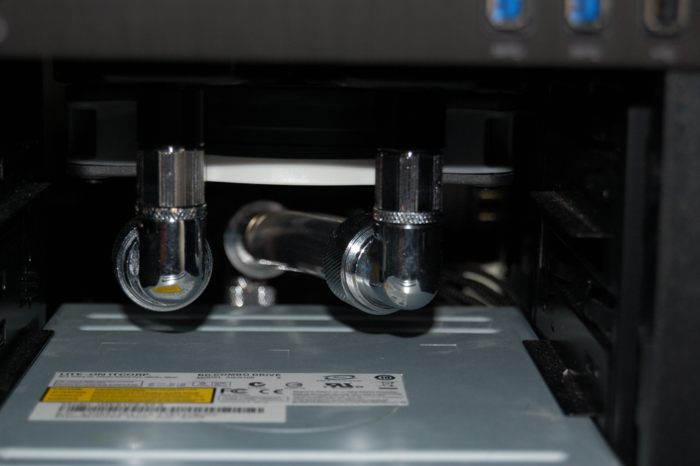
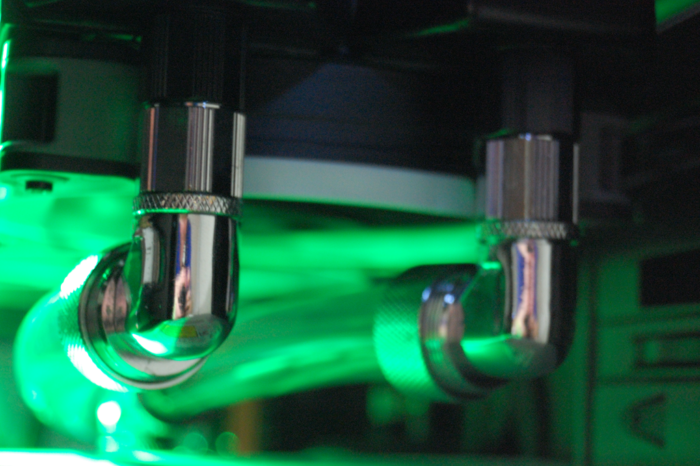
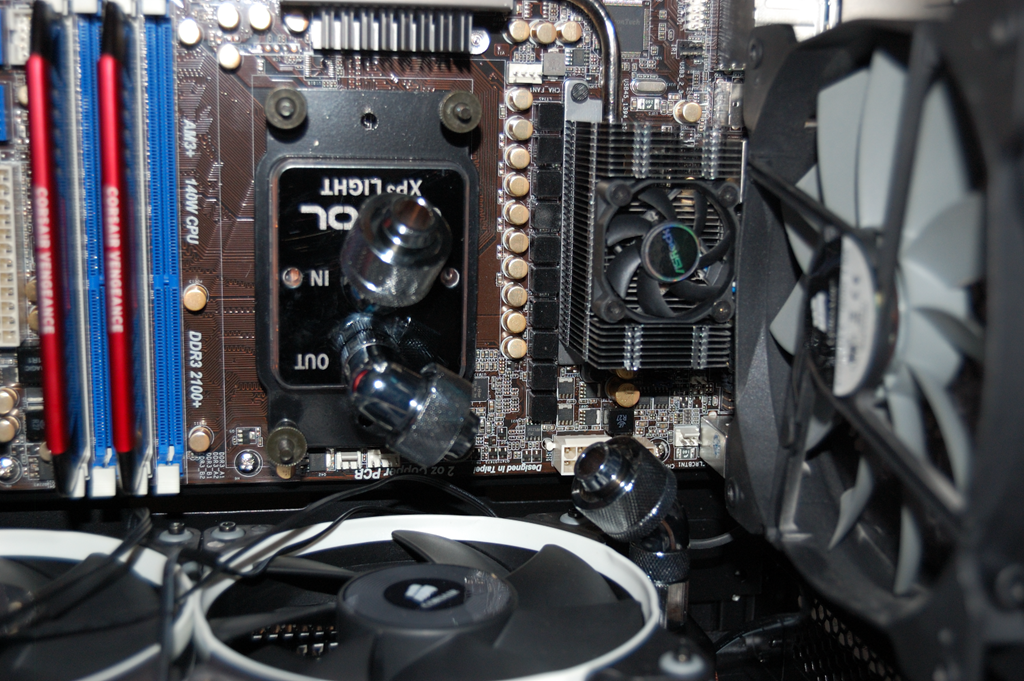
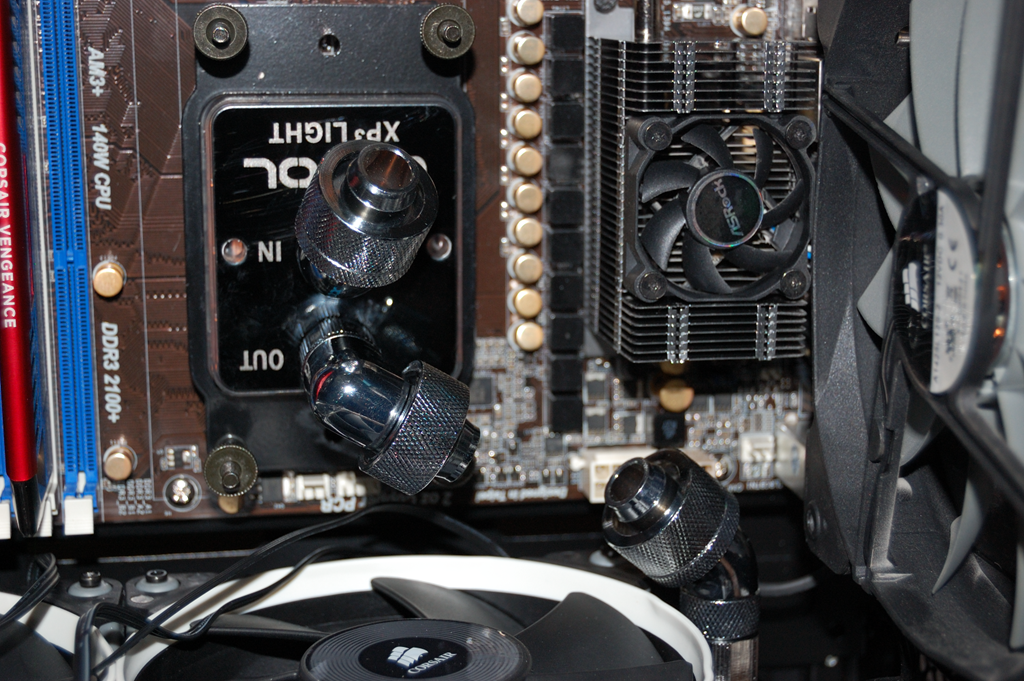
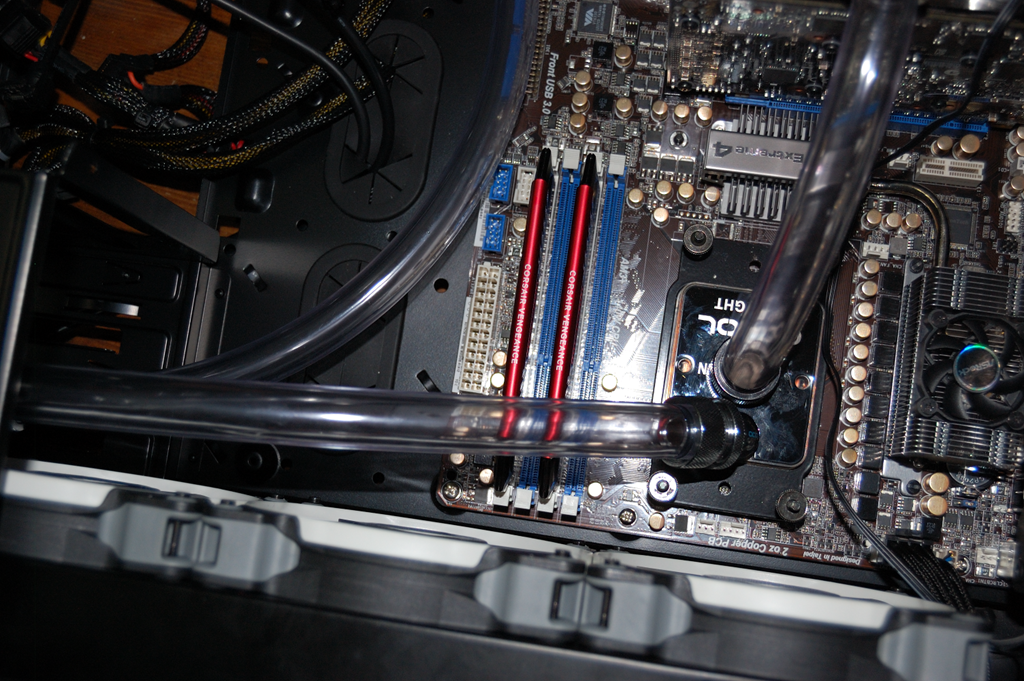
I had the inlet and outlet for the radiator pushed into the 5 1/4″ drive bay. This allowed me to use longer lengths of tubing with a 45-degree single-rotary fitting off the outlet on the CPU water block. Both the inlet and outlet on the radiator are 90-degree single-rotary fittings on 30mm spacers – actually 2x15mm spacers – to ensure clearance over the fans. And the fitting on the CPU block’s inlet is a flush compression fitting – note the CPU block I selected cannot fit two 1/2″x3/4″ flush compression fittings as both the inlet and outlet.

Now I’m aware this does mean that two hoses are interfering with the air flow around the radiator, but I went for the setup that I knew was going to be the easiest to make given the materials I had. Perhaps if I was using less stiff tubing (provided I was willing to spend several dollars a foot for it) then I could’ve gone with a different configuration that would’ve allowed more airflow around the radiator. But one of the fans was going to be blocked by the 5 1/4″ drive bay regardless and this configuration was easier to install.

Is there a better way to do this? Absolutely. After all I could’ve used rigid tubing for this whole thing.

And that is where I left things for the night. The next morning I picked up with my trip to Home Depot to acquire some M3 screws along with more tubing – I wasn’t sure if what I had left of the initial 10′ coil would suffice, but I was able to re-use many of the longer pieces I’d cut off from it. That was followed by a trip to Microcenter to get some more fittings I thought I would need – in the end, I only needed a couple of them and was able to return the rest.

So that is where I’ll leave this segment. The next part will pick up with installing the water blocks onto the graphics cards, which would give me a better idea of how to plan the loop.

Water cooling build in my wife’s computer – Part I

Build Log:

Before constructing a loop, it’s typically recommended to rinse out all of the components you will be using – the water blocks, radiators, pump and reservoir – with distilled water. While it’s good to rinse out everything, it’s only necessary to rinse out the radiators. And if you Google around, you’ll find a lot of interesting ways to go about doing that – dilute acid mixtures, the “shake and drain” method, and so on.

But one of the more interesting methods of preparing the radiator came from a video I saw on YouTube:

http://youtu.be/X9TwhwVlllo

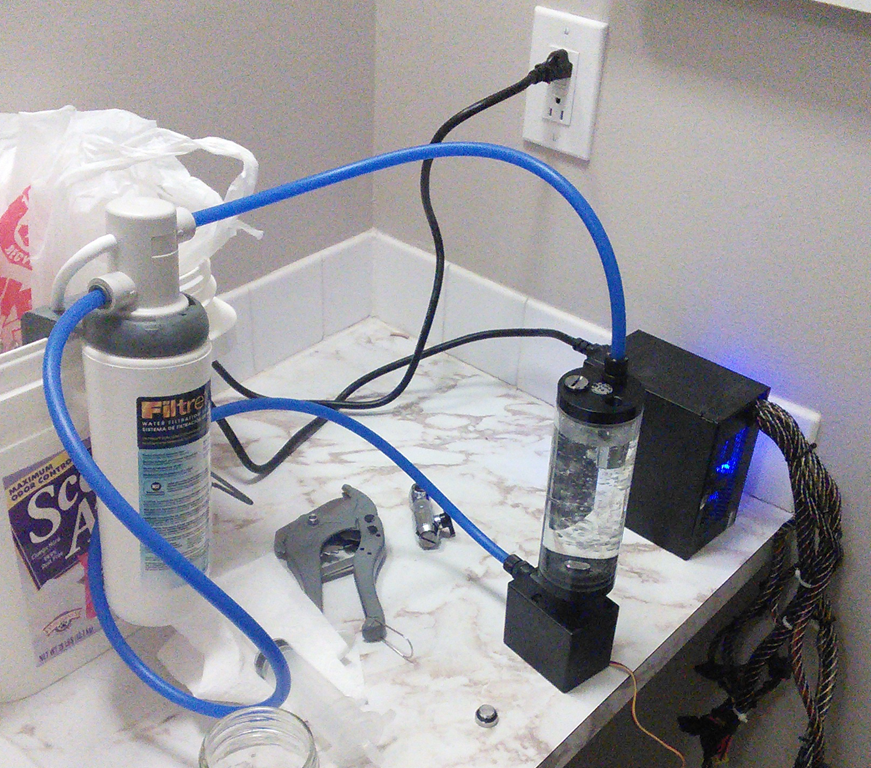
So that got me thinking. I didn’t need something as large as what he used, which is a whole-house water filter. So I looked at under-sink water filters instead. We’re still talking a decent expense, but with the right fittings, I could use the pump and reservoir to set up a makeshift loop to get distilled water flowing through the radiator and flushing it out.

Water filter: 3M Filtrete 3US-AS01

The tubing that comes with the water filter is 1/4″ ID, 3/8″ OD. Talk about some thin tubing. And it’s also very rigid, so finding some more flexible tubing might be worth your while. But Bitspower makes fittings that will work with this tubing, and I managed to find a couple at my local Microcenter – actually they had only two in stock when I bought them, so I got lucky on that mark.

Before flushing the radiator, the filter still needs to be primed. And you need to prime it with distilled water, not tap water. So I built a small loop to run from the pump to the filter back to the reservoir, which fed directly to the pump. I let this run for about 15 minutes.

primingloop.png

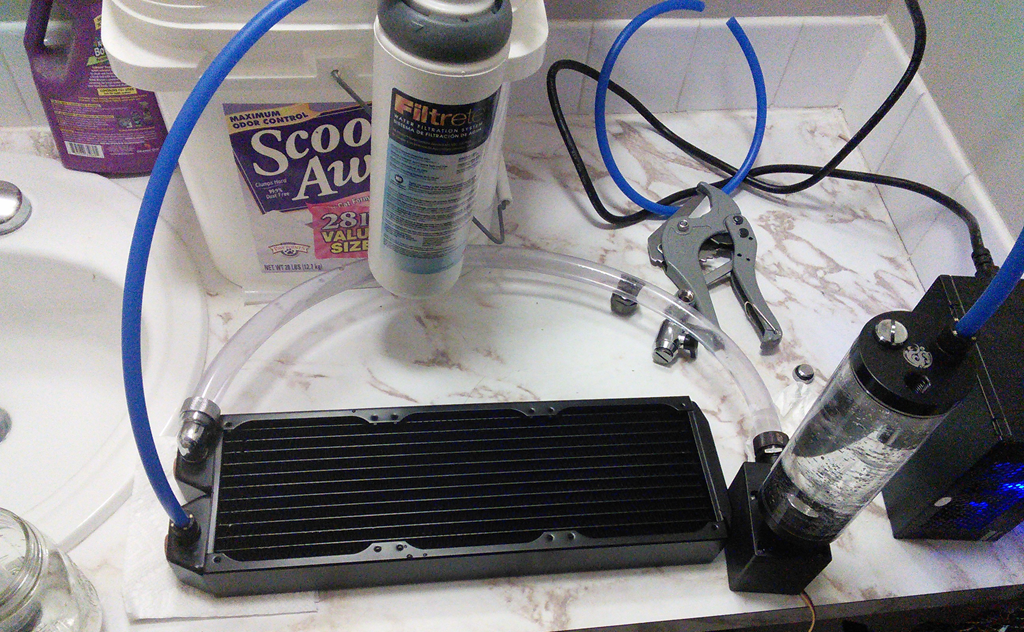
Then came the loop to flush the radiator. In building the loop, I used a length of 1/2″x3/4″ tubing to run from the pump to the radiator. The fitting that in the previous loop ran from the pump to the filter now feeds out of the radiator. The purpose of this, as the above video shows, is to filter out the crap and gunk in the radiator that results from the manufacturing. And it’s a much easier – okay, lazier – way of getting that gunk out.

flushradiator.png

I let this loop run for actually several hours while I tore apart my wife’s machine to get the mainboard out and prepare her CPU for the new water block. Now because of how little resistance the loop provides, there was a lot of cavitation in the reservoir, meaning there was no way to get all the air out of the loop. Had I used a small bucket as the “reservoir”, there probably wouldn’t have been nearly as much cavitation and air churning in the reservoir, so I later put a small towel under the pump so it wasn’t making nearly as much noise.

As I said, I let this loop run while I tore apart the computer and got the mainboard and graphics cards out of the machine and turned my attention to mounting the water block to the CPU.

Recall from the introduction that her CPU cooler was previously the ThermalTake Water 2.0 Performer. The ThermalTake CPU coolers have a bracket for under the mainboard, and that bracket has an adhesive foam on it that sticks to the mainboard. Needless to say, that was a pain to try to remove, as it required going slow and steady to separate the bracket from the mainboard. And I didn’t exactly get it all off there, but I’m not concerned as it’s not exactly in view. I actually debated on just cutting the bloody thing instead of messing with the adhesive foam.

Once the bracket was off, I got the mounting screws through the holes on the mainboard.

mountingscrews.png

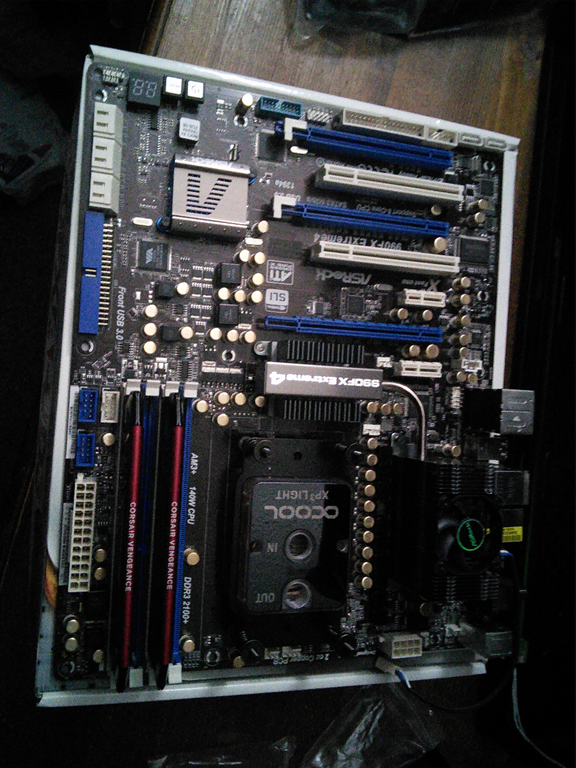
And mounted the CPU cooler to the CPU. For the thermal compound, I didn’t use what came with the CPU block. My go-to thermal compound has been Innovation Cooling‘s IC Diamond compound. It’s worked quite well for me in the past and I see no reason to think it won’t work well here.

cpucooler.png

And that’s where I’ll leave this iteration. In the next part, I’ll discuss the start of building out the loop, mounting the radiator and figuring out what fittings to use.

Water cooling build in my wife’s computer – Introduction

Build Log:

After tons of research and drooling over water-cooled builds I’d seen on YouTube, I came up with the bright idea to build a full custom water cooling loop in my wife’s computer.

Part of the concern is the fact the graphics cards she was running (details below on initial setup) ran hotter than I was comfortable under load. An option I was exploring to alleviate that concern is the Kraken G10 by NZXT, which allows you to mount certain all-in-one CPU liquid coolers to graphics cards, provided you have one of the right type. It also has a bracket for a fan to actively cool everything else on the card – since the CPU cooler will be mounted only onto the GPU – but reports indicate you may need heatsinks for the memory and voltage regulator modules (VRMs) on the card.

So before getting further, here’s what I started with:

With the ThermalTake cooler, her CPU was staying nice and cool – never getting much above the mid-50s (that’s Celsius) under typical load. And it was significantly quieter and less annoying than the stock cooler that comes with the AMD chip – we could only stand it for a couple days after initially building her system before I started researching other options.

But the graphics cards would regularly get into the 70s and 80s under load. While there was space and potential mount points to make use of Kraken G10s, only the GPUs on the board would be cooled, and I’d have to find other options to cool the VRMs and memory – and my research was not coming up with anything useful for the GTX 660 reference board. But the other complication was simply the fact it would’ve been three all-in-one CPU coolers in the same case. Finding mount points for all of them would’ve been interesting in the 750D. If she had, say, the 650D or another comparable mid-tower ATX case, then things probably would’ve been a little easier, but no guarantees on that mark.

So I started looking at custom water cooling loops. What initially started pushing me in that direction was running across YouTube tech commentator JayzTwoCents, which got my feet wet on the idea of water cooling after initially considering it. From there I found Singularity Computers and the build logs he has posted, and I think that set my mind toward doing that. So after tons of research, I started buying parts to build out the custom loop, starting with the easy stuff:

On the GPU water blocks, EK was pretty much the only option available for the GTX 660. I couldn’t find anyone else making a full-cover block for that card. That’s not necessarily a bad thing as EK is the company I’d seen continually recommended for water blocks for graphics cards. The only company I’d seen recommended close to as much as EK is XS-PC, but, again, they didn’t have a full-cover block that would fit her cards.

And at the time I bought them, the only company I could find distributing it in the US was out of stock, so I had to order it from EK… who is in Slovenia. And then, not long after the order arrived, the US distributor had it in stock – had I been able to order it from the US supplier, I would’ve been able to save $30 on shipping. On the plus side, it was shipped via UPS 3-day, and it was literally 3 days to deliver: I ordered it on a Friday from EK in Slovenia, and it arrived for pickup in Kansas City the following Monday. Had I ordered it from the US supplier, it likely would’ve been later in the week when it arrived unless I paid extra for a 3-day or quicker option.

On the CPU block, I was mixed in what to select as there are quite a few options available. I ultimately decided on AlphaCool thanks to a video I saw from JayzTwoCents reviewing the CPU block I ultimately purchased. Most of the fittings I ultimately used in this build were AlphaCool fittings, again thanks to JayzTwoCents, along with some fittings from Bitspower and Swiftech – the latter courtesy of my local Microcenter. And the radiator I chose also because of a JayzTwoCents review.

For the tubing I went with 1/2″x3/4″ tubing I found at my local Home Depot. It’s stiffer than other tubing that I’d seen recommended, but it was also about 70 cents a foot, instead of several dollars a foot for other options I’d seen online. Plus it’s available just down the road from where I live. Yeah I know I’ll probably have to replace it at the same time I replace the coolant, but that’s not a huge deal for me, as soft tubing typically needs to be periodically replaced anyway. That’s just the nature of it.

And at the price I paid, I could replace it three times in a year and still come out ahead cost-wise over other options I’ve seen available!

Speaking of coolant, only one name was in mind for that: Mayhems. Specifically, Mayhems XT-1 Clear. Initially I was looking at the X1 coolant, but the XT-1’s biodegradability (90% over 10 days, compared to 85% over 30 days for the X1) and extremely low toxicity won me over.

So that wraps up this introduction. In the next part, I’ll talk about preparing the components and starting to build out the loop, including tearing down my wife’s computer.

It’s not an "anti-college" debate

Let’s start with a simple question: if I recommend that you buy a PC over a Mac, am I anti-Mac? I think a lot of us would probably say No, especially if the context of that question includes a small discussion of your needs. Personally I have recommended Macs to people over PCs, but that was after asking numerous questions leading up to that recommendation.

So if I recommend a high school graduate pursue an apprenticeship over going to college, am I anti-college? For some reason, it seems many would say Yes. Anyone have a clue as to how the hell that fallacy came about?

For one, I am a college graduate. I have a Bachelor’s degree in business administration, plus an Associate’s degree in computer programming, and I’m putting serious consideration toward going back to community college to get a paralegal degree – for those curious, a paralegal is to a lawyer what a nurse is to a doctor. So to say I’m anti-college would be incorrect.

But at the same time, to say that everyone should go to college is also not correct. Yet the idea persists, and the most recent incarnation of it I’ve seen is Mandi Woodruff’s article on Yahoo Finance called "Is the anti-college debate over?"

Let’s get the fallacy out of the way: it’s not an "anti-college" debate. Instead it’s about asking the serious question of whether a high school graduate could spend 4 years of their life in a better way. There are people without even high school diplomas who are making more money than those with college and graduate degrees. It’s all about finding the right ideas and running with them. To support the idea the debate is essentially over, Woodruff references a recent Pew Research Center article that shows:

  • Median full-time earnings for college graduates is 45,500 (approximately $22/hr full time) per annum compared to 28,000 ($13.50/hr full time) for a diploma
  • Unemployment rate among high school graduates is a little over 3x the unemployment rate for college graduates
  • Poverty rate among high school graduates is 3.75x higher than among college graduates

Some pretty striking numbers. But does that mean that if everyone goes to and graduates from college, that the unemployment rate will be below the rate for Q4 20001According to the Bureau of Labor Statistics, the unemployment rate for September through December 2000 was 3.9%? No! Instead as more people shift to being college graduates, the unemployment and poverty numbers for college graduates will go up. Because the college degree won’t keep you out of poverty and won’t keep you off the unemployment line, plain and simple. The degree is no guarantee of success.

And that is what the "anti-college" debate is all about. As such, the "anti-college" debate is not over.

Arrogantly, Woodruff opens her article saying, "Say what you will about rising tuition, student loan bubbles and the merits of early entrepreneurship but, as with global warming and human evolution, you simply can’t ignore the facts."

We’re not ignoring the facts. Fact: the numbers paint a clear picture that a good way to advance your earnings potential is by getting a college degree.

Fact: A college degree is not the only way to do that. But the "pro-college" side of the debate keeps presuming that to be the case. The "anti-college" side acknowledges that reality, along with the reality that not everyone who starts college finishes – over 1 in 4 college students drop out after 1 year or less, and over 2 in 5 students at 4-year college drop out. And not everyone with a college degree will make more than those with a high school diploma – there are plenty of examples of people without college degrees making a comfortable living.

Plus the degree doesn’t determine your earnings potential. It’s all about what you do with the knowledge that degree is to represent.

The bigger problem is that most do not follow their passions, so what they earn when they start their careers is all they earn throughout their careers, or not significantly higher than that, when you take their future earnings and adjust for inflation. They also probably do not take the opportunities to better themselves, to make themselves more valuable to their employers and to other employers in their area.

Employers know they need to pay their college-graduated employees more than their community college graduates and high school-only graduates because college graduates tend to be saddled with significantly higher amounts of debt compared to 2-year graduates. According to American Student Assistance, four-year college students are almost twice as likely to borrow money than community college students, and more than twice as likely to borrow as students who pursue professional degrees or certificates, with about 1 in 10 college graduates having over $40,000 in student loan debt by the time they graduate. According to CNN Money, the average new graduate in 2012 had over $29,000 in debt. At an interest rate of 4% across 10 years, that debt will cost them about $3,600 per year until paid off. If that debt is refinanced to a 30 year loan (something many borrowers stupidly do), then you’re looking at about $1,700 per year for 30 years at 4% interest.

They will also be saddled with other living expenses and take on other debt in the form of car purchases and credit cards to buy things they will need when starting out on their own. All of that eats into their salaries and saps their discretionary income. In other words, higher earnings does not necessarily translate into higher standards of living, an assumption so many people tend to make.

And if the borrower falls behind on that student loan debt, it cannot be discharged in bankruptcy, meaning it will follow the borrower until it is paid in full.

Employers are paying higher for college graduates knowing their employees will have loans to pay off, and it’s better to pay an employee enough to cover what they expect living expenses to be than to have employees who can barely make ends meet. Sure they may be paying the employee more than what they might actually be worth to the company, but the company makes up for that by providing only cost-of-living adjustments to future salaries unless the employee can demonstrate additional value in some other way, thus warranting higher than just mere inflation adjustments to their salaries.

All of that debt needs to be paid back, and that hits the discretionary spending for the borrowers. That is why the economy is still being sluggish in its "recovery". When you have a mountain of debt to pay back – whether due to borrowing, collections, judgments, garnishments or foreclosures – it takes away from spending in other areas, meaning you have less to spend overall, and less money circulates within the economy to keep it going. You cut back to make ends meet, meaning less revenue for businesses, and the problem just cascades from there.

So why is the poverty rate for high school graduates higher than college graduates? To pursue higher-earning jobs, you obviously need the skills and education to qualify for those positions. College is not the only way to obtain them. I was learning what I needed to know before I stepped foot in a classroom, and my self-training has given me more than my classroom training ever did.

Beyond this, in today’s economy, college graduates are going after the jobs high school graduates tended to pursue. According to ProCon.org, 1 in 3 college graduates had a job requiring little more than a high school diploma in 2012, while 1 in 2 college graduates in 2011 had no job or were working only part time. Obviously this is going to put a squeeze on those with only a high school diploma, as fewer jobs requiring the skills of a college graduate means those grads – with their large debt loads – seek other employment, displacing those with lesser educations. This also limits the earning potential of the college graduate, both in the short and long term.

Further, of who the Bureau of Labor Statistics calls the 30 fastest growing jobs, only 12 require a Bachelor’s or better. There’s also a growing "skills gap" in the United States. It is estimated that approaching 1 in 2 job openings in the US are for "middle skill" jobs like construction, plumbing and electrical work. There isn’t enough labor to fill those jobs, though, so there is plenty of potential for people to take on an apprenticeship and earn a middle-class income in the process because of demand for those jobs and the services they provide. Even a trade school would do the trick for significantly less than the cost of a 4-year degree while still having nearly the same earning potential.

A generation ago, apprenticeships and trade schools along with the military taught people skills that could make them a living. And it tended to be better education because you tended to be taught through hard experience as well. That’s not exactly true today, but with the growing skills gap in the US, it needs to become true again.

All of this will play into the advice that should be given to high school students. It may be more beneficial for the student to take on an apprenticeship and learn a trade than to go to college, depending on what they think they want to do with the rest of their life, assuming their desires are realistic. Other students may be better served going to college and getting a 4 year degree.

Either way, there are jobs to be filled but not enough people who can fill them, and that is the problem that needs to be corrected. But touting the statistics on 4 year degrees isn’t going to improve an economy that is still dependent on the laws of supply and demand.

References[+]

Recognizing the obvious

Let’s start with something that should be quite obvious:

Marriage is a union, to be sure, but it’s a union that should liberate, not incarcerate. Real love shouldn’t limit a person’s potential, it should expand it.

Seth Adam Smith is at it again:

I’m sure it may come as a shock to some people, but I let my wife go. It was one of the hardest things I’ve had to do, but it was the right thing for the both of us.

He’s not talking about divorce, of course. Let’s get real. Instead it seems he’s finally realized something that should’ve been quite obvious to him for quite a long while: different people are different. He even goes so far as to admit that he and his wife are near polar opposites. In the midst of the poetic allegory of his article, he derives a point of view from either Ever After or Fiddler on the Roof (though he attributes the quote to his wife): "A fish may love a bird, but where would they live?"

And from this he comes up with the idea of a birdbath:

The bird bath is a symbol for our middle ground—the place where we come together—but it’s also the place from which we feel comfortable to let each other go. To "let go" of someone is to love them enough to let them fly or swim away (or to be themselves) and yet trust that they will always come back.

Sounds very poetic and romantic, doesn’t it? That old "let him/her go, and if it was meant to be, they’ll come back to you". Has he been watching Serendipity on repeat? Now given that movie stars Kate Beckinsale, I wouldn’t blame him, but… moving on…

Real love tells me to let Kim fly and trust that she’ll always come back. I have to let her go so she can chase her dreams, pursue her education, and develop her talents. Additionally, I have to let go of my fears that she might fly away and never come back. If the fish were to clip the bird’s wings, he would risk trimming her dreams and smothering her altogether.

Let’s rewind, shall we? In response to your previous article called "Marriage Isn’t For You" (my rebuttal here), you elaborated on the situation to NBC Today:

As Smith explained to TODAY.com, he began to struggle as Kim became ever more dedicated to her graduate studies in theater, which led the couple to relocate to Florida. Feeling isolated, Smith said he began to push Kim away.

Looking back, Smith knows his behavior was defensive, but he couldn’t help it when the tension culminated in an argument. Smith had been expecting this “ticking time bomb,” anticipating a blowout with Kim mustering just as much anger and frustration as he felt.

And now you’re talking about letting your wife "fly away" and hoping she’ll always be coming back home to you. Okay either you’ve got your mind filled with poetic allegory that you write down simply because it sounds good – hey I play on words myself as well, it’s why I have a blog – or you truly are delusional.

All of your poetic allegory can be boiled down to one sentence: Recognize each other’s differences and communicate with each other in how to work those differences, as well as your similarities, toward something workable for a sustainable and, hopefully, stable future. But then that’s not poetic is it? Or obscure for that matter.

Here’s the thing every couple needs to learn at some point, preferably long before wedding rings enter the picture: you each will want to do your own separate things. It’s a common point of advice for couples that you each have your own separate hobbies, things you like to do apart from each other, even… taking separate vacations (gasp!). But at the same time, whatever activities or hobbies you take on should not be to the detriment of your relationship and life together. If one person loves to travel, but you don’t have the money to do it, compromises have to be made.

Your wife is pursuing graduate studies in theater. You are pursuing swimming. Now what you need to do is find out how both of you can make your separate passions workable toward a mutual goal of a life together. It doesn’t take a birdbath analogy to recognize that, nor to express it. The analogy is poetic, I’ll admit, but wholly unnecessary.

So instead of "letting them go", what you actually need to be doing is being an active, but realistic source of encouragement. Familiarize yourself with what your wife is pursuing, and encourage your wife to become familiar with what you pursue. You needn’t share passions, but being familiar will allow you to be encouraging and understanding at the same time. At the same time, you need to be an ear for your wife when she wants to unload, and vice versa. This is where having a basic understanding of her passions and pursuits will be of great importance and assistance.

But you also need to have the courage to tell your wife when her pursuits are harming your relationship. This, as I mentioned in my earlier article, requires communication. It requires you being honest with each other. I’m not entirely sure if you’re at that point. Instead it sounds like you’re trying to rationalize away something by using hindsight and deriving a birdbath.

An amendment to support

Normally I’m not one for amending the Constitution of the United States, and I highly scrutinize any calls to amend the Constitution. But Daylight Saving Time has me in a little bit of a pro-amendment kick right now.

Under Article I, Section 8, one of the enumerated powers of Congress is to “fix the Standard of Weights and Measures”. This includes the standards around time and how it is tracked and measured. As such, I think we need to amend the Constitution to limit this power:

The power to fix the Standard of Weights and Measures shall not be construed as to allow the adjustment of the day’s hours without the consent of three-fourths of the States. The standard of hours that exists on the first of January of the year following the enactment of this amendment shall persist until overridden under the terms of this amendment.

In other words, make non-DST the default, and if Congress and the President want daylight saving time, they’ve got to take the issue up with the States first. Or we could even take it one step further and put it up for a national referendum.

The idea behind this is simple: daylight saving time is disruptive, and studies have shown little benefit and actually a bit of disruption. It benefits some industries while negatively affecting others. The chance of heart attack actually increases in the days following the spring transition but does not have a corresponding equal reduction in the days following the autumn transition. The goals of reducing energy usage are no longer met by the transition due to major changes in energy usage across the country and the world, and there are disruptions in productivity following each transition as well

So this is one area where I would fully back amending the Constitution, to remove from Congress the power to enact or re-enact daylight saving time without the States consenting or even the direct consent of the People through national referendum.